
Growing Chili Peppers in Pots: Unleash the fiery flavors of homegrown goodness, even without a sprawling garden! Have you ever dreamed of plucking vibrant, spicy peppers straight from your own plant, ready to add a kick to your favorite dishes? Well, dream no more! This DIY guide is your passport to a bountiful chili pepper harvest, all within the cozy confines of containers.
The history of chili peppers is as rich and vibrant as their colors. Originating in South America, these fiery fruits have been cultivated for thousands of years, adding zest and warmth to cuisines across the globe. From ancient Aztec rituals to modern-day culinary masterpieces, chili peppers have held a special place in human culture.
But why should you bother growing chili peppers in pots? Simple! Not everyone has the luxury of a large garden. Apartment dwellers, balcony enthusiasts, and even those with limited yard space can enjoy the satisfaction of nurturing their own chili pepper plants. Plus, container gardening offers greater control over soil conditions, watering, and pest management, leading to healthier, more productive plants. I’m excited to share my favorite tips and tricks to help you cultivate a thriving chili pepper garden, right on your patio!
Growing Fiery Chili Peppers in Pots: A DIY Guide to Spice Up Your Life!
Okay, chili pepper enthusiasts, gather ’round! I’m going to walk you through everything you need to know to successfully grow your own chili peppers in pots. It’s easier than you think, and the satisfaction of harvesting your own spicy bounty is seriously rewarding. Let’s get started!
Choosing Your Chili Pepper Variety
First things first, what kind of heat are you craving? The world of chili peppers is vast and varied, ranging from mild and fruity to face-meltingly hot. Here’s a quick rundown to help you choose:
* Mild: Poblano, Anaheim, Shishito. These are great for stuffing, roasting, or adding a subtle kick to dishes.
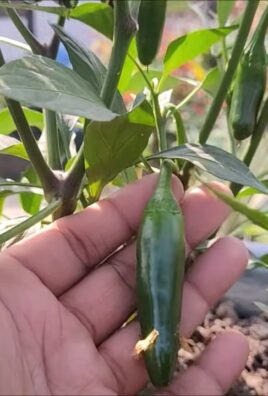
* Medium: Jalapeño, Serrano, Cayenne. These are your everyday peppers, perfect for salsas, sauces, and adding a noticeable heat.
* Hot: Thai Chili, Scotch Bonnet, Habanero. Things are getting serious! Use these sparingly for intense flavor and heat.
* Extremely Hot: Ghost Pepper (Bhut Jolokia), Carolina Reaper, Trinidad Scorpion. Handle with extreme caution! These are for the truly adventurous chili heads.
Consider your climate too! Some peppers thrive in warmer climates, while others are more tolerant of cooler temperatures. Do a little research on your chosen variety to ensure it’s a good fit for your growing conditions.
Gathering Your Supplies
Before we dive into planting, let’s make sure you have everything you need. Here’s your checklist:
* Chili Pepper Seeds or Seedlings: You can start from seeds or buy established seedlings from a nursery. Seeds require more patience, but it’s a fun and rewarding process.
* Pots: Choose pots that are at least 12 inches in diameter. Larger pots are better, as they provide more room for the roots to grow. Make sure the pots have drainage holes!
* Potting Mix: Use a high-quality potting mix specifically formulated for vegetables. Avoid using garden soil, as it can compact and hinder drainage.
* Fertilizer: A balanced fertilizer (e.g., 10-10-10) or a fertilizer specifically formulated for tomatoes and peppers will work well.
* Watering Can or Hose: For watering your plants.
* Optional:
* Seed starting tray and dome (if starting from seeds)
* Heat mat (if starting from seeds in a cool climate)
* Grow lights (if starting seeds indoors)
* Gloves (especially if handling hot peppers)
* Plant labels
Starting from Seeds (Optional)
If you’re starting from seeds, you’ll need to start them indoors about 6-8 weeks before the last expected frost. Here’s how:
1. Prepare Your Seed Starting Tray: Fill your seed starting tray with a seed starting mix. Moisten the mix thoroughly.
2. Sow the Seeds: Plant the seeds about ¼ inch deep in the soil. Place 2-3 seeds in each cell.
3. Cover and Warm: Cover the tray with a humidity dome to retain moisture. Place the tray on a heat mat to maintain a soil temperature of around 80-85°F (27-29°C).
4. Provide Light: Place the tray under grow lights or in a sunny window. If using a window, rotate the tray regularly to ensure even growth.
5. Water Regularly: Keep the soil consistently moist, but not soggy.
6. Thin Seedlings: Once the seedlings have emerged and have a few sets of true leaves, thin them out, leaving only the strongest seedling in each cell.
7. Harden Off: Before transplanting the seedlings outdoors, you’ll need to harden them off. This process gradually acclimates the seedlings to outdoor conditions. Start by placing the seedlings outdoors in a sheltered location for a few hours each day, gradually increasing the amount of time they spend outdoors over the course of a week.
Planting Your Chili Peppers
Whether you’re transplanting seedlings you started yourself or purchased from a nursery, the planting process is the same.
1. Prepare the Pot: Fill your pot with potting mix, leaving a few inches of space at the top.
2. Dig a Hole: Dig a hole in the center of the pot that is large enough to accommodate the root ball of the seedling.
3. Remove the Seedling: Gently remove the seedling from its container. If the roots are tightly bound, gently loosen them before planting.
4. Plant the Seedling: Place the seedling in the hole and backfill with potting mix. Gently firm the soil around the base of the plant.
5. Water Thoroughly: Water the plant thoroughly after planting.
Caring for Your Chili Peppers
Now that your chili peppers are planted, it’s time to provide them with the care they need to thrive.
1. Sunlight: Chili peppers need at least 6-8 hours of sunlight per day. Place your pots in a sunny location.
2. Watering: Water your chili peppers regularly, especially during hot, dry weather. Allow the soil to dry out slightly between waterings. Avoid overwatering, as this can lead to root rot. Check the soil moisture by sticking your finger about an inch into the soil. If it feels dry, it’s time to water.
3. Fertilizing: Fertilize your chili peppers every 2-3 weeks with a balanced fertilizer or a fertilizer specifically formulated for tomatoes and peppers. Follow the instructions on the fertilizer label.
4. Pruning: Pruning is not essential, but it can help to improve air circulation and encourage bushier growth. You can prune away any dead or yellowing leaves. You can also pinch off the tips of the branches to encourage branching.
5. Pest and Disease Control: Keep an eye out for pests and diseases. Common pests include aphids, spider mites, and whiteflies. Common diseases include blossom end rot and fungal infections. Treat any infestations or infections promptly with appropriate organic or chemical controls. Neem oil is a great organic option for many pests.
6. Support: As your chili pepper plants grow, they may need support. You can use stakes or cages to support the plants and prevent them from falling over. This is especially important for taller varieties or those with heavy fruit.
7. Pollination: Chili peppers are self-pollinating, but you can help them along by gently shaking the plants or using a small brush to transfer pollen from one flower to another. This is especially important if you’re growing your peppers indoors.
Harvesting Your Chili Peppers
The moment you’ve been waiting for! Harvesting your chili peppers is the most rewarding part of the process.
1. Timing: The time it takes for chili peppers to mature varies depending on the variety. Generally, it takes about 60-90 days from transplanting to harvest.
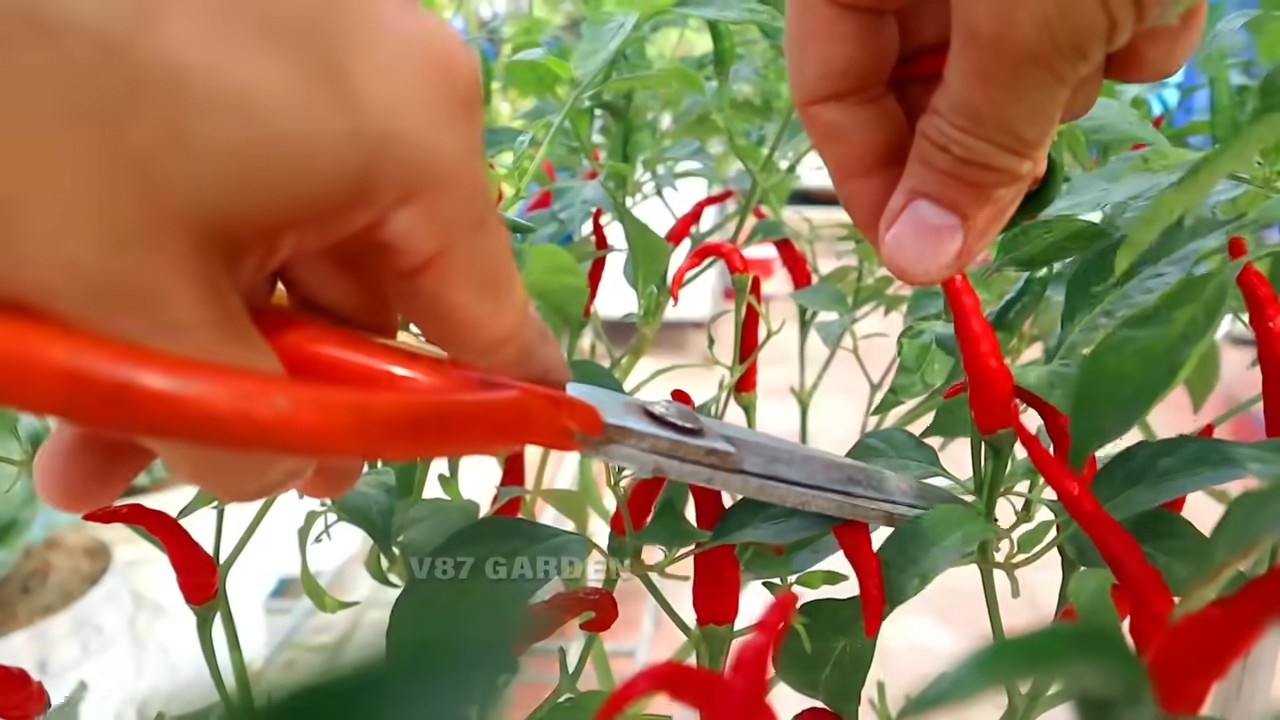
2. Ripeness: Chili peppers are typically harvested when they have reached their mature color. This can be red, green, yellow, orange, or even purple, depending on the variety.
3. Harvesting: Use scissors or pruning shears to cut the peppers from the plant. Be careful not to damage the plant.
4. Handling: Wear gloves when handling hot peppers, as the oils can irritate your skin.
5. Storage: Fresh chili peppers can be stored in the refrigerator for up to a week. You can also dry, freeze, or pickle them for longer storage.
Troubleshooting
Even with the best care, you may encounter some problems along the way. Here are a few common issues and how to address them:
* Blossom End Rot: This is a common problem that causes the bottom of the peppers to rot. It’s usually caused by a calcium deficiency. To prevent blossom end rot, ensure your soil is rich in calcium and water your plants consistently. You can also add calcium to the soil by using bone meal or eggshells.
* Aphids: These small, sap-sucking insects can weaken your plants. Treat aphids with insecticidal soap or neem oil.
* Spider Mites: These tiny pests can cause yellowing and stippling of the leaves. Treat spider mites with insecticidal soap or neem oil.
* Fungal Infections: These can cause spots or lesions on the leaves and stems. Prevent fungal infections by providing good air circulation and avoiding overwatering. Treat fungal infections with a fungicide.
* Lack of Fruit: If your chili pepper plants are not producing fruit, it could be due to a lack of pollination, insufficient sunlight, or nutrient deficiencies. Ensure your plants are getting enough sunlight and fertilize them regularly. You can also try hand-pollinating the flowers.
Enjoying Your Harvest
Now that you’ve harvested your chili peppers, it’s time to enjoy them! There are countless ways to use your homegrown peppers. Here are a

Conclusion
So, there you have it! Growing chili peppers in pots isn’t just a gardening trend; it’s a gateway to fresh, flavorful heat right at your fingertips. We’ve walked through the essential steps, from selecting the perfect pot and soil to nurturing your plants and harvesting your fiery bounty. But why should you take the plunge and try this DIY gardening adventure?
The answer is simple: control and convenience. Growing your own chili peppers in pots gives you complete control over the growing environment. You can tailor the soil composition, watering schedule, and sun exposure to perfectly suit your chosen variety. No more relying on supermarket produce that may lack the vibrant flavor and intense heat you crave. Plus, the convenience of having fresh chili peppers just steps away from your kitchen is undeniable. Imagine adding a pinch of homegrown heat to your favorite dishes whenever the mood strikes!
Beyond the practical benefits, growing chili peppers in pots is also incredibly rewarding. Watching your tiny seedlings transform into thriving plants laden with colorful peppers is a truly satisfying experience. It’s a connection to nature that can be enjoyed even in the smallest of spaces, whether you have a sprawling backyard or a compact balcony.
But the fun doesn’t stop there! Feel free to experiment with different varieties of chili peppers. From the mild and fruity poblano to the scorching habanero, there’s a chili pepper out there to suit every palate. You can also try different pot sizes and materials to see what works best for your growing conditions. Consider companion planting with herbs like basil or oregano to enhance the flavor of your peppers and deter pests.
And don’t forget the power of fertilizer! A balanced fertilizer, specifically formulated for fruiting plants, will provide your chili peppers with the nutrients they need to produce a bountiful harvest. Look for fertilizers with a higher phosphorus content, as this nutrient is essential for flower and fruit development.
Growing chili peppers in pots is a must-try for any home cook or gardening enthusiast. It’s a simple, rewarding, and delicious way to add a touch of homegrown heat to your life.
We encourage you to give it a try and share your experiences with us! What varieties are you growing? What tips and tricks have you discovered? Let us know in the comments below! We can’t wait to hear about your chili pepper adventures. Happy growing!
Frequently Asked Questions (FAQ)
What is the best size pot for growing chili peppers?
The ideal pot size for growing chili peppers depends on the variety you choose. Smaller varieties like Thai chili peppers can thrive in pots as small as 5 gallons. However, larger varieties like bell peppers or jalapeños will need at least a 10-gallon pot to accommodate their extensive root systems. A good rule of thumb is to choose a pot that is at least 12 inches in diameter and 12 inches deep. Remember, bigger is generally better when it comes to pot size, as it provides more room for the roots to grow and access nutrients.
What type of soil should I use for growing chili peppers in pots?
Chili peppers need well-draining soil that is rich in organic matter. A good potting mix specifically formulated for vegetables is an excellent choice. Avoid using garden soil, as it can be too heavy and compact, which can lead to drainage problems. You can also amend your potting mix with compost or other organic materials to improve its fertility and drainage. A slightly acidic to neutral pH (around 6.0 to 7.0) is ideal for chili peppers.
How often should I water my chili pepper plants in pots?
Watering frequency depends on several factors, including the weather, the size of the pot, and the type of soil you’re using. Generally, you should water your chili pepper plants when the top inch of soil feels dry to the touch. Avoid overwatering, as this can lead to root rot. During hot, dry weather, you may need to water your plants daily. In cooler weather, you may only need to water them every few days. Always water deeply, allowing the water to drain out of the bottom of the pot.
How much sunlight do chili pepper plants need?
Chili peppers need at least 6-8 hours of direct sunlight per day to thrive. Choose a sunny location for your pots, such as a south-facing balcony or patio. If you don’t have a sunny spot, you can supplement with grow lights.
What kind of fertilizer should I use for chili peppers?
Chili peppers are heavy feeders and need regular fertilization to produce a bountiful harvest. Use a balanced fertilizer specifically formulated for vegetables, such as a 10-10-10 or 5-10-5 fertilizer. Fertilize your plants every 2-3 weeks during the growing season. You can also use organic fertilizers, such as compost tea or fish emulsion.
How do I protect my chili pepper plants from pests and diseases?
Chili peppers can be susceptible to pests such as aphids, spider mites, and whiteflies. Regularly inspect your plants for signs of infestation and take action promptly. You can use insecticidal soap or neem oil to control these pests. To prevent diseases, ensure good air circulation around your plants and avoid overwatering. If you notice any signs of disease, such as leaf spots or wilting, remove the affected leaves immediately.
When should I harvest my chili peppers?
The time to harvest your chili peppers depends on the variety you’re growing and your personal preference. Generally, chili peppers are ready to harvest when they have reached their mature color and size. You can also test the heat level by tasting a small piece of the pepper. Use pruning shears or scissors to cut the peppers from the plant, leaving a small stem attached.
Can I overwinter my chili pepper plants?
Yes, you can overwinter your chili pepper plants indoors. Before the first frost, prune your plants back to about 6 inches tall and move them to a cool, bright location indoors. Water sparingly during the winter months. In the spring, gradually acclimate your plants to the outdoors before transplanting them back into their pots.
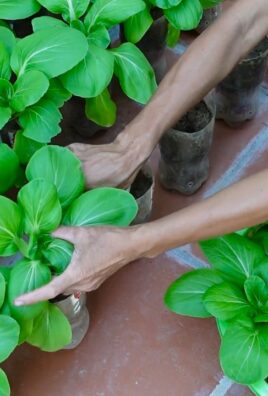
What are some good companion plants for chili peppers?
Companion planting can help to improve the health and yield of your chili pepper plants. Some good companion plants for chili peppers include basil, oregano, tomatoes, carrots, and onions. These plants can help to deter pests, attract beneficial insects, and improve the flavor of your peppers.
My chili pepper plant is producing flowers, but no peppers. What could be the problem?
There are several reasons why your chili pepper plant might be producing flowers but no peppers. One common reason is lack of pollination. Chili peppers are self-pollinating, but they may need some help from wind or insects to transfer pollen from the male to the female parts of the flower. You can try hand-pollinating your plants by gently shaking the flowers or using a small paintbrush to transfer pollen. Other possible reasons include insufficient sunlight, lack of nutrients, or extreme temperatures. Make sure your plants are getting enough sunlight and fertilizer, and protect them from extreme heat or cold.

Leave a Comment