
Effective Cleaning Hacks: Are you tired of spending your weekends scrubbing away grime and battling stubborn stains? I know I am! Imagine reclaiming those precious hours and enjoying a sparkling clean home with minimal effort. This isn’t just a dream; it’s entirely achievable with the right cleaning strategies.
Throughout history, people have sought ways to maintain clean and healthy living spaces. From ancient civilizations using natural remedies to modern innovations in cleaning technology, the quest for cleanliness is a timeless pursuit. But let’s face it, not all cleaning methods are created equal. Some are time-consuming, expensive, or simply ineffective. That’s where effective cleaning hacks come in!
In today’s busy world, time is a valuable commodity. We all want a clean home, but few of us have the hours to dedicate to extensive cleaning routines. These DIY tricks and hacks are designed to simplify your cleaning process, saving you time, money, and energy. I’m going to share some of my favorite and most effective cleaning hacks that will transform your home from cluttered to clean in no time. Get ready to discover simple solutions to everyday cleaning challenges and unlock the secrets to a spotless home without breaking a sweat!
DIY Cleaning Hacks That Will Save You Time and Money!
Hey there, fellow cleaning enthusiasts! I’m always on the lookout for clever ways to make cleaning easier and more affordable. Forget those expensive, chemical-laden cleaners – I’m all about using everyday items to achieve sparkling results. So, I’m excited to share some of my favorite DIY cleaning hacks that have seriously transformed my cleaning routine. Let’s get started!
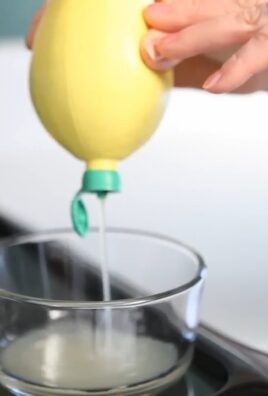
Cleaning Your Microwave with Lemon Power
Is your microwave looking a little… well, let’s just say “lived-in”? Don’t worry, I’ve got you covered. This lemon trick is a game-changer.
* The Goal: To loosen up splatters and grime inside your microwave, making them easy to wipe away.
* What You’ll Need:
* 1 lemon
* 1 cup of water
* Microwave-safe bowl
* Clean sponge or cloth
Step-by-Step Instructions:
1. Prepare the Lemon Solution: Cut the lemon in half. Squeeze the juice from both halves into the microwave-safe bowl. Then, drop the lemon halves into the bowl as well.
2. Add Water: Pour one cup of water into the bowl with the lemon juice and lemon halves.
3. Microwave Magic: Place the bowl in the microwave and heat on high for 3-5 minutes. You want the water to boil and create steam.
4. Let it Steam: Once the timer goes off, don’t open the microwave immediately! Let the steam work its magic for another 5-10 minutes. This is crucial for loosening the grime.
5. Wipe it Clean: Carefully remove the bowl (it will be hot!). Use a clean sponge or cloth to wipe down the inside of the microwave. You’ll be amazed at how easily the splatters come off. The lemon scent will also leave your microwave smelling fresh and clean!
Unclogging Drains with Baking Soda and Vinegar
Clogged drains are a total nightmare, right? But before you reach for harsh chemical drain cleaners, try this natural and effective solution.
* The Goal: To break down clogs and clear your drains using a simple chemical reaction.
* What You’ll Need:
* 1 cup baking soda
* 2 cups white vinegar
* Hot water
Step-by-Step Instructions:
1. Pour in the Baking Soda: Carefully pour one cup of baking soda down the clogged drain. Try to get as much of it down the drain as possible.
2. Add the Vinegar: Next, slowly pour two cups of white vinegar down the drain, following the baking soda.
3. The Fizzing Action: You’ll notice a fizzing reaction – that’s the baking soda and vinegar working together to break down the clog.
4. Let it Sit: Let the mixture sit for at least 30 minutes, or even better, overnight. This gives it plenty of time to work its magic.
5. Flush with Hot Water: After the waiting period, flush the drain with hot water for several minutes. This will help to clear away the loosened debris. If the drain is still slow, repeat the process.
Cleaning Grout with Baking Soda Paste
Dirty grout can make your whole bathroom or kitchen look dingy. This baking soda paste is my go-to for brightening up those grout lines.
* The Goal: To remove stains and grime from grout lines, restoring their original color.
* What You’ll Need:
* Baking soda
* Water
* Old toothbrush or grout brush
* Spray bottle (optional)
Step-by-Step Instructions:
1. Make the Paste: In a small bowl, mix baking soda with just enough water to form a thick paste. You want it to be spreadable but not too runny.
2. Apply the Paste: Using an old toothbrush or grout brush, apply the baking soda paste to the grout lines. Be generous and make sure to cover all the dirty areas.
3. Let it Sit: Allow the paste to sit on the grout for at least 15-20 minutes. For heavily stained grout, you can let it sit for up to an hour.
4. Scrub-a-dub-dub: After the waiting period, scrub the grout lines with the toothbrush or grout brush. Use a circular motion and apply some pressure to remove the stains.
5. Rinse and Repeat: Rinse the area with clean water. You can use a spray bottle to make rinsing easier. If necessary, repeat the process for stubborn stains.
Shining Stainless Steel with Olive Oil
Stainless steel appliances are beautiful, but they can be a magnet for fingerprints and smudges. This olive oil trick will leave them looking sleek and shiny.
* The Goal: To polish and protect stainless steel surfaces, leaving them streak-free and fingerprint-resistant.
* What You’ll Need:
* Olive oil
* Clean microfiber cloth
Step-by-Step Instructions:
1. Apply a Small Amount of Olive Oil: Pour a very small amount of olive oil onto a clean microfiber cloth. You don’t need much – a little goes a long way.
2. Wipe with the Grain: Wipe the stainless steel surface with the cloth, following the grain of the metal. This will help to avoid streaks.
3. Buff to a Shine: Use a clean, dry section of the microfiber cloth to buff the surface until it shines. This will remove any excess oil and leave a beautiful, streak-free finish.
Freshening Your Mattress with Baking Soda
Mattresses can harbor dust mites, odors, and moisture. This baking soda treatment will help to freshen and deodorize your mattress.
* The Goal: To absorb odors and moisture from your mattress, leaving it feeling fresh and clean.
* What You’ll Need:
* Baking soda
* Vacuum cleaner with upholstery attachment
* Essential oil (optional)
Step-by-Step Instructions:
1. Strip the Bed: Remove all bedding from the mattress.
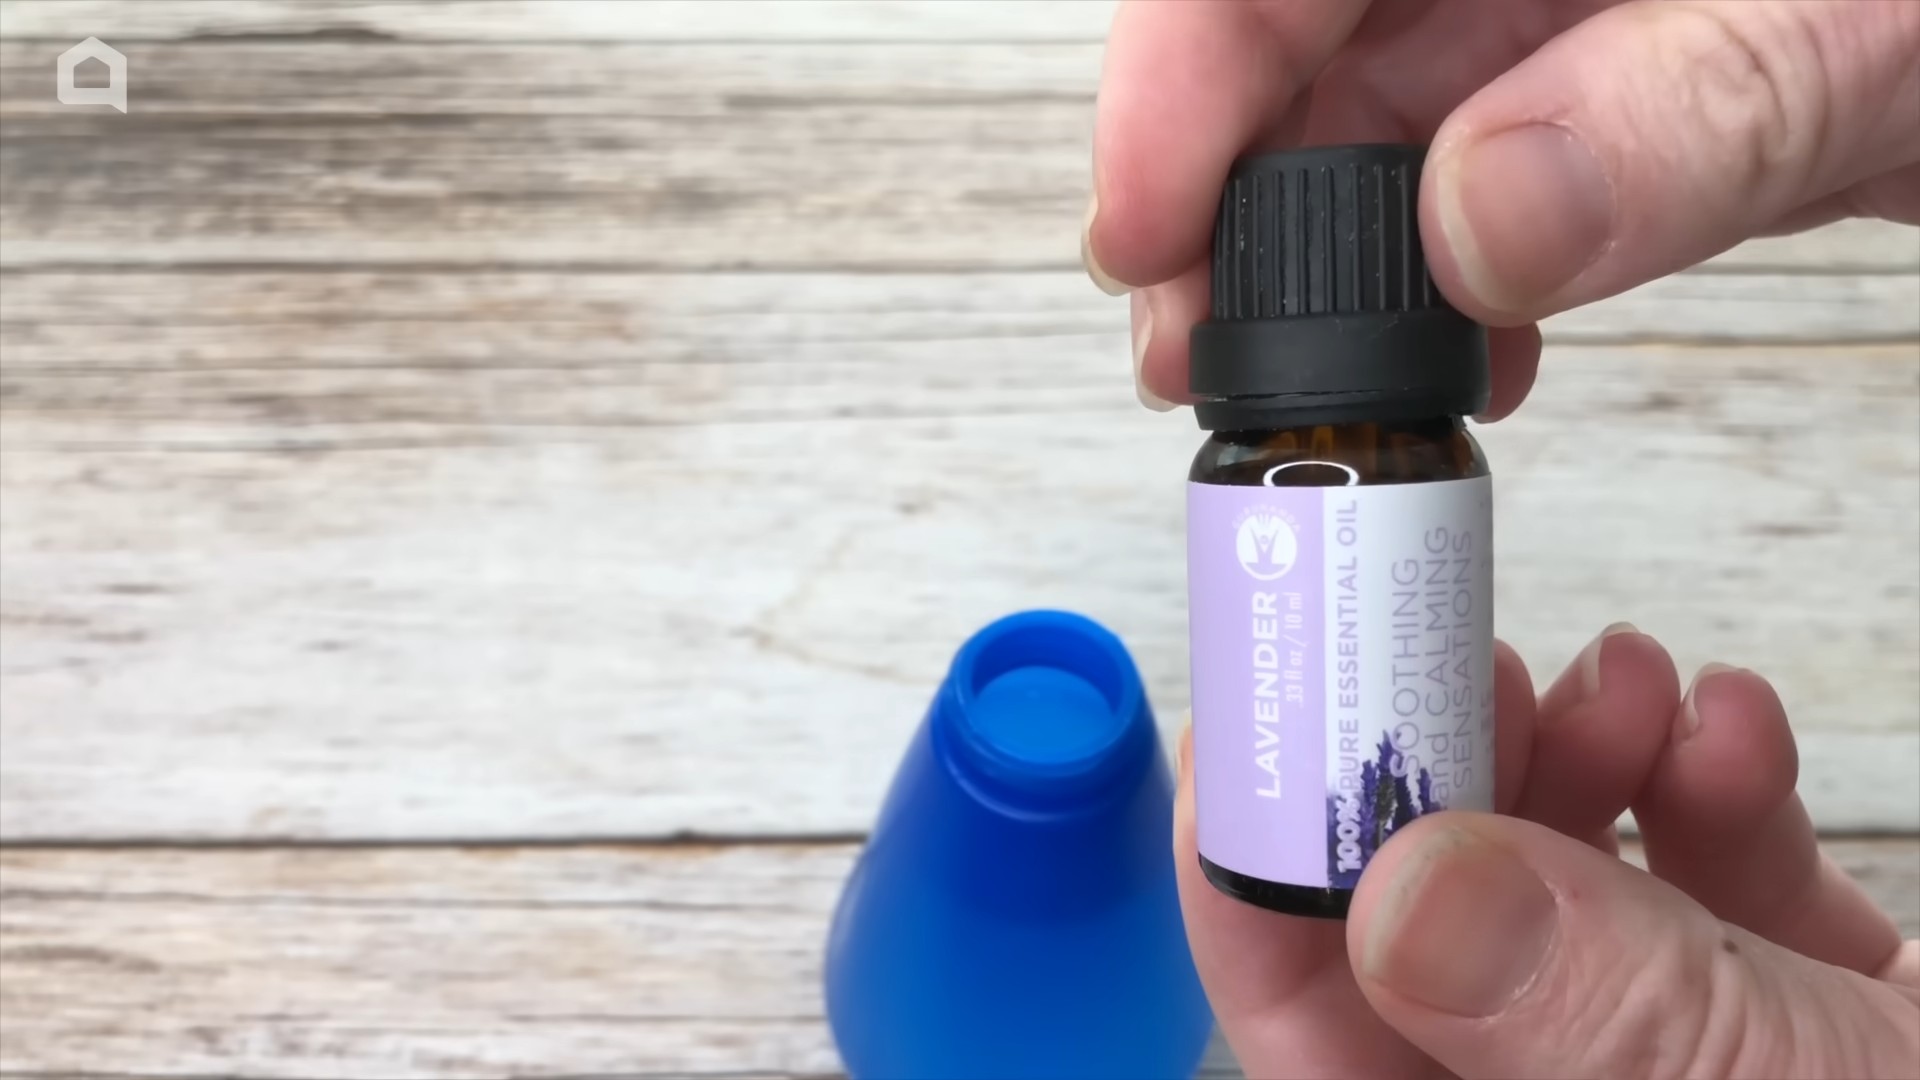
2. Sprinkle Baking Soda: Generously sprinkle baking soda over the entire surface of the mattress. If you want to add a pleasant scent, you can mix a few drops of your favorite essential oil with the baking soda before sprinkling. Lavender, eucalyptus, and tea tree oil are all great choices.
3. Let it Sit: Allow the baking soda to sit on the mattress for at least 30 minutes, or even better, for several hours. The longer it sits, the more odors and moisture it will absorb.
4. Vacuum Thoroughly: Use the upholstery attachment on your vacuum cleaner to thoroughly vacuum the entire surface of the mattress. Make sure to get into all the nooks and crannies.
5. Flip and Repeat: Flip the mattress over and repeat the process on the other side.
Cleaning Your Showerhead with Vinegar
Over time, showerheads can become clogged with mineral deposits, reducing water pressure. This vinegar soak will dissolve those deposits and restore your showerhead’s performance.
* The Goal: To remove mineral deposits and improve water flow in your showerhead.
* What You’ll Need:
* White vinegar
* Plastic bag
* Rubber band or twist tie
Step-by-Step Instructions:
1. Fill the Bag with Vinegar: Pour enough white vinegar into the plastic bag to completely submerge the showerhead.
2. Secure the Bag: Place the bag over the showerhead, making sure the showerhead is fully immersed in the vinegar. Secure the bag with a rubber band or twist tie.
3. Let it Soak: Let the showerhead soak in the vinegar for at least 30 minutes, or even overnight for heavily clogged showerheads.
4. Remove and Rinse: Remove the bag and discard the vinegar. Rinse the showerhead thoroughly with water to remove any remaining vinegar and loosened deposits.
5. Test the Water Flow: Turn on the shower and check the water flow. You should notice a significant improvement. If necessary, use a small brush or toothpick to remove any stubborn deposits from the showerhead nozzles.
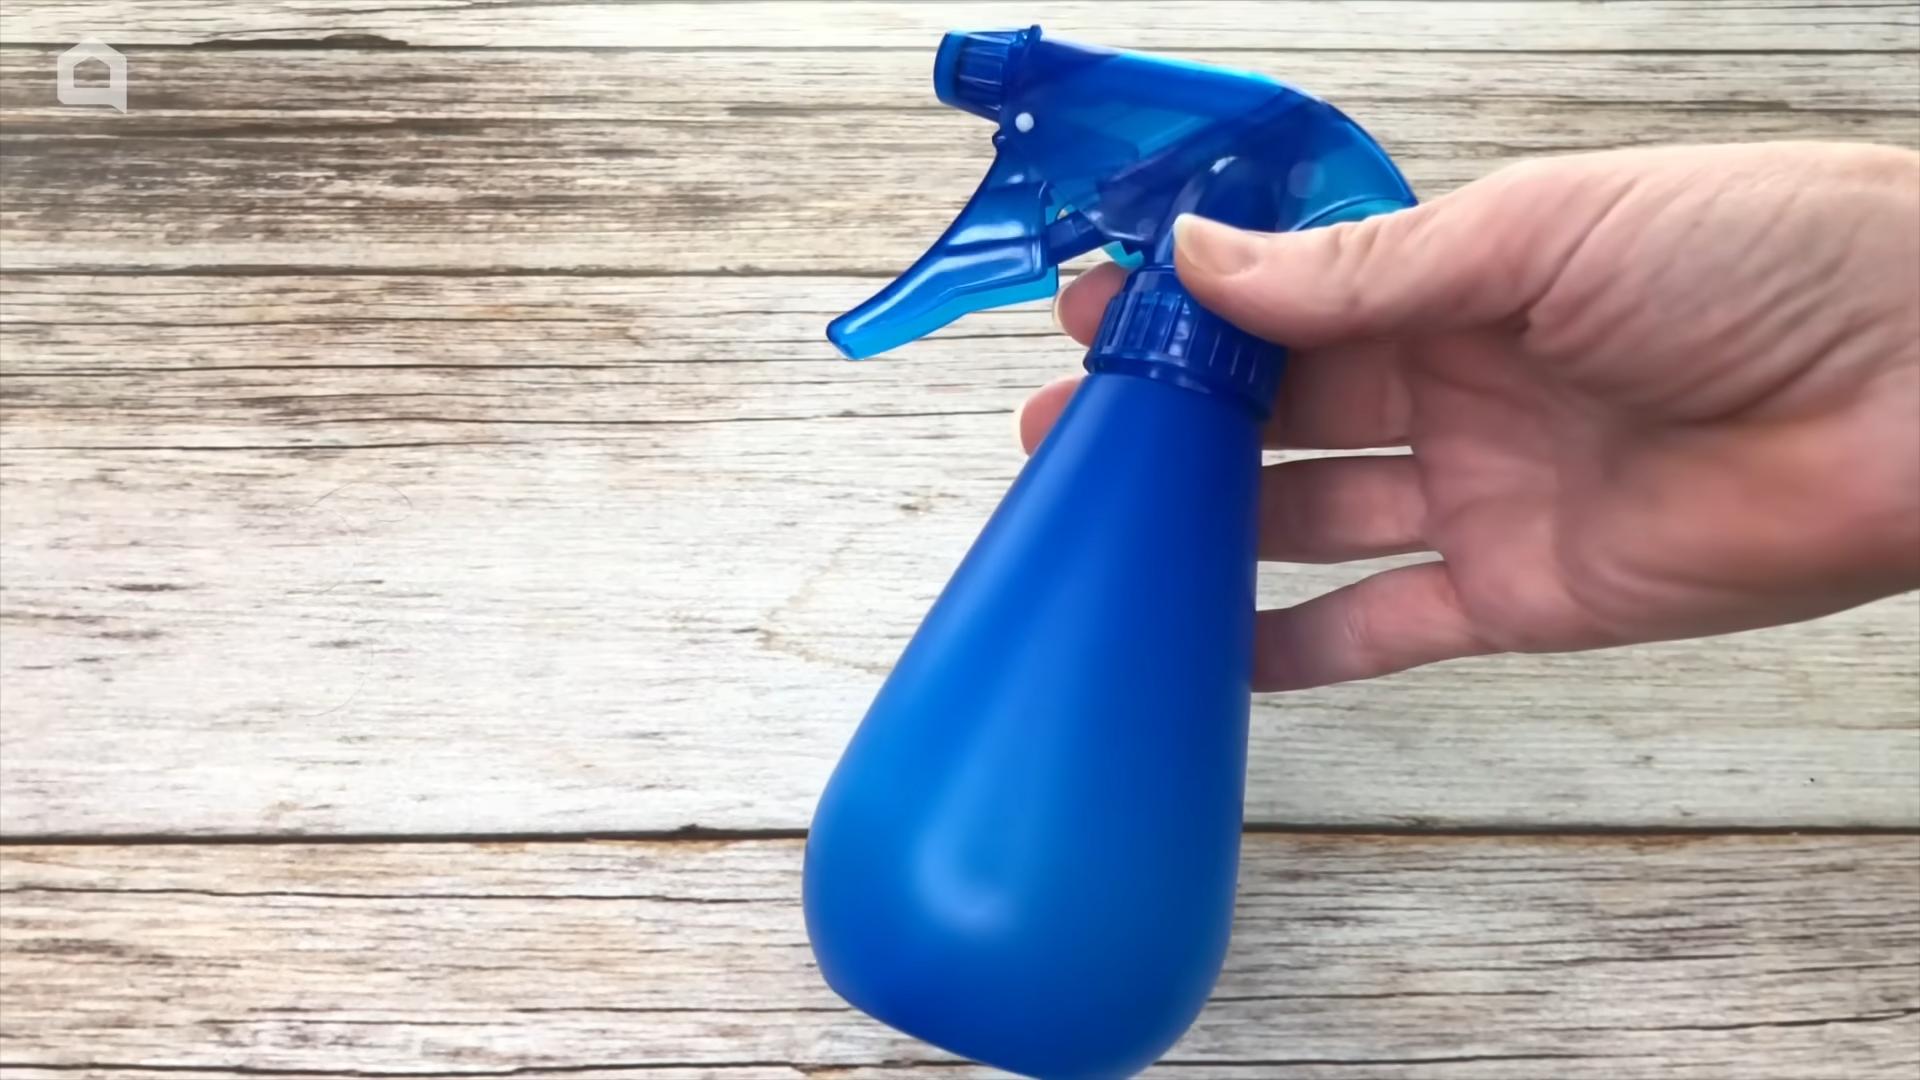
Cleaning Blinds with a Sock
Cleaning blinds can be a tedious task, but this sock trick makes it much easier and faster.
* The Goal: To quickly and efficiently dust blinds without leaving streaks or smudges.
* What You’ll Need:
* Old sock
* White vinegar or all-purpose cleaner
* Bowl of water
Step-by-Step Instructions:
1. Prepare the Sock: Dampen the sock with water and wring out any excess. You want it to be slightly damp, not soaking wet. You can also dip the
Conclusion
So, there you have it! This simple yet incredibly effective cleaning hack is a game-changer for anyone looking to streamline their cleaning routine and achieve sparkling results without breaking the bank or relying on harsh chemicals. We’ve shown you how to transform everyday items into powerful cleaning agents, saving you time, money, and effort.
But why is this DIY cleaning trick a must-try? It’s more than just a cost-effective solution; it’s about taking control of the ingredients you use in your home. You know exactly what’s going into your cleaning solutions, eliminating the worry of hidden toxins or allergens. Plus, it’s incredibly satisfying to create something useful from scratch!
Beyond the basic recipe, the possibilities are endless. Want to add a refreshing scent? Infuse your cleaning solution with essential oils like lemon, lavender, or eucalyptus. For tougher stains, consider adding a bit of baking soda or vinegar to the mix. Experiment with different ratios and ingredients to find the perfect formula for your specific needs. Remember to always test your DIY cleaning solution on a small, inconspicuous area first to ensure it doesn’t damage the surface.
This effective cleaning hack isn’t just about cleaning; it’s about creating a healthier, more sustainable home environment. It’s about reducing your reliance on store-bought products and embracing a more mindful approach to cleaning.
We wholeheartedly encourage you to give this DIY cleaning trick a try. You’ll be amazed at how easy and effective it is. And once you’ve experienced the magic for yourself, we’d love to hear about it! Share your experiences, variations, and tips in the comments below. Let’s build a community of DIY cleaning enthusiasts and inspire each other to create cleaner, healthier homes. Don’t forget to share this article with your friends and family so they can benefit from this amazing cleaning hack too! Let’s revolutionize the way we clean, one DIY solution at a time.
Frequently Asked Questions (FAQs)
Q: What types of surfaces can I use this DIY cleaning solution on?
A: This depends on the specific ingredients you’re using. Generally, a mild solution of soap and water is safe for most surfaces, including countertops, floors, and appliances. However, it’s crucial to test the solution on a small, inconspicuous area first, especially on delicate surfaces like wood, marble, or granite. Avoid using vinegar or acidic ingredients on these surfaces, as they can cause damage. If you’re unsure, consult the manufacturer’s instructions for the surface you’re cleaning.
Q: Can I use essential oils in my DIY cleaning solution?
A: Absolutely! Essential oils can add a pleasant scent and even provide additional cleaning benefits. Lemon, tea tree, lavender, and eucalyptus oils are popular choices for their antibacterial and antifungal properties. However, it’s important to use essential oils sparingly, as they can be potent. A few drops per batch of cleaning solution is usually sufficient. Also, be mindful of potential allergies or sensitivities to certain essential oils. Always research the safety of an essential oil before using it, especially if you have pets or young children.
Q: How long will my DIY cleaning solution last?
A: The shelf life of your DIY cleaning solution depends on the ingredients you use. Solutions made with fresh ingredients like lemon juice may only last for a week or two. Solutions made with distilled water and stable ingredients like castile soap can last for several months. To prolong the shelf life of your solution, store it in a cool, dark place in an airtight container. Always label your cleaning solution with the date it was made. If you notice any changes in color, odor, or consistency, discard the solution.
Q: Is this DIY cleaning solution safe for pets and children?
A: While DIY cleaning solutions are generally safer than commercial cleaners, it’s still important to exercise caution when using them around pets and children. Keep cleaning solutions out of reach of children and pets. Avoid using essential oils that are known to be toxic to pets. When cleaning, ensure that the area is well-ventilated. If your pet or child ingests the cleaning solution, contact your veterinarian or poison control center immediately.
Q: Can I use this DIY cleaning solution to clean my bathroom?
A: Yes, this DIY cleaning solution can be used to clean your bathroom. For general cleaning, a mild solution of soap and water is effective for cleaning sinks, countertops, and tiles. For tougher stains and mildew, you can add a bit of baking soda or vinegar to the mix. However, avoid using vinegar on grout, as it can erode it over time. Always rinse surfaces thoroughly after cleaning.
Q: What are some other effective cleaning hacks I can try?
A: There are countless effective cleaning hacks you can try! Here are a few ideas:
* Use vinegar to clean your microwave. Simply heat a cup of vinegar and water in the microwave for a few minutes, then wipe it clean.
* Use baking soda to deodorize your refrigerator. Place an open box of baking soda in the refrigerator to absorb odors.
* Use lemon juice to remove hard water stains. Rub lemon juice on the stains, let it sit for a few minutes, then rinse.
* Use a microfiber cloth to dust surfaces. Microfiber cloths are excellent at trapping dust and dirt.
* Use a toothbrush to clean hard-to-reach areas. A toothbrush is perfect for cleaning grout, faucets, and other small areas.
Q: What if my DIY cleaning solution doesn’t seem to be working?
A: If your DIY cleaning solution isn’t working as expected, there are a few things you can try. First, make sure you’re using the correct ratio of ingredients. Second, try increasing the concentration of the cleaning solution. Third, try using a different cleaning tool, such as a scrub brush or sponge. Finally, if all else fails, you may need to use a stronger cleaning solution or consider hiring a professional cleaner.
Q: How can I make my cleaning routine more sustainable?
A: There are many ways to make your cleaning routine more sustainable. Here are a few tips:
* Use reusable cleaning cloths instead of paper towels.
* Use refillable cleaning bottles.
* Buy cleaning products in bulk to reduce packaging waste.
* Compost food scraps and other organic waste.
* Reduce your consumption of single-use plastics.
* Support companies that are committed to sustainability.
By making small changes to your cleaning routine, you can significantly reduce your environmental impact. Remember, every little bit helps!
Leave a Comment