
Potato planter no backyard? No problem! I know what you’re thinking: “Growing potatoes without a backyard? Impossible!” But trust me, it’s not only possible, it’s incredibly rewarding. For centuries, potatoes have been a staple food source, playing a vital role in cultures around the globe. From the Andes Mountains, where they were first cultivated, to becoming a cornerstone of Irish cuisine, potatoes have nourished generations.
But what if you live in an apartment, a condo, or simply don’t have the space for a traditional garden? That’s where the magic of DIY potato planters comes in! This article is your ultimate guide to creating your very own potato planter no backyard required. We’ll explore simple, space-saving techniques that will allow you to enjoy freshly harvested potatoes, even if your “garden” is just a sunny balcony or patio.
Why do you need this DIY trick? Because fresh, homegrown potatoes taste infinitely better than anything you can buy at the store! Plus, it’s a fun, engaging activity that connects you with nature, reduces your carbon footprint, and provides a sense of accomplishment. So, let’s ditch the dirt limitations and dive into the world of potato planter no backyard solutions! Get ready to harvest your own delicious spuds, no matter where you live.
DIY Potato Planter: Grow Your Own Spuds, No Backyard Required!
Hey there, fellow gardening enthusiasts! Ever dreamed of harvesting your own potatoes but thought you needed acres of land? Well, dream no more! I’m going to show you how to build a fantastic potato planter that’s perfect for balconies, patios, or even a sunny corner indoors. Get ready to enjoy fresh, homegrown potatoes, even without a traditional backyard!
What You’ll Need: The Potato Planter Arsenal
Before we dive in, let’s gather our supplies. This project is relatively simple and doesn’t require a ton of fancy tools.
* A Large Container: This is the heart of our potato-growing operation. I recommend a container that’s at least 24 inches in diameter and 24 inches deep. A plastic storage tote works great, or you can use a large, sturdy pot. Just make sure it has drainage holes!
* Potting Mix: Don’t skimp on this! Use a high-quality potting mix that’s well-draining. Avoid using garden soil, as it can compact and hinder potato growth.
* Seed Potatoes: These are potatoes specifically grown for planting. You can find them at your local garden center or online. Choose a variety that you enjoy eating!
* Sharp Knife: For cutting the seed potatoes.
* Watering Can or Hose: To keep your potatoes hydrated.
* Optional:
* Drill: If your container doesn’t have enough drainage holes, you’ll need a drill to add some.
* Gloves: To protect your hands.
* Measuring Tape: To ensure accurate spacing.
* Compost or Aged Manure: To enrich the soil.
Preparing Your Seed Potatoes: The Spud Spa Treatment
This step is crucial for getting your potatoes off to a good start. We need to “chit” or sprout the seed potatoes.
1. Inspect Your Seed Potatoes: Look for potatoes that are firm and healthy. Avoid any that are soft, mushy, or have signs of disease.
2. Chitting (Sprouting): Place the seed potatoes in a cool, bright location for about a week or two. You’ll notice small “eyes” or sprouts starting to emerge. This process encourages early growth. I usually use an egg carton to keep them separated and upright.
3. Cutting (Optional): If your seed potatoes are large (bigger than an egg), you can cut them into smaller pieces. Each piece should have at least one or two “eyes.” Let the cut pieces dry for a day or two to callous over. This helps prevent rot. I find that smaller seed potatoes often don’t need cutting, which saves time and effort.
Building Your Potato Tower: Layer by Layer
Now for the fun part! We’re going to create a layered planting system that will allow us to harvest potatoes throughout the growing season.
1. Prepare the Container: Make sure your container has adequate drainage. If not, drill several holes in the bottom. I like to add a layer of gravel or small stones to the bottom to further improve drainage.
2. Initial Soil Layer: Add about 4-6 inches of potting mix to the bottom of the container. This will be the first layer for our potatoes.
3. Planting the First Layer: Place 3-4 seed potato pieces (or whole small seed potatoes) on top of the soil, spacing them evenly around the container. Make sure the “eyes” are facing upwards.
4. Cover with Soil: Cover the seed potatoes with another 4-6 inches of potting mix. Gently water the soil.
5. Wait for Growth: Now, we wait! Keep the soil moist but not soggy. In a few weeks, you’ll see green shoots emerging from the soil.
6. Adding More Soil: Once the shoots are about 6-8 inches tall, add another 4-6 inches of potting mix, burying the stems. This encourages the plant to produce more potatoes along the buried stem. This is the key to a bountiful harvest!
7. Repeat the Process: Continue adding soil as the plants grow, burying the stems each time. Repeat this process until you reach the top of the container. I usually leave a few inches of space at the top for watering.
Caring for Your Potato Plants: Nurturing Your Spuds
Now that your potato planter is built, it’s time to provide the care your plants need to thrive.
1. Watering: Potatoes need consistent moisture, especially during tuber formation. Water deeply whenever the top inch of soil feels dry. Avoid overwatering, as this can lead to rot. I usually check the soil moisture every day or two.
2. Sunlight: Potatoes need at least 6-8 hours of sunlight per day. Place your container in a sunny location. If you’re growing indoors, you may need to supplement with grow lights.
3. Fertilizing: Potatoes are heavy feeders. Fertilize every 2-3 weeks with a balanced fertilizer. You can also add compost tea or aged manure to the soil to provide extra nutrients. I prefer using an organic fertilizer to keep things natural.
4. Pest Control: Keep an eye out for pests like aphids, potato beetles, and flea beetles. If you spot any pests, treat them promptly with an appropriate insecticide or organic pest control method. I’ve found that neem oil is effective for many common garden pests.
5. Hilling: As the plants grow, continue to “hill” the soil around the stems. This encourages more potato production and protects the developing tubers from sunlight. Sunlight can turn potatoes green and bitter.
Harvesting Your Potatoes: The Grand Finale
The moment we’ve all been waiting for! Harvesting your own homegrown potatoes is incredibly rewarding.
1. When to Harvest: Potatoes are typically ready to harvest about 70-90 days after planting. You’ll know they’re ready when the plants start to flower and the foliage begins to die back.
2. Harvesting Technique: There are two ways to harvest your potatoes:
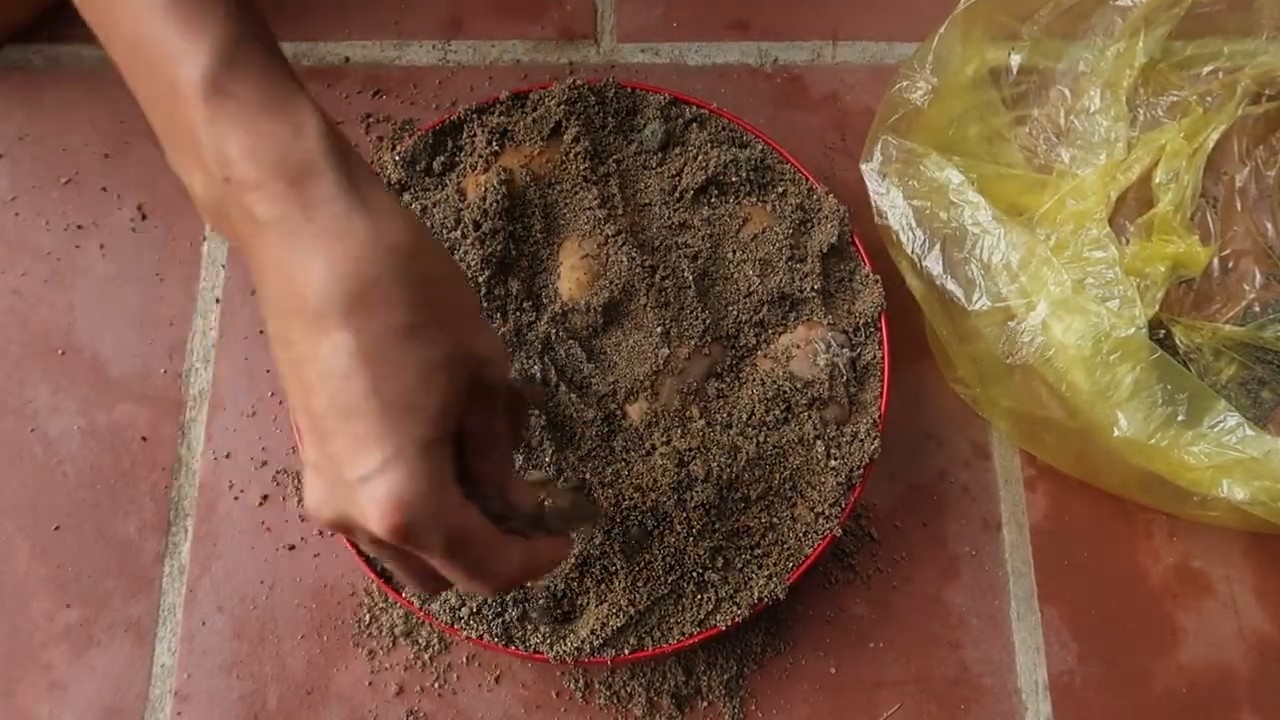
* Partial Harvest: You can reach into the container and carefully dig around the base of the plants to harvest some of the larger potatoes, leaving the smaller ones to continue growing. This allows you to enjoy fresh potatoes throughout the growing season.
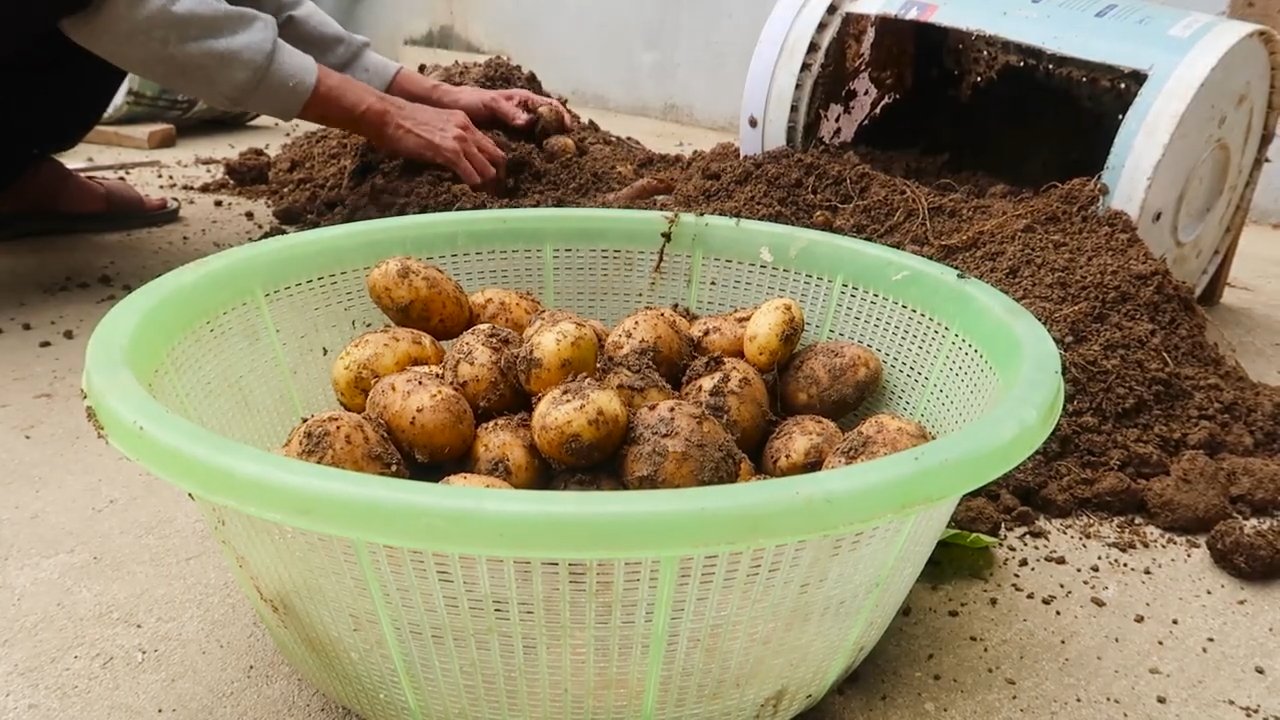
* Full Harvest: Once the foliage has completely died back, you can dump the entire contents of the container onto a tarp and sort through the soil to find all the potatoes.
3. Storing Your Potatoes: Store your harvested potatoes in a cool, dark, and dry place. Avoid storing them near apples or onions, as these can cause them to sprout prematurely. I usually store mine in a cardboard box in the basement.
Troubleshooting: Common Potato Problems and Solutions
Even with the best care, you might encounter some challenges along the way. Here are a few common potato problems and how to address them:
* Potato Scab: This is a common fungal disease that causes rough, scabby patches on the potato skin. To prevent potato scab, use disease-resistant varieties and avoid overwatering.
* Early Blight: This is another fungal disease that causes dark spots on the leaves. To prevent early blight, provide good air circulation and avoid overhead watering.
* Potato Beetles: These pests can quickly defoliate your potato plants. Handpick them off the plants or use an insecticide.
* Aphids: These tiny insects suck the sap from the leaves, causing them to curl and yellow. Spray them with insecticidal soap or neem oil.
* Green Potatoes: Potatoes that are exposed to sunlight can turn green and bitter. This is due to the production of solanine, a toxic compound. Discard any green potatoes. To prevent greening, make sure to hill the soil around the stems and keep the tubers covered.
Tips and Tricks for Potato-Growing Success
Here are a few extra tips to help you grow the best potatoes possible:
* Choose the Right Variety: Different potato varieties have different characteristics. Some are better suited for boiling, while others are better for baking or frying. Choose a variety that you enjoy eating and that is well-suited to your climate.
* Use High-Quality Potting Mix: Don’t skimp on the potting mix! A good-quality potting mix will provide the nutrients and drainage that your potatoes need to thrive.
* Water Regularly: Potatoes need consistent moisture, especially during tuber formation. Water deeply whenever the top inch of soil feels dry.
* Fertilize Regularly: Potatoes are heavy feeders. Fertilize every 2-3 weeks with a balanced fertilizer.
* Hill the Soil: As the plants grow, continue to “hill” the soil around the stems. This encourages more potato production and protects the developing tubers from sunlight.
* Rotate Your Crops: Avoid planting potatoes in the same container year after year. This can help prevent the buildup of pests and diseases.
Conclusion
So, you’re ready to ditch the dirt-filled backyard dream and embrace the world of container gardening? Fantastic! This DIY potato planter trick, perfect for those without a traditional garden, is more than just a space-saving solution; it’s a gateway to fresh, homegrown potatoes, regardless of your living situation. It’s about taking control of your food source, even in the smallest of apartments or balconies.
Why is this a must-try? Because it democratizes gardening. No longer is the joy of harvesting your own potatoes limited to those with sprawling acres. This method brings the farm-to-table experience directly to your doorstep, offering a tangible connection to the food you consume. Imagine the satisfaction of serving a meal featuring potatoes you nurtured from seed to spud, all within the confines of your urban oasis.
Beyond the sheer convenience, this DIY potato planter offers unparalleled control over your growing environment. You dictate the soil composition, ensuring optimal drainage and nutrient availability. You can easily move your planter to chase the sun or shelter it from harsh weather. And, perhaps most importantly, you eliminate the back-breaking labor associated with traditional potato farming. No more tilling, weeding, or digging through endless rows.
But the beauty of this method lies in its adaptability. Feel free to experiment with different potato varieties. Russets, Yukon Golds, fingerlings – the possibilities are endless! Consider adding companion plants like marigolds or basil to deter pests and enhance the flavor of your potatoes. You can even try different container materials, from repurposed burlap sacks to stylish galvanized tubs, to match your aesthetic.
Don’t be afraid to get creative with your layering technique. Some gardeners prefer to use straw or shredded newspaper in addition to soil, while others swear by adding compost tea for an extra boost of nutrients. The key is to observe your plants, learn from your mistakes, and adapt your approach accordingly.
This DIY potato planter is not just about growing potatoes; it’s about fostering a deeper connection with nature, embracing sustainable living, and proving that anyone, anywhere, can experience the joy of gardening. It’s a project that’s both rewarding and educational, offering a hands-on learning experience for gardeners of all ages and skill levels.
So, what are you waiting for? Gather your supplies, grab your seed potatoes, and embark on this exciting gardening adventure. We’re confident that you’ll be amazed by the results. And, most importantly, we encourage you to share your experiences with us! Post photos of your growing potatoes, share your tips and tricks, and let us know what worked (and what didn’t). Together, we can create a thriving community of urban potato farmers, one container at a time. Let’s revolutionize the way we think about food and gardening, starting with this simple, yet powerful, DIY potato planter.
Frequently Asked Questions (FAQ)
What kind of container should I use for my DIY potato planter?
The ideal container should be large enough to accommodate the growing potato plants and their developing tubers. A container that is at least 2 feet in diameter and 2-3 feet deep is generally recommended. You can use a variety of materials, including plastic bins, large buckets, fabric grow bags, or even repurposed containers like old trash cans or barrels. Make sure the container has drainage holes to prevent waterlogging, which can lead to root rot. Fabric grow bags are particularly beneficial as they allow for excellent drainage and aeration, promoting healthy root growth.
What type of soil should I use for my potato planter?
Potatoes thrive in well-draining, slightly acidic soil. A good potting mix specifically formulated for vegetables is an excellent choice. You can also create your own mix by combining equal parts of compost, peat moss (or coconut coir), and perlite or vermiculite. Avoid using garden soil, as it can be too heavy and compacted, hindering drainage and root development. The compost provides essential nutrients, while the peat moss or coconut coir helps retain moisture, and the perlite or vermiculite improves drainage and aeration.
How many seed potatoes should I plant in one container?
For a container of the recommended size (2-3 feet deep and 2 feet in diameter), you can plant 3-4 seed potatoes. Space them evenly around the container, ensuring they have enough room to grow. If you’re using a smaller container, reduce the number of seed potatoes accordingly. Overcrowding can lead to smaller potatoes and reduced yields.
How often should I water my potato plants?
Water your potato plants regularly, especially during hot and dry weather. The soil should be consistently moist but not waterlogged. Check the soil moisture by sticking your finger about an inch deep into the soil. If it feels dry, it’s time to water. Avoid overwatering, as this can lead to root rot. During periods of heavy rain, you may need to reduce watering frequency.
How much sunlight do potato plants need?
Potato plants need at least 6-8 hours of direct sunlight per day to thrive. Choose a location for your container that receives ample sunlight. If you live in a particularly hot climate, you may need to provide some afternoon shade to prevent the plants from overheating.
How do I “hill” the potatoes in a container?
“Hilling” is the process of adding more soil around the potato plants as they grow. This encourages the plants to produce more potatoes along the buried stems. When the potato plants are about 6-8 inches tall, add a layer of soil around the base of the plants, burying the lower portion of the stems. Repeat this process every few weeks as the plants continue to grow, until the container is nearly full.
When are the potatoes ready to harvest?
Potatoes are typically ready to harvest about 70-100 days after planting, depending on the variety. You can start harvesting “new potatoes” (small, immature potatoes) when the plants begin to flower. To harvest new potatoes, carefully dig around the base of the plant and remove a few potatoes, leaving the rest to continue growing. For mature potatoes, wait until the foliage starts to die back and turn yellow or brown. This indicates that the potatoes have reached their full size and are ready to be harvested.
What are some common pests and diseases that affect potato plants?
Common pests that can affect potato plants include aphids, potato beetles, and flea beetles. Diseases include early blight, late blight, and potato scab. Regularly inspect your plants for signs of pests or diseases. If you detect any problems, take action promptly to prevent them from spreading. Organic pest control methods, such as insecticidal soap or neem oil, can be effective for controlling pests. Ensure good air circulation around the plants to help prevent fungal diseases.
Can I grow potatoes in a container indoors?
While it’s possible to grow potatoes in a container indoors, it can be challenging to provide them with the necessary amount of sunlight. If you choose to grow potatoes indoors, you’ll need to supplement with grow lights to ensure they receive at least 12-14 hours of light per day. Also, ensure proper ventilation and humidity control to prevent fungal diseases.
What can I do with my potato plants after harvesting the potatoes?
After harvesting the potatoes, you can compost the potato plants or use them as mulch in your garden. Avoid composting plants that have been affected by disease. You can also save some of the smaller potatoes to use as seed potatoes for the next growing season. Store seed potatoes in a cool, dark, and dry place until planting time.
Leave a Comment