
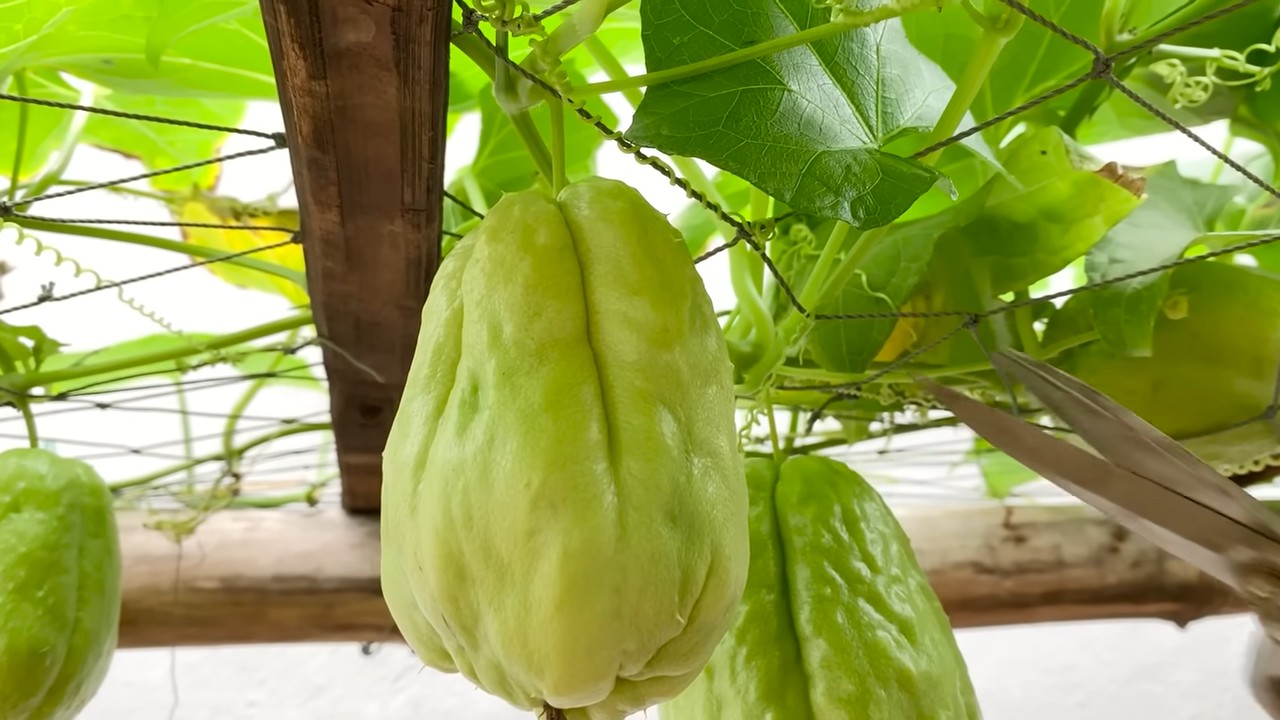
Boost Chayote Harvest: Are you dreaming of a bountiful chayote squash yield, overflowing from your garden and gracing your dinner table with its versatile goodness? I know I am! But sometimes, despite our best efforts, those prickly vines just don’t seem to produce as much as we’d hoped. Don’t worry, you’re not alone, and I’m here to share some game-changing DIY tricks to help you maximize your chayote harvest.
Chayote, also known as vegetable pear or mirliton, has a rich history, particularly in Mesoamerica, where it originated. For centuries, it has been a staple food, valued for its nutritional benefits and adaptability. It’s a resilient plant, but even resilient plants need a little help sometimes! That’s where these DIY hacks come in.
Why do you need these tricks? Well, a lackluster chayote harvest can be incredibly frustrating. Imagine putting in the time and effort, only to be rewarded with a handful of squash. These simple, actionable tips will address common issues like pollination problems, nutrient deficiencies, and improper pruning, ensuring you get the most out of your chayote plant. I’m going to show you how to boost chayote harvest with easy-to-implement strategies that will transform your garden into a chayote paradise. Get ready to enjoy a bumper crop of delicious, homegrown chayote!
Boosting Your Chayote Harvest: A DIY Guide to Abundant Vines
Hey fellow gardeners! Are you growing chayote (also known as mirliton or vegetable pear) and finding your harvest a little… underwhelming? Don’t worry, I’ve been there! Chayote can be a prolific producer, but sometimes it needs a little help to reach its full potential. I’m going to share my tried-and-true DIY methods for maximizing your chayote yield. Get ready for a bumper crop!
Understanding Chayote’s Needs
Before we dive into the DIY hacks, let’s quickly recap what chayote needs to thrive. This will help you understand why these techniques work.
* Sunlight: Chayote loves sunshine! Aim for at least 6-8 hours of direct sunlight daily.
* Water: Consistent moisture is key, especially during fruit development.
* Fertile Soil: Chayote is a heavy feeder, so rich, well-draining soil is essential.
* Support: These vines are vigorous and need a strong trellis or support system.
* Pollination: While chayote is self-fertile, good pollination is still important for fruit set.
* Pruning: Strategic pruning can encourage fruit production and improve air circulation.
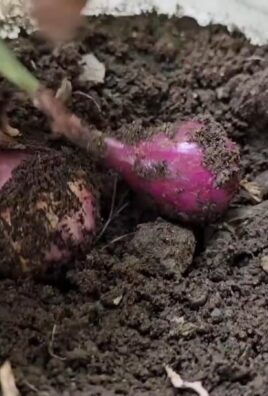
DIY Hack #1: Supercharging Your Soil
Chayote needs a nutrient-rich environment to produce those delicious fruits. Here’s how I boost my soil’s fertility:
Step 1: Soil Testing (Optional but Recommended)
While not strictly necessary, a soil test can tell you exactly what your soil is lacking. You can purchase a DIY soil test kit online or through your local garden center. Follow the instructions on the kit to collect your soil sample and send it to a lab for analysis. This will give you precise information about your soil’s pH and nutrient levels.
Step 2: Amending with Compost
Compost is my secret weapon for healthy soil! It improves drainage, adds nutrients, and supports beneficial microbes.
1. Gather your compost: I use a mix of homemade compost (from kitchen scraps and yard waste) and store-bought compost.
2. Apply the compost: Spread a 2-3 inch layer of compost around the base of your chayote plant, extending out to the drip line (the area directly under the outermost leaves).
3. Gently incorporate: Use a garden fork or trowel to gently mix the compost into the top few inches of soil. Be careful not to damage the roots.
Step 3: Adding Organic Fertilizer
While compost provides a good base, I like to supplement with an organic fertilizer to give my chayote an extra boost.
1. Choose your fertilizer: I prefer a balanced organic fertilizer with an NPK ratio (nitrogen, phosphorus, potassium) around 5-5-5 or 10-10-10. Look for fertilizers specifically formulated for vegetables or fruiting plants. Bone meal is also a great source of phosphorus, which is crucial for fruit development.
2. Apply the fertilizer: Follow the instructions on the fertilizer package for application rates. Generally, you’ll sprinkle the fertilizer around the base of the plant and gently work it into the soil.
3. Water thoroughly: After applying the fertilizer, water the area well to help the nutrients dissolve and reach the roots.
Step 4: Epsom Salt Boost (Magnesium Magic!)
Epsom salt (magnesium sulfate) can help improve nutrient uptake and promote healthy growth.
1. Mix the solution: Dissolve 1 tablespoon of Epsom salt in 1 gallon of water.
2. Apply the solution: Use a watering can to apply the Epsom salt solution to the base of your chayote plant every 2-4 weeks. You can also use a spray bottle to foliar feed the leaves, but be sure to do this in the early morning or late evening to avoid leaf burn.
DIY Hack #2: Optimizing Pollination
Even though chayote is self-fertile, encouraging pollination can significantly increase fruit set. Here’s how I do it:
Step 1: Attracting Pollinators
The more pollinators you have in your garden, the better!
1. Plant pollinator-friendly flowers: Include a variety of flowers that attract bees, butterflies, and other beneficial insects. Some of my favorites include lavender, sunflowers, zinnias, and borage.
2. Avoid pesticides: Pesticides can harm or kill pollinators. Opt for organic pest control methods instead.
3. Provide water: A shallow dish of water with pebbles or marbles for insects to land on can be a lifesaver for thirsty pollinators.
Step 2: Hand Pollination (If Needed)
If you’re not seeing a lot of pollinator activity, you can try hand-pollinating your chayote flowers.
1. Identify male and female flowers: Male flowers have a stamen (the pollen-producing part) while female flowers have a small, immature fruit behind the flower.
2. Collect pollen: Use a small paintbrush or cotton swab to collect pollen from the male flowers.
3. Transfer pollen: Gently brush the pollen onto the stigma (the receptive part) of the female flowers.
4. Repeat: Repeat this process every day for several days, especially during peak flowering.
DIY Hack #3: Pruning for Production
Pruning can seem counterintuitive, but it can actually encourage more fruit production by improving air circulation and directing the plant’s energy towards fruit development.
Step 1: Removing Dead or Diseased Growth
This is the first and most important step.
1. Inspect your plant: Look for any dead, damaged, or diseased leaves or stems.
2. Prune them away: Use clean, sharp pruning shears to remove these parts of the plant. Cut back to healthy growth.
Step 2: Thinning Out the Vine
Chayote vines can get incredibly dense, which can block sunlight and reduce air circulation.
1. Identify overcrowded areas: Look for areas where the vines are very thick and tangled.
2. Thin them out: Selectively remove some of the vines to create more space and allow sunlight to penetrate. Focus on removing older, less productive vines.
Step 3: Pinching Back the Tips
Pinching back the tips of the vines encourages branching and fruit production.
1. Locate the growing tips: Find the tips of the actively growing vines.
2. Pinch them off: Use your fingers or pruning shears to pinch off the top few inches of the vine. This will encourage the plant to send out new shoots from the sides, which will produce more flowers and fruits.
DIY Hack #4: Providing Adequate Support
Chayote vines are heavy and need a strong support system to climb on. A sturdy trellis is essential for maximizing your harvest.
Step 1: Choosing the Right Trellis
The trellis should be tall and strong enough to support the weight of the mature vine and its fruits.
1. Consider your space: Choose a trellis that fits your garden space. A large trellis can accommodate a vigorous vine, but a smaller trellis may be more suitable for a smaller garden.
2. Choose a sturdy material: Wood, metal, or strong plastic are all good options for trellis materials. Make sure the trellis is well-built and can withstand strong winds.
3. Ensure adequate height: The trellis should be at least 6-8 feet tall to allow the vine to climb and spread out.
Step 2: Building a Simple Trellis (Optional)
If you’re handy, you can build your own trellis using readily available materials.
1. Gather your materials: You’ll need wooden posts, wire mesh or chicken wire, and staples or nails.
2. Construct the frame: Dig holes for the wooden posts and set them in concrete for stability. Space the posts about 6-8 feet apart.
3. Attach the wire mesh: Staple or nail the wire mesh to the wooden posts, creating a climbing surface for the chayote vine.
Step 3: Training the Vine
Once you have a trellis in place, you’ll need to train the chayote vine to climb it.
1. Guide the vine: Gently guide the vine towards the trellis and tie it loosely to the support using soft twine or plant ties.
2. Encourage climbing: As the vine grows, continue to guide it along the trellis, tying it as needed.
3. Prune as needed: Prune any stray vines that are not climbing the trellis.
DIY Hack #5: Consistent Watering
Consistent moisture is crucial for chayote, especially during fruit development.
Step 1: Monitoring Soil Moisture
Check the soil moisture regularly, especially during hot, dry weather.
1. Use your finger: Stick your finger into the soil about 2 inches deep. If the soil feels dry, it’s time to water

Conclusion
So, there you have it! This simple, yet incredibly effective DIY trick to boost chayote harvest is more than just a gardening hack; it’s a game-changer for anyone looking to maximize their yield and enjoy an abundance of this versatile vegetable. We’ve explored the science behind why this method works, the straightforward steps involved, and the potential benefits that await you.
Why is this a must-try? Because it addresses a common problem faced by chayote growers: abundant foliage but limited fruit production. By strategically pruning and directing the plant’s energy, you can encourage it to focus on developing those delicious, pear-shaped fruits we all crave. Imagine the satisfaction of harvesting a significantly larger crop, enough to share with friends, family, and neighbors!
But the beauty of this DIY approach lies not only in its effectiveness but also in its adaptability. Feel free to experiment with variations to suit your specific growing conditions and preferences. For example, if you live in a particularly hot climate, you might want to provide some afternoon shade to your chayote plant, even after pruning. This will help prevent sunscald on the developing fruits. Alternatively, if you’re growing your chayote in a container, ensure it has adequate drainage and consider using a slow-release fertilizer to provide consistent nutrients.
Another variation to consider is the type of support structure you use. While a sturdy trellis is ideal, you can also train your chayote vine along a fence, pergola, or even a strong tree branch. Just make sure the support is strong enough to handle the weight of the mature vine and its fruits.
Don’t be afraid to get creative with your pruning techniques as well. While the general principle of removing excess foliage remains the same, you can adjust the intensity of pruning based on your plant’s growth habit and fruit production. Observe your plant closely and learn to recognize the signs of healthy growth and fruit development.
Ultimately, the key to success with this DIY trick is observation and adaptation. Pay attention to your chayote plant’s needs and adjust your approach accordingly. And remember, gardening is a journey, not a destination. There will be successes and setbacks along the way, but the rewards of growing your own food are well worth the effort.
We are confident that this DIY trick will significantly improve your chayote harvest. But we also want to hear from you! We encourage you to try this method in your own garden and share your experiences with us. Did you notice a significant increase in fruit production? Did you encounter any challenges along the way? What variations did you try? Your feedback will not only help us refine this technique but also inspire other gardeners to give it a try.
So, grab your pruning shears, head out to your garden, and get ready to boost your chayote harvest! We can’t wait to hear about your success stories. Happy gardening!
Frequently Asked Questions (FAQ)
Q: How often should I prune my chayote plant to boost fruit production?
A: The frequency of pruning depends on the growth rate of your chayote vine. Generally, you should aim to prune every 2-3 weeks during the growing season. The goal is to maintain a balance between foliage and fruit, ensuring that the plant’s energy is directed towards fruit development rather than excessive leaf growth. Observe your plant closely and adjust the pruning frequency accordingly. If you notice a lot of new growth, prune more frequently. If the plant seems stressed or slow-growing, reduce the pruning frequency.
Q: What is the best time of day to prune my chayote plant?
A: The best time to prune is in the morning, on a dry day. This allows the cuts to heal quickly and reduces the risk of fungal infections. Avoid pruning during wet or humid weather, as this can create a favorable environment for pathogens.
Q: How much of the chayote vine should I prune?
A: As a general rule, you should aim to remove about 20-30% of the foliage during each pruning session. Focus on removing excess leaves, especially those that are shading the developing fruits. Also, prune any dead, damaged, or diseased leaves and stems. Avoid removing too much foliage at once, as this can stress the plant and reduce its ability to photosynthesize.
Q: What tools do I need to prune my chayote plant?
A: You will need a pair of sharp, clean pruning shears or loppers. Make sure the blades are sharp to ensure clean cuts, which will heal more quickly. Before pruning, disinfect your tools with rubbing alcohol or a bleach solution to prevent the spread of diseases.
Q: Can I use the pruned chayote leaves and stems for anything?
A: Yes, the pruned chayote leaves and stems can be composted. They are a good source of green material for your compost pile. You can also use the young, tender shoots and leaves in salads or stir-fries. They have a mild, slightly sweet flavor.
Q: What if my chayote plant is not producing any fruit at all?
A: If your chayote plant is not producing any fruit, there could be several reasons. First, make sure the plant is getting enough sunlight. Chayote plants need at least 6-8 hours of sunlight per day to produce fruit. Second, check the soil fertility. Chayote plants need a well-drained soil that is rich in organic matter. You can amend the soil with compost or manure to improve its fertility. Third, ensure the plant is getting enough water. Chayote plants need consistent moisture, especially during fruit development. Fourth, consider the pollination. Chayote plants are monoecious, meaning they have separate male and female flowers on the same plant. However, they may require insect pollination to set fruit. If you are not seeing any bees or other pollinators in your garden, you can try hand-pollinating the flowers. Finally, make sure the plant is not stressed by pests or diseases. Inspect the plant regularly for signs of infestation or infection and take appropriate action.
Q: Will this DIY trick work for all varieties of chayote?
A: Yes, this DIY trick should work for most varieties of chayote. However, some varieties may be more vigorous than others and require more frequent pruning. Observe your plant closely and adjust your pruning techniques accordingly.
Q: How long does it take to see results after pruning my chayote plant?
A: You should start to see results within a few weeks of pruning. The plant will begin to direct its energy towards fruit development, and you should notice an increase in the number and size of the fruits. However, it may take a full growing season to see the full benefits of this DIY trick.
Q: Can I use this DIY trick on other vining plants?
A: While this DIY trick is specifically designed for chayote plants, the general principle of pruning to encourage fruit production can be applied to other vining plants as well, such as cucumbers, squash, and melons. However, the specific pruning techniques may vary depending on the plant species. Research the specific pruning requirements of each plant before attempting to prune it.

Leave a Comment