
Easy Tomato Growing Setup: Imagine biting into a sun-ripened, juicy tomato, bursting with flavor, that you grew yourself! There’s nothing quite like the taste of homegrown tomatoes, and the good news is, you don’t need acres of land or a green thumb of steel to achieve this delicious dream. For centuries, cultivating tomatoes has been a cherished tradition, from their origins in South America to their adoption into Italian cuisine and beyond. They’ve become a symbol of summer, freshness, and the simple joys of life.
But let’s be honest, getting started can feel a little daunting. That’s where this DIY guide comes in! I’m going to share my favorite, super-simple tricks for creating an easy tomato growing setup, even if you’re a complete beginner. We’ll bypass the complicated jargon and focus on practical, actionable steps that will have you harvesting your own delicious tomatoes in no time.
Why do you need this? Because store-bought tomatoes often lack the vibrant flavor and nutritional value of homegrown ones. Plus, there’s a huge sense of satisfaction that comes from nurturing a plant from seed to fruit. This DIY approach will save you money, reduce your reliance on commercially grown produce, and give you a fun, rewarding hobby. Let’s get started and transform your space into a tomato-growing paradise!

DIY Self-Watering Tomato Planter: Bountiful Harvest, Minimal Effort!
Hey there, fellow gardening enthusiasts! Are you dreaming of juicy, sun-ripened tomatoes but dread the daily watering routine? Well, I’ve got just the project for you! I’m going to walk you through building your very own self-watering tomato planter. This ingenious setup will keep your tomato plants happy and hydrated, even when you’re away on vacation or just plain busy. Trust me, this is a game-changer!
What Makes This Planter So Great?
Before we dive into the how-to, let’s talk about why this self-watering planter is so awesome:
* Consistent Moisture: The planter provides a steady supply of water directly to the roots, preventing overwatering and underwatering.
* Reduced Watering Frequency: Say goodbye to daily watering! You’ll only need to refill the reservoir every few days, depending on the weather.
* Healthier Plants: Consistent moisture promotes strong root development and healthier, more productive plants.
* Water Conservation: This system minimizes water waste by delivering water directly to the plant’s roots, reducing evaporation.
* Easy to Build: It’s a simple DIY project that anyone can tackle with basic materials and tools.
Materials You’ll Need
Alright, let’s gather our supplies. Here’s what you’ll need to build your self-watering tomato planter:
* Two Plastic Storage Bins: One large (approximately 20-30 gallons) and one smaller (approximately 10-15 gallons). The smaller bin needs to fit comfortably inside the larger bin with a few inches of space around the sides and bottom. Make sure they are food-grade plastic, especially the inner bin.
* PVC Pipe: A length of 3-4 inch diameter PVC pipe, about 12-18 inches long. This will be our watering tube.
* PVC End Cap: To fit the PVC pipe, preventing soil from falling into the water reservoir.
* Drill with Various Drill Bits: For creating drainage holes and holes for the watering tube.
* Landscape Fabric: To prevent soil from clogging the water reservoir.
* Potting Mix: A high-quality potting mix specifically formulated for tomatoes.
* Tomato Seedling: Your favorite variety of tomato seedling!
* Measuring Tape or Ruler: For accurate measurements.
* Utility Knife or Scissors: For cutting the landscape fabric.
* Gloves: To protect your hands.
* Optional: Mulch (straw, wood chips, etc.) to help retain moisture and suppress weeds.
Building Your Self-Watering Tomato Planter: Step-by-Step
Okay, let’s get our hands dirty! Follow these steps to build your self-watering tomato planter:
1. Prepare the Inner Bin (Planting Container)
This is where your tomato plant will live, so let’s get it ready.
1. Drill Drainage Holes: Using a drill bit (around 1/4 inch), drill several drainage holes in the bottom of the smaller plastic bin. Space them about 4-6 inches apart. These holes will allow excess water to drain out and prevent the soil from becoming waterlogged.
2. Drill Overflow Holes: About 2-3 inches from the bottom of the smaller bin, drill several overflow holes around the sides. These holes will prevent the water reservoir from overflowing and drowning your plant’s roots.
3. Cut Landscape Fabric: Cut a piece of landscape fabric slightly larger than the bottom of the smaller bin. This will act as a barrier between the soil and the water reservoir, preventing soil from clogging the reservoir and wicking water up to the roots.
4. Line the Bottom: Place the landscape fabric inside the smaller bin, covering the drainage holes. Make sure it’s snug against the bottom and extends up the sides a bit.
2. Prepare the Outer Bin (Water Reservoir)
This bin will hold the water that your tomato plant will use.
1. Drill Hole for Watering Tube: In the larger bin, drill a hole near one of the corners, large enough to accommodate the PVC pipe. The hole should be about 2-3 inches from the bottom of the bin. This is where you’ll insert the watering tube to refill the reservoir.
2. Optional: Add Support (For Larger Bins): If you’re using a very large outer bin, you might want to add some support to the bottom to prevent it from bowing under the weight of the water and soil. You can use bricks, rocks, or even pieces of wood.
3. Assemble the Planter
Now, let’s put everything together!
1. Place Inner Bin Inside Outer Bin: Carefully place the smaller bin (with the drainage holes and landscape fabric) inside the larger bin. Make sure it sits securely and that there’s enough space around the sides and bottom for the water reservoir.
2. Insert Watering Tube: Insert the PVC pipe into the hole you drilled in the outer bin. Make sure it reaches the bottom of the bin and extends a few inches above the top of the inner bin. This will allow you to easily refill the water reservoir.
3. Cap the Watering Tube: Place the PVC end cap on the top of the PVC pipe. This will prevent soil from falling into the water reservoir when you’re planting.
4. Planting Your Tomato Seedling
Time to get your tomato plant settled in its new home!
1. Fill with Potting Mix: Fill the smaller bin with high-quality potting mix, leaving a few inches of space at the top.
2. Create Planting Hole: Dig a hole in the center of the potting mix large enough to accommodate the root ball of your tomato seedling.
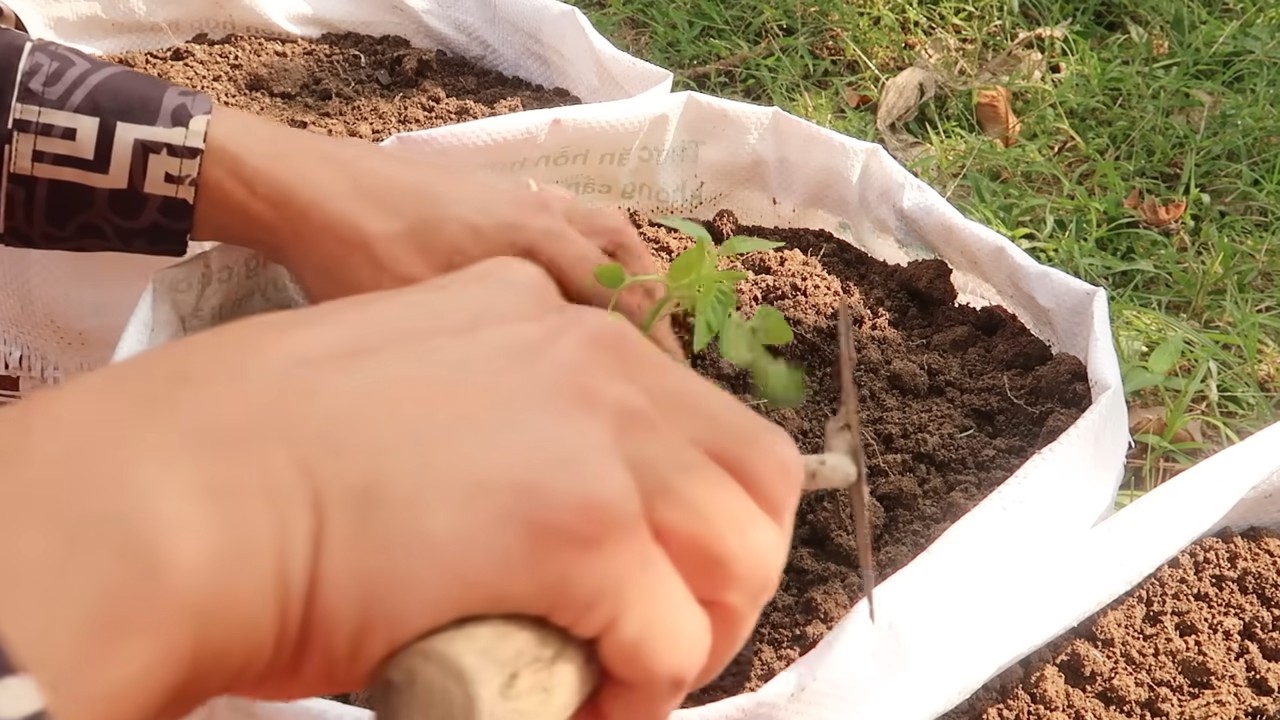
3. Plant the Seedling: Gently remove the tomato seedling from its container and place it in the planting hole. Make sure the top of the root ball is level with the surface of the potting mix.
4. Backfill with Potting Mix: Fill in the hole around the seedling with potting mix, gently firming the soil around the base of the plant.
5. Water Thoroughly: Water the potting mix thoroughly to help settle the soil and get the roots established.
5. Finishing Touches
Almost there! Let’s add the final touches to ensure your tomato plant thrives.
1. Add Mulch (Optional): Apply a layer of mulch (straw, wood chips, etc.) around the base of the tomato plant. This will help retain moisture, suppress weeds, and regulate soil temperature.
2. Provide Support: As your tomato plant grows, it will need support to prevent the stems from breaking. You can use a tomato cage, stakes, or a trellis. Install the support system now to avoid damaging the plant later.
3. Water Reservoir: Fill the water reservoir by pouring water into the PVC pipe until it reaches the level of the overflow holes.
4. Place in Sunny Location: Place your self-watering tomato planter in a sunny location that receives at least 6-8 hours of direct sunlight per day.
Maintaining Your Self-Watering Tomato Planter
Now that your planter is built and your tomato plant is happily settled in, here are a few tips for maintaining it:
* Check Water Level Regularly: Check the water level in the reservoir every few days, especially during hot weather. Refill as needed by pouring water into the PVC pipe.
* Fertilize Regularly: Tomato plants are heavy feeders, so fertilize them regularly with a balanced fertilizer. Follow the instructions on the fertilizer package.
* Prune as Needed: Prune your tomato plant regularly to remove suckers (the small shoots that grow between the main stem and the branches). This will help improve air circulation and promote fruit production.
* Monitor for Pests and Diseases: Keep an eye out for pests and diseases, and take action promptly if you notice any problems.
* Rotate Crops: If you’re using the same planter year after year, rotate your crops to prevent soilborne diseases.
Troubleshooting
Even with the best planning, sometimes things don’t go exactly as expected. Here are a few common problems and how to fix them:
* Plant Wilting: If your plant is wilting, even though the reservoir is full, it could be a sign of root rot. Make sure the drainage holes are not clogged and that the potting mix is well-draining.
* Slow Growth: If your plant is growing slowly, it could be due to lack of sunlight, nutrients, or water. Make sure it’s getting enough sunlight, fertilize regularly, and check the water level in the reservoir.
* Pests and Diseases: If you notice pests or diseases, treat them promptly with an appropriate insecticide or fungicide.
Enjoy Your Bountiful Harvest!
And there you have it! You’ve successfully built your own self-watering tomato planter. Now
Conclusion
So, there you have it! This simple, yet incredibly effective, DIY tomato growing setup is more than just a gardening hack; it’s a game-changer for anyone looking to cultivate delicious, homegrown tomatoes, regardless of their experience level or available space. We’ve shown you how to bypass the common pitfalls of traditional gardening, like soilborne diseases and inconsistent watering, by creating a self-contained, thriving ecosystem for your tomato plants.
Why is this a must-try? Because it simplifies the entire process. Forget about back-breaking weeding, constant monitoring of soil moisture, and the anxiety of potential root rot. This method promotes healthy root development, efficient nutrient absorption, and ultimately, a bountiful harvest of juicy, flavorful tomatoes. It’s an investment in your garden, your health, and your taste buds.
But the beauty of this DIY project lies in its adaptability. Feel free to experiment with different container sizes to accommodate various tomato varieties. Cherry tomatoes, for instance, might thrive in smaller containers, while larger beefsteak tomatoes will appreciate the extra space. You can also adjust the nutrient solution based on the specific needs of your chosen tomato variety. Consider adding organic fertilizers or compost tea to further enrich the growing medium and boost plant health.
Don’t be afraid to get creative with your setup! If you live in an area with limited sunlight, consider supplementing with grow lights to ensure your plants receive adequate illumination. You can also explore different mulching options to help retain moisture and suppress weed growth. Straw, wood chips, or even shredded newspaper can work wonders.
The possibilities are endless, and the rewards are immense. Imagine the satisfaction of biting into a sun-ripened tomato that you grew yourself, knowing that you nurtured it from seedling to fruit with your own hands. Picture the vibrant colors and the intoxicating aroma of your own personal tomato garden. This DIY tomato growing setup makes that dream a reality.
We wholeheartedly encourage you to give this method a try. It’s easy, affordable, and incredibly rewarding. And once you’ve experienced the joy of growing your own tomatoes, we’re confident that you’ll be hooked.
More importantly, we want to hear about your experiences! Share your photos, tips, and variations with us in the comments section below. Let’s build a community of tomato enthusiasts and learn from each other’s successes and challenges. Together, we can unlock the secrets to growing the most delicious, homegrown tomatoes imaginable. So, grab your supplies, get your hands dirty, and embark on this exciting gardening adventure. Happy growing! Remember, this **easy tomato growing setup** is your ticket to a summer filled with fresh, flavorful tomatoes.
FAQ
What type of container is best for this DIY tomato growing setup?
The ideal container size depends on the type of tomato you plan to grow. For smaller varieties like cherry or grape tomatoes, a 5-gallon bucket or container will suffice. However, for larger varieties like beefsteak or heirloom tomatoes, we recommend using a 10-gallon or larger container to provide ample space for root development. Ensure the container is made of food-grade plastic and has drainage holes at the bottom. Dark-colored containers can absorb more heat, which can be beneficial in cooler climates but may overheat the soil in warmer regions. Consider using a lighter-colored container or wrapping a dark container with reflective material to mitigate heat absorption.
How often should I water my tomato plants using this setup?
One of the biggest advantages of this DIY setup is its ability to regulate moisture levels. However, you still need to monitor the soil moisture regularly. The frequency of watering will depend on factors such as the weather, the size of the plant, and the type of growing medium you’re using. A good rule of thumb is to check the soil moisture by inserting your finger about an inch deep. If the soil feels dry to the touch, it’s time to water. When watering, saturate the soil thoroughly until water drains out of the drainage holes. Avoid overwatering, as this can lead to root rot. During hot, sunny days, you may need to water more frequently, while during cooler, cloudy days, you can water less often.
What type of growing medium should I use for this setup?
A well-draining, nutrient-rich growing medium is essential for healthy tomato growth. We recommend using a mix of equal parts potting soil, compost, and perlite or vermiculite. Potting soil provides a good base for the growing medium, while compost adds essential nutrients and improves soil structure. Perlite or vermiculite helps to improve drainage and aeration, preventing the soil from becoming waterlogged. Avoid using garden soil, as it can be too heavy and compact, hindering root growth. You can also add slow-release fertilizer to the growing medium to provide a steady supply of nutrients to your tomato plants.
How much sunlight do my tomato plants need?
Tomato plants require at least 6-8 hours of direct sunlight per day to thrive. Choose a location for your DIY setup that receives ample sunlight throughout the day. If you live in an area with limited sunlight, consider supplementing with grow lights. LED grow lights are a great option, as they are energy-efficient and provide the full spectrum of light that tomato plants need. Position the grow lights about 12-18 inches above the plants and adjust the height as the plants grow. You can also use reflective materials, such as aluminum foil or white paint, to bounce sunlight onto the plants and increase light exposure.
How do I prevent pests and diseases from affecting my tomato plants?
Prevention is key when it comes to pests and diseases. Start by using disease-resistant tomato varieties. Regularly inspect your plants for signs of pests or diseases, such as aphids, whiteflies, or fungal infections. If you spot any problems, take action immediately. You can use organic pest control methods, such as insecticidal soap or neem oil, to control pests. For fungal diseases, you can use copper-based fungicides or baking soda sprays. Ensure good air circulation around your plants by spacing them properly and pruning away any crowded foliage. You can also use companion planting to deter pests and attract beneficial insects. For example, planting basil near your tomato plants can help to repel aphids and whiteflies.
Can I grow tomatoes indoors using this DIY setup?
Yes, you can grow tomatoes indoors using this DIY setup, but you’ll need to provide adequate light and ventilation. As mentioned earlier, you’ll need to supplement with grow lights to ensure your plants receive enough light. You’ll also need to provide good air circulation to prevent fungal diseases. You can use a fan to circulate air around the plants. Additionally, you’ll need to pollinate the flowers manually, as there won’t be any bees or other pollinators indoors. You can use a small paintbrush or cotton swab to transfer pollen from one flower to another.
What are some common problems I might encounter with this setup, and how can I fix them?
Some common problems include blossom end rot, nutrient deficiencies, and pest infestations. Blossom end rot is caused by a calcium deficiency and can be prevented by ensuring consistent watering and adding calcium to the soil. Nutrient deficiencies can be identified by yellowing leaves or stunted growth. You can address nutrient deficiencies by adding fertilizer to the growing medium. Pest infestations can be controlled using organic pest control methods. Regularly monitor your plants and take action quickly to prevent problems from escalating.
How do I know when my tomatoes are ripe and ready to harvest?
The color of the tomato will change from green to red, yellow, or orange, depending on the variety. The tomato should also feel slightly soft to the touch. Gently twist the tomato off the vine when it’s ripe. Avoid pulling the tomato, as this can damage the plant. The taste of the tomato will also be a good indicator of ripeness. Ripe tomatoes will have a sweet, tangy flavor.

Leave a Comment