
Hydrogen Peroxide Grout Cleaner: Tired of staring at dingy, discolored grout lines that make your otherwise sparkling clean tiles look, well, not so sparkling? I get it! We’ve all been there, scrubbing away with little to no success, feeling like we’re fighting a losing battle against stubborn stains. But what if I told you there’s a simple, effective, and surprisingly affordable solution hiding in your medicine cabinet?
Grout cleaning has always been a chore, hasn’t it? Historically, people have used everything from harsh chemicals to elbow grease to try and restore their grout to its former glory. But the beauty of using hydrogen peroxide grout cleaner is that it offers a gentler, yet powerful, alternative. It’s a method that’s been whispered about in cleaning circles for years, and now I’m here to share the secrets with you!
Why is this DIY trick so essential? Because nobody wants to live with grimy grout! It can affect the overall look and feel of your home, making it seem less inviting and clean. Plus, dirty grout can harbor bacteria and mold, which isn’t ideal for your health. So, ditch the expensive, store-bought cleaners and let’s dive into how you can create your own effective and safe hydrogen peroxide grout cleaner. I promise, you’ll be amazed at the results!
DIY Hydrogen Peroxide Grout Cleaner: Sparkling Clean Grout Without Harsh Chemicals!
Hey there, fellow DIY enthusiasts! Are you tired of dingy, stained grout lines ruining the look of your beautiful tile? I know I was! I’ve tried countless commercial grout cleaners, and honestly, I was never fully satisfied. They were either too harsh, smelled awful, or just didn’t deliver the sparkling clean results I craved. That’s when I decided to experiment with a simple, yet powerful, solution: hydrogen peroxide.
Hydrogen peroxide is a fantastic, eco-friendly alternative to harsh chemicals. It’s a natural bleaching agent and disinfectant, making it perfect for tackling stubborn grout stains. Plus, it’s readily available at most drugstores and supermarkets. In this article, I’m going to share my tried-and-true method for cleaning grout with hydrogen peroxide, leaving your tile looking fresh and revitalized.
What You’ll Need
Before we dive in, let’s gather our supplies. This is a pretty straightforward project, so you likely already have most of these items on hand.
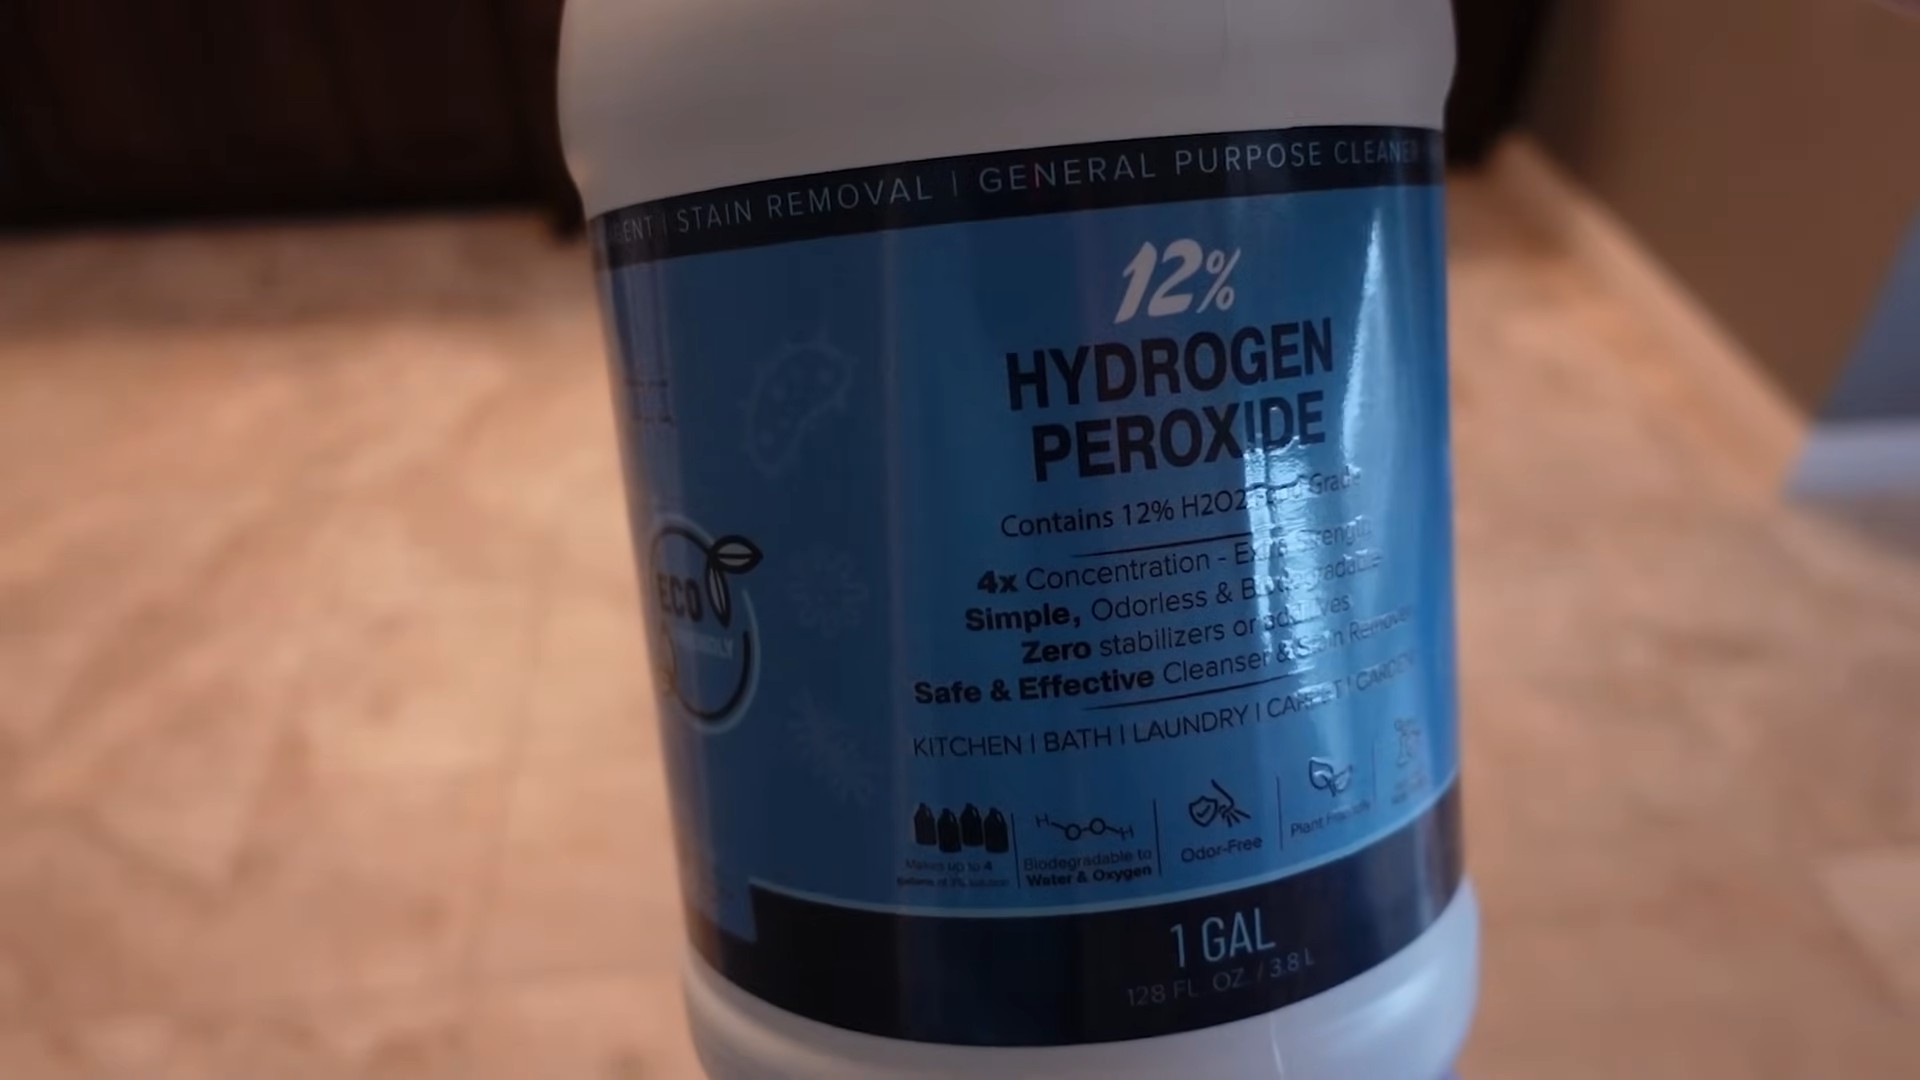
* **Hydrogen Peroxide (3%):** This is the standard concentration you’ll find at the store. Don’t use anything stronger without diluting it significantly, as it could damage some types of tile or grout.
* **Baking Soda:** This acts as a mild abrasive, helping to scrub away stubborn stains.
* **Spray Bottle:** For easy application of the hydrogen peroxide solution.
* **Old Toothbrush or Grout Brush:** A small, stiff-bristled brush is essential for scrubbing the grout lines.
* **Gloves:** Protect your hands from prolonged exposure to hydrogen peroxide.
* **Eye Protection:** Safety first! Goggles or glasses will prevent splashes from getting into your eyes.
* **Clean Cloth or Sponge:** For wiping away the cleaning solution and any residue.
* **Warm Water:** For rinsing.
* **Optional: Small Bowl:** If you prefer to make a paste instead of using a spray bottle.
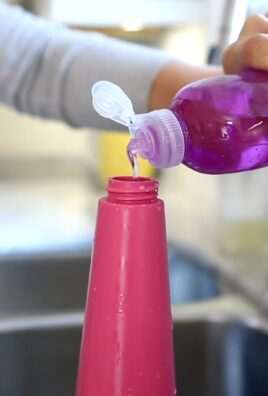
* **Optional: Dish Soap:** A few drops can help boost the cleaning power.
Preparing Your Grout for Cleaning
Before you start scrubbing, it’s important to prep your grout. This will help the hydrogen peroxide work more effectively.
1. **Sweep or Vacuum:** Remove any loose dirt, dust, or debris from the tile surface. This prevents you from just pushing the grime around while you’re cleaning.
2. **Wipe Down the Tile:** Use a damp cloth or sponge to wipe down the tile surface. This will remove any surface-level dirt and grime, allowing the hydrogen peroxide to penetrate the grout more effectively.
3. **Ventilate the Area:** Open windows or turn on a fan to ensure good ventilation. While hydrogen peroxide is relatively safe, it’s always a good idea to have fresh air circulating.
Cleaning Grout with Hydrogen Peroxide: Two Methods
I’ve found that hydrogen peroxide works wonders on grout, and I have two methods I like to use, depending on the severity of the staining.
Method 1: Hydrogen Peroxide Spray
This method is great for light to moderate staining and is super easy to apply.
1. **Fill the Spray Bottle:** Pour hydrogen peroxide into your spray bottle. You can use it straight or add a few drops of dish soap for extra cleaning power. I usually add about 5-6 drops of dish soap per cup of hydrogen peroxide.
2. **Spray the Grout:** Generously spray the hydrogen peroxide solution onto the grout lines. Make sure to saturate the grout thoroughly.
3. **Let it Sit:** Allow the hydrogen peroxide to sit on the grout for at least 10-15 minutes. For heavily stained grout, you can let it sit for up to 30 minutes. This gives the hydrogen peroxide time to break down the stains.
4. **Scrub the Grout:** Using your old toothbrush or grout brush, scrub the grout lines in a back-and-forth motion. Apply firm pressure, but be careful not to damage the tile or grout. You should start to see the stains lifting as you scrub.
5. **Rinse with Warm Water:** Once you’ve scrubbed all the grout lines, rinse the area thoroughly with warm water. Use a clean cloth or sponge to wipe away any remaining cleaning solution and residue.
6. **Dry the Tile:** Use a clean, dry towel to dry the tile surface. This will prevent water spots and help to keep the grout clean.
Method 2: Hydrogen Peroxide and Baking Soda Paste
This method is more effective for tackling stubborn, deeply ingrained stains. The baking soda acts as a mild abrasive, helping to scrub away the grime.
1. **Make the Paste:** In a small bowl, mix together hydrogen peroxide and baking soda to form a thick paste. The consistency should be similar to toothpaste. I usually start with about 1/2 cup of baking soda and slowly add hydrogen peroxide until I reach the desired consistency.
2. **Apply the Paste:** Using your fingers or a small spatula, apply the paste directly to the grout lines. Make sure to cover the entire stained area.
3. **Let it Sit:** Allow the paste to sit on the grout for at least 30 minutes, or even longer for heavily stained grout. I sometimes let it sit overnight for really tough stains.
4. **Scrub the Grout:** Using your old toothbrush or grout brush, scrub the grout lines in a back-and-forth motion. Apply firm pressure, and you should see the stains lifting as you scrub.
5. **Rinse with Warm Water:** Once you’ve scrubbed all the grout lines, rinse the area thoroughly with warm water. Use a clean cloth or sponge to wipe away any remaining paste and residue. You may need to rinse several times to remove all the baking soda.
6. **Dry the Tile:** Use a clean, dry towel to dry the tile surface.
Dealing with Stubborn Stains
Sometimes, even with these methods, you might encounter stubborn stains that just won’t budge. Don’t worry, I’ve got a few extra tips for you!
* **Repeat the Process:** For particularly stubborn stains, you may need to repeat the cleaning process several times. Don’t give up!
* **Increase the Soak Time:** Try letting the hydrogen peroxide solution or paste sit on the grout for a longer period of time. This will give it more time to break down the stains.
* **Use a Stiffer Brush:** If your toothbrush or grout brush isn’t doing the trick, try using a stiffer brush. Just be careful not to damage the tile or grout.
* **Try a Magic Eraser:** A magic eraser can sometimes help to remove stubborn stains. Wet the magic eraser and gently rub it over the grout lines.
* **Consider a Commercial Grout Cleaner (as a Last Resort):** If all else fails, you may need to resort to a commercial grout cleaner. However, be sure to choose a cleaner that is specifically designed for your type of tile and grout, and always follow the manufacturer’s instructions carefully.
Important Considerations and Safety Tips
While hydrogen peroxide is a relatively safe cleaning agent, it’s still important to take a few precautions.
* **Test in an Inconspicuous Area:** Before cleaning your entire tile surface, test the hydrogen peroxide solution or paste in an inconspicuous area to make sure it doesn’t damage the tile or grout.
* **Wear Gloves and Eye Protection:** Protect your hands and eyes from prolonged exposure to hydrogen peroxide.
* **Avoid Contact with Skin and Eyes:** If hydrogen peroxide comes into contact with your skin or eyes, rinse immediately with plenty of water.
* **Do Not Mix with Other Cleaners:** Never mix hydrogen peroxide with other cleaning agents, especially bleach, as this can create dangerous fumes.
* **Store Properly:** Store hydrogen peroxide in a cool, dark place, away from children and pets.
* **Be Mindful of Colored Grout:** While hydrogen peroxide is generally safe for white or light-colored grout, it may lighten or discolor colored grout. Test in an inconspicuous area first.
Maintaining Your Clean Grout
Once you’ve achieved sparkling clean grout, you’ll want to keep it that way! Here are a few tips for maintaining your grout and preventing future stains.
* **Wipe Up Spills Immediately:** Clean up spills as soon as they happen to prevent them from soaking into the grout.
* **Regular Cleaning:** Clean your tile and grout regularly with a mild soap and water solution.
* **Seal Your Grout:** Consider sealing your grout to protect it from stains and moisture. Grout sealers are available at most home improvement stores.
* **Use a Squeegee:** After showering, use a squeegee to remove excess water from the tile and grout. This will help to prevent mold and mildew growth.
* **Ventilate Your Bathroom:** Ensure good ventilation in your bathroom to prevent moisture buildup.
I hope this guide has been helpful! Cleaning grout with hydrogen peroxide is a simple, effective, and eco-friendly way to keep your tile looking its best. With a little elbow grease and these tips, you can say goodbye to dingy grout and hello to sparkling clean tile! Happy cleaning!

Conclusion
So, there you have it! A simple, effective, and budget-friendly way to tackle grimy grout using the power of hydrogen peroxide. Forget spending a fortune on harsh chemical cleaners that fill your home with unpleasant fumes. This DIY hydrogen peroxide grout cleaner method is not only gentler on your lungs and the environment, but it’s also incredibly effective at lifting dirt, grime, and even stubborn stains from your grout lines.
Why is this a must-try? Because it works! We’ve all been there, scrubbing endlessly with little to no visible improvement. This method combines the natural bleaching and disinfecting properties of hydrogen peroxide with the abrasive power of baking soda (if you choose to use it), creating a dynamic duo that cuts through the toughest grime. Plus, you likely already have hydrogen peroxide in your medicine cabinet, making this a readily available solution.
Don’t be afraid to experiment! While the basic recipe of hydrogen peroxide and water (or baking soda) is a great starting point, you can customize it to suit your specific needs. For heavily soiled grout, consider letting the solution sit for a longer period, even up to an hour, before scrubbing. For colored grout, test the solution in an inconspicuous area first to ensure it doesn’t affect the color. You can also add a few drops of your favorite essential oil, like tea tree or lemon, for an extra boost of cleaning power and a fresh, clean scent. Just be sure the essential oil is safe for the surface you are cleaning.
This DIY hydrogen peroxide grout cleaner is a game-changer for anyone looking to revitalize their tile surfaces. It’s a cost-effective, eco-friendly, and surprisingly simple solution that delivers impressive results. Say goodbye to dingy grout and hello to sparkling clean floors and walls!
We’re confident that you’ll be amazed by the difference this simple trick can make. So, ditch the expensive cleaners and give this DIY method a try. We encourage you to share your experiences with us! Let us know in the comments below how this hydrogen peroxide grout cleaner worked for you, what variations you tried, and any tips you discovered along the way. Your feedback will help others achieve the same sparkling results. We can’t wait to hear your success stories!
Frequently Asked Questions (FAQ)
What exactly is hydrogen peroxide and why does it work as a grout cleaner?
Hydrogen peroxide (H2O2) is a mild antiseptic with bleaching and disinfecting properties. It works as a grout cleaner because it oxidizes stains and breaks down dirt and grime. The oxidation process lifts the stains from the grout, making them easier to scrub away. It’s also a natural disinfectant, helping to kill mold and mildew that can thrive in damp environments like bathrooms and kitchens. The bubbling action you see when hydrogen peroxide comes into contact with dirt is a sign that it’s actively working to clean the surface.
What type of hydrogen peroxide should I use?
The standard 3% hydrogen peroxide solution, commonly found in drugstores and pharmacies, is perfectly effective for cleaning grout. Higher concentrations of hydrogen peroxide are available, but they are generally not necessary for this purpose and can be more irritating to the skin and eyes. Always wear gloves when handling hydrogen peroxide, regardless of the concentration.
Can I use hydrogen peroxide on all types of grout?
While hydrogen peroxide is generally safe for most types of grout, it’s always a good idea to test it in an inconspicuous area first, especially if you have colored grout. Some colored grouts may be susceptible to fading or discoloration with prolonged exposure to hydrogen peroxide. If you notice any color change, dilute the hydrogen peroxide with more water or discontinue use. For epoxy grout, hydrogen peroxide is generally safe, but again, testing is recommended.
How long should I let the hydrogen peroxide solution sit on the grout?
The amount of time you let the solution sit depends on the severity of the staining. For lightly soiled grout, 10-15 minutes may be sufficient. For heavily stained grout, you can let it sit for up to an hour. Keep an eye on the area and reapply the solution if it starts to dry out. The longer the solution sits, the more time it has to penetrate and break down the dirt and grime.
What kind of brush should I use to scrub the grout?
A stiff-bristled brush is ideal for scrubbing grout. You can use a grout brush specifically designed for this purpose, or an old toothbrush works well for smaller areas. Avoid using metal brushes, as they can scratch the tile and damage the grout. Focus on scrubbing in a back-and-forth motion along the grout lines to loosen the dirt.
Is it safe to mix hydrogen peroxide with other cleaning products?
No! It is extremely important *not* to mix hydrogen peroxide with certain cleaning products, especially bleach. Mixing hydrogen peroxide and bleach can create toxic chlorine gas, which is harmful to breathe. Always use hydrogen peroxide on its own or with safe ingredients like baking soda or dish soap.
How often should I clean my grout with hydrogen peroxide?
The frequency of cleaning depends on how much traffic the area receives and how prone it is to getting dirty. In high-traffic areas like bathrooms and kitchens, you may need to clean your grout every few weeks. In less frequently used areas, you can clean it every few months. Regular cleaning will help prevent dirt and grime from building up and make it easier to maintain clean grout.
What are some other uses for hydrogen peroxide around the house?
Hydrogen peroxide is a versatile cleaning agent with many uses beyond grout cleaning. It can be used to disinfect cutting boards, whiten laundry, remove stains from carpets, and even clean your toothbrush. Always dilute hydrogen peroxide with water when using it on delicate surfaces.
Can I use hydrogen peroxide to remove mold from grout?
Yes, hydrogen peroxide is effective at killing mold and mildew on grout. Spray the affected area with hydrogen peroxide and let it sit for 10-15 minutes before scrubbing. For stubborn mold, you may need to repeat the process or use a stronger solution of hydrogen peroxide. Be sure to ventilate the area well when cleaning with hydrogen peroxide.
What safety precautions should I take when using hydrogen peroxide?
Always wear gloves when handling hydrogen peroxide to protect your skin from irritation. Avoid getting hydrogen peroxide in your eyes. If contact occurs, rinse immediately with plenty of water. Ventilate the area well when cleaning with hydrogen peroxide. Keep hydrogen peroxide out of reach of children and pets. Store hydrogen peroxide in a cool, dark place to prevent it from breaking down.

Leave a Comment