
Grow Kale at Home – and unlock a world of fresh, nutritious greens right outside your door! Have you ever dreamed of strolling into your backyard and harvesting vibrant, leafy kale for a delicious salad or smoothie? Well, dream no more! This DIY guide is packed with simple, effective tricks to help you cultivate a thriving kale patch, even if you’re a complete beginner.
Kale, a nutritional powerhouse, has a rich history dating back to ancient Greece and Rome, where it was a staple food. Over centuries, it has been cultivated across the globe, prized for its hardiness and health benefits. But let’s be honest, buying kale at the grocery store can be expensive, and sometimes the quality isn’t the best. That’s where the magic of home gardening comes in!
Imagine the satisfaction of knowing exactly where your food comes from, free from harmful pesticides and bursting with flavor. Plus, grow kale at home is surprisingly easy and rewarding. Whether you have a sprawling garden or just a sunny balcony, I’m going to show you how to create the perfect environment for your kale to flourish. From choosing the right seeds to protecting your plants from pests, I’ll share my favorite DIY tricks and hacks to ensure a bountiful harvest. Let’s get our hands dirty and start growing!
Growing Cabbage: Your DIY Guide for Your Own Garden
Hello garden friends! I love harvesting fresh vegetables directly from my garden, and cabbage is no exception. It’s super healthy, versatile, and surprisingly easy to grow, even if you don’t have a huge garden. In this guide, I’ll show you how to successfully grow cabbage at home, whether in a garden bed or in a pot on the balcony. Let’s get started!
What you need: The Materials List
Before we begin, here is a list of everything you’ll need for growing cabbage:
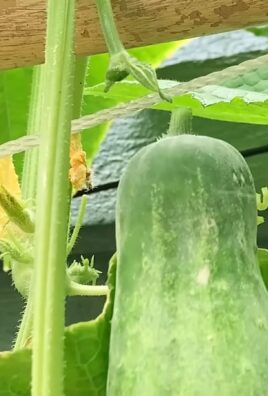
- Cabbage seeds or young plants: Choose the variety that you like best! There’s kale, lacinato kale, black cabbage, and many more.
- Seed starting mix (optional): If you want to start your cabbage plants from seed yourself.
- Pots or seedling trays (optional): For starting seeds.
- Garden soil: Preferably nutrient-rich and well-draining.
- Compost or organic fertilizer: For a good supply of nutrients.
- Watering can or garden hose: For watering.
- Garden tools: Spade, shovel, rake.
- Plant stakes (optional): For particularly tall types of cabbage.
- Protective netting (optional): Against cabbage white butterflies and other pests.
Growing Cabbage: Step by Step
Here is a detailed guide on how to successfully grow cabbage:
1. Choosing the Right Variety
Before you start growing, you should consider which type of cabbage you want to grow. Each variety has its own pros and cons, and some are better suited for certain climates than others. Here are some popular cabbage varieties:
- Kale (Grünkohl): Very hardy and robust, ideal for cold regions. It can be harvested into the winter.
- Lacinato Kale (Palmkohl/Cavolo Nero): Also known as black cabbage, it has long, narrow leaves and a mild taste.
- Brussels Sprouts (Rosenkohl): Forms small sprouts on a stalk. Needs a bit more space and time to grow.
- Cauliflower (Blumenkohl): Known for its white head. Requires a consistent water supply.
- Broccoli (Brokkoli): Similar to cauliflower, but with green florets. Can be harvested multiple times.
- White Cabbage and Red Cabbage (Weißkohl und Rotkohl): Ideal for making sauerkraut or as a side dish.
2. The Right Location
Cabbage needs a sunny location to grow well. At least six hours of sun per day is ideal. The soil should be well-draining and nutrient-rich. Avoid locations where other cabbage family plants have previously grown to prevent diseases.
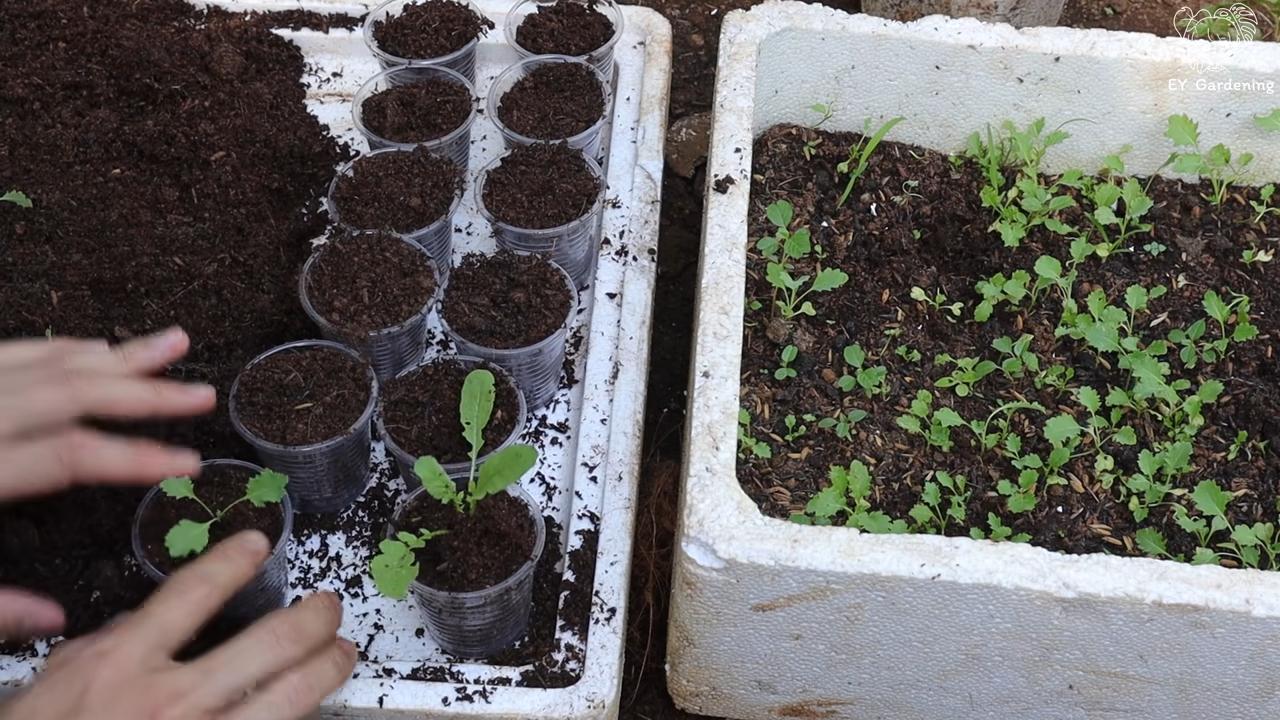
3. Starting Cabbage Indoors (Optional)
You can either sow cabbage directly into the garden bed or start it indoors. Starting it indoors has the advantage that the plants get a head start and you can plant them in the bed later when the weather is better.
- Sowing: Fill seedling trays or small pots with seed starting mix. Sow the cabbage seeds about 1 cm deep in the soil.
- Watering: Water the soil gently so that it is moist but not wet.
- Location: Place the seedling trays in a bright and warm place. A temperature of 18-20°C is ideal.
- Care: Keep the soil moist and ventilate the seedling trays regularly to prevent mold.
- Pricking out: As soon as the seedlings have their first true leaves (after the seed leaves), you can prick them out. This means transplanting them into larger pots so they have more space to grow.
4. Planting Cabbage in the Garden Bed
Once the young plants are strong enough (about 10-15 cm high) and the weather permits (no more frost!), you can plant them in the garden bed.
- Soil preparation: Loosen the soil in the bed thoroughly and remove weeds. Work in compost or organic fertilizer to enrich the soil with nutrients.
- Planting distance: Pay attention to the correct planting distance so the cabbage plants have enough space to grow. Depending on the variety, the distance between plants is 40-60 cm and between rows is 50-70 cm.
- Planting: Dig holes large enough to accommodate the root balls of the young plants. Place the plants in the holes and fill them with soil. Press the soil down lightly.
- Watering: Water the plants thoroughly after planting.
5. Growing Cabbage in a Pot
If you don’t have a garden, you can also grow cabbage in a pot on a balcony or patio.
- Pot size: Choose a pot with a diameter of at least 30 cm and a volume of at least 10 liters.
- Soil: Use a high-quality, well-draining potting mix.
- Planting: Plant the young plants in the pot and water them thoroughly.
- Location: Place the pot in a sunny location.
- Fertilizing: Fertilize the plants regularly with an organic fertilizer or a liquid fertilizer for vegetables.
Cabbage Care: How to Keep Your Cabbage Healthy and Strong
Proper care is crucial for a bountiful cabbage harvest. Here are some tips:
1. Watering
Cabbage needs regular water, especially during dry periods. Make sure the soil is always slightly moist, but avoid waterlogging. It’s best to water in the morning or evening to avoid evaporation.
2. Fertilizing
Cabbage is a heavy feeder and requires a lot of nutrients. Fertilize the plants regularly with compost, organic fertilizer, or a liquid fertilizer for vegetables. Start fertilizing about two weeks after planting and repeat every 2-3 weeks.
3. Weed Control
Regularly remove weeds that grow around the cabbage plants. Weeds compete with the cabbage for nutrients and water.
4. Pest Control
Cabbage can be attacked by various pests, such as cabbage white butterflies, flea beetles, or aphids.
- Cabbage White Butterflies: The caterpillars of the cabbage white butterfly eat the leaves of the cabbage. You can pick them off by hand or cover the plants with a protective net.
- Flea Beetles: Small, jumping beetles that eat holes in the leaves. Keep the soil moist and sprinkle wood ash around the plants.
- Aphids: Suck plant sap and can weaken the plants. Spray the plants with a jet of water or use a soap solution.
5. Disease Prevention
To prevent diseases, you should practice good crop rotation. This means you should not grow cabbage in the same location every year. Rotate the location every 2-3 years. Also, ensure good air circulation for the plants and avoid waterlogging.
Harvesting Cabbage: The Reward for Your Work
Depending on the variety and planting time, you can harvest cabbage after about 2-4 months.
Cauliflower and Broccoli: Harvest the heads…
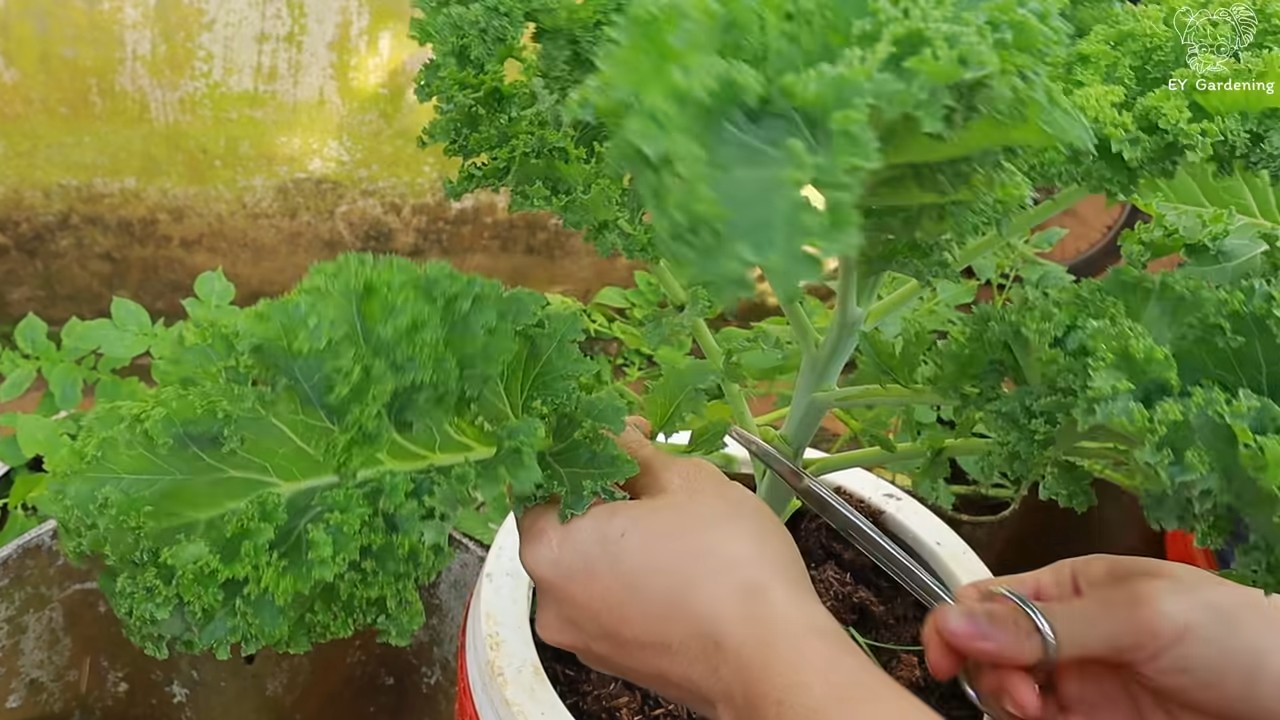
Kale: Can be harvested throughout the winter. Harvest the outer leaves while the inner ones continue to grow.
Lacinato Kale: Harvest the leaves from the bottom up.
Brussels Sprouts: Harvest the sprouts when they are firm and closed.
Conclusion
So, there you have it! Growing kale at home is not only achievable, but it’s also incredibly rewarding. From the vibrant, nutrient-packed leaves gracing your plate to the sheer satisfaction of nurturing something from seed to harvest, this DIY project is a game-changer for any food enthusiast, health-conscious individual, or budding gardener.
Why is this a must-try? Because fresh, homegrown kale surpasses anything you can find at the grocery store. The flavor is more intense, the texture is crisper, and you have complete control over the growing process, ensuring it’s free from unwanted pesticides and chemicals. Plus, think of the money you’ll save! No more overpriced bunches of kale wilting away in your refrigerator.
But the benefits extend beyond the culinary. Gardening is therapeutic. It’s a chance to connect with nature, de-stress, and get your hands dirty (literally!). Watching your kale plants thrive is a deeply satisfying experience that can boost your mood and overall well-being.
Ready to take your kale cultivation to the next level? Consider these variations:
* Experiment with different kale varieties: From the classic curly kale to the smoother, more delicate Lacinato (dinosaur) kale and the vibrant Red Russian kale, each offers a unique flavor and texture profile. Try growing a few different types to find your favorites.
* Vertical gardening: If you’re short on space, explore vertical gardening techniques. Kale thrives in vertical planters, hanging baskets, or even repurposed pallets. This is a great way to maximize your yield in a small area.
* Succession planting: To ensure a continuous harvest throughout the growing season, practice succession planting. Sow new seeds every few weeks to stagger your harvests and keep your plate piled high with fresh kale.
* Companion planting: Enhance your kale’s growth and deter pests by planting it alongside beneficial companions like marigolds, nasturtiums, or garlic. These plants can attract pollinators, repel unwanted insects, and even improve the soil quality.
Don’t be intimidated if you’re a beginner. Growing kale at home is surprisingly easy, even for those with limited gardening experience. With a little patience, attention, and the right resources, you’ll be harvesting your own delicious kale in no time.
We wholeheartedly encourage you to give this DIY trick a try. It’s a simple, sustainable, and incredibly rewarding way to enjoy fresh, healthy kale. And most importantly, we want to hear about your experience! Share your tips, tricks, and triumphs in the comments below. Let’s create a community of kale-growing enthusiasts and inspire others to embrace the joys of homegrown goodness. What are you waiting for? Get planting!
Frequently Asked Questions (FAQ)
What is the best time of year to plant kale?
Kale is a cool-season crop, meaning it thrives in cooler temperatures. The best time to plant kale depends on your climate. In areas with mild winters, you can plant kale in the fall for a winter harvest. In colder climates, start seeds indoors 6-8 weeks before the last expected frost and transplant them outdoors in the spring. You can also plant kale in late summer for a fall harvest. Avoid planting kale during the hottest months of the year, as high temperatures can cause it to bolt (go to seed) and become bitter.
How much sunlight does kale need?
Kale needs at least 6 hours of sunlight per day to thrive. Choose a sunny location in your garden or on your balcony for your kale plants. If you’re growing kale indoors, use grow lights to supplement natural sunlight. Insufficient sunlight can result in leggy, weak plants with poor leaf production.
What kind of soil is best for growing kale?
Kale prefers well-drained soil that is rich in organic matter. Amend your soil with compost or aged manure before planting to improve its fertility and drainage. Kale also prefers a slightly acidic to neutral soil pH, between 6.0 and 7.0. You can test your soil pH with a soil testing kit and adjust it accordingly with lime or sulfur.
How often should I water my kale plants?
Water your kale plants regularly, especially during dry periods. Keep the soil consistently moist, but avoid overwatering, which can lead to root rot. Water deeply at the base of the plants, rather than overhead, to prevent fungal diseases. Mulching around your kale plants can help retain moisture in the soil and suppress weeds.
What are some common pests and diseases that affect kale?
Kale can be susceptible to several pests and diseases, including aphids, cabbage worms, flea beetles, and fungal diseases like powdery mildew. Inspect your plants regularly for signs of pests or diseases and take action promptly. You can control aphids and cabbage worms with insecticidal soap or Bacillus thuringiensis (Bt). Flea beetles can be controlled with row covers or diatomaceous earth. Prevent fungal diseases by providing good air circulation, avoiding overhead watering, and removing infected leaves.
How do I harvest kale?
You can start harvesting kale leaves when they are about 4-6 inches long. Harvest the outer leaves first, leaving the inner leaves to continue growing. You can harvest kale leaves continuously throughout the growing season. Simply snap or cut the leaves off near the base of the plant. Avoid harvesting more than one-third of the plant at a time to allow it to continue growing.
Can I grow kale in containers?
Yes, kale grows well in containers. Choose a container that is at least 12 inches deep and wide to provide enough room for the roots to grow. Use a well-draining potting mix and water regularly. Container-grown kale may need more frequent watering and fertilization than kale grown in the ground.
How do I store harvested kale?
Store harvested kale in the refrigerator in a plastic bag or container. Kale will stay fresh for up to a week in the refrigerator. You can also freeze kale for longer storage. To freeze kale, wash and chop the leaves, then blanch them in boiling water for 2-3 minutes. Drain the kale and plunge it into ice water to stop the cooking process. Drain the kale again and squeeze out any excess water. Pack the kale into freezer bags or containers and freeze for up to 12 months.
My kale plants are bolting (going to seed). What should I do?
Bolting is a natural process that occurs when kale plants are exposed to high temperatures or long days. Once kale plants bolt, the leaves become bitter and less palatable. To prevent bolting, plant kale in the spring or fall, avoid planting it during the hottest months of the year, and provide shade during hot weather. If your kale plants do bolt, you can still harvest the leaves, but they may not taste as good. You can also allow the plants to go to seed and collect the seeds for planting next year.
Can I eat the stems of kale?
Yes, you can eat the stems of kale, but they can be tough and fibrous. To make them more palatable, remove the tough outer layer of the stems with a vegetable peeler. You can then chop the stems and add them to soups, stews, or stir-fries. You can also juice the stems or add them to smoothies.
Leave a Comment