
Indoor Strawberry Growing: Imagine plucking a perfectly ripe, juicy strawberry right from your own home, even in the dead of winter! Sounds like a dream, right? Well, it doesn’t have to be! For centuries, humans have cultivated plants indoors, from ancient Roman conservatories to Victorian-era greenhouses. But you don’t need a sprawling estate to enjoy fresh produce year-round.
This DIY guide is your passport to a world of sweet, homegrown goodness. Forget those bland, store-bought berries that lack flavor. We’re diving deep into the wonderful world of indoor strawberry growing, revealing simple yet effective tricks and hacks that will transform your living space into a miniature strawberry farm.
Why should you embark on this berry-licious adventure? Because everyone deserves access to fresh, healthy food, regardless of the season or their outdoor space. Plus, it’s incredibly rewarding to nurture a plant from seedling to harvest. So, grab your gardening gloves, and let’s get started! I’m excited to share all my secrets to successful indoor strawberry cultivation with you!
Grow Delicious Strawberries Indoors: A Step-by-Step Guide
Hey there, fellow plant enthusiasts! Ever dreamt of plucking fresh, juicy strawberries right from your own home, even when it’s snowing outside? Well, dream no more! I’m going to walk you through a super fun and rewarding DIY project: growing strawberries indoors. It’s easier than you might think, and the taste of homegrown berries is simply unbeatable. Let’s get started!
What You’ll Need: The Strawberry Starter Kit
Before we dive in, let’s gather our supplies. Think of this as your strawberry-growing arsenal!
* Strawberry Plants: You have a few options here. You can buy bare-root strawberry plants (usually available in early spring), established strawberry plants from a nursery, or even propagate your own from runners (more on that later!). Day-neutral or everbearing varieties are best for indoor growing as they produce fruit throughout the season, unlike June-bearing varieties. Some good choices are ‘Albion’, ‘Seascape’, or ‘Ozark Beauty’.
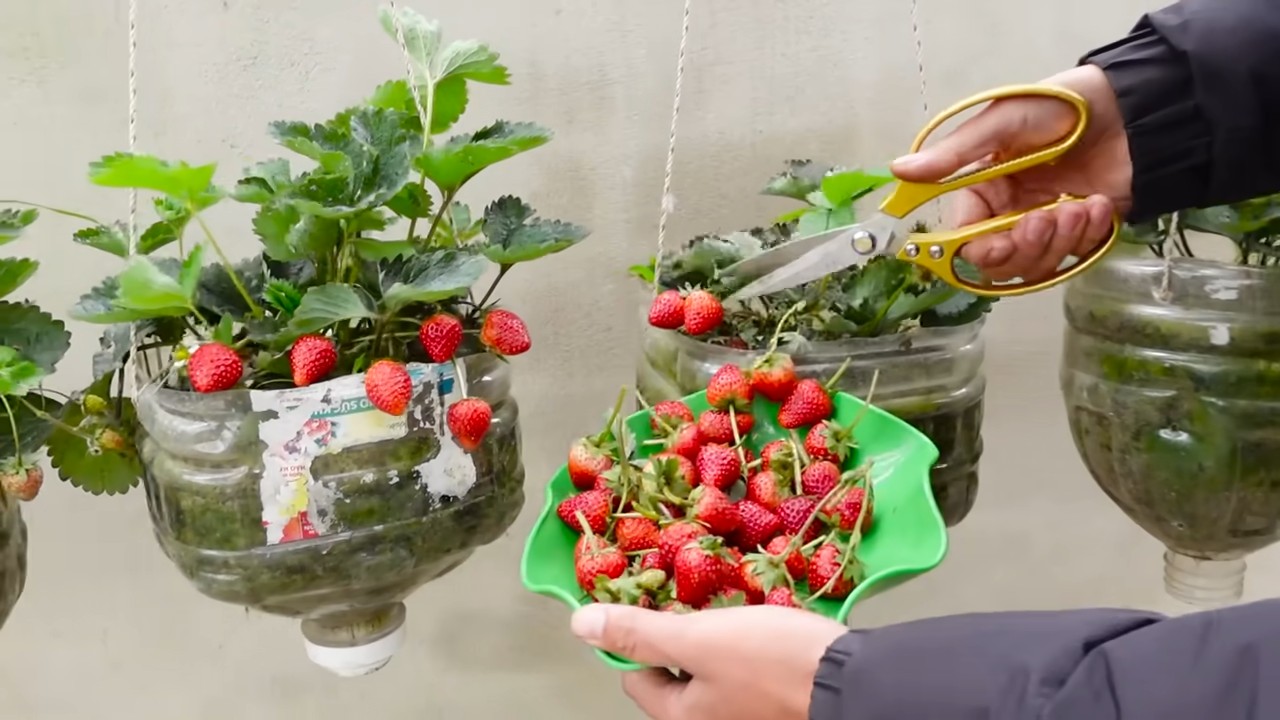
* Containers: Choose pots that are at least 6-8 inches in diameter. You can use plastic pots, terracotta pots, or even hanging baskets! Make sure they have drainage holes. I personally love using hanging baskets because they look beautiful and save space.
* Potting Mix: Don’t use garden soil! It’s too heavy and doesn’t drain well. Opt for a high-quality potting mix specifically formulated for containers. A mix containing peat moss, perlite, and vermiculite is ideal.
* Grow Lights: This is crucial for indoor strawberry growing. Strawberries need at least 6-8 hours of direct sunlight per day. Since most homes don’t offer that, grow lights are essential. LED grow lights are energy-efficient and work great.
* Fertilizer: A balanced liquid fertilizer (like 10-10-10) is perfect for feeding your strawberry plants.
* Watering Can or Spray Bottle: For gentle watering.
* Small Gardening Tools: A trowel for planting and small scissors for trimming runners.
* Optional: Strawberry supports or cages to keep the berries off the soil.
Step-by-Step Planting Guide: From Bare Roots to Berries
Okay, now for the fun part! Let’s get those strawberries planted.
1. Prepare Your Containers: Fill your chosen containers with the potting mix, leaving about an inch of space at the top. Gently tap the container to settle the soil.
2. Planting Bare-Root Strawberries: If you’re using bare-root plants, soak the roots in water for about an hour before planting. This helps rehydrate them. Dig a small hole in the center of the potting mix, large enough to accommodate the roots. Place the plant in the hole, making sure the crown (the point where the roots meet the stem) is level with the soil surface. Don’t bury the crown, or the plant may rot. Gently spread the roots out and cover them with potting mix. Water thoroughly.
3. Planting Established Strawberry Plants: If you’re using established plants from a nursery, gently remove the plant from its container. Loosen the roots slightly with your fingers. Dig a hole in the potting mix that’s the same size as the root ball. Place the plant in the hole and cover the roots with potting mix. Water thoroughly.
4. Spacing: If you’re planting multiple strawberry plants in the same container, space them about 8-10 inches apart. This gives them enough room to grow and prevents overcrowding.
Light, Water, and Food: The Strawberry Care Routine
Now that your strawberries are planted, it’s time to create the perfect environment for them to thrive.
1. Light: Place your strawberry plants under the grow lights. Position the lights about 6-12 inches above the plants. Keep the lights on for 6-8 hours per day. You can use a timer to automate this process.
2. Watering: Strawberries need consistent moisture, but they don’t like to be waterlogged. Water your plants when the top inch of soil feels dry to the touch. Water deeply, until water drains out of the drainage holes. Avoid getting water on the leaves, as this can promote fungal diseases. I usually check the soil moisture every other day.
3. Fertilizing: Feed your strawberry plants with a balanced liquid fertilizer every 2-3 weeks. Follow the instructions on the fertilizer label. During the flowering and fruiting stage, you can switch to a fertilizer that’s higher in phosphorus and potassium to promote fruit production.
4. Temperature: Strawberries prefer temperatures between 60-80°F (15-27°C). Avoid placing them near drafts or extreme temperature fluctuations.
Pollination: Helping Your Strawberries Produce Fruit
Strawberries are self-pollinating, but they often need a little help, especially indoors where there are no bees or wind to do the job.
1. Hand-Pollination: Use a small, soft paintbrush to gently brush the pollen from one flower to another. Do this every day or two when the plants are flowering. You can also gently shake the plants to release pollen. I find that using a small fan to circulate air around the plants also helps with pollination.
Dealing with Runners: To Cut or Not to Cut?
Strawberry plants produce runners, which are long stems that grow horizontally and develop new plantlets at the end.
1. Runner Management: If you want to propagate more strawberry plants, you can allow the runners to root in small pots filled with potting mix. Once the new plantlets have developed roots, you can cut them from the mother plant. However, if you want your plants to focus on producing fruit, it’s best to cut off the runners as soon as they appear. This will redirect the plant’s energy towards fruit production. I usually snip them off with small scissors.
Pest and Disease Control: Keeping Your Strawberries Healthy
Even indoors, strawberry plants can be susceptible to pests and diseases.
1. Common Pests: Watch out for aphids, spider mites, and whiteflies. You can control these pests by spraying your plants with insecticidal soap or neem oil.
2. Common Diseases: Powdery mildew and gray mold are common fungal diseases that can affect strawberries. To prevent these diseases, avoid overwatering, provide good air circulation, and remove any infected leaves. You can also spray your plants with a fungicide if necessary.
3. Prevention is Key: Regularly inspect your plants for any signs of pests or diseases. Early detection and treatment are crucial for preventing serious problems.
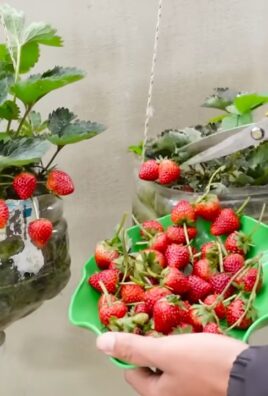
Harvesting Your Strawberries: The Sweet Reward
After all your hard work, it’s finally time to harvest your delicious strawberries!
1. When to Harvest: Strawberries are ready to harvest when they are fully red and slightly soft to the touch. Gently twist the berry off the plant, leaving a small piece of the stem attached.
2. Enjoy Your Harvest: Eat your strawberries fresh, or use them in your favorite recipes. They’re delicious in smoothies, jams, pies, and more!
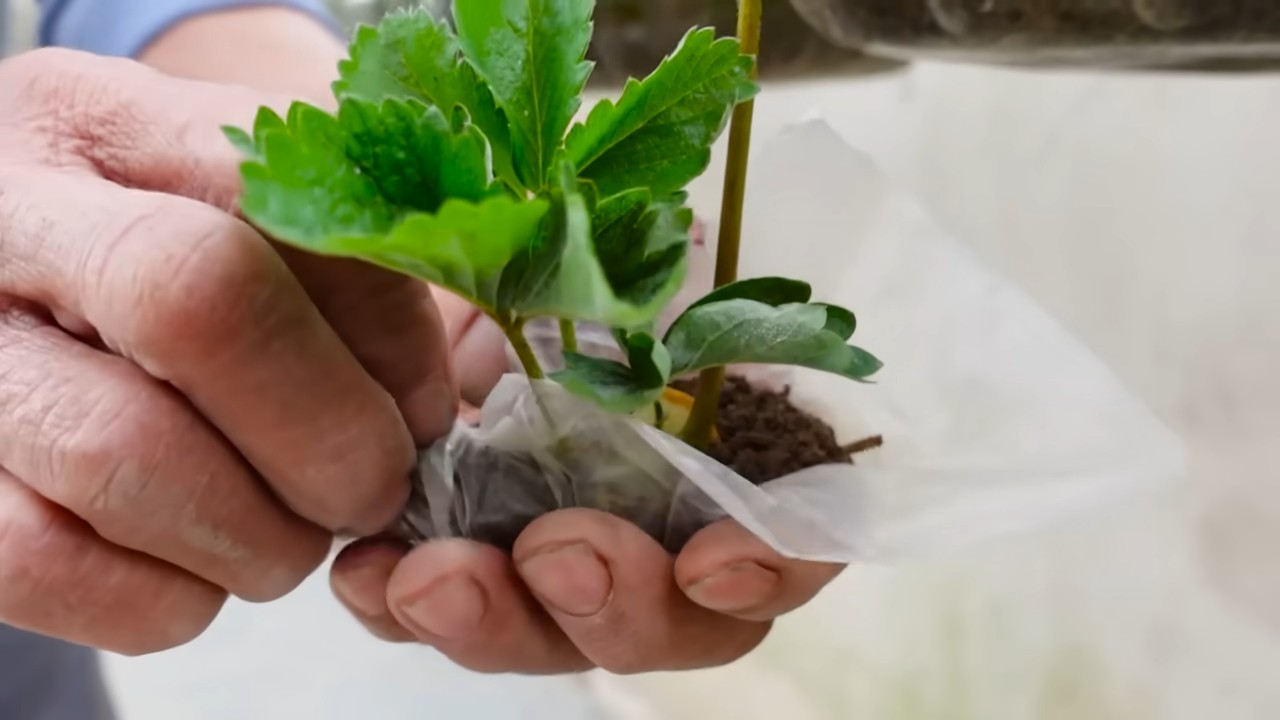
Propagating Strawberries from Runners: Expanding Your Strawberry Patch
As I mentioned earlier, you can easily propagate new strawberry plants from runners. This is a great way to expand your strawberry patch without having to buy new plants.
1. Rooting Runners: When you see runners developing, place small pots filled with potting mix near the mother plant. Position the runners so that the plantlets at the end are in contact with the potting mix. You can use a paperclip or hairpin to hold the plantlet in place.
2. Watering and Waiting: Water the plantlets regularly, keeping the soil moist. After a few weeks, the plantlets will develop roots.
3. Separating the Plantlets: Once the plantlets have developed roots, you can cut them from the mother plant. You now have new strawberry plants that you can transplant into their own containers.
Troubleshooting: Common Problems and Solutions
Even with the best care, you might encounter some problems along the way. Here are a few common issues and how to fix them:
* Yellowing Leaves: This could be a sign of overwatering, underwatering, or nutrient deficiency. Check the soil moisture and adjust your watering accordingly. Fertilize your plants with a balanced fertilizer.
* Lack of Fruit: This could be due to insufficient light, poor pollination, or lack of nutrients. Make sure your plants are getting enough light, hand-pollinate the flowers, and fertilize your plants regularly.
* Small Berries: This could be caused by overcrowding, lack of water, or lack of nutrients. Thin out your plants if they are overcrowded, water them regularly, and fertilize them with a balanced fertilizer.
* Pests and Diseases: As mentioned earlier, regularly inspect your plants for pests and diseases and treat them accordingly.
Choosing the Right Strawberry Variety for Indoors
Not all strawberry varieties are created equal, especially when it comes to indoor growing.
Conclusion
So, there you have it! Transforming your living space into a miniature strawberry farm is not only achievable but also incredibly rewarding. This DIY indoor strawberry growing trick offers a delightful way to enjoy fresh, juicy strawberries year-round, regardless of the weather outside. Forget those bland, store-bought berries that lack the vibrant flavor of homegrown produce. With a little effort and the right setup, you can cultivate a continuous supply of sweet, sun-kissed strawberries right in your own home.
But why is this indoor strawberry growing method a must-try? Firstly, it’s a fantastic way to connect with nature, even in an urban environment. Nurturing your strawberry plants from tiny seedlings to fruit-bearing beauties provides a sense of accomplishment and a calming, therapeutic experience. Secondly, you have complete control over the growing process, ensuring that your strawberries are free from harmful pesticides and chemicals. You know exactly what goes into your food, promoting a healthier lifestyle for you and your family.
Furthermore, this DIY project is surprisingly budget-friendly. While there’s an initial investment in supplies like pots, soil, and grow lights (if needed), the long-term savings on store-bought strawberries quickly add up. Plus, you can propagate new plants from runners, expanding your strawberry patch without spending extra money.
Looking for variations to spice things up? Consider experimenting with different strawberry varieties. Everbearing strawberries are a great choice for continuous harvests throughout the year, while June-bearing varieties offer a larger, more concentrated yield. You can also explore different growing mediums, such as hydroponics, for a more advanced and efficient system. Vertical gardening techniques, using stacked planters or hanging baskets, are perfect for maximizing space in smaller apartments. And don’t forget the power of companion planting! Basil, thyme, and marigolds are known to deter pests and enhance the flavor of strawberries.
Ready to embark on your indoor strawberry growing adventure? We encourage you to give this DIY trick a try. It’s a fun, educational, and delicious way to bring the joys of gardening indoors. Remember to start small, be patient, and don’t be afraid to experiment. Every growing season is a learning opportunity.
We’re confident that you’ll be amazed by the results. Imagine the satisfaction of plucking a perfectly ripe strawberry from your own indoor garden and savoring its sweet, juicy flavor. It’s an experience that’s hard to beat.
But the journey doesn’t end here! We want to hear about your experiences. Share your tips, tricks, and photos with us in the comments section below. Let’s create a community of indoor strawberry growers and learn from each other. What challenges did you face? What successes did you achieve? What are your favorite strawberry recipes? Your insights can help others succeed in their own indoor gardening endeavors.
So, grab your gardening gloves, gather your supplies, and get ready to transform your home into a strawberry paradise. Happy growing!
Frequently Asked Questions (FAQ)
What are the best strawberry varieties to grow indoors?
Everbearing varieties like ‘Seascape’, ‘Albion’, and ‘Ozark Beauty’ are generally recommended for indoor growing because they produce fruit throughout the growing season, rather than just in June. Day-neutral varieties are also a good choice. June-bearing varieties can be grown indoors, but you’ll only get one large harvest per year. Consider the size of your growing space and the amount of light available when selecting your varieties. Some varieties are more compact and better suited for smaller spaces.
How much light do indoor strawberries need?
Strawberries need at least 6-8 hours of direct sunlight per day to thrive. If you don’t have a sunny window, you’ll need to supplement with grow lights. LED grow lights are a popular and energy-efficient option. Position the lights about 6-12 inches above the plants. The color spectrum of the light is also important. Look for grow lights that emit a full spectrum of light, including blue and red wavelengths, which are essential for plant growth and flowering.
What kind of soil should I use for indoor strawberry growing?
Use a well-draining potting mix that is specifically formulated for fruits and vegetables. Avoid using garden soil, as it can be too heavy and may contain pests or diseases. A mix of peat moss, perlite, and vermiculite is a good option. You can also add some compost to the mix to provide extra nutrients. Ensure the pots you use have drainage holes to prevent waterlogging, which can lead to root rot.
How often should I water my indoor strawberry plants?
Water your strawberry plants when the top inch of soil feels dry to the touch. Avoid overwatering, as this can lead to root rot. Water deeply, until the water drains out of the bottom of the pot. During the flowering and fruiting stages, strawberries need more water than usual. Check the soil moisture regularly and adjust your watering schedule accordingly.
How do I pollinate my indoor strawberry plants?
Since there are no bees or other pollinators indoors, you’ll need to hand-pollinate your strawberry plants. Use a small, soft brush to gently transfer pollen from the stamen (the part with the pollen) to the pistil (the central part of the flower). Do this every day or two when the plants are flowering. You can also use a small fan to gently blow air around the plants, which can help to distribute the pollen.
How do I fertilize my indoor strawberry plants?
Fertilize your strawberry plants every 2-3 weeks with a balanced liquid fertilizer. Look for a fertilizer that is specifically formulated for fruits and vegetables. Follow the instructions on the fertilizer label carefully. Avoid over-fertilizing, as this can damage the plants. During the flowering and fruiting stages, you can switch to a fertilizer that is higher in phosphorus and potassium, which are essential for fruit development.
How do I deal with pests and diseases on my indoor strawberry plants?
Inspect your plants regularly for signs of pests or diseases. Common pests include aphids, spider mites, and whiteflies. You can control these pests with insecticidal soap or neem oil. Diseases such as powdery mildew and gray mold can be prevented by providing good air circulation and avoiding overwatering. If you notice any signs of disease, remove the affected leaves or fruit immediately.
How long does it take for indoor strawberry plants to produce fruit?
It typically takes about 2-3 months for indoor strawberry plants to produce fruit after planting. The exact time will depend on the variety of strawberry, the growing conditions, and the age of the plant. Be patient and continue to provide your plants with the care they need.
Can I grow strawberries indoors year-round?
Yes, you can grow strawberries indoors year-round if you provide them with the right conditions. This includes adequate light, water, nutrients, and temperature. You may need to adjust your growing practices depending on the season. For example, you may need to provide more light during the winter months.
What do I do with the runners that my strawberry plants produce?
Strawberry plants produce runners, which are long, slender stems that grow horizontally from the plant. These runners can be used to propagate new strawberry plants. Simply place the runner in a pot of soil and wait for it to root. Once the runner has rooted, you can cut it from the mother plant. Alternatively, you can remove the runners to encourage the mother plant to produce more fruit.


Leave a Comment