
Baking Soda Dish Soap Cleaner: sounds like a science experiment, right? Well, it kind of is, but the amazing results you’ll get in your kitchen will make you feel like a cleaning wizard! Forget those harsh chemicals and expensive store-bought cleaners. I’m going to show you how to whip up a powerful, all-natural cleaning solution using just two simple ingredients you probably already have in your pantry.
The history of using baking soda as a cleaning agent stretches back centuries. Ancient Egyptians used a natural form of baking soda called natron for cleaning and even as a type of soap. While dish soap is a more modern invention, combining it with baking soda creates a synergistic effect, boosting its cleaning power significantly. It’s a time-tested combination with a modern twist!
Why do you need this Baking Soda Dish Soap Cleaner in your life? Because it’s effective, eco-friendly, and saves you money! We’re all looking for ways to reduce our exposure to harsh chemicals and create a healthier home environment. Plus, let’s be honest, who doesn’t love a good DIY project that actually works? This simple trick tackles everything from stubborn grease to baked-on food, leaving your dishes sparkling clean and your conscience clear. So, ditch the chemicals and embrace the power of this dynamic duo – your kitchen (and your wallet) will thank you!
DIY Baking Soda and Dish Soap Cleaner: Your All-Purpose Cleaning Solution
Hey there, fellow DIY enthusiasts! I’m so excited to share one of my absolute favorite cleaning hacks with you: a powerful, all-purpose cleaner made with just two simple ingredients – baking soda and dish soap! Seriously, this stuff is magic. It’s incredibly versatile, effective, and way cheaper than buying those fancy cleaners at the store. Plus, you probably already have everything you need in your pantry!
This cleaner is fantastic for tackling grime in the bathroom, kitchen messes, stubborn stains, and so much more. I’ve used it on everything from my stovetop to my shower tiles, and I’m always amazed by the results. Let’s dive in and learn how to make this чудо-cleaner!
What Makes This Cleaner So Great?
Before we get started, let’s talk about why this combination works so well.
* Baking Soda: This is your gentle abrasive. It’s mildly alkaline, which helps to dissolve dirt, grease, and grime. It’s also a natural deodorizer, so it’s perfect for getting rid of unpleasant smells.
* Dish Soap: This is your surfactant, meaning it helps to break down surface tension and lift away dirt and grease. It also adds a bit of sudsing power to the mix.
Together, these two ingredients create a cleaning powerhouse that’s tough on messes but gentle on most surfaces.
Materials You’ll Need
Okay, let’s gather our supplies. You won’t need much!
* Baking Soda
* Dish Soap (I prefer a grease-cutting variety like Dawn, but any dish soap will work)
* A Bowl or Container for Mixing
* A Spoon or Spatula
* A Spray Bottle (optional, for thinner mixtures)
* A Scrub Brush or Sponge
* Gloves (optional, but recommended if you have sensitive skin)
Making Your Baking Soda and Dish Soap Cleaner: Two Ways!
I’m going to show you two different ways to make this cleaner, depending on what you’re planning to clean and your preferred consistency. The first method creates a paste, which is great for scrubbing. The second method creates a spray, which is better for lighter cleaning and larger surfaces.
Method 1: The Cleaning Paste
This is my go-to method for tackling tough stains and grime.
1. Combine the Ingredients: In your bowl, add about 1/2 cup of baking soda.
2. Add Dish Soap Gradually: Slowly drizzle in the dish soap, about a tablespoon at a time.
3. Mix Thoroughly: Use your spoon or spatula to mix the baking soda and dish soap together. You want to achieve a thick, spreadable paste. If it’s too dry, add a little more dish soap. If it’s too runny, add a little more baking soda.
4. Adjust Consistency (Important!): The consistency is key! You’re aiming for something like toothpaste. It should hold its shape but still be easy to spread.
5. Test on a Hidden Area: Before applying the paste to a large area, test it on a small, inconspicuous spot to make sure it doesn’t damage the surface. This is especially important for delicate materials like painted surfaces or certain types of countertops.
Method 2: The Cleaning Spray
This method is perfect for cleaning larger areas like shower walls or countertops.
1. Combine Ingredients in a Spray Bottle: In your spray bottle, add 1/4 cup of baking soda.
2. Add Dish Soap: Add 1 tablespoon of dish soap to the spray bottle.
3. Fill with Water: Slowly fill the rest of the spray bottle with warm water.
4. Shake Well: Secure the spray nozzle and shake the bottle vigorously to ensure the baking soda dissolves completely. You might need to shake it a few times during use, as the baking soda can settle at the bottom.
5. Test on a Hidden Area: As with the paste, test the spray on a small, hidden area before applying it to a larger surface.
Using Your Baking Soda and Dish Soap Cleaner: Step-by-Step
Now that you’ve made your cleaner, let’s put it to work!
1. Apply the Cleaner:
* For the Paste: Apply a generous amount of the paste to the surface you want to clean.
* For the Spray: Spray the surface liberally with the cleaner.
2. Let it Sit (Important!): Allow the cleaner to sit on the surface for a few minutes. This gives the baking soda and dish soap time to work their magic and break down the dirt and grime. For tough stains, you can let it sit for up to 15-20 minutes.
3. Scrub: Use your scrub brush or sponge to scrub the surface in a circular motion. Apply a little elbow grease for stubborn stains.
4. Rinse Thoroughly: Rinse the surface thoroughly with clean water. Make sure to remove all traces of the cleaner.
5. Dry: Use a clean cloth or towel to dry the surface.
Where Can You Use This Cleaner?
This cleaner is incredibly versatile! Here are just a few ideas:
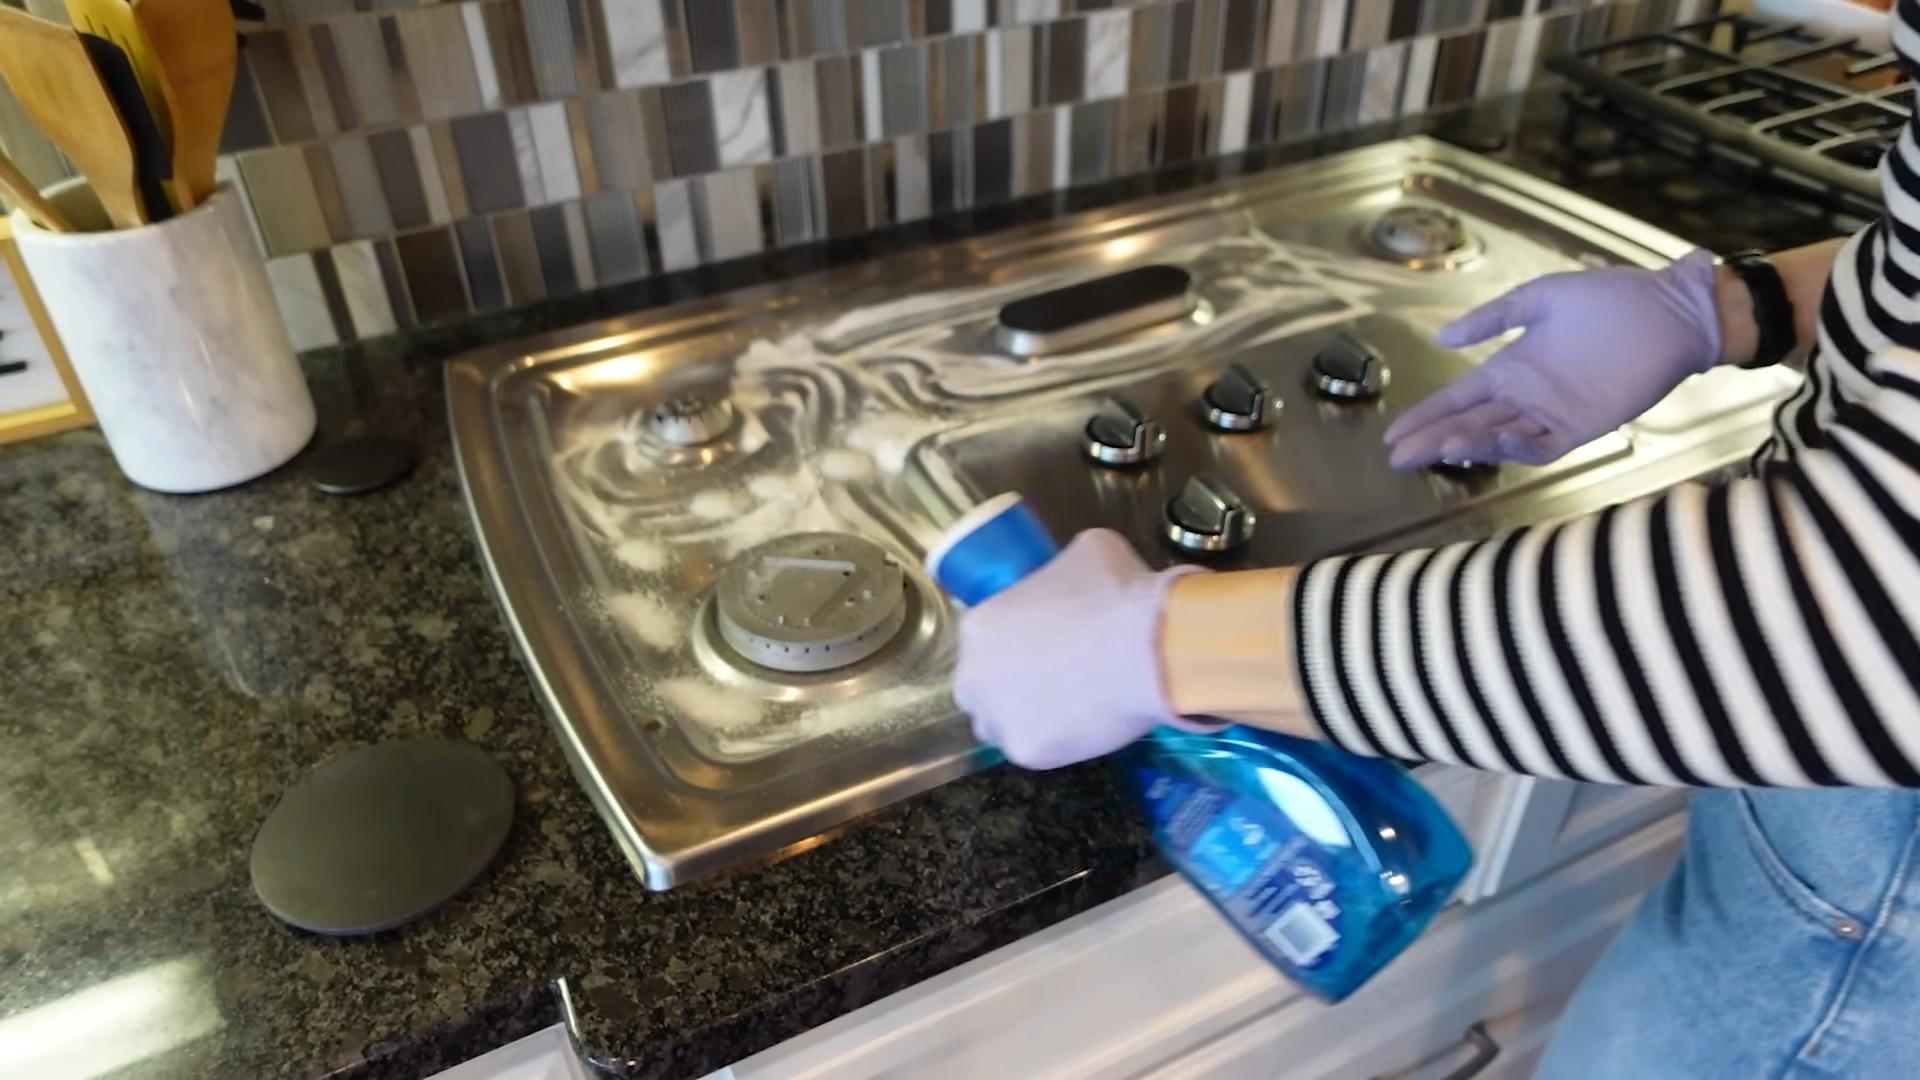
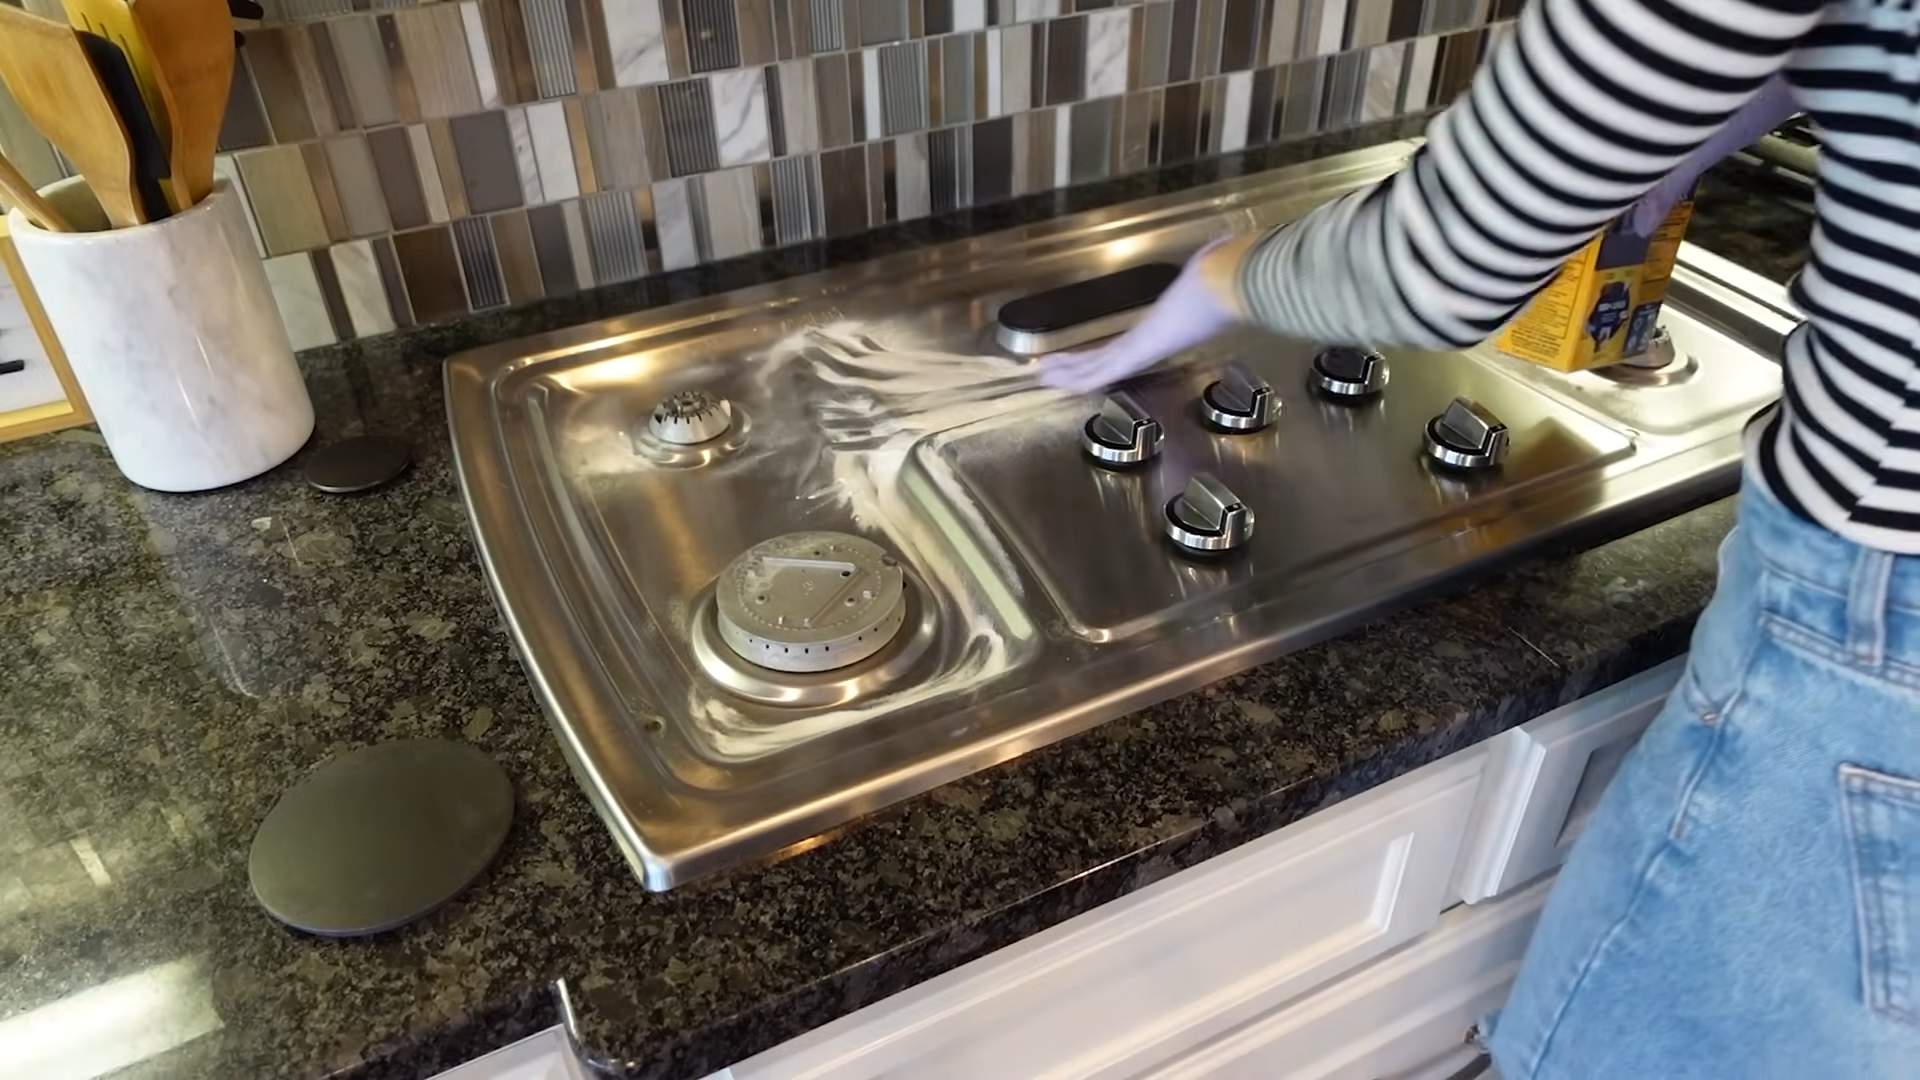
* Kitchen: Clean your stovetop, oven, countertops, sink, and even your microwave. It’s great for removing grease splatters and food stains.
* Bathroom: Clean your shower tiles, bathtub, sink, and toilet. It’s effective at removing soap scum and hard water stains.
* Laundry: Use it as a pre-treatment for stains on clothing. Just apply a small amount to the stain, let it sit for a few minutes, and then wash as usual.
* General Cleaning: Clean your floors (test on a hidden area first!), walls, and even your car’s interior.
Important Tips and Precautions
* Always Test First: I can’t stress this enough! Always test the cleaner on a small, hidden area before applying it to a larger surface. This will help you avoid any potential damage or discoloration.
* Avoid Certain Surfaces: While this cleaner is generally safe for most surfaces, avoid using it on delicate materials like marble, granite, or wood that has not been properly sealed. The abrasive nature of baking soda can scratch these surfaces.
* Don’t Mix with Other Cleaners: Never mix this cleaner with other cleaning products, especially bleach. Mixing cleaning products can create dangerous fumes.
* Wear Gloves: If you have sensitive skin, it’s a good idea to wear gloves when using this cleaner.
* Storage: Store the paste in an airtight container. The spray can be stored in the spray bottle. Over time, the baking soda in the spray may settle, so just shake it well before each use.
* Adjust Ratios: Feel free to experiment with the ratios of baking soda and dish soap to find what works best for you and your cleaning needs.
* For Stubborn Oven Cleaning: For a really tough oven cleaning job, make a thick paste, coat the inside of your oven (avoiding heating elements), let it sit overnight, and then scrub and rinse the next day.
* Dealing with Grout: This cleaner is fantastic for cleaning grout! Apply the paste to the grout lines, let it sit for a few minutes, scrub with a grout brush, and then rinse.
* Removing Sticky Residue: This cleaner can also help remove sticky residue from labels or tape. Apply the paste, let it sit for a few minutes, and then scrub.
Troubleshooting
* Cleaner is too runny: Add more baking soda.
* Cleaner is too dry: Add more dish soap or water (for the spray).
* Cleaner is not cleaning effectively: Make sure you’re using enough cleaner and letting it sit on the surface long enough. You may also need to scrub a little harder.
* Surface is scratched: You may be using too much baking soda or scrubbing too hard. Try using a softer sponge or diluting the cleaner with more water.
Why I Love This DIY Cleaner
Honestly, this baking soda and dish soap cleaner has become a staple in my cleaning routine. It’s so simple to make, incredibly effective, and saves me a ton of money. Plus, I love knowing exactly what’s in my cleaner and avoiding harsh chemicals. I hope you give it a try and discover its чудо-cleaning power for yourself! Happy cleaning!
Conclusion
So, there you have it! Transforming your cleaning routine with this simple, yet incredibly effective, baking soda dish soap cleaner is more than just a cost-saving measure; it’s a step towards a healthier home and a more sustainable lifestyle. We’ve explored the powerful synergy between baking soda and dish soap, revealing how this dynamic duo can tackle even the most stubborn grime and grease without the harsh chemicals found in many commercial cleaners.
Why is this DIY trick a must-try? Because it’s a game-changer. It’s affordable, readily accessible, and remarkably versatile. Think about it: you likely already have these ingredients in your pantry and under your sink. No more last-minute trips to the store for expensive, specialized cleaners. No more worrying about exposing your family to potentially harmful chemicals. This baking soda dish soap cleaner offers a natural, effective alternative that’s gentle on your surfaces and your peace of mind.
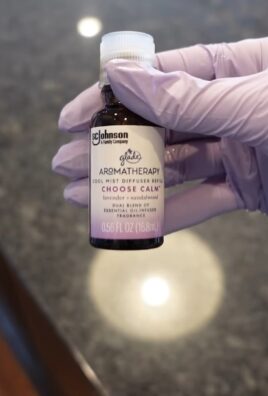
But the benefits don’t stop there. This cleaner is incredibly adaptable. Feel free to experiment with different variations to suit your specific needs and preferences. For a boost of freshness, add a few drops of your favorite essential oil, like lemon, lavender, or tea tree. Lemon oil, in particular, is known for its degreasing properties, making it an excellent addition to your cleaning arsenal. For extra scrubbing power on tough stains, consider adding a small amount of salt or even a sprinkle of borax (use with caution and always wear gloves). Remember to always test any new variation on a small, inconspicuous area first to ensure it doesn’t damage the surface.
Beyond the basic recipe, consider using this baking soda dish soap cleaner in other areas of your home. It works wonders on stovetops, oven interiors (though you might need a bit more elbow grease!), bathroom tiles, and even as a pre-treatment for laundry stains. Its gentle abrasive action makes it perfect for removing stubborn residue without scratching delicate surfaces.
We understand that switching to a DIY cleaner might seem daunting at first, but we promise, the results are worth it. The satisfaction of creating a powerful, effective cleaner with your own two hands is truly rewarding. Plus, you’ll be contributing to a cleaner, greener planet by reducing your reliance on commercially produced chemicals.
So, what are you waiting for? Gather your baking soda and dish soap, and get ready to experience the cleaning power of this incredible DIY solution. We’re confident that you’ll be amazed by the results.
We encourage you to try this baking soda dish soap cleaner and share your experiences with us! Let us know what variations you’ve tried, what surfaces you’ve cleaned, and what kind of results you’ve achieved. Your feedback is invaluable and helps us continue to refine and improve our recipes. Share your tips and tricks in the comments below – let’s build a community of DIY cleaning enthusiasts! We can’t wait to hear from you and learn from your experiences. Happy cleaning!
Frequently Asked Questions (FAQ)
1. Is baking soda dish soap cleaner safe for all surfaces?
While baking soda is generally a mild abrasive, it’s always best to test the cleaner on a small, inconspicuous area first, especially on delicate surfaces like polished wood, painted surfaces, or certain types of stone. Avoid using it on surfaces that are known to be easily scratched. For instance, while it’s great for stainless steel sinks, use caution on brushed stainless steel appliances as excessive scrubbing could alter the finish. When in doubt, err on the side of caution and test before applying liberally.
2. What kind of dish soap should I use?
Any liquid dish soap will work, but we recommend using a natural or plant-based dish soap to further reduce your exposure to harsh chemicals. Look for dish soaps that are free of phosphates, sulfates, and artificial fragrances. These types of dish soaps are not only better for your health but also more environmentally friendly. However, even conventional dish soap will work effectively in this recipe.
3. How long does the baking soda dish soap cleaner last?
Since this cleaner doesn’t contain any preservatives, it’s best to use it within a week or two. Store it in an airtight container in a cool, dark place to prevent it from drying out or losing its effectiveness. If you notice any changes in color, texture, or smell, it’s best to discard it and make a fresh batch. Making a new batch is quick and easy, so there’s no need to make large quantities.
4. Can I use this cleaner on my dishes?
While this cleaner is effective for cleaning various surfaces, we don’t recommend using it directly on dishes that you eat from. The abrasive nature of baking soda, even though mild, could potentially leave micro-scratches on delicate dishware over time. Stick to using your regular dish soap for washing dishes. This DIY cleaner is best suited for cleaning countertops, sinks, stovetops, and other household surfaces.
5. How do I adjust the recipe for different cleaning needs?
The basic recipe of baking soda and dish soap can be adjusted to suit your specific cleaning needs. For tougher stains, increase the amount of baking soda. For a more liquid consistency, add more water. As mentioned earlier, you can also add essential oils for fragrance and added cleaning power. Experiment with different ratios and additions to find what works best for you. Remember to always test any new variation on a small, inconspicuous area first.
6. What if the baking soda doesn’t dissolve completely?
Baking soda can sometimes clump together, especially if it’s been exposed to moisture. To ensure it dissolves properly, mix it with a small amount of warm water first to create a paste. Then, gradually add the dish soap and remaining water, stirring until everything is well combined. If you still have some undissolved baking soda, don’t worry too much. It will still provide some abrasive cleaning power.
7. Can I use this cleaner to clean my oven?
Yes, this cleaner can be used to clean your oven, but it may require a bit more effort than commercial oven cleaners. Preheat your oven to a low temperature (around 200°F) for about 15 minutes, then turn it off. This will help loosen the grime. Apply a generous amount of the baking soda dish soap cleaner to the interior of the oven, focusing on areas with heavy buildup. Let it sit for several hours or even overnight. Then, scrub the oven with a sponge or scrub brush and wipe away the residue with a damp cloth. You may need to repeat the process for stubborn stains.
8. Is this cleaner safe for septic systems?
Baking soda is generally considered safe for septic systems. It’s a natural substance that breaks down easily and doesn’t contain any harsh chemicals that could harm the beneficial bacteria in your septic tank. However, it’s always a good idea to use any cleaning product in moderation to avoid overloading your septic system.
9. Can I use this cleaner on grout?
Yes, this cleaner is excellent for cleaning grout! The abrasive nature of baking soda helps to lift dirt and grime from the grout lines. Apply the cleaner to the grout, let it sit for a few minutes, then scrub with a grout brush or an old toothbrush. Rinse with water and wipe dry. For heavily stained grout, you may need to repeat the process or use a stronger solution of baking soda and water.
10. What are some other uses for baking soda in cleaning?
Baking soda is a versatile cleaning agent with many other uses beyond this recipe. It can be used to deodorize refrigerators, clean drains, remove stains from carpets, and even polish silver. Its mild abrasive properties and alkaline nature make it an effective and eco-friendly cleaning solution for a wide range of household tasks. Explore different ways to incorporate baking soda into your cleaning routine for a healthier and more sustainable home.
Leave a Comment