
Grow Cauliflower at Home? Absolutely! Imagine stepping into your backyard and harvesting your own crisp, delicious cauliflower, ready to be roasted, steamed, or transformed into a creamy soup. Forget those bland, overpriced heads at the grocery store – with a little know-how, you can cultivate vibrant, flavorful cauliflower right in your own garden.
For centuries, cauliflower has been a culinary staple, tracing its roots back to the Mediterranean region. From ancient Roman banquets to modern-day kitchens, this versatile vegetable has graced tables worldwide. But you don’t need to be a seasoned farmer to enjoy the fruits (or rather, the curds!) of your labor.
Many people shy away from growing cauliflower, believing it’s too difficult or time-consuming. But I’m here to tell you that with a few simple tricks and DIY hacks, you can successfully grow cauliflower at home, even if you’re a beginner gardener. This article will equip you with the essential knowledge and practical tips to nurture your cauliflower from seedling to harvest.
Why spend money on store-bought cauliflower when you can have fresher, healthier, and more flavorful produce right at your fingertips? Plus, there’s nothing quite like the satisfaction of growing your own food. Let’s dive in and unlock the secrets to a bountiful cauliflower harvest!
Growing Your Own Cauliflower: Your Comprehensive DIY Guide for a Bountiful Harvest
Hey garden friends! Have you ever wondered how you can grow that crisp, versatile, and super-healthy cauliflower right in your own garden? I’ll show you how! It’s easier than you think, and the joy of harvesting your own cauliflower is priceless. Let’s dive into the world of cauliflower cultivation together!
What You Need for Growing Cauliflower
Before we get started, here is a list of the things you will need:
- Cauliflower seeds (it’s best to choose a variety suitable for your region)
- Seed-starting mix
- Seedling pots or trays
- Larger pots or a garden bed
- Garden tools (shovel, rake, watering can)
- Compost or other organic fertilizer
- Mulching material (e.g., straw or wood chips)
- Possibly a fleece or net for pest protection
The Preparation: How to Get Started Right
The key to a successful cauliflower harvest lies in proper preparation. Here are the steps you should follow:
- Choose your seeds: Select a cauliflower variety that is suitable for your climate and growing conditions. There are early, mid-season, and late varieties. Find out which variety thrives best in your region. I’ve personally had good experiences with the ‘Erfurter Zwerg’ variety, as it is relatively robust.
- Prepare for sowing: Fill your seedling pots or trays with seed-starting mix. Press the soil down lightly.
- Sow the seeds: Place the cauliflower seeds in the soil, about 1 cm (0.4 inches) deep. Cover them lightly with soil and water them gently.
- Provide warmth: Cauliflower seedlings need warmth. Place the seedling pots in a bright and warm location, ideally at a temperature between 18 and 22 degrees Celsius (64-72°F). A mini-greenhouse or a windowsill over a heater is perfect.
- Maintain moisture: Keep the soil moist, but not wet. Spray it regularly with a spray bottle.
Growing On: From Seed to Young Plant
After sowing, the exciting phase of growing on begins. Here are the most important steps to raise healthy young plants:
- Observe germination: The first seedlings should appear after about a week.
- Thinning: When the seedlings are a little larger (have about 2-3 leaves), you should thin them out. This means removing the weaker plants so that the stronger ones have enough space to grow.
- Transplanting: Once the plants are large enough (have about 5-6 leaves), you can transplant them into larger pots. Use a nutrient-rich vegetable soil for this.
- Hardening off: Before you plant the cauliflower plants outdoors, you should harden them off. This means placing them outside for a few hours at a time for several days so they can get used to the sun and cooler temperatures.
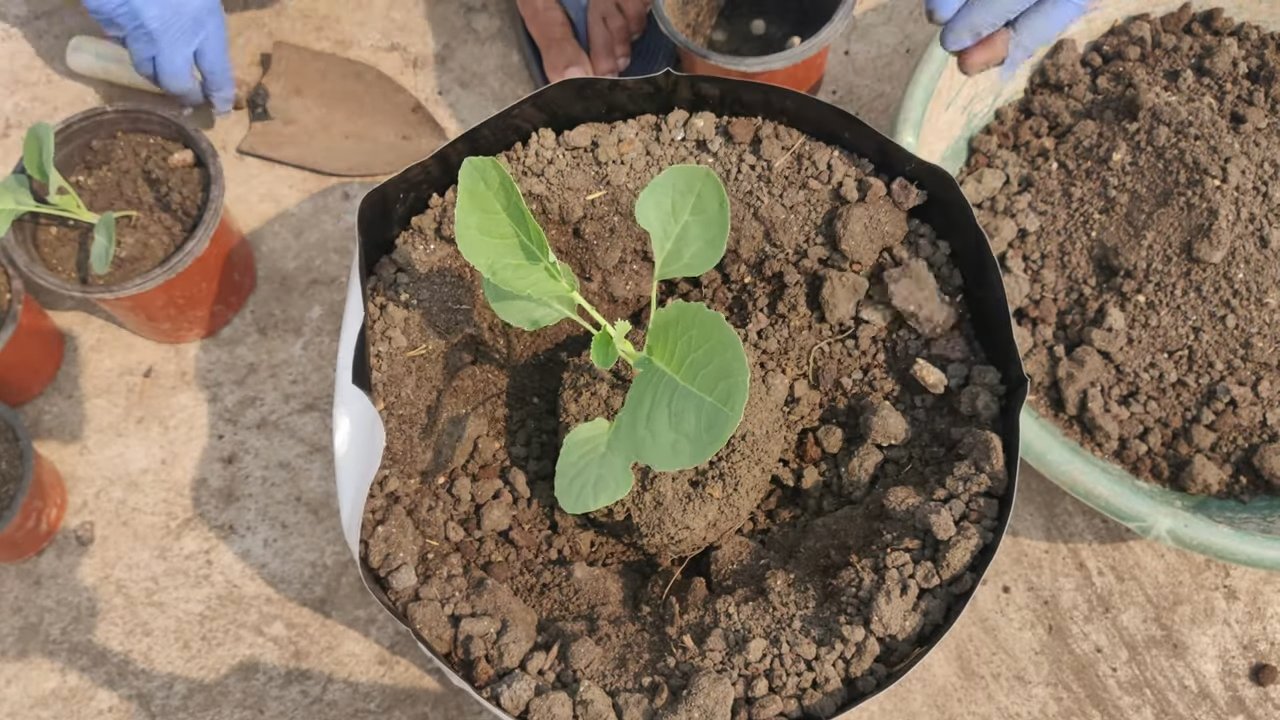
Planting Out: Into the Garden Bed!
Now comes the most exciting part: planting the young plants into the garden bed or into larger pots.
- Choose the right time: Cauliflower can be planted out in the spring (after the last frosts) or in the summer (for an autumn harvest). Make sure the soil temperature is at least 10 degrees Celsius (50°F).
- Prepare the location: Cauliflower needs a sunny spot with nutrient-rich, well-draining soil. Loosen the soil and work in compost or other organic fertilizer.
- Dig planting holes: Dig planting holes that are slightly larger than the root balls of the young plants.
- Place the plants: Carefully place the plants in the planting holes and fill them with soil. Press the soil down lightly.
- Watering: Water the plants thoroughly.
- Mulching: Cover the soil around the plants with mulching material. This helps to retain moisture in the soil and suppress weeds.
Care: How to Keep Your Cauliflower Healthy and Strong
After planting out, proper care is crucial for a bountiful harvest.
- Water regularly: Cauliflower needs a lot of water, especially during head formation. Water regularly, but avoid waterlogging.
- Fertilize: Fertilize the plants regularly with an organic fertilizer. I like to use nettle tea or compost tea.
- Remove weeds: Keep the bed weed-free so the cauliflower gets enough nutrients and light.
- Protect from pests: Cauliflower can be infested by various pests, such as cabbage white butterflies, flea beetles, or cabbage root flies. Protect the plants with a fleece or net. In case of a severe infestation, you can also use biological pesticides.
- Observe head formation: Once the cauliflower heads start to form, you should check them regularly.
- Blanching (optional): To get a particularly white cauliflower head, you can tie the leaves together around the head once it is about the size of a fist. This prevents the head from getting too much sunlight.
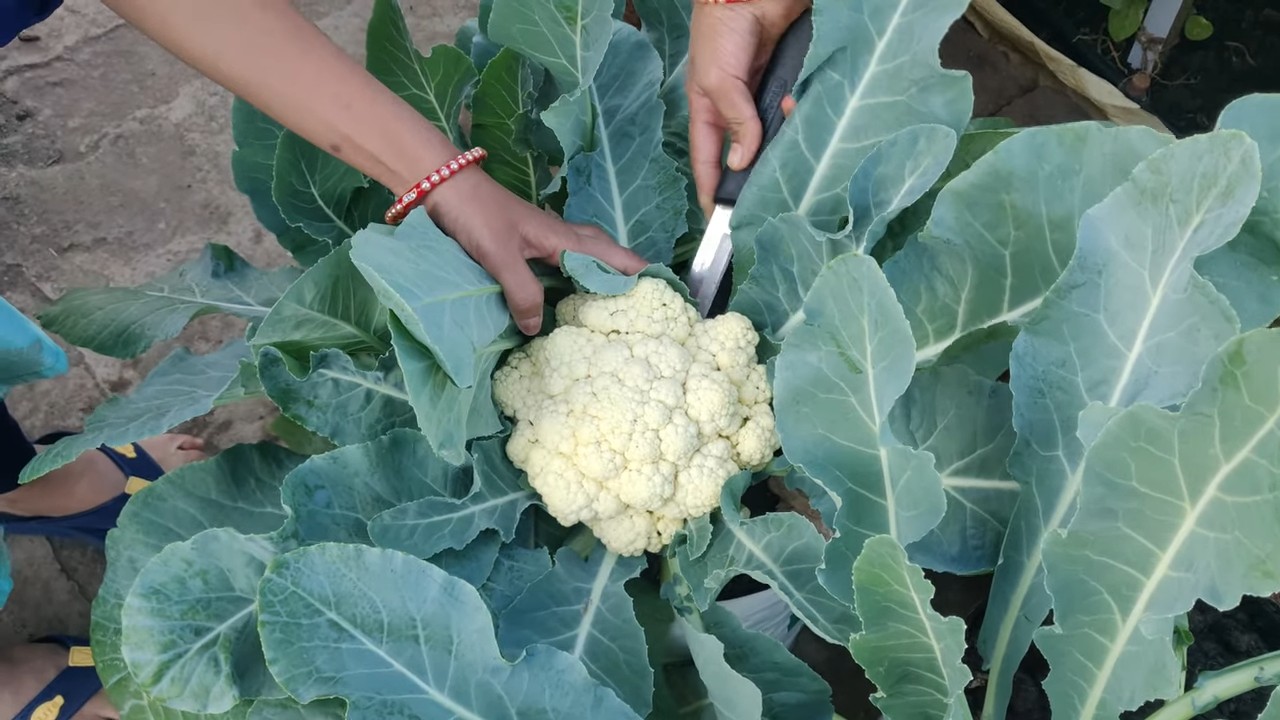
The Harvest: The Reward for Your Efforts
The time has finally come: the harvest is just around the corner!
- Recognize the right time: The cauliflower is ready to harvest when the head is firm and closed, and the florets have not yet started to separate.
- Harvesting: Cut the cauliflower head with a sharp knife. Leave a few leaves on the stalk to protect the head.
- Storage: Cauliflower keeps in the refrigerator for about a week. You can also freeze or pickle it.
Common Problems and Solutions
Problems can also arise when growing cauliflower. Here are some of the most common problems and how you can solve them:
- Yellow leaves: Yellow leaves can be a sign of a nutrient deficiency. Fertilize the plants with an organic fertilizer.
- Small heads: Small heads can be caused by a lack of water or nutrients. Water and fertilize the plants regularly.
- Pests: Protect the plants from pests with a fleece or net. In case of a severe infestation, you can also use biological pesticides.
- Diseases: Cauliflower can be affected by various diseases, such as clubroot or downy mildew. Practice good crop rotation and use healthy seeds.
Additional Tips for a Successful Harvest
- Practice crop rotation: Do not grow cauliflower in the same spot every year. Rotate your crops to prevent diseases and pests.
- Improve the soil: Regularly improve the soil with compost or other organic material.
- Variety: Try different cauliflower varieties to find out which ones grow best in your garden.
- Observe: Observe your plants regularly to identify and address problems early.
I hope this guide helps you to successfully grow your own cauliflower. Happy gardening and a bountiful harvest
Conclusion
So, there you have it! Growing cauliflower at home might seem daunting at first, but with a little patience, the right techniques, and a dash of determination, you can harvest your own delicious, fresh cauliflower heads. This isn’t just about saving money at the grocery store; it’s about connecting with your food, understanding the growing process, and enjoying the unparalleled flavor of homegrown produce.
Why is this DIY trick a must-try? Because it empowers you to control the quality of your food. You know exactly what goes into your cauliflower – no mystery pesticides or questionable farming practices. Plus, the satisfaction of nurturing a plant from seed to table is incredibly rewarding. Imagine serving a cauliflower dish to your family or friends, knowing you grew the star ingredient yourself! That’s a feeling you can’t buy.
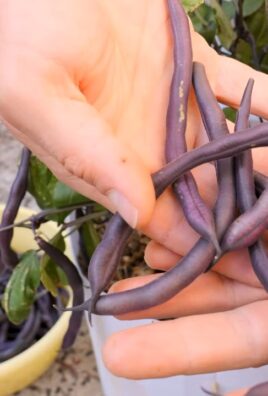
Beyond the basic method, there’s plenty of room for experimentation. Try different cauliflower varieties! Purple cauliflower adds a vibrant splash of color to your plate, while Romanesco cauliflower offers a unique, fractal-like appearance and a slightly nutty flavor. You can also adjust your planting schedule to aim for a fall harvest, which often yields sweeter and more robust cauliflower due to cooler temperatures. Consider companion planting to deter pests naturally. Marigolds, for example, are known to repel many common garden insects.
Don’t be afraid to get your hands dirty and embrace the learning process. Every garden is unique, and what works for one person might not work for another. The key is to observe your plants, adapt your approach as needed, and most importantly, have fun!
We wholeheartedly encourage you to try growing cauliflower at home. It’s a rewarding experience that will not only enhance your culinary creations but also deepen your appreciation for the natural world. And remember, even if your first attempt isn’t perfect, don’t give up! Gardening is a journey, not a destination.
Once you’ve harvested your beautiful cauliflower, we’d love to hear about your experience! Share your tips, tricks, and triumphs in the comments below. Let’s build a community of home gardeners who are passionate about growing their own food. Show us your pictures, tell us your stories, and inspire others to embark on this exciting adventure. Let’s prove that anyone can successfully grow cauliflower at home with the right knowledge and a little bit of love.
Frequently Asked Questions (FAQ)
Q: How much space does cauliflower need to grow?
A: Cauliflower plants require a fair amount of space to thrive. Ideally, you should space them about 18 to 24 inches apart in rows that are 30 to 36 inches apart. This allows for adequate air circulation and sunlight penetration, which are crucial for healthy growth and head development. If you’re growing in containers, choose pots that are at least 12 inches in diameter and depth per plant. Overcrowding can lead to smaller heads and increased susceptibility to diseases.
Q: What kind of soil is best for growing cauliflower?
A: Cauliflower thrives in well-drained, fertile soil that is rich in organic matter. The ideal soil pH is between 6.0 and 7.0. Before planting, amend your soil with compost, aged manure, or other organic materials to improve its structure and nutrient content. Cauliflower is a heavy feeder, so ensuring the soil is nutrient-rich is essential for optimal growth. A soil test can help you determine if your soil is lacking any essential nutrients and guide you on what amendments to add.
Q: How often should I water my cauliflower plants?
A: Consistent watering is crucial for cauliflower, especially during head formation. Aim to keep the soil consistently moist but not waterlogged. Water deeply at the base of the plants, avoiding wetting the leaves, which can encourage fungal diseases. The frequency of watering will depend on your climate and soil type, but generally, you should water every 2-3 days, or more often during hot, dry weather. Mulching around the plants can help retain moisture in the soil.
Q: What are some common pests and diseases that affect cauliflower, and how can I control them?
A: Cauliflower is susceptible to several pests and diseases, including cabbage worms, aphids, flea beetles, clubroot, and black rot. To control cabbage worms, handpick them off the plants or use Bacillus thuringiensis (Bt), a natural insecticide. Aphids can be controlled with insecticidal soap or a strong spray of water. Flea beetles can be deterred with row covers or diatomaceous earth. To prevent clubroot, ensure your soil is well-drained and has a pH above 7.0. Crop rotation can also help. Black rot can be prevented by using disease-free seeds and avoiding overhead watering. If you notice any signs of disease, remove the affected leaves immediately.
Q: How do I know when my cauliflower is ready to harvest?
A: Cauliflower is typically ready to harvest when the head is firm, compact, and reaches the desired size, usually 6-8 inches in diameter. The exact time to harvest will depend on the variety and growing conditions. Check the seed packet or plant tag for specific information. The head should be white or the color specified for the variety you’re growing. If the curds start to separate or the head becomes loose, it’s past its prime and should be harvested immediately. To harvest, cut the stem just below the head, leaving a few leaves attached to protect it.
Q: Can I grow cauliflower in containers?
A: Yes, you can successfully grow cauliflower in containers, but you’ll need to choose a large enough pot (at least 12 inches in diameter and depth) and use a high-quality potting mix. Container-grown cauliflower will require more frequent watering and fertilization than plants grown in the ground. Choose a sunny location that receives at least 6 hours of sunlight per day. Consider using a slow-release fertilizer or supplementing with liquid fertilizer every few weeks to ensure the plants receive adequate nutrients.
Q: My cauliflower head is turning yellow. What’s wrong?
A: Yellowing of the cauliflower head can be caused by several factors, including overexposure to sunlight, lack of nutrients, or disease. To prevent yellowing due to sunlight, blanch the head by tying the outer leaves together over the developing head when it reaches about 3 inches in diameter. This will protect it from the sun and keep it white. Ensure your plants are receiving adequate nutrients by fertilizing regularly. If you suspect disease, inspect the plant carefully for other symptoms and take appropriate action.
Q: Can I grow cauliflower in the fall?
A: Yes, growing cauliflower in the fall is often a great option, especially in regions with hot summers. Fall-grown cauliflower tends to be sweeter and more robust due to the cooler temperatures. Start your seeds indoors in mid-summer and transplant them outdoors in late summer or early fall. Be sure to choose a variety that matures quickly enough to be harvested before the first frost. Protect your plants from early frosts with row covers or blankets.
Q: What are some good companion plants for cauliflower?
A: Companion planting can help deter pests, attract beneficial insects, and improve the overall health of your cauliflower plants. Good companion plants for cauliflower include:
* Marigolds: Repel many common garden pests.
* Nasturtiums: Attract aphids away from cauliflower.
* Rosemary: Deters cabbage moths.
* Thyme: Repels cabbage worms.
* Garlic: Deters aphids and other pests.
* Onions: Repel cabbage flies.
* Legumes (beans, peas): Fix nitrogen in the soil, benefiting cauliflower.
Avoid planting cauliflower near strawberries, as they can inhibit each other’s growth.

Leave a Comment