
Grow Peas Indoors? Absolutely! Imagine harvesting fresh, sweet peas right from your windowsill, even when the snow is falling outside. It sounds like a dream, right? Well, it’s a dream that can easily become a reality with a few simple tricks and a little bit of know-how. For centuries, humans have cultivated gardens, finding solace and sustenance in nurturing plants. While traditionally an outdoor activity, the desire to connect with nature and enjoy fresh produce year-round has led to innovative indoor gardening techniques.
Let’s be honest, who wouldn’t want a taste of spring in the middle of winter? Growing peas indoors offers a fantastic solution for those with limited outdoor space, challenging climates, or simply a craving for homegrown goodness all year long. Plus, it’s a wonderfully rewarding project! This DIY guide will walk you through everything you need to know to successfully grow peas indoors, from selecting the right varieties to providing optimal growing conditions. Say goodbye to bland, store-bought peas and hello to a vibrant, delicious harvest right at your fingertips!

Growing Peas Indoors: Your DIY Guide for a Bountiful Harvest
Hello garden friends! Do you fancy some fresh, crisp peas but don’t have a garden, or the weather is acting up? Don’t worry, I’ll show you how you can easily grow peas indoors! It’s simpler than you think and brings a touch of spring into your home, even when winter is raging outside.
What you need:
- Pea seeds: Choose varieties that are suitable for growing in containers. Bush or dwarf peas are ideal.
- Planters: Pots or containers with good drainage. A depth and width of at least 15 cm (6 inches) is good.
- High-quality potting soil: A well-draining mix is important.
- Plant stakes or a trellis: Peas need something to climb on, even dwarf varieties.
- Grow light (optional): Especially in winter or with low daylight.
- Spray bottle: For moistening the soil.
- Watering can: For watering.
Choosing the Right Pea Variety
Choosing the right pea variety is crucial for the success of your indoor garden project. Not all types of peas are equally well-suited for growing in pots. Here are some varieties that I can personally recommend:
- Dwarf Peas (Bush Peas): These varieties stay compact and require less space. They are ideal for smaller pots and windowsills. Popular varieties include ‘Little Marvel’ or ‘Tom Thumb’.
- Shelling Peas: These peas are harvested when the pods are plump and full. You have to shell the peas from the pods before eating them. ‘Green Arrow’ is a good choice for indoor growing.
- Snap Peas: With snap peas, you can eat the whole pod. They are crisp and sweet. ‘Sugar Ann’ is an early-ripening variety that is well-suited for growing in pots.
- Snow Peas: Similar to snap peas, but with flatter pods. They are often used in Asian dishes. ‘Oregon Sugar Pod II’ is a proven variety.
When buying seeds, pay attention to the description and choose varieties that are labeled as “container-friendly” or “for growing in pots.”
Step-by-Step Guide: Growing Peas Indoors
1. Preparing the Planters:
- Clean your pots thoroughly with warm, soapy water.
- Make sure the pots have drainage holes so excess water can run off.
- Fill the pots with high-quality potting soil. Leave about 2-3 cm (1 inch) of space at the top.
2. Sowing the Pea Seeds:
- Lightly moisten the soil with a spray bottle.
- Press the pea seeds about 2-3 cm (1 inch) deep into the soil.
- Place 3-4 seeds per pot to ensure at least one plant germinates.
- Cover the seeds with soil and press down lightly.
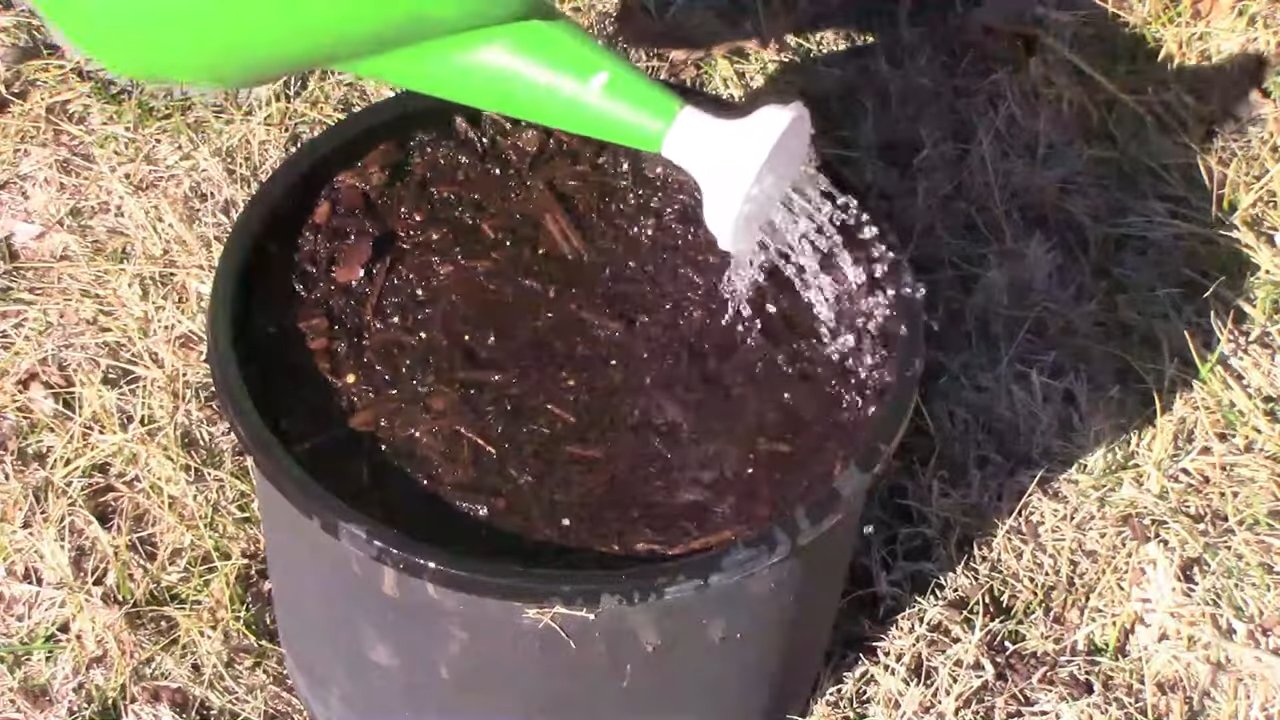
- Water the soil gently with a watering can until it is well-moistened.
3. Germination and Location:
- Place the pots in a warm place (approx. 18-24°C / 64-75°F).
- Germination usually takes 7-14 days.
- As soon as the first seedlings appear, move the pots to a bright location. A south-facing window is ideal.
- If you don’t have enough daylight, use a grow light.
4. Watering and Fertilizing:
- Keep the soil moist, but not wet. Water when the top layer of soil feels dry.
- Avoid waterlogging, as this can lead to root rot.
- Fertilize the peas every 2-3 weeks with an organic liquid fertilizer. Make sure the fertilizer is suitable for vegetables.
5. Supporting the Plants:
- Once the pea plants are about 10-15 cm (4-6 inches) tall, they need a climbing support.
- Insert plant stakes into the soil or install a small trellis.
- Gently guide the pea plants along the support.
6. Pollination (optional):
- Peas are generally self-pollinating, but you can assist pollination by gently shaking the flowers or dabbing them with a brush.
7. Harvest:
- The harvest time depends on the pea variety.
- Shelling peas are ready when the pods are plump and full.
- Snap peas and snow peas can be harvested when the pods have reached the desired size.
- Harvest the peas regularly to encourage the production of new pods.
Additional Tips for a Successful Harvest
- Ventilation: Ensure good air circulation to prevent fungal diseases. Open the window regularly or use a fan.
- Pests: Watch out for pests like aphids or spider mites. If infested, you can treat the plants with a mild insecticide or a soap solution.
- Soil Management: Peas are heavy feeders. After the harvest, you should replace the soil or enrich it with compost before using it for other plants.
- Regular Checks: Check your pea plants regularly for signs of disease or pests. The earlier you spot problems, the easier they are to fix.
- Patience: Be patient! Growing peas takes time and care. But the effort is worth it when you can harvest your own fresh peas.
The Right Lighting for Your Indoor Peas
Light is a crucial factor for the growth and development of your pea plants. During the summer, when the days are long and sunny, a south-facing window can provide enough light. In winter or in apartments with little daylight, however, additional lighting is necessary.
- Grow Lights: Grow lights are specially designed for plant growth and provide the right spectrum of light. LED grow lights are energy-efficient and long-lasting.
- Fluorescent Tubes: Fluorescent tubes are a more affordable alternative to grow lights. Make sure you use tubes with full-spectrum light.
- Lamp Placement: Place the lamp about 15-30 cm (6-12 inches) above the plants. The exact distance depends on the strength of the lamp.
- Lighting Duration: Peas need about 12-16 hours of light per day. Set a timer to automatically turn the lamp on and off.
The Right Watering and Fertilizing
Proper watering and fertilizing are crucial for healthy and productive pea plants.
Fertilizing: Peas are heavy feeders and need regular fertilization. Use an organic liquid fertilizer suitable for vegetables. Fertilize the peas every 2-3 weeks according to the instructions on the package.
Watering: Water the peas regularly, but avoid waterlogging. The soil should be moist, but not wet. Check the soil moisture by sticking your finger about 2-3 cm (1 inch) deep into the soil. If the soil feels dry, it’s time to water.
Conclusion
So, there you have it! Growing peas indoors is not only achievable but also incredibly rewarding. Forget relying solely on grocery store produce, especially when you crave that fresh, sweet taste of homegrown peas in the dead of winter. This DIY trick empowers you to cultivate your own little patch of springtime, right inside your home.
Why is this a must-try? Because it offers a multitude of benefits. First and foremost, you gain access to incredibly fresh, flavorful peas that surpass anything you can buy in a store. The taste difference is truly remarkable. Secondly, it’s a fantastic way to extend your growing season, allowing you to enjoy peas long before and after the traditional outdoor growing period. Thirdly, it’s a sustainable and eco-friendly option, reducing your reliance on commercially grown produce and its associated transportation costs. Finally, it’s simply a fun and engaging project that connects you with nature and provides a sense of accomplishment.
But the beauty of this DIY approach lies in its adaptability. Feel free to experiment with different pea varieties. Snow peas, sugar snap peas, and shelling peas all thrive indoors. Consider using different types of containers, from repurposed plastic tubs to decorative pots, as long as they provide adequate drainage. You can also explore different support structures, such as bamboo stakes, trellises, or even simple twine strung between posts.
For a spicier twist, try adding a few radish seeds to your pea container. Radishes mature quickly and can be harvested before the peas fully take over, adding a peppery kick to your salads. Or, if you’re feeling adventurous, experiment with companion planting. Herbs like mint or chamomile can deter pests and enhance the flavor of your peas.
The key to success with growing peas indoors is consistent care and attention. Regular watering, adequate light, and proper support are essential. Don’t be afraid to adjust your approach based on your specific environment and the needs of your plants. Observe your peas closely, and you’ll quickly learn what they need to thrive.
We wholeheartedly encourage you to give this DIY trick a try. It’s a simple, affordable, and incredibly satisfying way to bring a touch of spring into your home, regardless of the season. And most importantly, it allows you to enjoy the unparalleled taste of homegrown peas.
Once you’ve embarked on your indoor pea-growing journey, we’d love to hear about your experience! Share your tips, tricks, and photos in the comments section below. Let’s create a community of indoor pea enthusiasts and learn from each other’s successes and challenges. Together, we can unlock the secrets to year-round pea production and enjoy the delicious rewards of our efforts. So, grab your seeds, prepare your containers, and get ready to experience the joy of growing peas indoors!
Frequently Asked Questions (FAQ)
1. What kind of peas are best for growing indoors?
While you can technically grow any type of pea indoors, some varieties are better suited for container gardening than others. Bush varieties, also known as dwarf or compact peas, are generally preferred because they don’t require as much vertical space as vining varieties. Popular choices include ‘Little Marvel,’ ‘Sugar Ann,’ and ‘Tom Thumb.’ Sugar snap peas and snow peas also do well indoors, but they will need a trellis or other support system to climb. Ultimately, the best pea variety for you will depend on your personal preferences and the amount of space you have available. Experiment with different varieties to see which ones thrive best in your indoor environment.
2. How much light do indoor peas need?
Peas are sun-loving plants and require at least 6-8 hours of direct sunlight per day to thrive. If you don’t have a sunny window that provides enough light, you’ll need to supplement with artificial lighting. Grow lights, such as LED or fluorescent lights, are an excellent option. Position the lights about 6-12 inches above the plants and keep them on for 14-16 hours per day. Rotate your pea plants regularly to ensure that all sides receive adequate light. Insufficient light can lead to leggy growth, reduced flowering, and lower yields.
3. What kind of soil should I use for growing peas indoors?
Peas prefer well-draining soil that is rich in organic matter. A good potting mix specifically formulated for vegetables is ideal. Avoid using garden soil, as it can be too heavy and may contain pests or diseases. You can also amend your potting mix with compost or other organic materials to improve drainage and fertility. Ensure that your container has drainage holes to prevent waterlogging, which can lead to root rot.
4. How often should I water my indoor pea plants?
Water your pea plants regularly, keeping the soil consistently moist but not waterlogged. Check the soil moisture level daily by sticking your finger about an inch into the soil. If the soil feels dry, it’s time to water. Water deeply, allowing the excess water to drain out of the drainage holes. Avoid overhead watering, as this can promote fungal diseases. During hot or dry weather, you may need to water more frequently.
5. Do I need to fertilize my indoor pea plants?
Peas are relatively light feeders, but they will benefit from occasional fertilization. Use a balanced liquid fertilizer diluted to half strength every 2-3 weeks. Avoid over-fertilizing, as this can lead to excessive foliage growth at the expense of flowering and pod production. You can also amend your soil with compost or other organic fertilizers to provide a slow-release source of nutrients.
6. How do I support my indoor pea plants?
Vining pea varieties require a support system to climb. You can use a trellis, bamboo stakes, or even simple twine strung between posts. Install the support system when the plants are young, so they can easily attach themselves. As the plants grow, gently guide the vines onto the support structure.
7. How long does it take for peas to mature indoors?
The time it takes for peas to mature indoors depends on the variety and growing conditions. Generally, it takes about 60-70 days from planting to harvest. You can start harvesting peas when the pods are plump and filled with peas. Pick the pods regularly to encourage continued production.
8. What are some common pests and diseases that affect indoor pea plants?
Common pests that can affect indoor pea plants include aphids, spider mites, and whiteflies. These pests can be controlled with insecticidal soap or neem oil. Fungal diseases, such as powdery mildew, can also be a problem. To prevent fungal diseases, ensure good air circulation and avoid overhead watering. If you notice any signs of pests or diseases, treat them promptly to prevent them from spreading.
9. Can I grow peas indoors year-round?
Yes, you can grow peas indoors year-round, provided you have adequate light and temperature control. Peas prefer cooler temperatures, ideally between 60-70°F (15-21°C). Avoid placing your pea plants near heat sources, such as radiators or vents. With proper care and attention, you can enjoy a continuous harvest of fresh peas throughout the year.
10. How do I save seeds from my indoor pea plants?
If you want to save seeds from your indoor pea plants, allow some of the pods to mature fully on the vine. The pods will turn brown and dry out. Once the pods are completely dry, shell the peas and store them in an airtight container in a cool, dark place. Be aware that if you are growing hybrid pea varieties, the seeds may not produce plants that are true to type.

Leave a Comment