
Shine Furniture with Pledge: Ever looked at your dull, lifeless furniture and wished you could bring back that showroom sparkle without breaking the bank? I know I have! We’ve all been there, staring at scratches and faded finishes, wondering if a complete furniture overhaul is the only answer. But what if I told you there’s a simple, affordable, and incredibly effective way to revitalize your beloved pieces using something you probably already have in your cleaning cabinet?
The practice of caring for wooden furniture dates back centuries, with ancient civilizations using natural oils and waxes to protect and beautify their prized possessions. While the methods have evolved, the desire to preserve and enhance the beauty of our furniture remains a constant. In today’s fast-paced world, finding quick and easy solutions is more important than ever. That’s where this DIY trick comes in!
This article will guide you through a step-by-step process to shine furniture with Pledge, transforming it from drab to fab in minutes. You’ll learn the best techniques, the right Pledge products to use, and even some insider tips to achieve a professional-looking finish. Not only will this save you money on expensive furniture polishes and professional cleaning services, but it will also give you the satisfaction of knowing you’ve breathed new life into your cherished furniture pieces. So, grab your Pledge, and let’s get started on this easy and rewarding DIY project!
DIY Furniture Polish with Pledge: Revive Your Wood’s Natural Beauty
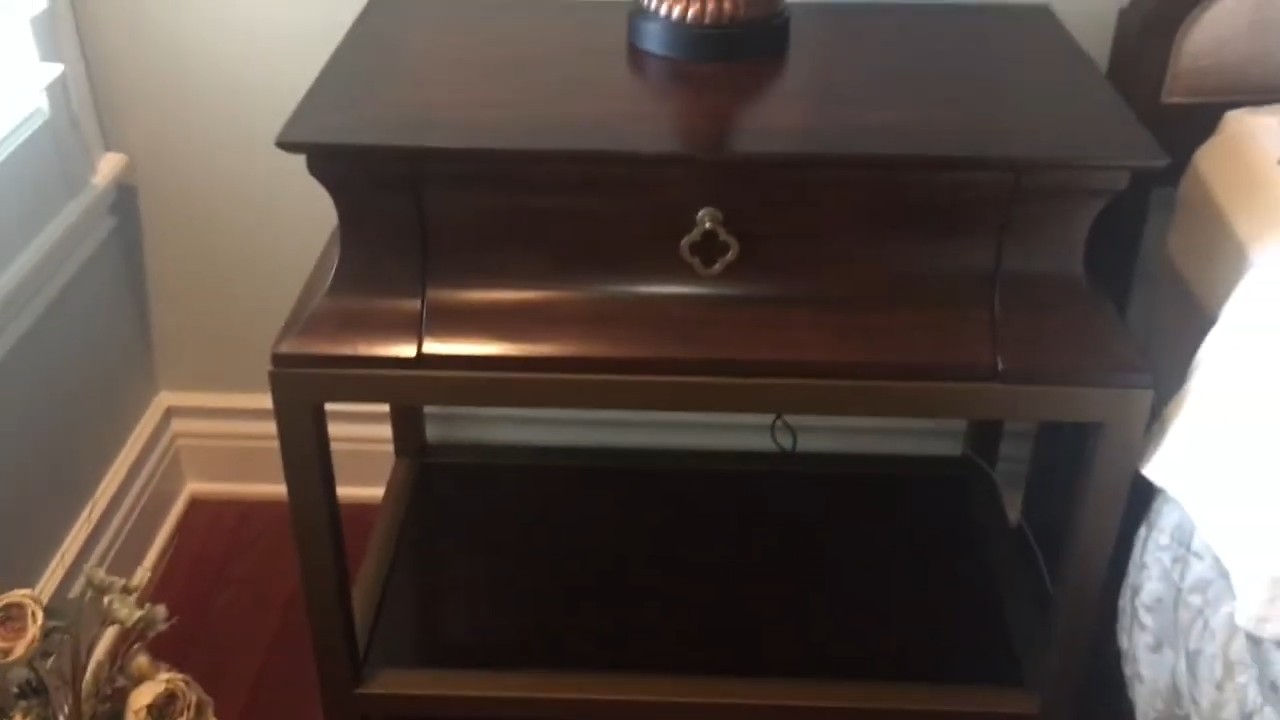
Okay, friends, let’s talk furniture. We all love that warm, inviting glow of beautifully polished wood, right? But those store-bought furniture polishes can be pricey and sometimes filled with ingredients we’d rather avoid. So, I’m going to share my go-to DIY furniture polish using Pledge Multi-Surface Cleaner. Yes, you read that right! Pledge isn’t just for dusting; it can actually bring out the natural shine of your wood furniture.
This method is perfect for maintaining the shine on furniture that already has a good finish. If your furniture has deep scratches or a severely damaged finish, you might need to consider refinishing it instead. But for everyday upkeep and a quick shine boost, this is a fantastic and affordable solution.
What You’ll Need
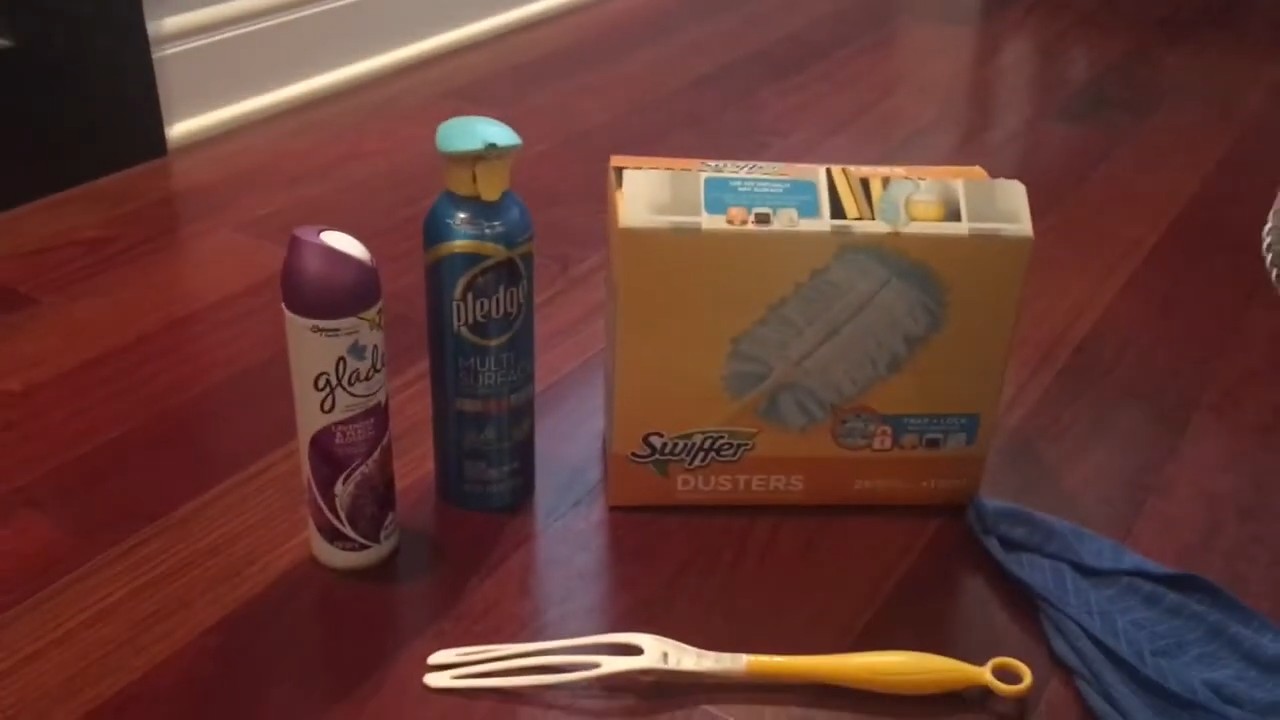
Before we dive in, let’s gather our supplies. This is a super simple project, so the list is short and sweet:
* Pledge Multi-Surface Cleaner (the aerosol can works best)
* Two clean, soft microfiber cloths (one for applying, one for buffing)
* Optional: A small bowl of warm water
* Optional: A drop or two of mild dish soap (if your furniture is particularly dirty)
Preparing Your Furniture
Before we start polishing, we need to prep the surface. This ensures we’re not just spreading dirt around and that the Pledge can work its magic.
1. Dust Thoroughly: This is the most crucial step! Use a dry microfiber cloth to remove all dust, crumbs, and loose debris from the surface of your furniture. Pay attention to corners, crevices, and any decorative details. You can even use a vacuum cleaner with a soft brush attachment for larger surfaces.
2. Assess the Dirt Level: Is your furniture just a little dusty, or is it grimy from spills and fingerprints? If it’s just dusty, you can skip the next step. But if it’s noticeably dirty, a gentle cleaning is in order.
3. Gentle Cleaning (If Needed): In a small bowl, mix warm water with a drop or two of mild dish soap. Dip a clean microfiber cloth into the soapy water, wring it out *really* well (you want it damp, not soaking wet), and gently wipe down the furniture surface. Immediately follow with a clean, dry microfiber cloth to remove any remaining moisture. Let the furniture air dry completely before moving on to the next step.
Polishing with Pledge: Step-by-Step
Now for the fun part! We’re going to use the Pledge to bring out that beautiful shine.
1. Shake Well: Give your can of Pledge Multi-Surface Cleaner a good shake. This ensures the ingredients are properly mixed.
2. Lightly Spray: Hold the Pledge can about 6-8 inches away from the furniture surface and spray a light, even coat. Don’t overdo it! A little goes a long way. You want a thin layer, not a dripping mess. I usually work in small sections, like a tabletop in quarters, to prevent the Pledge from drying too quickly.
3. Immediate Wipe Down: Immediately after spraying, use a clean, soft microfiber cloth to wipe the Pledge into the wood. Use circular motions and apply gentle pressure. This helps to distribute the polish evenly and lift any remaining dirt or grime.
4. Buff to a Shine: Now, grab your second clean, dry microfiber cloth. Use this cloth to buff the surface of the furniture in circular motions. This step is key to achieving that beautiful, glossy shine. Apply a bit of pressure as you buff, and you’ll see the wood start to gleam.
5. Repeat as Needed: Continue this process, working in small sections, until you’ve polished the entire piece of furniture.
6. Inspect and Touch Up: Once you’ve finished polishing, take a step back and inspect your work. If you see any streaks or dull spots, simply re-spray a small amount of Pledge and buff again with a clean cloth.
Tips and Tricks for Best Results
Okay, here are a few extra tips to help you achieve the best possible results:
* Test in an Inconspicuous Area: Before polishing the entire piece of furniture, test the Pledge in a small, hidden area (like the back of a leg or inside a drawer) to make sure it doesn’t damage or discolor the finish. This is especially important for antique or delicate furniture.
* Use the Right Cloths: Microfiber cloths are essential for this project. They’re soft, absorbent, and won’t scratch the furniture’s surface. Avoid using paper towels or old rags, as they can leave behind lint or streaks.
* Don’t Over-Saturate: As I mentioned before, a little Pledge goes a long way. Over-saturating the furniture can leave a sticky residue and attract dust.
* Work in a Well-Ventilated Area: Pledge has a distinct scent, so it’s best to work in a well-ventilated area to avoid inhaling too many fumes. Open a window or turn on a fan.
* Regular Maintenance: To keep your furniture looking its best, polish it regularly. I usually polish my furniture every few weeks, or whenever it starts to look dull or dusty.
* For Heavily Soiled Furniture: If your furniture is heavily soiled or has stubborn stains, you may need to use a stronger cleaning solution before polishing. Consider using a wood cleaner specifically designed for furniture. Always follow the manufacturer’s instructions and test in an inconspicuous area first.
* Avoid Direct Sunlight: Keep your polished furniture out of direct sunlight, as this can cause the finish to fade or crack over time.
* Be Gentle with Antiques: If you’re polishing antique furniture, be extra careful and gentle. Antique finishes can be delicate and easily damaged. If you’re unsure about using Pledge on an antique, consult with a professional furniture restorer.
* Dealing with Sticky Residue: If you accidentally use too much Pledge and end up with a sticky residue, don’t panic! Simply dampen a clean microfiber cloth with warm water and gently wipe away the residue. Then, buff the surface with a dry cloth.
* Different Types of Wood: This method works well on most types of finished wood furniture. However, if you have furniture made of a very porous or unfinished wood, the Pledge may not be as effective. In that case, you may need to use a different type of polish or treatment specifically designed for that type of wood.
* Consider the Finish: The type of finish on your furniture can also affect the results. For example, furniture with a high-gloss finish will likely shine more than furniture with a matte finish.
* Don’t Forget the Legs and Details: When polishing your furniture, don’t forget to pay attention to the legs, trim, and other decorative details. These areas can often accumulate dust and grime, so it’s important to clean and polish them as well.
* Listen to Your Furniture: Okay, maybe not literally! But pay attention to how your furniture responds to the Pledge. If you notice any adverse effects, such as discoloration or damage, stop using the Pledge immediately and consult with a professional.
Troubleshooting
Sometimes, things don’t go exactly as planned. Here are a few common issues you might encounter and how to fix them:
* Streaks: If you’re seeing streaks after polishing, it’s likely because you’re using too much Pledge or not buffing enough. Try using less Pledge and buffing more vigorously with a clean, dry cloth.
* Dull Spots: Dull spots can be caused by uneven application of the Pledge or by areas that are particularly dirty. Try re-spraying a small amount of Pledge on the dull spots and buffing again.
* Sticky Residue: As mentioned earlier, sticky residue is usually caused by using too much Pledge. Wipe away the residue with a damp cloth and buff with a dry cloth.
* Discoloration: If you notice any discoloration after using Pledge, stop using it immediately and consult with a professional furniture restorer. Discoloration can be a sign that the Pledge is damaging the finish of your furniture.
Enjoy Your Beautifully Polished Furniture!
And there you have it! A simple, affordable, and effective way to polish your furniture using Pledge Multi-Surface Cleaner. With a little elbow grease and these helpful tips, you can keep your wood furniture looking its best for years to come. Now, go forth and make your furniture shine!
Conclusion
So, there you have it! This simple, cost-effective, and surprisingly effective DIY furniture polish using ingredients you likely already have in your pantry is a game-changer. Forget expensive store-bought products laden with harsh chemicals. This method not only cleans and shines your furniture but also nourishes the wood, helping to protect it from drying out and cracking over time. The gentle ingredients are far less likely to damage delicate finishes, making it a safe and reliable option for all your wooden furniture pieces.
Why is this DIY trick a must-try? Because it delivers professional-quality results without the professional price tag or the environmental impact of disposable aerosol cans. It’s a sustainable, budget-friendly, and incredibly satisfying way to care for your cherished furniture. You’ll be amazed at the difference it makes, restoring the natural luster and beauty of your wood.
But the best part? This recipe is incredibly versatile. Feel free to experiment with different essential oils to create a custom scent that suits your preferences. A few drops of lemon essential oil can enhance the cleaning power and leave a fresh, citrusy aroma. Lavender oil adds a calming fragrance, while cedarwood oil can help repel insects and further protect your wood. You can also adjust the ratio of ingredients to achieve your desired consistency. If you prefer a thicker polish, add a bit more olive oil. For a lighter spray, increase the amount of water.
For antique furniture, consider using a very small amount of white vinegar in the mixture. The acidity can help remove stubborn grime and restore the original shine, but be sure to test it on an inconspicuous area first to ensure it doesn’t damage the finish. Always err on the side of caution when dealing with valuable or delicate pieces.
We’re confident that once you try this DIY furniture polish, you’ll never go back to store-bought brands. It’s a simple, effective, and rewarding way to care for your furniture and create a healthier home environment.
So, what are you waiting for? Gather your ingredients, mix up a batch of this amazing DIY furniture polish, and prepare to be amazed. We encourage you to try this simple method and share your experiences with us! Let us know in the comments how it worked for you, what variations you tried, and any tips or tricks you discovered along the way. We can’t wait to hear from you and see the beautiful results you achieve! Don’t forget to share before and after photos – we love seeing the transformations! Let’s all work together to keep our furniture looking its best, naturally and affordably.
Frequently Asked Questions
Is this DIY furniture polish safe for all types of wood?
Generally, yes, this DIY furniture polish is safe for most types of wood, including hardwoods like oak, maple, and cherry, as well as softwoods like pine. However, it’s always a good idea to test it on an inconspicuous area first, especially if you’re dealing with antique or delicate furniture. Look for a spot on the back of a leg, under a table, or inside a drawer. Apply a small amount of the polish, let it sit for a few minutes, and then wipe it off. Check for any discoloration, damage, or changes to the finish. If everything looks good, you can proceed with polishing the rest of the piece. Avoid using this polish on unfinished wood, as it may absorb too much of the oil and become sticky.
How often should I use this DIY furniture polish?
The frequency of polishing depends on how often your furniture is exposed to dust, dirt, and sunlight. In general, polishing every one to three months is sufficient for most pieces. However, if your furniture is in a high-traffic area or exposed to direct sunlight, you may need to polish it more frequently. Over-polishing can actually damage the finish, so it’s best to err on the side of caution. If your furniture looks dull or dusty, it’s time to polish it. Otherwise, you can wait until the next scheduled polishing.
Can I use this DIY furniture polish on leather furniture?
No, this DIY furniture polish is specifically formulated for wood furniture and is not suitable for leather. Leather requires specialized cleaning and conditioning products to maintain its suppleness and prevent cracking. Using this polish on leather could damage the finish and leave it feeling greasy or sticky.
What if my furniture has a lot of buildup or grime?
If your furniture has a lot of buildup or grime, you may need to clean it before polishing. You can use a mild soap and water solution to gently clean the surface. Be sure to use a soft cloth and avoid scrubbing too hard. Rinse the surface with clean water and dry it thoroughly before applying the DIY furniture polish. For stubborn stains or grime, you can try using a paste of baking soda and water. Apply the paste to the stain, let it sit for a few minutes, and then gently scrub it with a soft cloth. Rinse the surface with clean water and dry it thoroughly before polishing.
How should I store the DIY furniture polish?
Store the DIY furniture polish in an airtight container in a cool, dark place. This will help to prevent the oils from going rancid and the water from evaporating. A glass jar or spray bottle is ideal for storing the polish. Be sure to label the container clearly so you don’t accidentally use it for something else. The polish should last for several months if stored properly. If you notice any changes in the color, smell, or consistency of the polish, it’s best to discard it and make a fresh batch.
Can I add other ingredients to the DIY furniture polish?
Yes, you can experiment with adding other ingredients to the DIY furniture polish to customize it to your preferences. As mentioned earlier, essential oils are a great way to add fragrance and enhance the cleaning power of the polish. You can also add a small amount of beeswax to create a thicker, more protective polish. Melt the beeswax in a double boiler or microwave before adding it to the other ingredients. Be sure to stir the mixture well to ensure that the beeswax is evenly distributed. Another option is to add a small amount of lemon juice to help remove stubborn stains and brighten the wood. However, be careful not to add too much lemon juice, as it can be acidic and damage the finish.
My furniture is very old and delicate. Is this polish still safe to use?
When dealing with antique or delicate furniture, extra caution is always advised. While the ingredients in this DIY furniture polish are generally gentle, it’s crucial to test it in an inconspicuous area first, as mentioned previously. If you’re unsure about the safety of using this polish on your antique furniture, it’s best to consult with a professional furniture restorer. They can assess the condition of your furniture and recommend the best cleaning and polishing methods. They may also be able to identify any potential risks or concerns. Remember, preserving the integrity of antique furniture is paramount, so it’s always better to be safe than sorry.
What kind of cloth should I use to apply the polish?
The best type of cloth to use for applying this DIY furniture polish is a soft, lint-free cloth. Microfiber cloths are an excellent choice, as they are gentle on the wood and won’t leave behind any scratches or residue. You can also use an old t-shirt or flannel cloth. Avoid using paper towels, as they can be abrasive and leave behind lint. When applying the polish, use a circular motion to work it into the wood. Then, use a clean, dry cloth to buff the surface and remove any excess polish. This will help to create a smooth, even shine.

Leave a Comment