
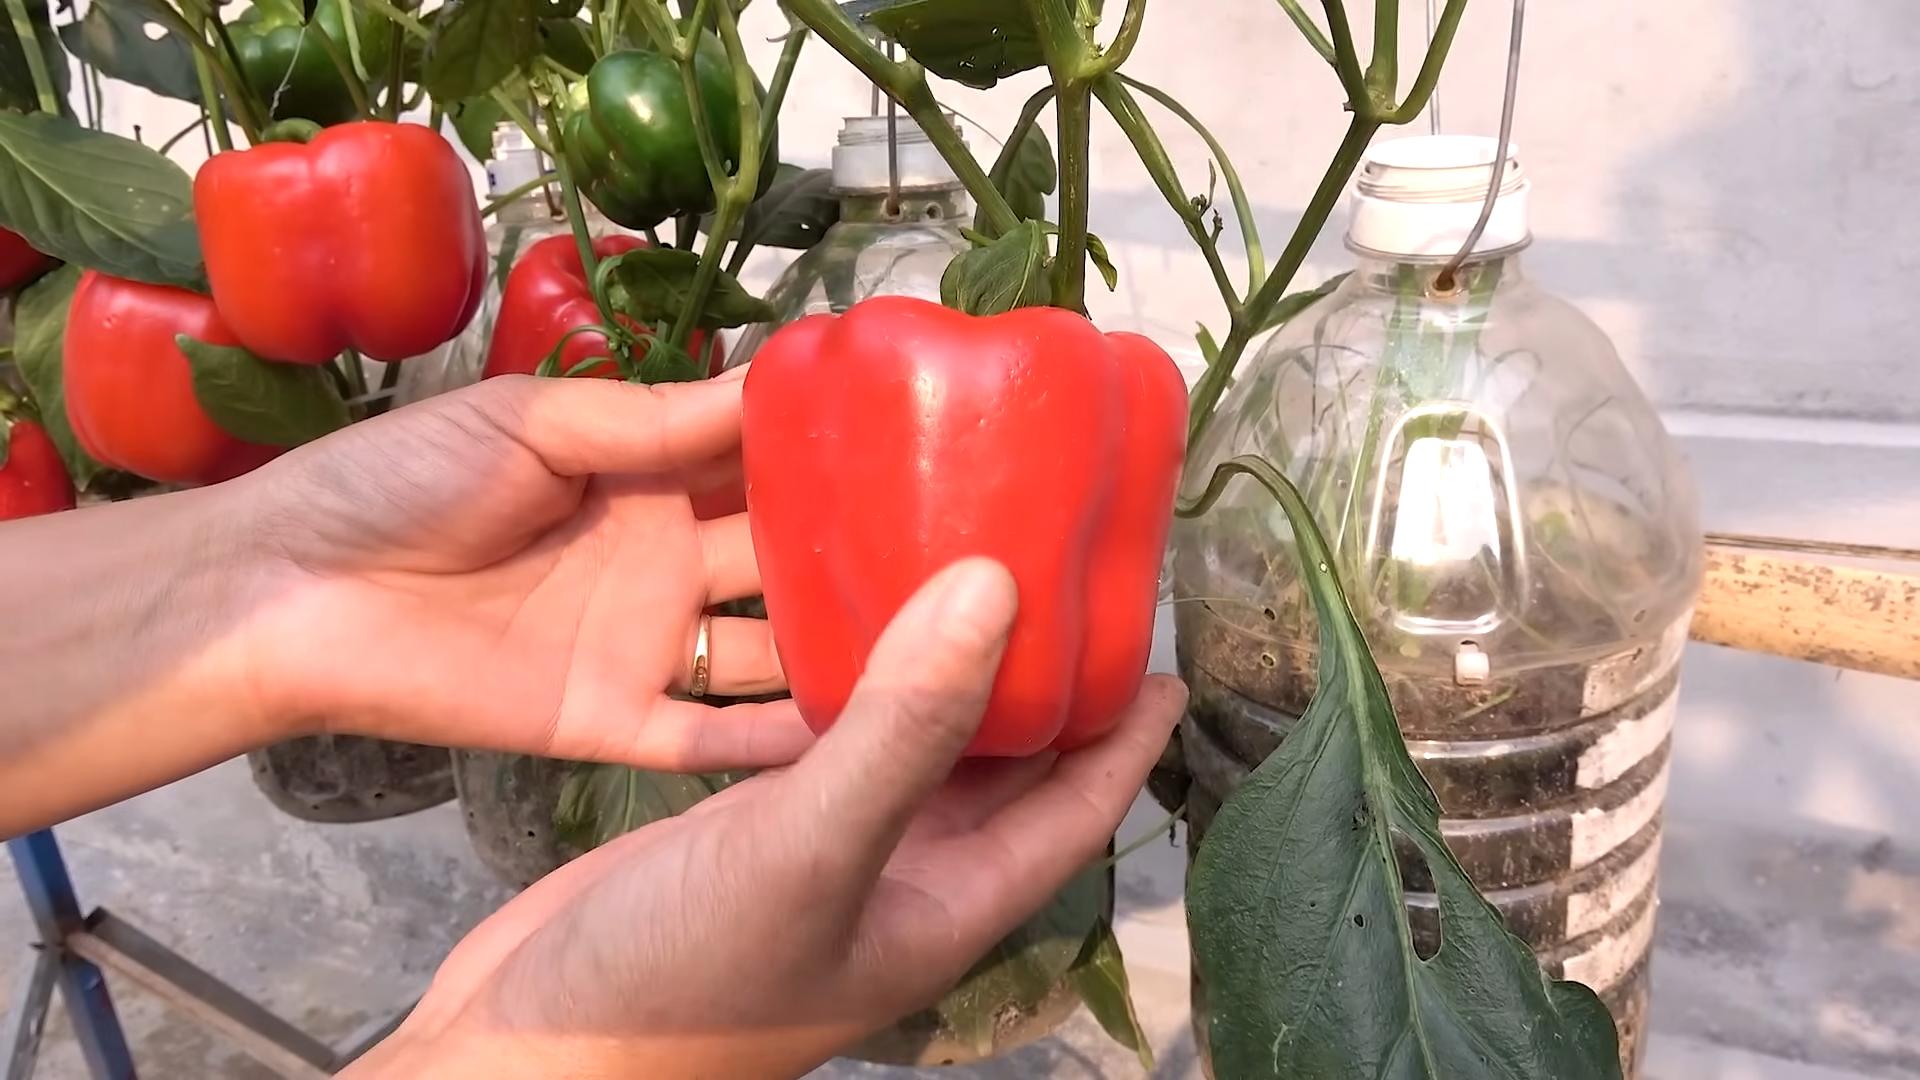
Planting Peppers at Home can seem daunting, but trust me, with a few simple tricks and a little DIY spirit, you can be harvesting your own vibrant, flavorful peppers in no time! I remember my grandmother, a true gardening guru, always had a thriving pepper patch. For generations, growing your own food, including peppers, has been a cornerstone of self-sufficiency and a connection to the earth. From the ancient Incas who cultivated peppers thousands of years ago to modern-day gardeners, the allure of these spicy and sweet fruits has endured.
But why bother with the effort of planting peppers at home when you can just buy them at the store? Well, for starters, the taste of a homegrown pepper, ripened on the vine, is simply unmatched. Plus, you have complete control over the growing process, ensuring your peppers are free from harmful pesticides and chemicals. In today’s world, where we’re increasingly conscious of what we consume, knowing exactly where your food comes from is a huge benefit. This DIY guide will equip you with the knowledge and simple hacks you need to successfully grow peppers, even if you have limited space or experience. Get ready to add some zest to your garden and your meals!
Planting Peppers at Home: A Beginner’s Guide to a Bountiful Harvest
Hey there, fellow gardening enthusiasts! I’m so excited to share my pepper-growing secrets with you. Peppers are one of my favorite things to grow – they’re vibrant, versatile, and surprisingly easy to cultivate, even if you’re a complete beginner. This guide will walk you through every step, from choosing the right seeds to harvesting your delicious peppers. Let’s get started!
Choosing Your Pepper Varieties
Before we get our hands dirty, let’s talk about pepper varieties. The world of peppers is vast and exciting! From sweet bell peppers to fiery habaneros, there’s a pepper out there for everyone. Here’s a quick rundown to help you choose:
* **Sweet Peppers:** These are your bell peppers (red, yellow, orange, green), banana peppers, and pimientos. They’re mild and perfect for salads, stuffing, and roasting.
* **Mildly Spicy Peppers:** Think jalapeños, poblanos, and Anaheim peppers. They offer a gentle kick and are great for salsas, sauces, and grilling.
* **Hot Peppers:** Now we’re talking! This category includes serranos, cayenne peppers, and Thai chilies. Use them sparingly to add some serious heat to your dishes.
* **Super-Hot Peppers:** Handle with care! Ghost peppers, habaneros, and Scotch bonnets are not for the faint of heart. They’re incredibly spicy and should be used with caution.
Consider your climate and growing space when choosing your pepper varieties. Some peppers thrive in warmer climates, while others are more tolerant of cooler temperatures. Also, think about how you plan to use your peppers. Do you want to make salsa? Stuff them? Or just add a little heat to your meals?
Starting Your Pepper Seeds Indoors
Starting your pepper seeds indoors is crucial, especially if you live in a region with a shorter growing season. This gives your peppers a head start and ensures a more abundant harvest. I usually start my seeds about 6-8 weeks before the last expected frost.
1. **Gather Your Supplies:**
* Pepper seeds (of course!)
* Seed starting trays or small pots
* Seed starting mix (a light, well-draining soil)
* Spray bottle filled with water
* Heat mat (optional, but highly recommended)
* Grow lights (also optional, but they make a big difference)
* Clear plastic dome or plastic wrap
2. **Prepare Your Seed Starting Trays:** Fill your seed starting trays or pots with seed starting mix. Gently press the soil down to remove any air pockets.
3. **Sow Your Seeds:** Make a small indentation (about 1/4 inch deep) in the soil. Place 2-3 pepper seeds in each indentation. Cover the seeds with soil and gently pat it down. I always plant a few extra seeds in case some don’t germinate.
4. **Water Your Seeds:** Use a spray bottle to gently moisten the soil. Avoid overwatering, as this can lead to damping off (a fungal disease that can kill seedlings).
5. **Provide Warmth and Light:** Place your seed starting trays on a heat mat (if using) and under grow lights (if using). The ideal temperature for pepper seed germination is between 75-85°F (24-29°C). If you’re not using grow lights, place your trays in a warm, sunny location.
6. **Maintain Humidity:** Cover your seed starting trays with a clear plastic dome or plastic wrap to create a humid environment. This will help the seeds germinate.
7. **Monitor and Water:** Check your seed starting trays daily. Keep the soil consistently moist, but not soggy. Remove the plastic dome or plastic wrap once the seeds have germinated.
8. **Thin Your Seedlings:** Once your seedlings have developed their first true leaves (the leaves that appear after the initial seed leaves), thin them out by snipping off the weaker seedlings at the soil line. Leave only the strongest seedling in each cell or pot.
Transplanting Your Pepper Seedlings Outdoors
Once the danger of frost has passed and the soil has warmed up, it’s time to transplant your pepper seedlings outdoors. This is an exciting step!
1. **Harden Off Your Seedlings:** Before transplanting, you need to harden off your seedlings. This means gradually acclimating them to outdoor conditions. Start by placing your seedlings outdoors in a sheltered location for a few hours each day, gradually increasing the amount of time they spend outside over the course of a week or two. This will help them adjust to the sun, wind, and temperature changes.
2. **Choose a Sunny Location:** Peppers need at least 6-8 hours of sunlight per day to thrive. Choose a location in your garden that receives plenty of sun.
3. **Prepare the Soil:** Peppers prefer well-drained soil that is rich in organic matter. Amend your soil with compost or aged manure before planting.
4. **Dig Your Planting Holes:** Dig holes that are slightly larger than the root balls of your seedlings. Space the holes about 18-24 inches apart, depending on the variety of pepper you’re planting. Larger pepper varieties will need more space.
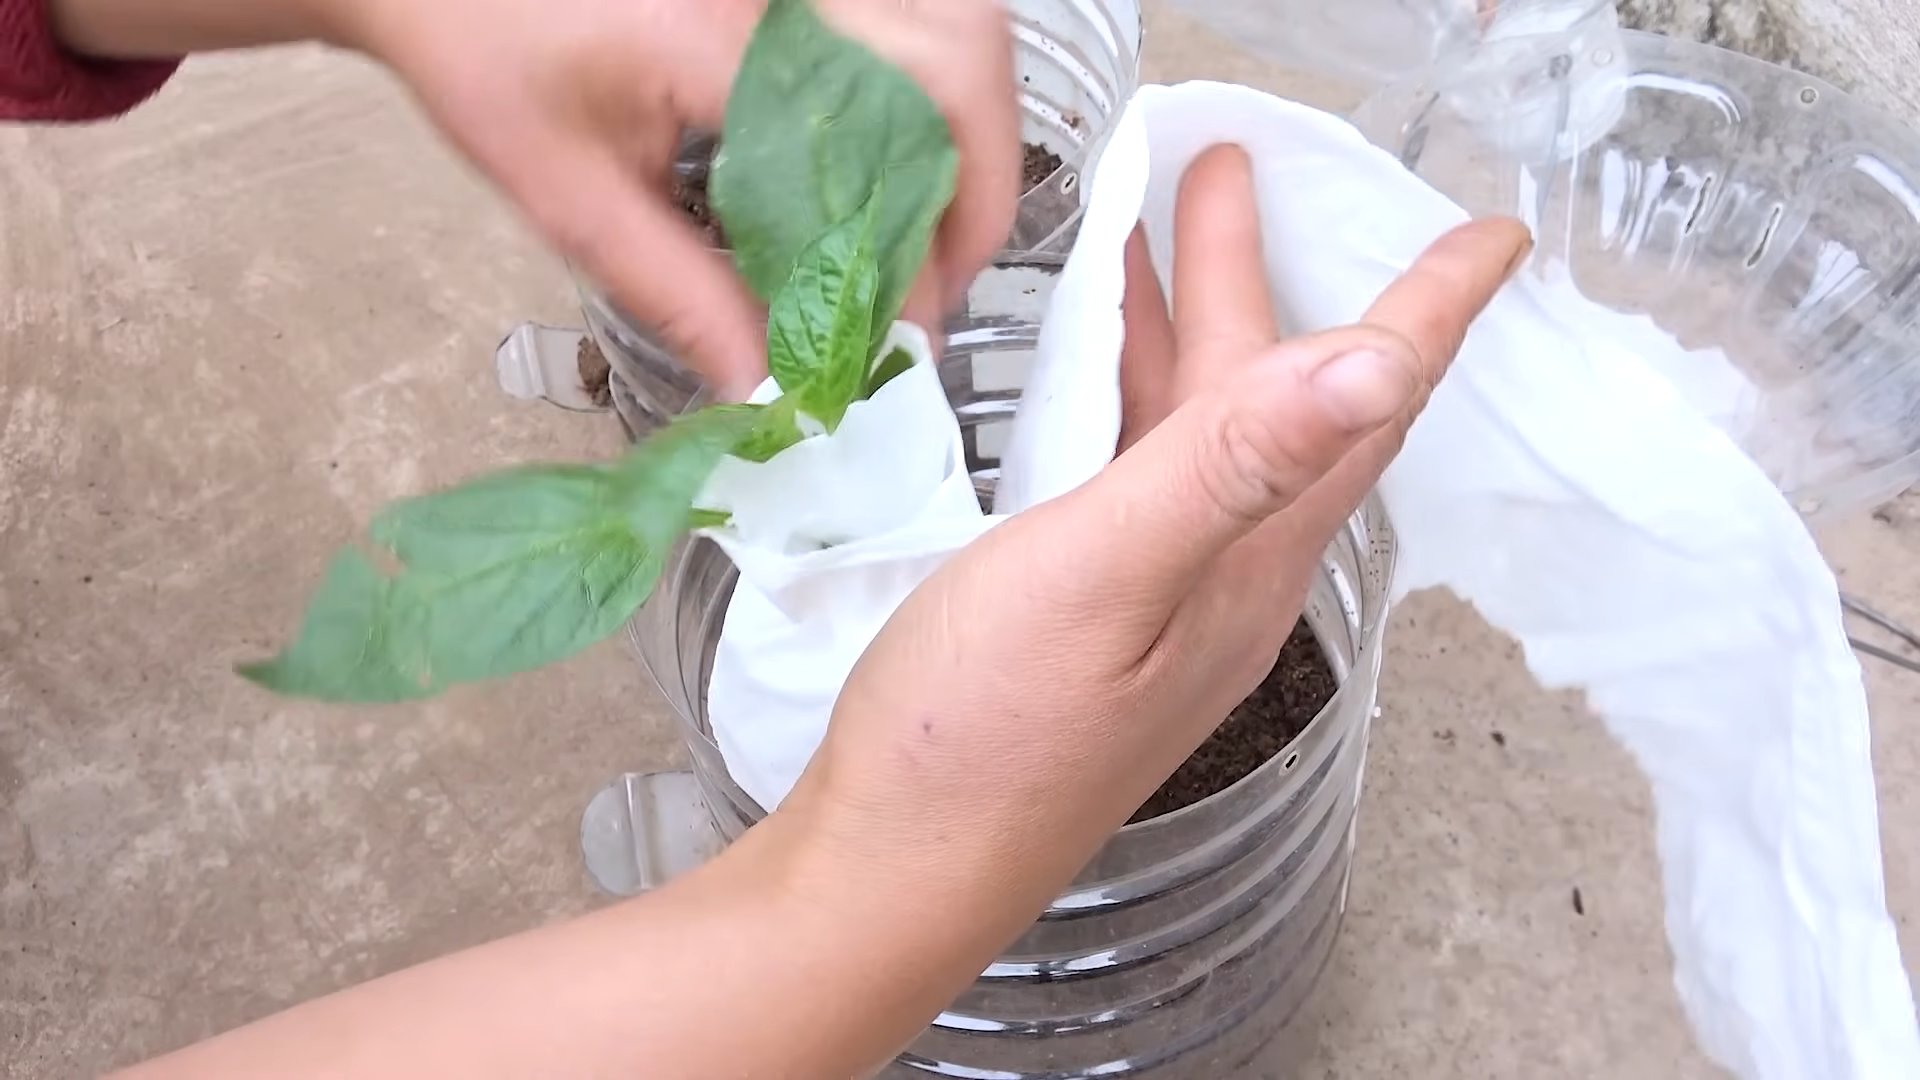
5. **Transplant Your Seedlings:** Gently remove your seedlings from their trays or pots. Loosen the root ball slightly and place the seedling in the planting hole. Make sure the top of the root ball is level with the surrounding soil.
6. **Fill the Holes and Water:** Fill the holes with soil and gently pat it down. Water your seedlings thoroughly after planting.
7. **Mulch Around Your Plants:** Apply a layer of mulch around your pepper plants to help retain moisture, suppress weeds, and regulate soil temperature. I like to use straw or wood chips.
8. **Stake or Cage Your Plants:** As your pepper plants grow, they may need support to prevent them from falling over. Stake or cage your plants to provide support. This is especially important for larger pepper varieties.
Caring for Your Pepper Plants
Now that your pepper plants are in the ground, it’s time to provide them with the care they need to thrive.
1. **Watering:** Water your pepper plants regularly, especially during hot, dry weather. Aim to keep the soil consistently moist, but not soggy. Water deeply and less frequently, rather than shallowly and often.
2. **Fertilizing:** Peppers are heavy feeders and benefit from regular fertilization. Use a balanced fertilizer or a fertilizer specifically formulated for vegetables. Follow the instructions on the fertilizer package. I like to fertilize my pepper plants every 2-3 weeks.
3. **Weeding:** Keep your garden free of weeds, as they can compete with your pepper plants for nutrients and water. Hand-pull weeds or use a hoe to remove them.
4. **Pest and Disease Control:** Keep an eye out for pests and diseases. Common pepper pests include aphids, flea beetles, and spider mites. Common pepper diseases include blossom end rot, fungal leaf spot, and verticillium wilt. Treat any problems promptly with appropriate organic or chemical controls. I prefer to use organic methods whenever possible.
5. **Pruning (Optional):** Pruning your pepper plants can help improve air circulation and encourage fruit production. Remove any suckers (small shoots that grow from the base of the plant) and any yellowing or diseased leaves.
Harvesting Your Peppers
The moment you’ve been waiting for! Harvesting your peppers is the most rewarding part of the process.
1. **Know When to Harvest:** The timing of your harvest will depend on the variety of pepper you’re growing and your personal preference. Sweet peppers are typically harvested when they are fully colored and firm. Hot peppers can be harvested when they are green or when they have turned their mature color (usually red, orange, or yellow).
2. **Use Pruning Shears or a Knife:** Use pruning shears or a knife to cut the peppers from the plant. Be careful not to damage the plant.
3. **Handle with Care:** Peppers are delicate and can bruise easily. Handle them with care to avoid damaging them.
4. **Store Your Peppers:** Store your peppers in the refrigerator for up to a week. You can also freeze them for longer storage. To freeze peppers, wash them, remove the stems and seeds, and chop them into desired sizes. Spread them out on a baking sheet and freeze them for a few hours. Then, transfer them to freezer bags or containers.
Troubleshooting Common Pepper Problems
Even with the best care, you may encounter some problems while growing peppers. Here are a few common issues and how to address them:
* **Blossom End Rot:** This is a common problem that causes the bottom of the pepper to rot. It’s usually caused by a calcium deficiency. To prevent blossom end rot, make sure your soil is well-drained and that you’re watering your plants consistently. You can also add calcium to the soil by using bone meal or eggshells.
* **Aphids:** These tiny insects can suck the sap from your pepper plants, causing them to weaken and become stunted. To control aphids, spray your plants with insecticidal soap or neem oil
Conclusion
So, there you have it! Mastering the art of planting peppers at home is not only achievable but also incredibly rewarding. We’ve walked through the essential steps, from selecting the right seeds and nurturing seedlings to transplanting and providing ongoing care. But why is this DIY approach a must-try? Because it puts you in complete control. You get to choose the varieties you love, ensure they’re grown organically (if you wish), and experience the unparalleled satisfaction of harvesting peppers you’ve nurtured from tiny seeds.
Beyond the control and satisfaction, planting peppers at home offers significant cost savings compared to buying them at the grocery store, especially if you’re a pepper enthusiast who enjoys a variety of flavors and heat levels. Imagine having a constant supply of sweet bell peppers for salads, fiery jalapenos for salsas, and exotic habaneros for those who dare!
But the journey doesn’t end here. Experimentation is key to becoming a true pepper-growing pro. Consider trying different soil mixes to see which your peppers thrive in. Explore companion planting – basil, for example, is said to improve pepper growth and flavor. And don’t be afraid to get creative with your containers. While traditional pots work perfectly well, you could also repurpose old buckets, tires (painted, of course!), or even create a vertical garden for a stunning visual display.
For those looking to extend their harvest, consider succession planting. Start new seeds every few weeks to ensure a continuous supply of peppers throughout the growing season. And if you live in a colder climate, you can even overwinter your pepper plants indoors to enjoy a head start the following year.
The possibilities are truly endless when you embrace the DIY spirit of planting peppers at home. It’s a journey of learning, experimentation, and ultimately, delicious rewards.
We wholeheartedly encourage you to give it a try. Start small, perhaps with just a few plants, and gradually expand your pepper patch as you gain confidence. And most importantly, don’t forget to share your experiences with us! We’d love to hear about your successes, your challenges, and any unique tips or tricks you discover along the way. Share your photos, your stories, and your pepper-growing wisdom in the comments below. Let’s build a community of passionate home pepper growers!
Now, let’s address some of the most frequently asked questions to ensure your pepper-planting journey is a resounding success.
Frequently Asked Questions (FAQ)
What are the best pepper varieties to grow for beginners?
For beginners, some of the easiest and most rewarding pepper varieties to grow include bell peppers (especially the ‘California Wonder’ variety), jalapenos, and banana peppers. These varieties are generally more tolerant of beginner mistakes and produce reliably well. They also have a wide range of culinary uses, making them a versatile addition to your garden. Avoid starting with super-hot peppers like ghost peppers or Scotch bonnets, as they can be more challenging to cultivate and require specific growing conditions.
How much sunlight do pepper plants need?
Pepper plants are sun-loving vegetables and require at least 6-8 hours of direct sunlight per day to thrive. Insufficient sunlight can lead to leggy growth, reduced fruit production, and smaller, less flavorful peppers. Choose a location in your garden that receives ample sunlight throughout the day. If you’re growing peppers indoors, supplement with grow lights to ensure they receive enough light.
What type of soil is best for growing peppers?
Peppers prefer well-draining, fertile soil with a slightly acidic pH (around 6.0-6.8). Amend your garden soil with compost or other organic matter to improve drainage and fertility. You can also use a potting mix specifically formulated for vegetables. Avoid heavy clay soils, as they can become waterlogged and suffocate the roots.
How often should I water my pepper plants?
Water your pepper plants regularly, especially during hot, dry weather. Aim to keep the soil consistently moist but not waterlogged. Water deeply at the base of the plant, avoiding wetting the foliage, which can increase the risk of fungal diseases. Check the soil moisture regularly by sticking your finger about an inch into the soil. If it feels dry, it’s time to water.
When should I fertilize my pepper plants?
Fertilize your pepper plants regularly throughout the growing season. Start with a balanced fertilizer (e.g., 10-10-10) when transplanting seedlings. Once the plants start to flower and produce fruit, switch to a fertilizer higher in phosphorus and potassium to promote fruit development. Follow the instructions on the fertilizer label for application rates. Organic options like compost tea or fish emulsion are also excellent choices.
How do I prevent pests and diseases from affecting my pepper plants?
Prevention is key when it comes to pests and diseases. Start by choosing disease-resistant pepper varieties. Practice good garden hygiene by removing weeds and debris around your plants. Monitor your plants regularly for signs of pests or diseases. Common pests include aphids, spider mites, and whiteflies. Control these pests with insecticidal soap or neem oil. Fungal diseases can be prevented by ensuring good air circulation and avoiding overhead watering. If you notice signs of disease, treat promptly with a fungicide.
When is the best time to harvest my peppers?
The best time to harvest your peppers depends on the variety and your personal preference. Bell peppers are typically harvested when they are fully colored and firm to the touch. Jalapenos can be harvested when they are green or red, depending on your desired level of heat. Hot peppers are generally harvested when they are fully mature and have reached their final color. Use pruning shears or a sharp knife to cut the peppers from the plant, leaving a small stem attached.
Can I grow peppers in containers?
Yes, peppers grow very well in containers. Choose a container that is at least 12 inches in diameter and has good drainage holes. Use a potting mix specifically formulated for vegetables. Container-grown peppers may require more frequent watering and fertilizing than those grown in the ground.
What are some common problems when growing peppers and how can I fix them?
Some common problems include blossom end rot (caused by calcium deficiency), stunted growth (caused by nutrient deficiencies or poor soil), and pest infestations. Blossom end rot can be prevented by ensuring consistent watering and adding calcium to the soil. Stunted growth can be addressed by fertilizing with a balanced fertilizer. Pest infestations can be controlled with insecticidal soap or neem oil.
How can I overwinter my pepper plants?
If you live in a colder climate, you can overwinter your pepper plants indoors to enjoy a head start the following year. Before the first frost, prune your pepper plants back to about 6-8 inches tall. Dig them up carefully and pot them in containers. Bring them indoors and place them in a sunny location. Water sparingly throughout the winter. In the spring, gradually acclimate them to outdoor conditions before transplanting them back into the garden.

Leave a Comment