
Growing Kale in Bottles: Sounds a little unconventional, right? But trust me, it’s a game-changer! Are you dreaming of fresh, homegrown kale but short on space or dealing with pesky garden pests? Well, you’re in the right place. This DIY guide will unlock a simple, effective, and surprisingly stylish way to cultivate your own leafy greens, even if you only have a balcony or a sunny windowsill.
The concept of container gardening, including using repurposed items like bottles, has roots stretching back centuries. From ancient hanging gardens to resourceful wartime victory gardens, people have always found creative ways to grow food in limited spaces. Today, with increasing urbanization and a renewed focus on sustainable living, the need for innovative gardening solutions is greater than ever.
Let’s face it, buying organic kale at the grocery store can be expensive, and you’re never quite sure how fresh it is. Plus, who wants to battle slugs and cabbage worms in a traditional garden bed? Growing Kale in Bottles offers a fantastic solution. It’s a budget-friendly, space-saving, and pest-resistant method that allows you to enjoy fresh, nutritious kale right at your fingertips. I’m excited to share this easy-to-follow guide that will have you harvesting your own delicious kale in no time!
Upcycled Kale: Growing Your Greens in Plastic Bottles
Hey there, fellow gardening enthusiasts! I’m super excited to share one of my favorite DIY projects: growing kale in upcycled plastic bottles. It’s a fantastic way to reuse those bottles that would otherwise end up in the trash, plus it’s a space-saving solution if you’re short on garden real estate. Trust me, even if you’re a beginner, you can totally nail this!
Why Grow Kale in Bottles?
Before we dive in, let’s talk about why this method is so awesome:
* Eco-Friendly: We’re giving plastic bottles a new life, reducing waste and helping the planet.
* Space-Saving: Perfect for balconies, patios, or small gardens. You can hang them, stack them, or arrange them however you like.
* Easy to Manage: The bottles provide good drainage and make it easy to monitor the soil moisture.
* Pest Control: Elevated bottles can help deter some ground-dwelling pests.
* Aesthetically Pleasing: With a little creativity, you can create a beautiful and unique vertical garden.
What You’ll Need
Okay, let’s gather our supplies. Here’s what you’ll need to get started:
* Plastic Bottles: Any size will work, but I prefer using 2-liter bottles. Make sure they’re clean and have the labels removed.
* Kale Seeds or Seedlings: Choose your favorite kale variety! I personally love Tuscan kale (also known as Lacinato or Dinosaur kale) for its flavor and texture.
* Potting Soil: Use a good quality potting mix that drains well.
* Drill or Sharp Knife: For creating drainage holes and cutting the bottles.
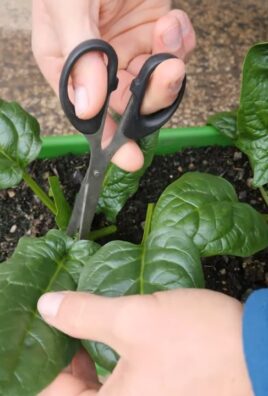
* Scissors: For trimming and shaping.
* Measuring Tape or Ruler: For accurate cutting and spacing.
* Permanent Marker: For marking cutting lines.
* Hanging Material (Optional): Rope, wire, or chain if you want to hang your bottles.
* Watering Can or Hose: For watering your kale.
* Gloves: To protect your hands.
* Safety Glasses: Especially when using power tools.
Preparing the Bottles
This is where the magic begins! We’re going to transform those ordinary plastic bottles into mini kale gardens.
1. Clean the Bottles: Thoroughly wash the bottles with soap and water to remove any residue. Rinse them well and let them dry completely.
2. Remove Labels: Peel off the labels. If they’re stubborn, try soaking the bottles in warm, soapy water for a few minutes.
3. Mark the Cutting Line: Decide where you want to cut the bottle. I usually cut it about one-third of the way down from the top. Use a permanent marker and a ruler to draw a straight line around the bottle. This will create the planting container.
4. Cut the Bottle: Carefully cut along the marked line using a sharp knife or scissors. If you’re using a knife, be extra cautious!
5. Create Drainage Holes: This is crucial for preventing waterlogging. Use a drill or a sharp knife to create several drainage holes in the bottom of the bottle. I usually make about 4-6 holes, depending on the size of the bottle.
6. Smooth the Edges (Optional): If the cut edges are sharp, you can smooth them down with sandpaper or a lighter. Be careful when using a lighter!
Planting Your Kale
Now for the fun part – planting your kale!
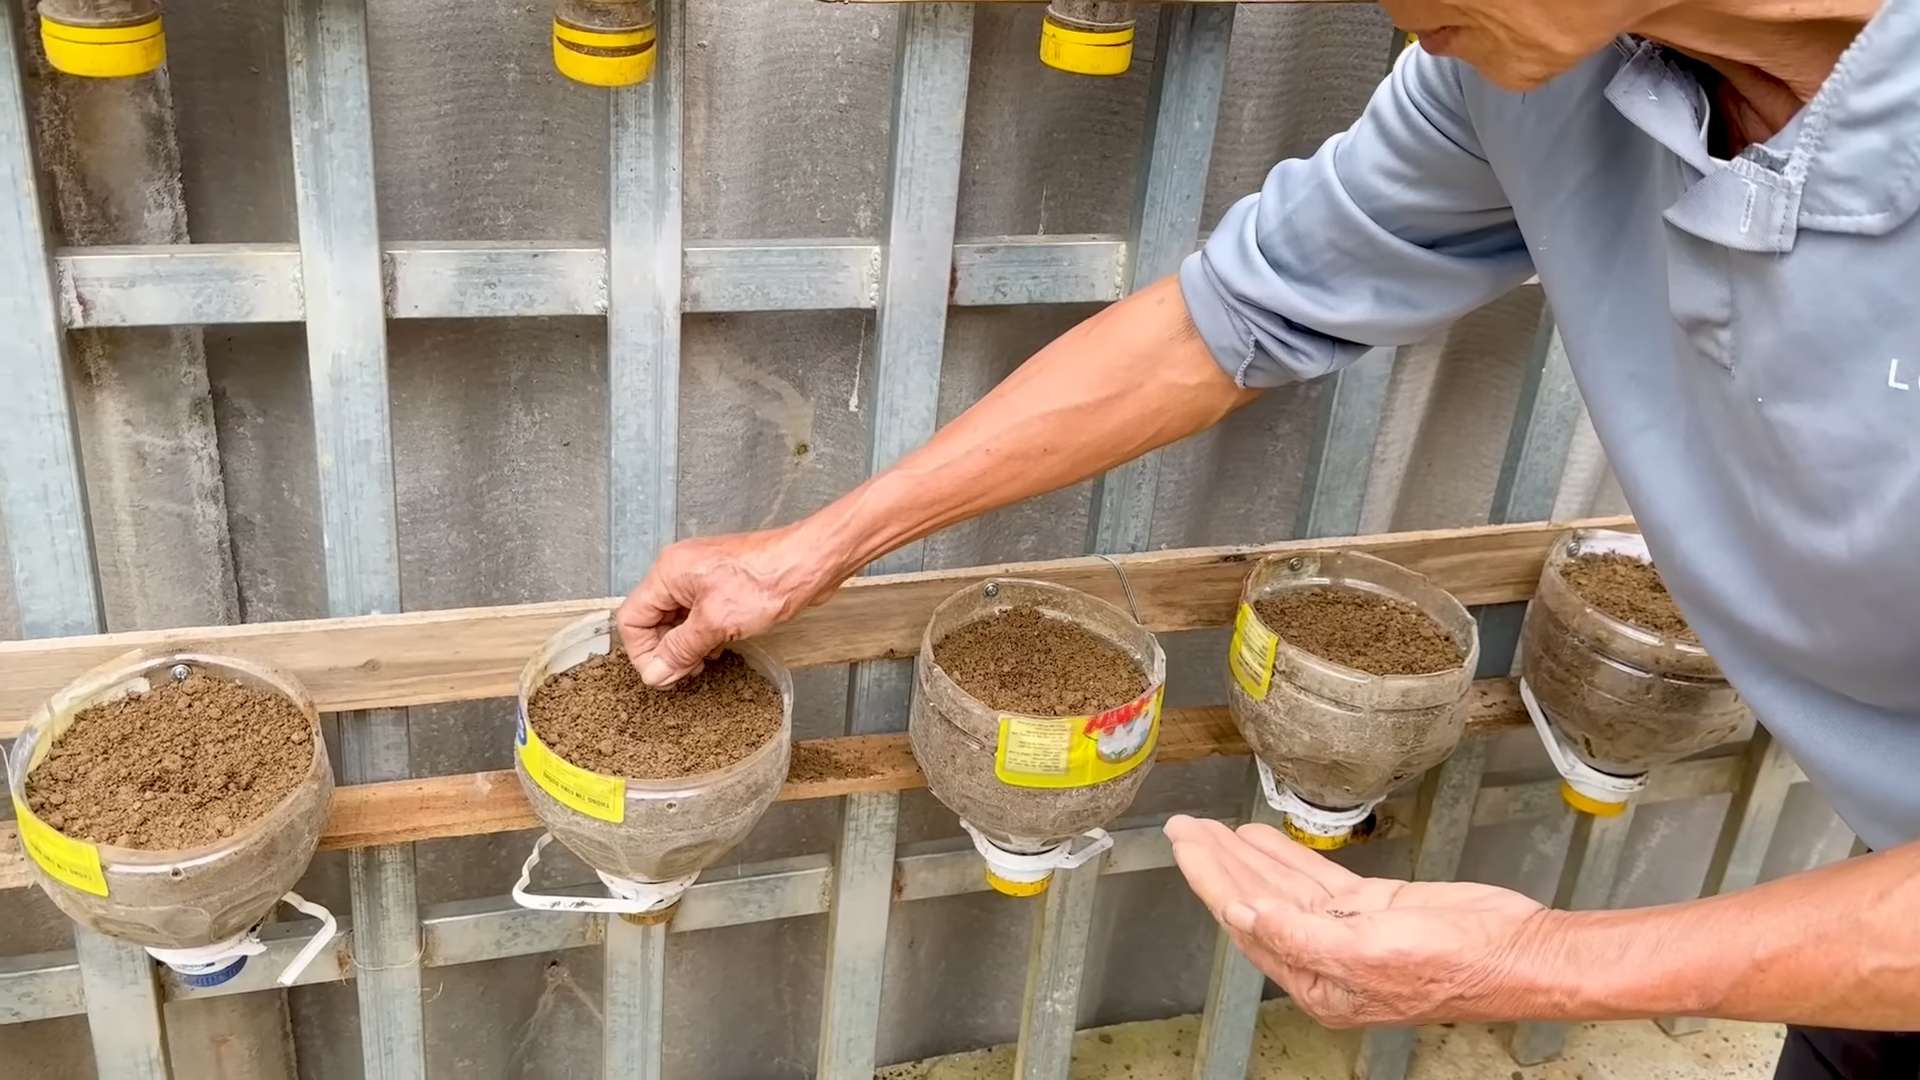
1. Fill the Bottle with Soil: Fill the prepared bottle with potting soil, leaving about an inch of space at the top.
2. Plant the Seeds or Seedlings:
* From Seed: Make a small indentation in the soil, about 1/4 inch deep. Place 2-3 kale seeds in each indentation and cover them lightly with soil. Gently water the soil.
* From Seedling: Gently remove the kale seedling from its container. Loosen the roots slightly and place the seedling in the center of the bottle. Fill in around the seedling with soil, making sure the top of the root ball is level with the soil surface. Gently water the soil.
3. Water Thoroughly: Water the soil thoroughly until water drains out of the drainage holes. This helps settle the soil and ensures the roots get a good start.
Hanging Your Bottles (Optional)
If you want to hang your kale bottles, here’s how:
1. Drill Hanging Holes: Drill two holes near the top of the bottle, on opposite sides. Make sure the holes are large enough to accommodate your chosen hanging material (rope, wire, or chain).
2. Attach Hanging Material: Thread the rope, wire, or chain through the holes and secure it tightly. Make sure the bottle is balanced and won’t tip over when hanging.
3. Hang Your Bottles: Find a sunny spot to hang your kale bottles. Make sure the location is protected from strong winds.
Caring for Your Kale
Kale is relatively easy to care for, but here are a few tips to keep your plants happy and healthy:
1. Sunlight: Kale needs at least 6 hours of sunlight per day. Place your bottles in a sunny location.
2. Watering: Water regularly, especially during hot, dry weather. Check the soil moisture by sticking your finger into the soil. If it feels dry, it’s time to water. Avoid overwatering, as this can lead to root rot.
3. Fertilizing: Feed your kale every 2-3 weeks with a balanced liquid fertilizer. Follow the instructions on the fertilizer label.
4. Pest Control: Keep an eye out for pests like aphids, cabbage worms, and slugs. You can handpick pests off the plants or use organic pest control methods like insecticidal soap or neem oil.
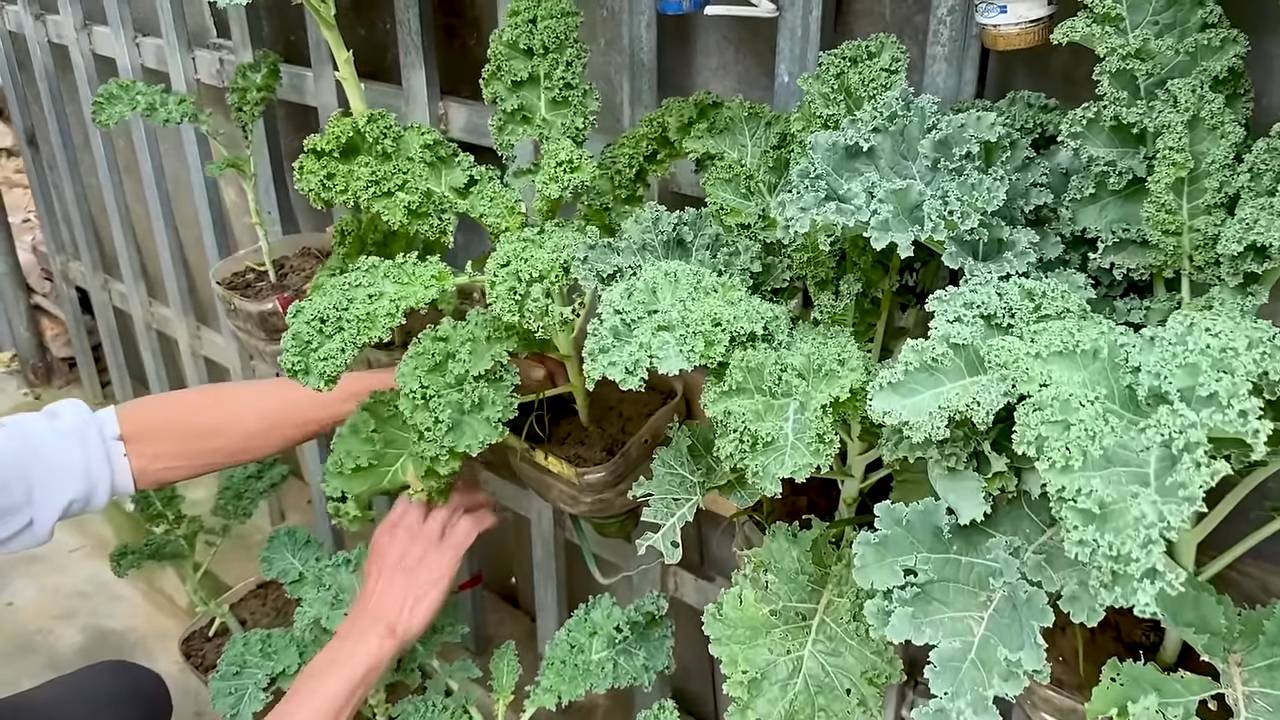
5. Harvesting: You can start harvesting kale leaves when they are about 4-6 inches long. Harvest the outer leaves first, leaving the inner leaves to continue growing. This will encourage the plant to produce more leaves.
Troubleshooting
Sometimes things don’t go exactly as planned. Here are a few common problems and how to fix them:
* Yellowing Leaves: This could be a sign of overwatering, underwatering, or nutrient deficiency. Check the soil moisture and adjust your watering schedule accordingly. Fertilize your kale with a balanced fertilizer.
* Leggy Growth: This means your kale isn’t getting enough sunlight. Move your bottles to a sunnier location.
* Pest Infestation: Identify the pest and use appropriate pest control methods.
* Slow Growth: This could be due to poor soil quality, lack of nutrients, or insufficient sunlight. Amend the soil with compost, fertilize regularly, and make sure your kale is getting enough sunlight.
Creative Ideas for Your Bottle Garden
Want to take your bottle garden to the next level? Here are a few creative ideas:
* Paint the Bottles: Add some color and personality to your garden by painting the bottles. Use weather-resistant paint and get creative with your designs.
* Label the Bottles: Use a permanent marker to label each bottle with the type of kale you’re growing.
* Create a Vertical Garden Wall: Attach the bottles to a wooden pallet or trellis to create a stunning vertical garden wall.
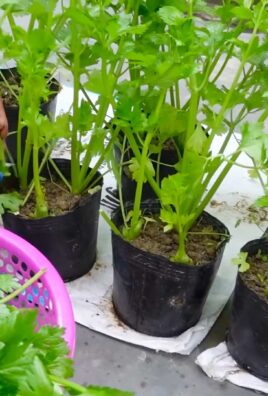
* Mix and Match: Grow other herbs and vegetables in your bottles alongside your kale.
* Add Decorative Elements: Decorate your bottles with shells, stones, or other decorative elements.
Enjoy Your Homegrown Kale!
And there you have it! You’ve successfully created your own upcycled kale garden. Now you can enjoy fresh, homegrown kale in your salads, smoothies, soups, and more. I find it incredibly rewarding to grow my own food, and I hope you do too! Happy gardening!
Conclusion
So, there you have it! Growing kale in bottles isn’t just a quirky gardening experiment; it’s a genuinely effective and rewarding way to cultivate fresh, nutritious greens, even if you’re short on space or dealing with less-than-ideal soil conditions. We’ve walked through the entire process, from selecting the right bottles and preparing your growing medium to planting your kale seeds and providing ongoing care.
Why is this DIY trick a must-try? Because it democratizes access to fresh produce. It empowers you to grow your own food, regardless of your living situation. Apartment dwellers, balcony gardeners, and anyone with limited yard space can enjoy the satisfaction of harvesting their own kale. Beyond the practical benefits, it’s also an incredibly engaging and educational activity, especially for children. They can witness the miracle of growth firsthand and learn about the importance of healthy eating and sustainable practices.
But the beauty of this method lies in its adaptability. Feel free to experiment with different varieties of kale. Curly kale, Lacinato kale (also known as dinosaur kale), and Red Russian kale all thrive in bottle gardens. You can also try companion planting by adding herbs like thyme or rosemary to your bottles. These herbs not only add flavor to your culinary creations but also help deter pests.
Consider the aesthetic possibilities as well. Paint your bottles with vibrant colors or create a vertical garden by hanging them on a wall or fence. This transforms your kale garden into a living work of art. You can even use different sizes of bottles to create a tiered effect, adding visual interest to your space.
Don’t be afraid to get creative and personalize your bottle garden to suit your own style and preferences. The key is to provide your kale plants with adequate sunlight, water, and nutrients. With a little bit of care and attention, you’ll be rewarded with a bountiful harvest of fresh, delicious kale.
We wholeheartedly encourage you to give this DIY trick a try. It’s a fun, affordable, and sustainable way to grow your own food and connect with nature. And most importantly, it allows you to enjoy the incredible health benefits of fresh, homegrown kale.
Once you’ve embarked on your bottle gardening adventure, we’d love to hear about your experience! Share your photos, tips, and challenges in the comments below. Let’s create a community of bottle gardeners and inspire others to embrace this innovative and rewarding method of growing kale. Your insights could be invaluable to someone just starting out. Let us know what worked for you, what challenges you faced, and any creative adaptations you made along the way. Together, we can unlock the full potential of growing kale in bottles and make fresh, healthy food accessible to everyone. So, grab some bottles, get your hands dirty, and start growing!
Frequently Asked Questions (FAQs)
What kind of bottles are best for growing kale?
The ideal bottles are sturdy plastic bottles, like those used for water, juice, or soda. Look for bottles that are at least 2 liters in size to provide enough room for the kale roots to grow. Clear or translucent bottles are preferable, as they allow you to monitor the moisture level of the soil. Make sure to thoroughly clean the bottles before using them to remove any residue that could harm your plants. Avoid using bottles that have contained harsh chemicals or pesticides.
How do I prepare the bottles for planting?
First, thoroughly clean the bottles with soap and water to remove any residue. Then, cut a large opening in the side of the bottle, leaving enough of the bottle intact to provide support for the soil and plants. Make sure the opening is large enough to easily plant and harvest your kale. Drill drainage holes in the bottom of the bottle to prevent waterlogging. This is crucial for healthy root development. You can also add a layer of gravel or small stones to the bottom of the bottle to further improve drainage.
What type of soil should I use?
A well-draining potting mix is essential for growing kale in bottles. Avoid using garden soil, as it can be too heavy and compact, leading to poor drainage and root rot. A good potting mix will contain a blend of peat moss, perlite, and vermiculite, which provides excellent drainage and aeration. You can also add compost to the potting mix to provide additional nutrients for your kale plants.
How often should I water my kale plants?
Water your kale plants regularly, especially during hot, dry weather. The frequency of watering will depend on the size of the bottle, the type of potting mix, and the weather conditions. Check the soil moisture regularly by sticking your finger into the soil. If the top inch of soil feels dry, it’s time to water. Water thoroughly until water drains out of the drainage holes. Avoid overwatering, as this can lead to root rot.
How much sunlight do kale plants need?
Kale plants need at least 6 hours of sunlight per day to thrive. Place your bottle garden in a sunny location, such as a south-facing window or balcony. If you don’t have enough natural sunlight, you can supplement with grow lights. Rotate the bottles regularly to ensure that all sides of the plants receive adequate sunlight.
What kind of fertilizer should I use?
Feed your kale plants with a balanced liquid fertilizer every 2-3 weeks. Look for a fertilizer that is specifically formulated for vegetables. Follow the instructions on the fertilizer label carefully. You can also add compost tea to the soil to provide additional nutrients. Avoid over-fertilizing, as this can burn the roots of your plants.
How do I protect my kale plants from pests?
Kale plants can be susceptible to pests such as aphids, cabbage worms, and flea beetles. Inspect your plants regularly for signs of pests. If you find any pests, you can try spraying them with insecticidal soap or neem oil. You can also handpick the pests off the plants. Companion planting with herbs like rosemary and thyme can also help deter pests.
When can I harvest my kale?
You can start harvesting kale leaves when they are about 4-6 inches long. Harvest the outer leaves first, leaving the inner leaves to continue growing. This will encourage the plant to produce more leaves. You can harvest kale leaves throughout the growing season.
Can I grow kale in bottles indoors?
Yes, you can grow kale in bottles indoors, but you’ll need to provide adequate sunlight or supplemental lighting. Place your bottle garden near a sunny window or use grow lights to provide at least 6 hours of light per day. Make sure to rotate the bottles regularly to ensure that all sides of the plants receive adequate light.
What are some variations I can try?
Experiment with different varieties of kale, such as curly kale, Lacinato kale, and Red Russian kale. Try companion planting with herbs like thyme, rosemary, or basil. Paint your bottles with vibrant colors or create a vertical garden by hanging them on a wall or fence. Use different sizes of bottles to create a tiered effect. You can also try growing other leafy greens, such as spinach or lettuce, in bottles.
What if my kale plants are not growing well?
If your kale plants are not growing well, check the following:
* **Sunlight:** Are they getting enough sunlight?
* **Water:** Are they being watered properly?
* **Nutrients:** Are they getting enough nutrients?
* **Pests:** Are they being attacked by pests?
* **Drainage:** Is the soil draining properly?
Adjust your care accordingly to address any issues. If you’re still having problems, consult with a local gardening expert.
Can I reuse the soil from my bottle garden?
It’s generally not recommended to reuse the soil from your bottle garden without amending it. After a growing season, the soil will likely be depleted of nutrients and may contain harmful pathogens. You can amend the soil by adding compost, fertilizer, and other organic matter. However, it’s often best to start with fresh potting mix each season to ensure the best results.
How do I dispose of the bottles after I’m done with them?
If the bottles are still in good condition, you can reuse them for another growing season. If they are damaged or no longer needed, you can recycle them. Check with your local recycling center for information on how to recycle plastic bottles in your area. You can also repurpose the bottles for other uses, such as storage containers or craft projects.
Leave a Comment