
Grow Bag Potatoes: Imagine harvesting a bounty of delicious, homegrown potatoes right from your patio or balcony! It’s easier than you think, and this DIY guide will show you exactly how to do it using grow bags. Forget the sprawling garden – this method is perfect for small spaces and beginner gardeners like myself!
The history of potato cultivation is rich and fascinating, dating back thousands of years to the Andes Mountains. While our ancestors relied on traditional in-ground planting, we’re now embracing innovative techniques like grow bags to make potato farming accessible to everyone. This isn’t just about convenience; it’s about connecting with the earth and enjoying the unparalleled flavor of freshly harvested, homegrown produce.
Why should you try this DIY trick? Well, for starters, growing potatoes in grow bags offers excellent drainage and aeration, leading to healthier plants and bigger yields. Plus, the mobility of the bags allows you to chase the sun or protect your precious potatoes from unexpected frost. I’ve found that it’s also a fantastic way to control soil quality and prevent common potato diseases. So, if you’re looking for a simple, rewarding, and space-saving way to grow bag potatoes, you’ve come to the right place! Let’s get started and unlock the secrets to a successful potato harvest!
Grow Your Own Spuds: A Beginner’s Guide to Growing Potatoes in Grow Bags
Okay, potato lovers, listen up! Forget digging up your whole garden – we’re going to grow delicious, homegrown potatoes in grow bags! It’s easier than you think, perfect for small spaces, and honestly, there’s nothing quite like the taste of freshly dug potatoes you grew yourself. I’m going to walk you through every step, from choosing the right potatoes to harvesting your bounty. Let’s get started!
What You’ll Need
Before we dive in, let’s gather our supplies. This is what you’ll need to become a potato-growing pro:
* Grow Bags: I recommend 10-gallon grow bags at a minimum. Bigger is better, especially if you want a larger harvest. Fabric grow bags are ideal because they allow for good drainage and aeration.
* Seed Potatoes: These aren’t your regular grocery store potatoes! Seed potatoes are specifically grown for planting and are certified disease-free. You can find them at your local garden center or online. Choose a variety you love to eat!
* Potting Mix: Don’t use garden soil directly in your grow bags. It’s too heavy and can compact. A good quality potting mix is essential for drainage and aeration. I like to mix compost into my potting mix for extra nutrients.
* Compost: As mentioned above, compost is your friend! It adds nutrients and improves soil structure.
* Fertilizer (Optional): A balanced, slow-release fertilizer can give your potatoes an extra boost. Look for one formulated for vegetables.
* Watering Can or Hose: You’ll need to keep your potatoes well-watered, especially during dry spells.
* Gardening Gloves: Protect your hands!
* Trowel or Small Shovel: For planting and adding soil.
Choosing Your Seed Potatoes
This is a crucial step! Seed potatoes come in different varieties, each with its own characteristics. Consider these factors when choosing:
* Days to Maturity: Some varieties mature faster than others. If you live in a colder climate with a shorter growing season, choose a faster-maturing variety.
* Potato Type: Do you prefer waxy potatoes for boiling, or floury potatoes for baking? There are also all-purpose varieties.
* Disease Resistance: Look for varieties that are resistant to common potato diseases in your area.
* Personal Preference: Ultimately, choose a variety that you enjoy eating! Some popular choices include Yukon Gold, Red Pontiac, and Russet Burbank.
Preparing Your Seed Potatoes
Before planting, you need to “chit” your seed potatoes. This encourages them to sprout, giving them a head start.
1. Inspect Your Seed Potatoes: Make sure they are firm and healthy. Discard any that are soft or rotten.
2. Cut Large Seed Potatoes (Optional): If your seed potatoes are larger than an egg, you can cut them into pieces. Each piece should have at least one “eye” (the small buds that will sprout). Let the cut pieces dry for a day or two to prevent rotting.
3. Chitting: Place your seed potatoes in a cool, bright location (but not direct sunlight) for a week or two. You can use an egg carton or a tray. The eyes will start to sprout.
Planting Your Seed Potatoes
Now for the fun part! Let’s get those potatoes in the ground (or, rather, in the grow bag).
1. Fill the Grow Bag: Fill the grow bag about one-third full with your potting mix and compost mixture.
2. Plant the Seed Potatoes: Place the seed potatoes, sprout-side up, on top of the soil. Space them about 10-12 inches apart if you’re planting multiple seed potatoes in one bag.
3. Cover with Soil: Cover the seed potatoes with about 4 inches of soil.
4. Water Thoroughly: Water the soil well until it’s evenly moist.
“Hilling” Your Potatoes
This is a key technique for maximizing your potato harvest. As the potato plants grow, you’ll need to add more soil to encourage more potatoes to form along the stem.
1. Wait for Growth: Once the potato plants have grown about 6-8 inches tall, it’s time to “hill” them.
2. Add More Soil: Add more of your potting mix and compost mixture to the grow bag, covering the stems of the plants, leaving only the top few leaves exposed.
3. Repeat: Repeat this process every few weeks as the plants continue to grow, until the grow bag is almost full. This encourages the plants to produce more potatoes along the buried stems.
Caring for Your Potato Plants
Now that your potatoes are planted, it’s important to provide them with the right care.
1. Watering: Potatoes need consistent moisture, especially during tuber formation. Water deeply whenever the top inch of soil feels dry. Avoid overwatering, which can lead to rot.
2. Sunlight: Potatoes need at least 6-8 hours of sunlight per day. Place your grow bags in a sunny location.
3. Fertilizing (Optional): If you’re using fertilizer, follow the instructions on the package. Avoid over-fertilizing, which can lead to excessive foliage growth at the expense of tuber production.
4. Pest Control: Keep an eye out for pests like aphids, potato beetles, and flea beetles. Handpick them off the plants or use an organic insecticide if necessary.
5. Disease Prevention: Ensure good air circulation around the plants to prevent fungal diseases. Avoid overhead watering, which can spread diseases.
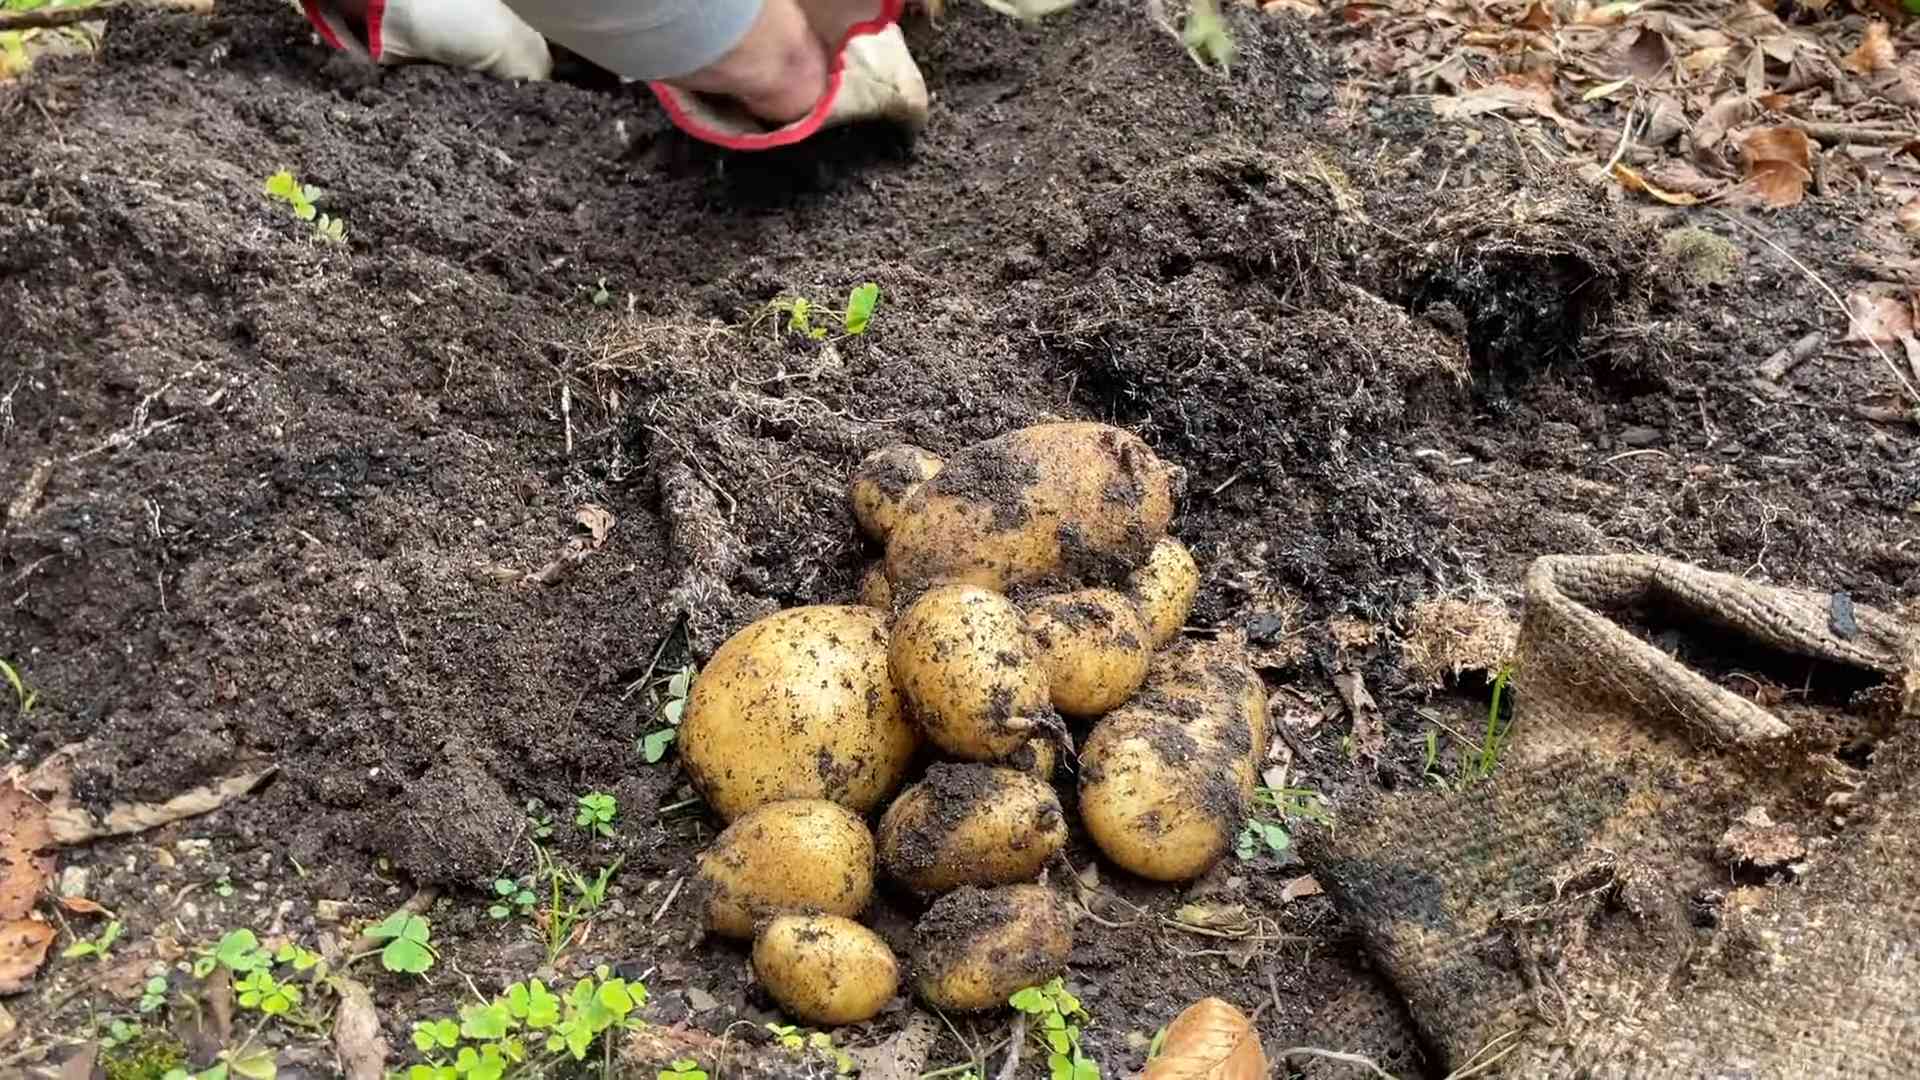
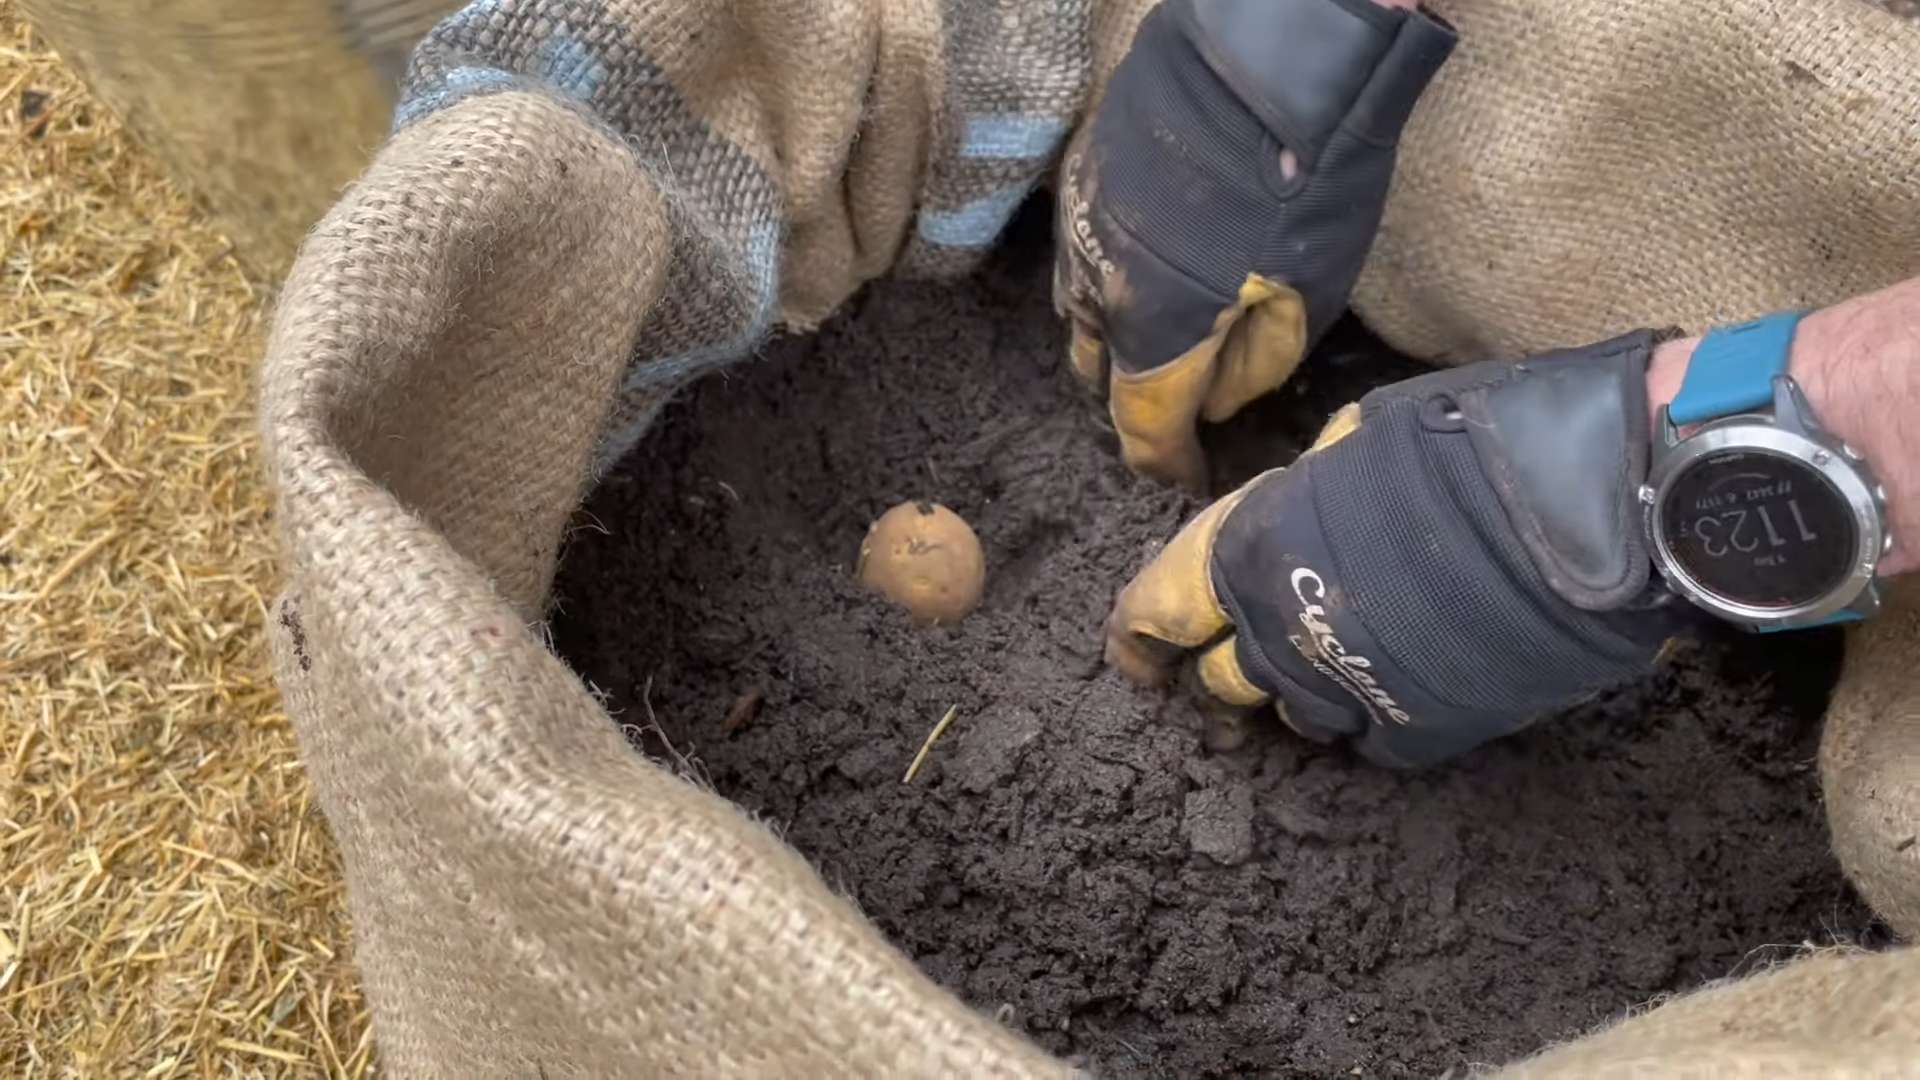
Harvesting Your Potatoes
The moment we’ve all been waiting for! Knowing when to harvest your potatoes is key to getting the best flavor and yield.
1. Check the Foliage: The potato plants will start to flower, and the foliage will eventually begin to turn yellow and die back. This is a sign that the potatoes are maturing.
2. Test Dig: Gently dig around the base of one plant to check the size of the potatoes. If they’re the size you want, it’s time to harvest!
3. Harvesting: Carefully tip the grow bag over and gently remove the potatoes from the soil. Be careful not to damage them.
4. Curing (Optional): To improve their storage life, you can cure your potatoes. Spread them out in a cool, dark, and well-ventilated place for a week or two. This allows the skins to harden and helps prevent rot.
Troubleshooting
Even with the best care, you might encounter some problems. Here are a few common issues and how to address them:
* Potato Blight: This fungal disease can cause brown spots on the leaves and tubers. Prevent it by ensuring good air circulation and avoiding overhead watering. If blight occurs, remove infected foliage immediately.
* Scab: This disease causes rough, scabby patches on the potato skins. It’s more common in alkaline soils. Amend your soil with compost to lower the pH.
* Pests: As mentioned earlier, keep an eye out for pests and take action promptly.
* Small Potatoes: This can be caused by insufficient watering, poor soil, or overcrowding. Make sure your potatoes are getting enough water and nutrients, and space them properly when planting.
Enjoying Your Homegrown Potatoes
Congratulations! You’ve successfully grown your own potatoes in grow bags. Now it’s time to enjoy the fruits (or rather, tubers) of your labor. There are endless ways to cook and enjoy your homegrown potatoes. Roast them, boil them, mash them, fry them – the possibilities are endless! And trust me, they’ll taste so much better than anything you can buy in the store.
Happy growing! I hope this guide has inspired you to try growing your own potatoes in grow bags. It’s a rewarding experience that will bring you delicious, homegrown potatoes for months to come. Don’t be afraid to experiment with different varieties and techniques to find what works best for you. And most importantly, have fun!
Conclusion
So, there you have it! Growing your own potatoes in grow bags isn’t just a gardening trend; it’s a game-changer for anyone who loves fresh, homegrown produce, regardless of their space limitations. This method offers a fantastic blend of convenience, control, and impressive yields, making it a must-try for both seasoned gardeners and beginners alike. Forget back-breaking digging and endless weeding – with grow bags, you’re essentially creating a portable potato paradise right on your patio, balcony, or even a sunny corner of your driveway.
But why is this DIY trick a must-try? First and foremost, it’s incredibly space-efficient. If you’ve always dreamed of growing your own potatoes but thought you didn’t have the room, grow bags are the answer. They allow you to maximize your yield in a minimal footprint. Second, the controlled environment of a grow bag gives you a significant advantage. You have complete control over the soil composition, drainage, and watering, leading to healthier plants and bigger, better potatoes. Third, harvesting is a breeze! No more blindly digging around in the dirt, hoping to unearth a few spuds. Simply tip the bag over, and your treasure trove of potatoes is ready for collection.
Beyond the basic method, there’s plenty of room for experimentation and personalization. Consider trying different varieties of potatoes to see which ones thrive best in your grow bag setup. Red potatoes, Yukon Golds, and even fingerling potatoes are all excellent candidates. You can also experiment with different soil mixes to find the perfect blend for your local climate and potato variety. Adding compost or other organic matter can further enrich the soil and boost your yields.
For those looking to take their grow bag potato game to the next level, consider companion planting. Marigolds, for example, can help deter pests, while basil can improve the flavor of your potatoes. You can also try succession planting, staggering your planting times to ensure a continuous harvest throughout the growing season.
Don’t be afraid to get creative and adapt the method to suit your specific needs and preferences. The beauty of DIY gardening is that there’s no one-size-fits-all approach. The most important thing is to get started and learn as you go.
We wholeheartedly encourage you to try this DIY trick and experience the joy of harvesting your own homegrown potatoes. It’s a rewarding and satisfying experience that will connect you with nature and provide you with delicious, fresh produce. Once you’ve given it a try, we’d love to hear about your experience! Share your photos, tips, and tricks in the comments below. Let’s build a community of grow bag potato enthusiasts and learn from each other. Happy growing! This method of growing grow bag potatoes is sure to bring you joy and delicious potatoes.
Frequently Asked Questions (FAQ)
What size grow bag is best for growing potatoes?
The ideal size grow bag for potatoes is typically between 10 and 20 gallons. A 10-gallon bag is suitable for smaller potato varieties or if you’re just starting out. A 20-gallon bag provides more space for the roots to develop and can accommodate larger potato varieties or multiple seed potatoes. The larger the bag, the more potatoes you’re likely to harvest, but also the more soil you’ll need. Consider the space you have available and the amount of potatoes you want to grow when choosing your grow bag size.
What type of soil should I use in my grow bag for potatoes?
Potatoes need well-draining, nutrient-rich soil. A good mix consists of equal parts of the following:
* **Potting mix:** Provides good drainage and aeration.
* **Compost:** Adds essential nutrients and improves soil structure.
* **Peat moss or coco coir:** Helps retain moisture.
Avoid using garden soil, as it can be too heavy and may not drain well, leading to root rot. You can also add slow-release fertilizer to the soil mix to provide a steady supply of nutrients throughout the growing season. A slightly acidic soil pH (around 6.0 to 6.5) is ideal for potatoes.
How many seed potatoes should I plant in a grow bag?
For a 10-gallon grow bag, plant one to two seed potatoes. For a 20-gallon grow bag, you can plant two to three seed potatoes. Space the seed potatoes evenly within the bag to allow for adequate growth. If you’re using larger seed potatoes, you can cut them into pieces, ensuring that each piece has at least one “eye” (sprout). Allow the cut pieces to callous over for a day or two before planting to prevent rot.
How often should I water my grow bag potatoes?
Watering frequency depends on the weather, the size of the grow bag, and the type of soil you’re using. Generally, you should water your grow bag potatoes whenever the top inch of soil feels dry to the touch. During hot, dry weather, you may need to water daily. Avoid overwatering, as this can lead to root rot. Ensure that the grow bag has adequate drainage to prevent water from pooling at the bottom. A good way to check if your potatoes need water is to lift the bag; if it feels light, it’s time to water.
How much sunlight do grow bag potatoes need?
Potatoes need at least six to eight hours of direct sunlight per day to thrive. Choose a location for your grow bags that receives plenty of sunlight. If you live in a particularly hot climate, you may need to provide some afternoon shade to prevent the plants from overheating.
How do I “hill” potatoes in a grow bag?
“Hilling” is the process of adding more soil around the potato plants as they grow. This encourages the plants to produce more potatoes along the buried stems. When the potato plants are about 6 inches tall, add a few inches of soil to the grow bag, covering the lower part of the stems. Repeat this process every few weeks as the plants grow, until the grow bag is nearly full.
When are grow bag potatoes ready to harvest?
Grow bag potatoes are typically ready to harvest about 70 to 90 days after planting, depending on the variety. You can start harvesting “new potatoes” (small, tender potatoes) a few weeks earlier. To harvest, simply tip the grow bag over and collect the potatoes. If you want to store your potatoes for longer, allow them to cure for a few days in a cool, dry place before storing them in a dark, well-ventilated area.
What are some common problems with grow bag potatoes and how can I prevent them?
Some common problems with grow bag potatoes include:
* **Pests:** Potato beetles, aphids, and other pests can damage potato plants. Inspect your plants regularly and treat any infestations promptly with insecticidal soap or other appropriate methods.
* **Diseases:** Blight and other fungal diseases can affect potato plants. Ensure good air circulation around the plants and avoid overwatering. Use disease-resistant potato varieties if possible.
* **Root rot:** Overwatering can lead to root rot. Ensure that the grow bag has adequate drainage and avoid watering too frequently.
* **Sunscald:** Potatoes exposed to direct sunlight can turn green and become toxic. Hill the potatoes properly to keep them covered with soil.
By taking preventative measures and addressing any problems promptly, you can ensure a successful grow bag potato harvest.


Leave a Comment