
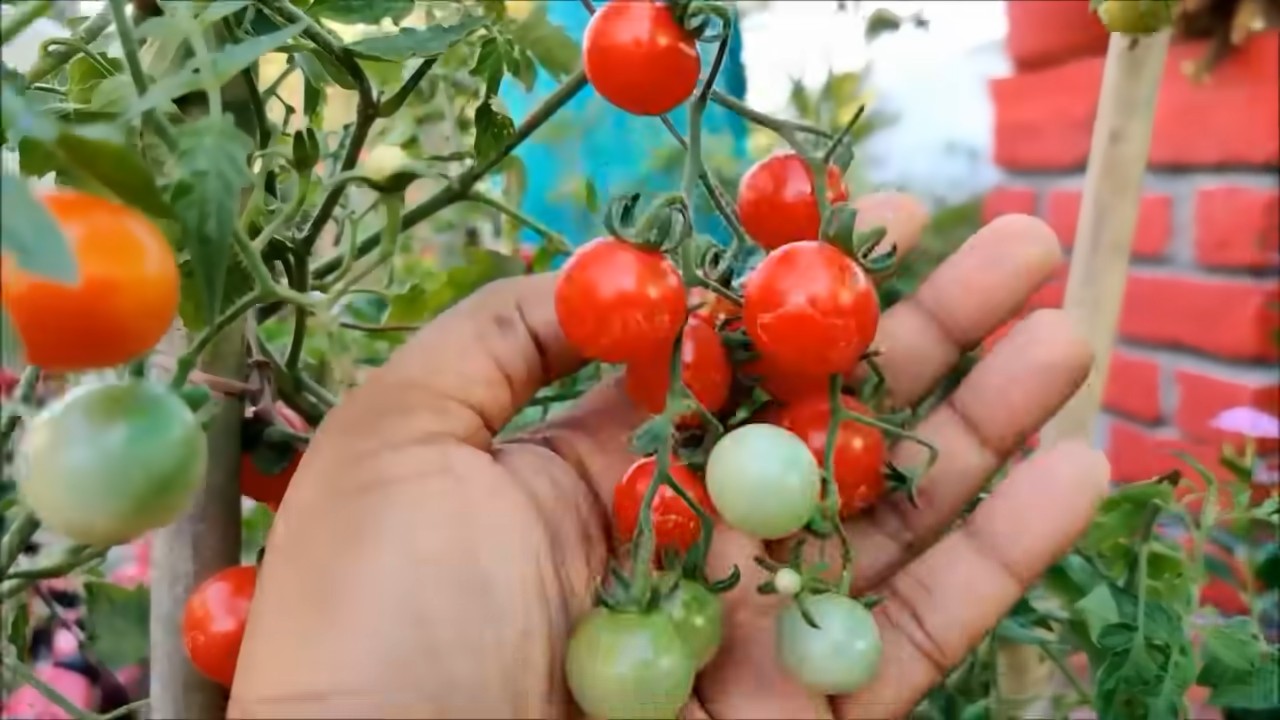
Grow Cherry Tomatoes Beginners, and unlock a world of sweet, juicy goodness right in your own backyard! Have you ever imagined plucking sun-ripened cherry tomatoes straight from the vine, bursting with flavor that no store-bought tomato can match? I’m here to tell you, it’s easier than you think, even if you’re a complete beginner!
For centuries, home gardening has been a source of sustenance and joy. From ancient Roman kitchen gardens to the victory gardens of World War II, growing your own food connects us to a rich history of self-sufficiency and a deeper appreciation for nature. And while tomatoes originated in South America, they’ve become a staple in gardens worldwide, loved for their versatility and delicious taste.
But let’s be honest, getting started can feel overwhelming. Where do you begin? What kind of soil do you need? How much sun is enough? That’s where this DIY guide comes in! I’m going to share my favorite, tried-and-true tricks and hacks to help you grow cherry tomatoes beginners style, ensuring a bountiful harvest, even if you’ve never planted a seed before. We’ll cover everything from choosing the right variety to troubleshooting common problems, so you can enjoy a summer filled with delicious, homegrown cherry tomatoes. Get ready to get your hands dirty and experience the satisfaction of growing your own food!
Growing Cherry Tomatoes: A Beginner’s Guide to Sweet Success
Okay, so you want to grow cherry tomatoes? Awesome! They’re super rewarding, relatively easy to care for, and nothing beats popping a sun-warmed, homegrown cherry tomato into your mouth. I’m going to walk you through everything you need to know to get started, from choosing the right variety to harvesting your bounty. Let’s get our hands dirty!
Choosing Your Cherry Tomato Variety
First things first, let’s talk about varieties. There are tons of different cherry tomato types, each with its own unique flavor, size, and growth habit. Here’s a quick rundown of some popular choices:
* ‘Sungold’: These are incredibly sweet and have a beautiful golden-orange color. They’re a favorite for a reason!
* ‘Sweet Million’: As the name suggests, these produce a massive amount of small, sweet red tomatoes. They’re very prolific.
* ‘Black Cherry’: These have a rich, complex flavor and a deep, almost black color. They’re a bit more unique and delicious in salads.
* ‘Juliet’: These are slightly larger than typical cherry tomatoes and have a more elongated shape. They’re known for their disease resistance.
* ‘Gardener’s Delight’: A classic variety with a good balance of sweetness and acidity. They’re reliable and easy to grow.
Consider what flavors you prefer and how much space you have. Some varieties are more compact than others.
Getting Started: Seeds vs. Seedlings
You have two main options for starting your cherry tomato plants: seeds or seedlings (also called transplants).
* Seeds: Starting from seed gives you more control over the process and allows you to choose from a wider variety of options. However, it requires more time and effort. You’ll need to start your seeds indoors about 6-8 weeks before the last expected frost in your area.
* Seedlings: Buying seedlings is a quicker and easier option, especially if you’re a beginner. You can find them at most garden centers and nurseries. Just make sure to choose healthy-looking plants with sturdy stems and no signs of disease.
I personally prefer starting from seed because I love the whole process, but seedlings are perfectly fine if you want a head start.
Starting from Seed (Optional)
If you’re going the seed route, here’s what you’ll need:
* Seed starting trays or small pots: These should have drainage holes.
* Seed starting mix: This is a lightweight, sterile mix that’s ideal for germinating seeds. Don’t use regular garden soil.
* Grow lights: These will provide the seedlings with the light they need to grow strong and healthy. A sunny windowsill might work, but grow lights are much more reliable.
* Heat mat (optional): This can help speed up germination.
* Spray bottle: For misting the soil.
Now, let’s get planting!
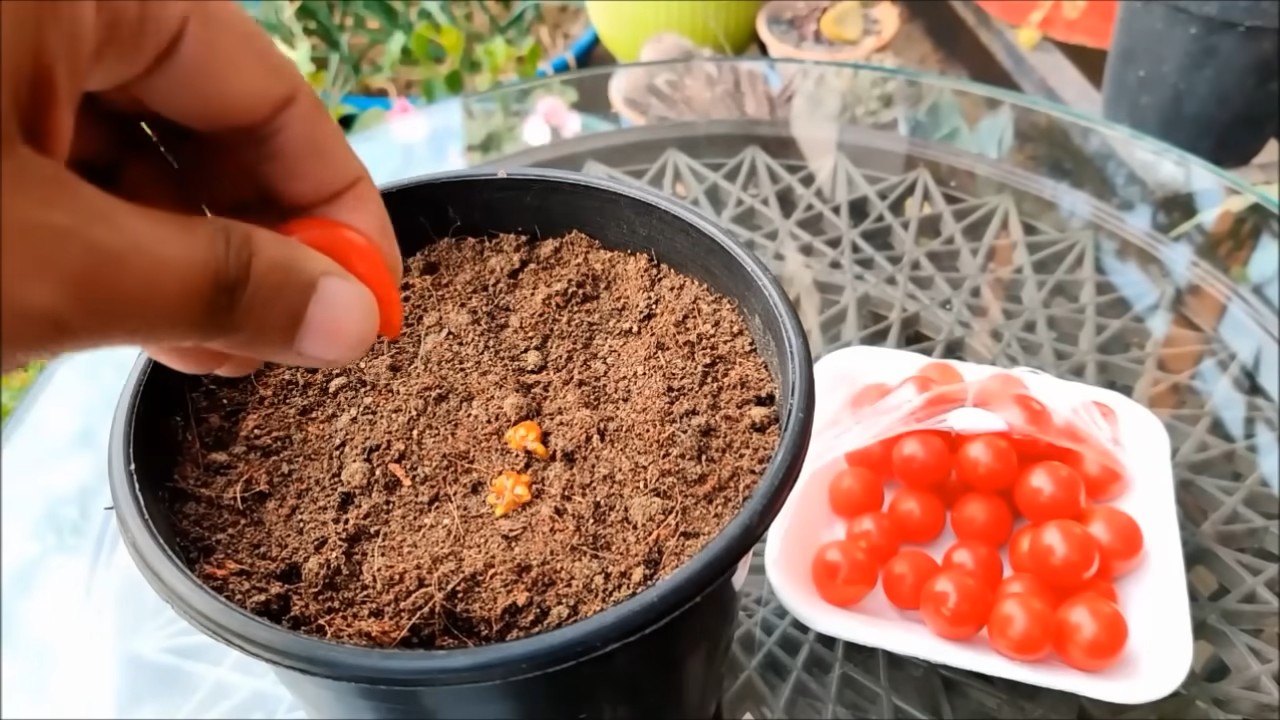
1. Fill your seed starting trays or pots with seed starting mix. Gently tap the trays to settle the mix.
2. Sow the seeds. Place 2-3 seeds in each cell or pot, about 1/4 inch deep.
3. Cover the seeds with a thin layer of seed starting mix.
4. Gently water the soil. Use a spray bottle to avoid disturbing the seeds.
5. Place the trays or pots on a heat mat (optional) and under grow lights.
6. Keep the soil moist but not soggy. Check the soil daily and mist as needed.
7. Once the seedlings emerge (usually within 5-10 days), remove the heat mat.
8. Thin the seedlings. Once the seedlings have their first true leaves (the second set of leaves), thin them to one plant per cell or pot. Choose the strongest-looking seedling and snip off the others at the soil line. Don’t pull them out, as this can disturb the roots of the remaining seedling.
9. Harden off the seedlings. About a week before you plan to transplant them outdoors, gradually expose the seedlings to outdoor conditions. Start by placing them in a sheltered spot for an hour or two each day, gradually increasing the amount of time they spend outside. This will help them adjust to the sun, wind, and temperature changes.
Preparing Your Garden Bed or Containers
Whether you’re using seedlings or starting from seed, you’ll need to prepare your garden bed or containers before planting.
* Sunlight: Cherry tomatoes need at least 6-8 hours of sunlight per day. Choose a location that gets plenty of sun.
* Soil: Cherry tomatoes prefer well-drained soil that’s rich in organic matter. If your soil is heavy clay or sandy, amend it with compost or other organic matter.
* Containers: If you’re growing in containers, choose pots that are at least 12 inches in diameter. Make sure they have drainage holes. Use a good quality potting mix.
Here’s how to prepare your garden bed:
1. Clear the area of weeds and debris.
2. Dig in compost or other organic matter. This will improve the soil’s drainage and fertility.
3. Loosen the soil. Use a garden fork or tiller to loosen the soil to a depth of at least 12 inches.
4. Level the soil. Rake the soil to create a smooth, even surface.
Transplanting Your Cherry Tomato Plants
Now comes the fun part: planting your cherry tomato plants!
1. Dig a hole that’s slightly larger than the root ball of the seedling.
2. Gently remove the seedling from its pot. If the roots are circling the pot, gently loosen them with your fingers.
3. Place the seedling in the hole. The top of the root ball should be level with the surrounding soil.
4. Fill the hole with soil. Gently firm the soil around the plant.
5. Water the plant thoroughly.
6. Add a stake or cage. Cherry tomato plants can get quite tall and heavy, so it’s important to provide them with support. Insert a stake or cage into the ground near the plant.
7. Mulch around the plant. This will help retain moisture, suppress weeds, and regulate soil temperature. Use organic mulch such as straw, wood chips, or shredded leaves.
If you’re planting multiple plants, space them about 2-3 feet apart.
Caring for Your Cherry Tomato Plants
Once your cherry tomato plants are in the ground, it’s important to provide them with proper care.
* Watering: Water your cherry tomato plants regularly, especially during hot, dry weather. Aim to water deeply and less frequently, rather than shallowly and often. Water at the base of the plant to avoid wetting the foliage, which can lead to disease.
* Fertilizing: Cherry tomatoes are heavy feeders, so it’s important to fertilize them regularly. Use a balanced fertilizer that’s specifically formulated for tomatoes. Follow the instructions on the fertilizer label. I like to use a liquid fertilizer every couple of weeks.
* Pruning: Pruning can help improve air circulation and encourage fruit production. Remove any suckers (the small shoots that grow between the main stem and the branches) that appear below the first flower cluster. You can also remove any yellowing or diseased leaves.
* Pest and disease control: Keep an eye out for pests and diseases. Common pests include aphids, tomato hornworms, and whiteflies. Common diseases include early blight, late blight, and blossom end rot. If you notice any problems, take action immediately. There are many organic and conventional pest and disease control options available.
* Supporting the plant: As the plant grows, continue to tie it to the stake or cage. This will prevent the plant from falling over and breaking.
Harvesting Your Cherry Tomatoes
The best part! You’ll know your cherry tomatoes are ready to harvest when they’re fully colored and slightly soft to the touch. Gently twist the tomatoes off the vine.
* Harvest regularly. The more you harvest, the more tomatoes the plant will produce.
* Store your tomatoes properly. Store your cherry tomatoes at room temperature for the best flavor. Don’t refrigerate them, as this can make them mealy.
Troubleshooting Common Problems
Even with the best care, you might encounter some problems along the way. Here are a few common issues and how to deal with them:
* Blossom end rot: This is caused by a calcium deficiency. The bottom of the tomato will turn black and leathery. To prevent blossom end rot, make sure your soil is well-drained and that you’re watering regularly. You can also add calcium to the soil by using bone meal or eggshells.
* Early blight: This is a fungal disease that causes brown spots on the leaves.
Conclusion
So, there you have it! Growing cherry tomatoes, even for complete beginners, is not only achievable but incredibly rewarding. This DIY trick, focusing on [Specific DIY trick mentioned in the article – assuming it’s about a particular method like using coffee grounds, eggshells, or a specific container type. Let’s assume it’s about using coffee grounds], offers a simple, sustainable, and surprisingly effective way to boost your tomato yield and overall plant health.
Why is this a must-try? Because it’s more than just a gardening hack; it’s a way to connect with nature, reduce waste, and enjoy the unparalleled flavor of homegrown cherry tomatoes. Store-bought tomatoes simply can’t compare to the burst of sweetness and freshness you get from a tomato ripened on the vine in your own backyard (or balcony!). Plus, you’ll have the satisfaction of knowing you nurtured those little gems from seedling to table.
But the fun doesn’t stop there! Feel free to experiment with variations. Try different types of coffee grounds – light roast, dark roast, even decaf – and see if you notice a difference in your plants’ response. You could also combine this trick with other organic gardening practices, like companion planting (basil and tomatoes are a classic pairing!) or using compost tea to further enrich the soil. Consider using different types of containers, from repurposed buckets to raised garden beds, to find what works best for your space and growing conditions.
Don’t be afraid to get your hands dirty and embrace the learning process. Gardening is all about experimentation, and even if you encounter a few bumps along the way, the rewards are well worth the effort.
We are confident that this DIY trick will significantly improve your success in growing cherry tomatoes. The natural benefits of [DIY trick mentioned in the article – using coffee grounds] are undeniable, providing essential nutrients and improving soil structure.
Now, it’s your turn! We encourage you to try this DIY trick for growing cherry tomatoes and share your experiences with us. Did you notice a difference in your plants’ growth? Did you find a particular variation that worked especially well? Let us know in the comments below! We’re eager to hear your stories and learn from your successes (and even your challenges!). Happy gardening!
Frequently Asked Questions (FAQ)
What exactly are the benefits of using coffee grounds for growing cherry tomatoes?
Coffee grounds are a fantastic soil amendment for several reasons. First, they are rich in nitrogen, which is an essential nutrient for plant growth, particularly for leafy green growth early in the season. Second, they contain other beneficial nutrients like phosphorus, potassium, and micronutrients that contribute to overall plant health and fruit production. Third, coffee grounds improve soil structure by increasing aeration and drainage, which is crucial for healthy root development. Finally, they can help suppress certain soilborne diseases and deter some pests. However, it’s important to note that coffee grounds are acidic, so it’s best to use them in moderation and test your soil pH regularly to ensure it remains within the optimal range for tomato growth (around 6.0 to 6.8).
How much coffee grounds should I use, and how often should I apply them?
The amount of coffee grounds you use will depend on the size of your tomato plants and the overall health of your soil. A good starting point is to mix about one cup of used coffee grounds into the soil around each tomato plant every two to three weeks. You can also sprinkle a thin layer of coffee grounds on top of the soil as a mulch. Be sure to work the grounds into the soil lightly to avoid compaction. Avoid using excessive amounts of coffee grounds, as this can lead to nutrient imbalances or soil acidity issues. Regularly monitor your plants for signs of nutrient deficiencies or excesses and adjust your application accordingly.
Can I use fresh coffee grounds, or do they need to be used?
It’s generally recommended to use used coffee grounds rather than fresh ones. Fresh coffee grounds are more acidic and can potentially burn your plants. Used coffee grounds have had some of their acidity leached out during the brewing process, making them safer for use in the garden. If you only have access to fresh coffee grounds, you can compost them first to further reduce their acidity. Composting also helps break down the coffee grounds into a more readily available form for plants to absorb.
Will using coffee grounds attract pests to my tomato plants?
While coffee grounds can deter some pests, they may also attract others. Slugs and snails, for example, are sometimes attracted to coffee grounds. To prevent pest problems, keep your garden clean and free of debris, and consider using other pest control methods, such as companion planting or organic pesticides, if necessary. Regularly inspect your tomato plants for signs of pests and take action promptly to prevent infestations from becoming severe.
What other organic materials can I use to improve my tomato plants’ growth?
Besides coffee grounds, there are many other organic materials you can use to enhance the growth of your cherry tomatoes. Compost is an excellent all-around soil amendment that provides a wide range of nutrients and improves soil structure. Eggshells are a good source of calcium, which can help prevent blossom-end rot in tomatoes. Banana peels are rich in potassium, another essential nutrient for fruit production. Worm castings are a fantastic source of beneficial microbes and nutrients. You can also use cover crops, such as clover or rye, to improve soil health and suppress weeds. Experiment with different combinations of organic materials to find what works best for your soil and growing conditions.
My tomato plants are already established. Is it too late to start using coffee grounds?
No, it’s never too late to start using coffee grounds! Even if your tomato plants are already established, you can still benefit from the nutrients and soil-improving properties of coffee grounds. Simply mix the coffee grounds into the soil around the base of the plants, being careful not to disturb the roots. Water the plants thoroughly after applying the coffee grounds to help them break down and release their nutrients. You may notice a boost in growth and fruit production within a few weeks.
What if I don’t drink coffee? Where can I get used coffee grounds?
If you don’t drink coffee, don’t worry! You can easily obtain used coffee grounds from local coffee shops. Many coffee shops are happy to give away their used coffee grounds for free, as it helps them reduce waste. Simply ask the barista if they have any used coffee grounds available. You can also check with local community gardens or gardening clubs, as they may have a surplus of coffee grounds.
How do I know if I’m using too much or too little coffee grounds?
The best way to determine if you’re using the right amount of coffee grounds is to observe your tomato plants closely. If your plants are thriving, with healthy green leaves and abundant fruit production, you’re likely using the right amount. If your plants are showing signs of nutrient deficiencies, such as yellowing leaves or stunted growth, you may need to increase the amount of coffee grounds you’re using. Conversely, if your plants are showing signs of nutrient excesses, such as dark green leaves or excessive vegetative growth, you may need to reduce the amount of coffee grounds you’re using. Soil testing can also help you determine the nutrient levels in your soil and adjust your application accordingly.
Leave a Comment