
Grow Epazote Herb Indoors: Ever dreamt of having fresh, flavorful herbs right at your fingertips, no matter the season? I know I have! There’s something incredibly satisfying about snipping off a few leaves from your own plant to add that perfect touch to your culinary creations. And that’s where growing epazote herb indoors comes in! This often-overlooked herb, deeply rooted in Mexican and Central American cuisine, boasts a unique flavor profile – a blend of citrus, anise, and mint – that can elevate your dishes to a whole new level.
Epazote has been used for centuries, not just for its distinctive taste, but also for its medicinal properties. Traditionally, it’s been used to aid digestion, especially when cooking beans. But let’s be honest, sometimes life gets in the way of tending to an outdoor garden. That’s why I’m so excited to share these simple DIY tricks and hacks that will allow you to grow epazote herb indoors successfully, even if you have limited space or a less-than-green thumb.
Imagine adding a sprig of freshly grown epazote to your quesadillas, black beans, or even a simple salad. No more relying on dried herbs that lack that vibrant, fresh flavor! This guide will walk you through everything you need to know, from selecting the right pot and soil to providing the perfect amount of light and water. So, let’s get started and bring a little bit of Mexico into your home with this amazing herb!
Growing Epazote Indoors: A Beginner’s Guide
Hey there, fellow plant enthusiasts! Ever heard of epazote? It’s a fascinating herb with a unique flavor, often used in Mexican cuisine, especially with beans. And guess what? You can totally grow it indoors! I’ve been doing it for a while now, and I’m excited to share my secrets with you. It’s easier than you might think, and having fresh epazote on hand is a game-changer for your cooking.
Why Grow Epazote Indoors?
Before we dive in, let’s talk about why you might want to grow epazote indoors.
* Year-Round Supply: No matter the season, you’ll have fresh epazote whenever you need it.
* Control Over Growing Conditions: You can manage the light, temperature, and humidity, ensuring optimal growth.
* Pest Control: Indoor growing minimizes the risk of pests and diseases.
* Convenience: It’s right there in your kitchen or living room! No need to run to the store every time you need a sprig.
* It’s Fun!: Seriously, watching your plants thrive is incredibly rewarding.
What You’ll Need
Okay, let’s gather our supplies. This is what I use, and it works great for me:
* Epazote Seeds: You can find these online or at some nurseries specializing in herbs. Make sure they’re from a reputable source.
* Seed Starting Tray or Small Pots: These are perfect for getting your seeds started.
* Seed Starting Mix: This is a light, airy soil mix that’s ideal for delicate seedlings.
* Larger Pot (6-8 inches): Once your seedlings are big enough, they’ll need a bigger home.
* Potting Soil: A good quality potting mix that drains well.
* Grow Light (Optional but Recommended): Especially if you don’t have a sunny window.
* Watering Can or Spray Bottle: For gentle watering.
* Small Shovel or Trowel: For transplanting.
* Plant Food (Optional): A balanced liquid fertilizer can help boost growth.
Starting Your Epazote Seeds
This is where the magic begins! Getting your seeds to sprout is the first step to having your own indoor epazote garden.
1. Prepare Your Seed Starting Tray or Pots: Fill your seed starting tray or small pots with seed starting mix. Gently pat it down, but don’t pack it too tightly.
2. Sow the Seeds: Epazote seeds are tiny, so sprinkle them lightly over the surface of the soil. You don’t need to bury them too deep; just gently press them into the soil. I usually sow a few seeds per cell or pot to increase my chances of germination.
3. Water Gently: Use a spray bottle to mist the soil thoroughly. You want it to be moist but not soggy.
4. Cover and Wait: Cover the tray or pots with a clear plastic lid or plastic wrap to create a humid environment. This helps the seeds germinate.
5. Find a Warm Spot: Place the tray or pots in a warm location, ideally around 70-75°F (21-24°C). A heat mat can be helpful if your home is cooler.
6. Monitor and Water: Check the soil moisture daily. Keep it consistently moist, but don’t let it dry out. Remove the cover for a short time each day to allow for air circulation and prevent mold growth.
7. Wait for Germination: Epazote seeds typically germinate in 7-14 days. Be patient!
Transplanting Your Seedlings
Once your seedlings have developed a few sets of true leaves (the leaves that look like miniature versions of the adult plant’s leaves), it’s time to transplant them into larger pots.
1. Prepare Your Larger Pot: Fill your larger pot (6-8 inches) with potting soil. Make a small hole in the center, large enough to accommodate the seedling’s root ball.
2. Gently Remove the Seedling: Carefully remove the seedling from the seed starting tray or pot. Use a small trowel or your fingers to gently loosen the soil around the roots. Be careful not to damage the delicate roots.
3. Place the Seedling in the Pot: Place the seedling in the hole you made in the potting soil. Make sure the top of the root ball is level with the surrounding soil.
4. Fill in with Soil: Gently fill in the space around the seedling with potting soil. Pat the soil down lightly.
5. Water Thoroughly: Water the newly transplanted seedling thoroughly.
6. Provide Support (Optional): If your seedling is a bit leggy (tall and spindly), you can provide support with a small stake or chopstick.
Caring for Your Epazote Plant
Now that your epazote plant is in its new home, it’s time to provide it with the care it needs to thrive.
* Light: Epazote needs plenty of light, at least 6-8 hours of direct sunlight per day. If you don’t have a sunny window, use a grow light. I use a full-spectrum LED grow light, and it works wonders.
* Watering: Water your epazote plant when the top inch of soil feels dry to the touch. Avoid overwatering, as this can lead to root rot. Make sure your pot has drainage holes.
* Temperature: Epazote prefers temperatures between 60-80°F (15-27°C).
* Humidity: Epazote doesn’t need high humidity, but it appreciates a little extra moisture in the air. You can increase humidity by placing a tray of water near the plant or using a humidifier.
* Fertilizing: Feed your epazote plant every 2-4 weeks with a balanced liquid fertilizer. Follow the instructions on the fertilizer label. I usually dilute the fertilizer to half strength to avoid burning the roots.
* Pruning: Prune your epazote plant regularly to encourage bushier growth. Pinch off the tips of the stems to promote branching. You can also remove any yellowing or dead leaves.
* Pest Control: Keep an eye out for pests like aphids or spider mites. If you spot any, treat them with insecticidal soap or neem oil. I prefer to use organic pest control methods whenever possible.
Harvesting Your Epazote
The best part! You can start harvesting epazote leaves once the plant is about 6-8 inches tall.
1. Choose the Right Leaves: Select healthy, mature leaves to harvest.
2. Use Scissors or Pruning Shears: Use sharp scissors or pruning shears to cut the leaves from the stem.
3. Harvest Regularly: Harvest epazote leaves regularly to encourage continued growth.
4. Use Fresh or Dried: You can use epazote leaves fresh or dry them for later use. To dry them, hang them upside down in a cool, dry place or use a dehydrator.
Troubleshooting
Even with the best care, you might encounter some problems. Here are a few common issues and how to address them:
* Yellowing Leaves: This could be a sign of overwatering, underwatering, or nutrient deficiency. Check the soil moisture and adjust your watering accordingly. If the soil is consistently moist, you might be overwatering. If the soil is dry, you might be underwatering. If you suspect a nutrient deficiency, fertilize your plant with a balanced liquid fertilizer.
* Leggy Growth: This is usually caused by insufficient light. Move your plant to a brighter location or use a grow light.
* Pests: Inspect your plant regularly for pests. Treat any infestations with insecticidal soap or neem oil.
* Root Rot: This is caused by overwatering. Make sure your pot has drainage holes and allow the soil to dry out slightly between waterings. If the root rot is severe, you may need to repot your plant with fresh soil.
Using Your Homegrown Epazote
Now that you have a bountiful supply of fresh epazote, it’s time to put it to use!
* Beans: Epazote is traditionally used in bean dishes to help reduce gas. Add a few sprigs of epazote to your beans while they’re cooking.
* Soups and Stews: Add epazote to soups and stews for a unique flavor.
* Salsas: Use epazote in salsas for a fresh, herbaceous taste.
* Tacos and Quesadillas: Sprinkle chopped epazote on tacos and quesadillas.
* Teas: Epazote can also be used to make tea. Steep a few fresh or dried leaves in hot water for a few minutes.
Final Thoughts
Growing epazote indoors is a rewarding experience. With a little care and attention, you can
Conclusion
So, there you have it! Growing epazote herb indoors is not only achievable but also incredibly rewarding. Forget relying on potentially wilted or overpriced bunches from the grocery store. Imagine having a readily available supply of this unique and flavorful herb right at your fingertips, ready to elevate your favorite Mexican dishes.
This DIY trick is a must-try for several compelling reasons. First and foremost, it grants you complete control over the growing environment. You can ensure your epazote receives the optimal amount of light, water, and nutrients, resulting in a healthier and more flavorful herb. Secondly, it’s a sustainable and cost-effective solution. Once you’ve established your indoor epazote garden, you’ll have a continuous supply without the need for constant purchases. Finally, and perhaps most importantly, it’s a deeply satisfying experience. Nurturing a plant from seed to harvest is a rewarding process that connects you with nature and provides a sense of accomplishment.
But the fun doesn’t stop there! Feel free to experiment with different variations to tailor the growing process to your specific needs and preferences. For example, if you live in a particularly dry climate, consider using a self-watering planter to maintain consistent moisture levels. You could also try growing different varieties of epazote, each with its own subtle nuances in flavor. Some gardeners even incorporate companion planting techniques, growing epazote alongside other herbs like cilantro or oregano to create a thriving indoor herb garden ecosystem.
Don’t be afraid to get creative and personalize your epazote growing experience!
We’ve provided you with the knowledge and tools to successfully grow epazote herb indoors. Now, it’s your turn to put them into action. We wholeheartedly encourage you to give this DIY trick a try. Whether you’re a seasoned gardener or a complete beginner, we believe you’ll find the process both enjoyable and rewarding.
Once you’ve harvested your first batch of homegrown epazote, we’d love to hear about your experience! Share your tips, tricks, and photos in the comments below. Let’s build a community of indoor epazote enthusiasts and learn from each other. Your insights could be invaluable to other readers who are just starting their own indoor herb gardens. So, go ahead, embrace the challenge, and discover the joy of growing your own fresh, flavorful epazote!
Frequently Asked Questions (FAQ)
What exactly is epazote, and why should I grow it?
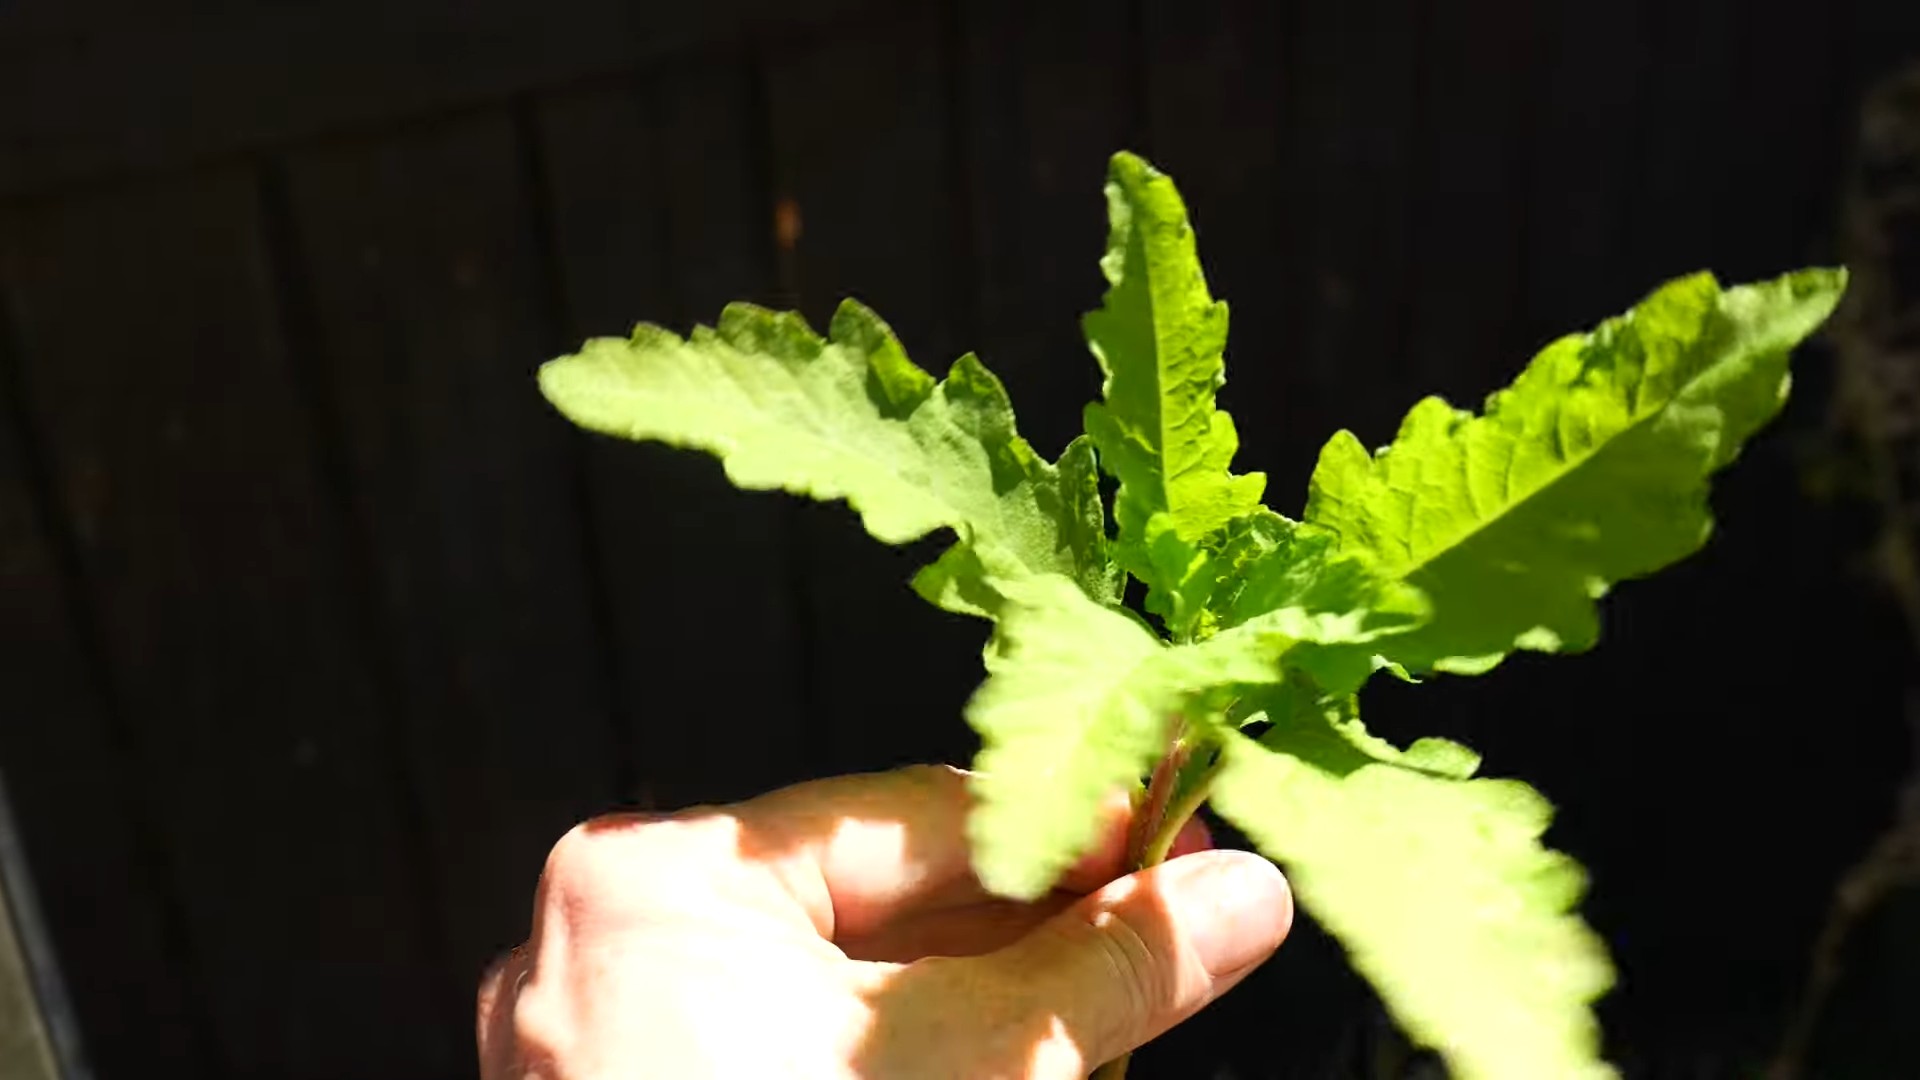
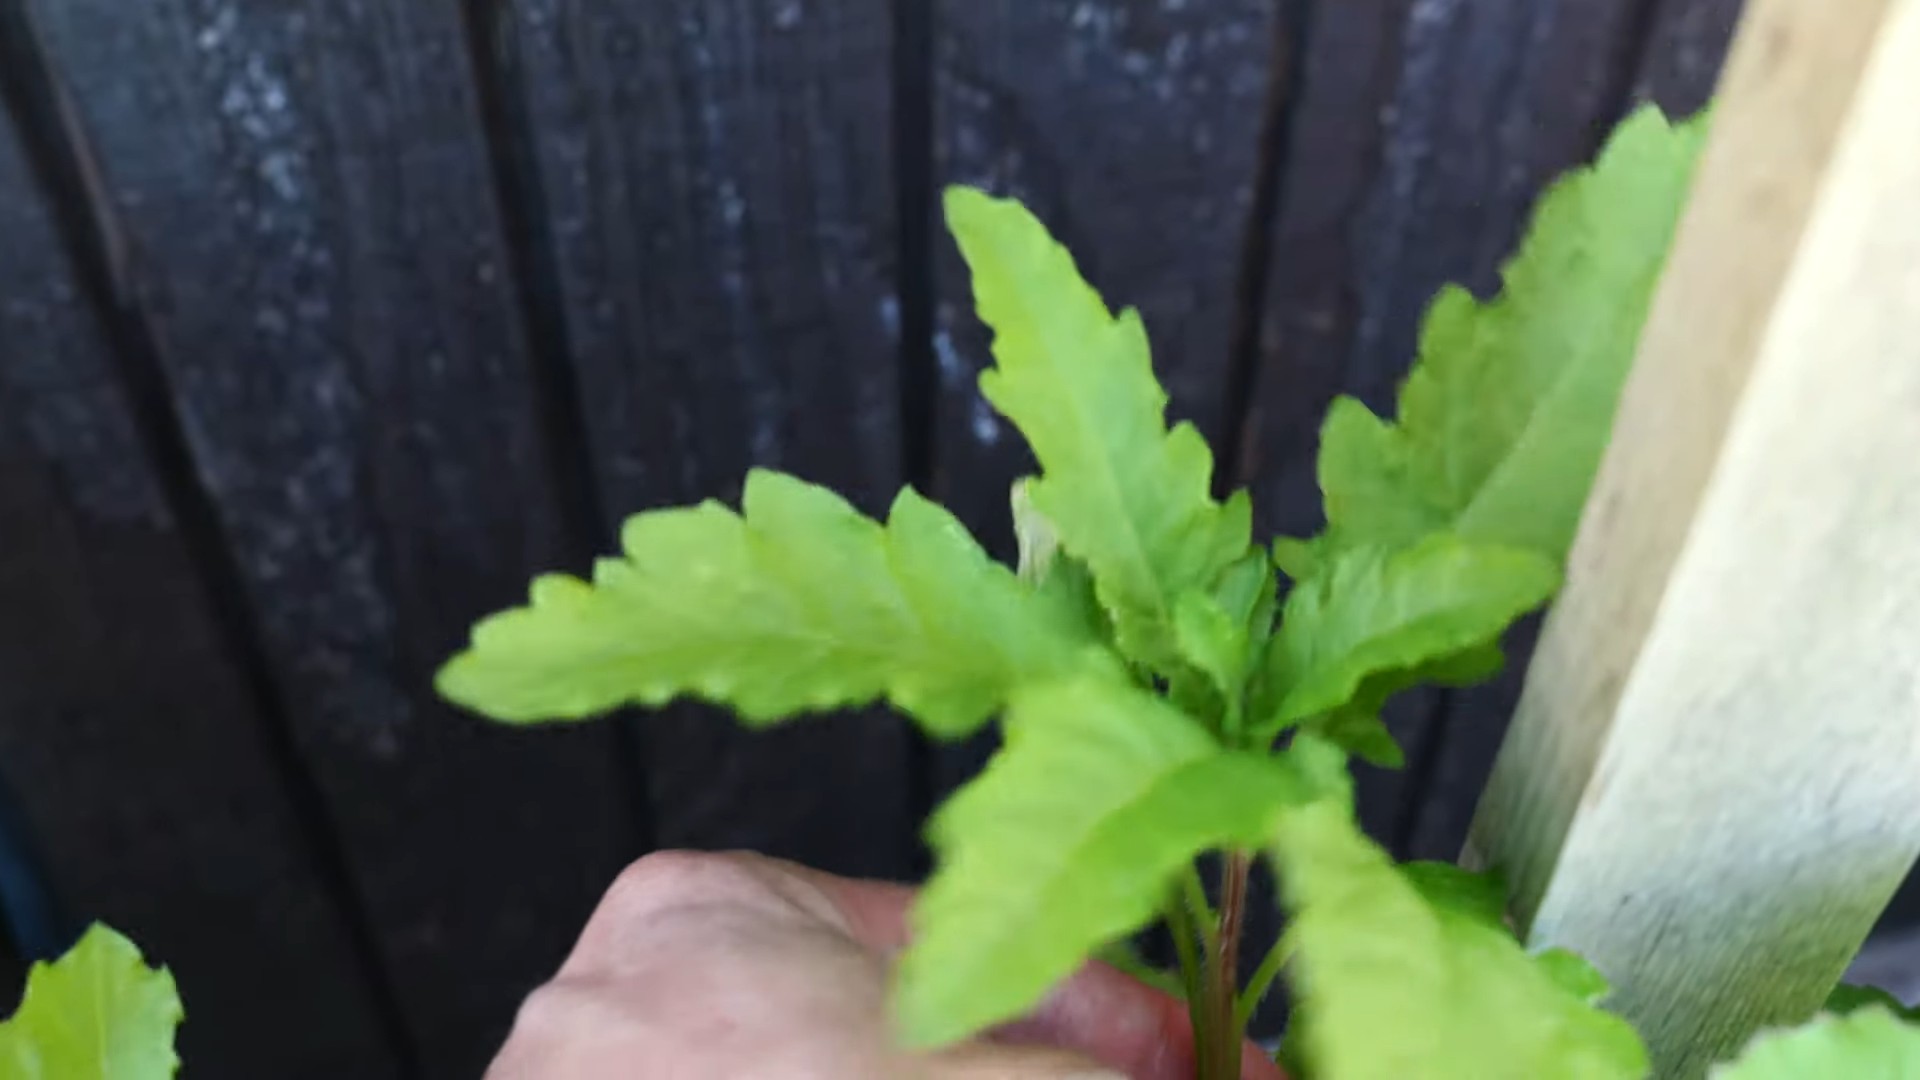
Epazote (Dysphania ambrosioides) is a pungent herb native to Central America and Mexico. It’s a staple ingredient in many traditional Mexican dishes, particularly bean dishes, where it’s believed to help reduce flatulence (hence its nickname, “wormseed”). Its flavor is often described as a combination of citrus, anise, and mint, with a slightly resinous undertone. Growing your own epazote ensures you have a fresh, readily available supply of this unique herb, allowing you to experiment with authentic Mexican cuisine and enjoy its potential digestive benefits. Plus, store-bought epazote can sometimes be difficult to find and may not be as fresh as homegrown.
How much sunlight does indoor epazote need?
Epazote thrives in bright, indirect sunlight. Aim for at least 6 hours of sunlight per day. If you don’t have a naturally sunny spot, consider using a grow light to supplement the natural light. Place the grow light about 6-12 inches above the plant for optimal growth. Rotate the plant regularly to ensure all sides receive adequate light. Signs of insufficient light include leggy growth (long, thin stems) and pale leaves.
What type of soil is best for growing epazote indoors?
Epazote prefers well-draining soil that is rich in organic matter. A good potting mix for herbs, amended with compost or aged manure, is ideal. Avoid heavy clay soils, as they can retain too much moisture and lead to root rot. You can also create your own potting mix by combining equal parts of potting soil, perlite, and compost. Ensure the pot has drainage holes to prevent waterlogging.
How often should I water my indoor epazote plant?
Water your epazote plant when the top inch of soil feels dry to the touch. Avoid overwatering, as this can lead to root rot. Water thoroughly until excess water drains out of the drainage holes. Reduce watering frequency during the winter months when the plant’s growth slows down. Check the soil moisture regularly and adjust your watering schedule accordingly.
How do I harvest epazote?
You can start harvesting epazote leaves once the plant is about 6-8 inches tall. Simply snip off the leaves as needed, using scissors or pruning shears. Avoid removing more than one-third of the plant at a time, as this can stress the plant and hinder its growth. Regular harvesting encourages the plant to produce more leaves. The flavor of epazote is strongest just before the plant flowers.
Does epazote need fertilizer?
Epazote is not a heavy feeder, but it can benefit from occasional fertilization. Use a balanced liquid fertilizer diluted to half strength every 2-3 weeks during the growing season (spring and summer). Avoid over-fertilizing, as this can lead to leggy growth and a less flavorful herb. You can also amend the soil with compost or aged manure to provide a slow-release source of nutrients.
Are there any pests or diseases that affect epazote?
Epazote is generally resistant to pests and diseases, but it can occasionally be affected by aphids, spider mites, or whiteflies. Inspect your plant regularly for signs of infestation. If you notice any pests, treat them with insecticidal soap or neem oil. Overwatering can lead to root rot, so ensure the soil is well-draining and avoid letting the plant sit in standing water. Good air circulation can also help prevent fungal diseases.
Can I grow epazote from seed indoors?
Yes, you can easily grow epazote from seed indoors. Start the seeds indoors 6-8 weeks before the last expected frost. Sow the seeds thinly in a seed-starting tray filled with moist seed-starting mix. Cover the seeds lightly with soil and keep them moist. Germination typically occurs within 7-14 days. Once the seedlings have developed a few sets of true leaves, transplant them into individual pots.
Is epazote safe to consume?
Epazote is generally safe to consume in moderation as a culinary herb. However, it contains ascaridole, a compound that can be toxic in large doses. Pregnant women and individuals with liver or kidney problems should avoid consuming epazote. Always use epazote sparingly and consult with a healthcare professional if you have any concerns.
My epazote plant is flowering. Should I do anything?
Once epazote flowers, the leaves can become more bitter. If you prefer a milder flavor, pinch off the flower buds as soon as they appear. You can also allow the plant to flower and collect the seeds for future planting. However, be aware that the plant may become less productive after flowering.

Leave a Comment