
Growing Sweet Potatoes can seem daunting, but trust me, with a few clever tricks and a little DIY spirit, you can harvest a bounty of these delicious and nutritious tubers right in your own backyard! Forget those bland, store-bought sweet potatoes – imagine sinking your teeth into a homegrown, earthy-sweet masterpiece.
For centuries, sweet potatoes have been a staple in diets around the world, with roots tracing back to Central and South America. They’ve been revered not only for their taste but also for their incredible nutritional value, packed with vitamins, minerals, and antioxidants. But why rely on grocery stores when you can cultivate your own sweet potato patch, tailored to your taste and grown with love?
I know what you’re thinking: “I don’t have a green thumb!” Or maybe, “I don’t have enough space!” That’s where these DIY tricks come in. I’m going to share some simple, effective methods that will help you overcome common challenges and maximize your sweet potato yield, even in small spaces. From sprouting slips to choosing the right soil, I’ll guide you through every step of the process. So, get ready to roll up your sleeves and discover the joy of growing sweet potatoes – it’s easier than you think, and the rewards are incredibly sweet!
DIY: Growing Sweet Potatoes Like a Pro (Even if You’re a Beginner!)
Okay, so you want to grow sweet potatoes? Awesome! They’re delicious, nutritious, and surprisingly easy to cultivate once you get the hang of it. I’m going to walk you through everything you need to know, from sprouting your own slips (the little shoots that become your plants) to harvesting a bountiful crop. Let’s get started!
Getting Started: Sprouting Your Sweet Potato Slips
This is probably the most crucial part, and it needs to happen well before planting season. We’re essentially tricking the sweet potato into thinking it’s spring and time to grow.
* Timing is Key: Start this process about 6-8 weeks before your last expected frost. This gives the slips enough time to develop strong roots.
* Choosing Your Sweet Potato: Select organic sweet potatoes if possible. Non-organic ones are sometimes treated to prevent sprouting. Look for firm, healthy potatoes without any soft spots or blemishes. You can use sweet potatoes from the grocery store, but organic is always a safer bet.
* The Water Method: This is the classic and, in my opinion, easiest method.
* The Soil Method: This method involves burying the sweet potato in soil.
Step-by-Step: Water Method for Sprouting Slips
1. Gather Your Supplies: You’ll need a sweet potato (or several!), a wide-mouthed jar or glass, toothpicks, and water.
2. Prepare the Sweet Potato: Wash the sweet potato thoroughly to remove any dirt.
3. Insert Toothpicks: Insert 3-4 toothpicks evenly spaced around the middle of the sweet potato. These will act as supports to suspend the potato in the jar.
4. Fill the Jar with Water: Fill the jar with enough water so that the bottom third to half of the sweet potato is submerged.
5. Position the Sweet Potato: Carefully balance the sweet potato on the rim of the jar, using the toothpicks to hold it in place. Make sure the bottom end (the end that was attached to the plant) is submerged in water.
6. Find a Sunny Spot: Place the jar in a warm, sunny location. A windowsill is perfect.
7. Maintain Water Level: Check the water level daily and add more as needed to keep the bottom of the sweet potato submerged.
8. Wait and Watch: Be patient! It can take several weeks for the sweet potato to start sprouting. You’ll first see roots emerging from the bottom, followed by sprouts (slips) appearing on the top.
9. Harvesting the Slips: Once the slips are 6-8 inches long and have several leaves, they’re ready to be harvested. Gently twist or cut the slips off the sweet potato, being careful not to damage the roots.
10. Rooting the Slips: Place the harvested slips in a glass of water, making sure the bottom inch or two is submerged. Change the water every day or two. Within a week or so, the slips will develop their own roots.
Step-by-Step: Soil Method for Sprouting Slips
1. Gather Your Supplies: You’ll need a sweet potato (or several!), a container (like a seedling tray or pot), potting soil, and water.
2. Prepare the Container: Fill the container with potting soil, leaving about an inch of space at the top.
3. Bury the Sweet Potato: Lay the sweet potato horizontally on top of the soil and gently cover it with more soil, leaving the top inch or so exposed.
4. Water Thoroughly: Water the soil thoroughly until it’s evenly moist.
5. Find a Warm Spot: Place the container in a warm location, ideally around 75-85°F (24-29°C). You can use a heat mat to help maintain the temperature.
6. Keep the Soil Moist: Check the soil moisture regularly and water as needed to keep it consistently moist but not soggy.
7. Wait and Watch: Similar to the water method, it will take several weeks for the sweet potato to start sprouting.
8. Harvesting the Slips: Once the slips are 6-8 inches long and have several leaves, carefully dig them up from the soil, trying to keep as much of the root system intact as possible.
9. Planting the Slips: These slips are now ready to be planted directly into your garden.
Preparing Your Garden Bed
Sweet potatoes are sun-loving plants and need well-drained soil. Here’s how to get your garden bed ready:
* Sunlight: Choose a location that receives at least 6-8 hours of direct sunlight per day.
* Soil: Sweet potatoes prefer loose, sandy loam soil. Heavy clay soil can lead to misshapen potatoes. If you have clay soil, amend it with plenty of compost and sand to improve drainage.
* Soil pH: The ideal soil pH for sweet potatoes is between 5.5 and 6.5. You can test your soil pH with a soil testing kit.
* Fertilizing: Sweet potatoes don’t need a lot of nitrogen, as this can encourage leafy growth at the expense of tuber development. Instead, focus on phosphorus and potassium. Amend the soil with compost, bone meal, and wood ash before planting.
* Creating Ridges: Sweet potatoes grow best on raised ridges or mounds. This improves drainage and makes harvesting easier. Create ridges that are about 8-12 inches high and 12-18 inches wide.
Step-by-Step: Preparing the Garden Bed
1. Clear the Area: Remove any weeds, rocks, or debris from the planting area.
2. Amend the Soil: Dig in compost, bone meal, and wood ash to improve soil fertility and drainage.
3. Test the Soil pH: Use a soil testing kit to check the pH and adjust as needed.
4. Create Ridges: Use a hoe or shovel to create raised ridges or mounds in the planting area. Space the ridges about 3-4 feet apart.
5. Water the Soil: Water the soil thoroughly to moisten it before planting.
Planting Your Sweet Potato Slips
Now for the fun part – getting those slips into the ground!
* Timing: Plant your sweet potato slips after the last frost, when the soil has warmed up to at least 60°F (15°C).
* Spacing: Space the slips about 12-18 inches apart on the ridges.
* Planting Depth: Plant the slips deep enough so that only the top leaves are above the soil.
Step-by-Step: Planting the Slips
1. Dig a Hole: Dig a hole in the top of the ridge that is deep enough to accommodate the roots of the slip.
2. Plant the Slip: Gently place the slip in the hole, making sure the roots are spread out.
3. Cover the Roots: Cover the roots with soil and gently firm the soil around the base of the slip.
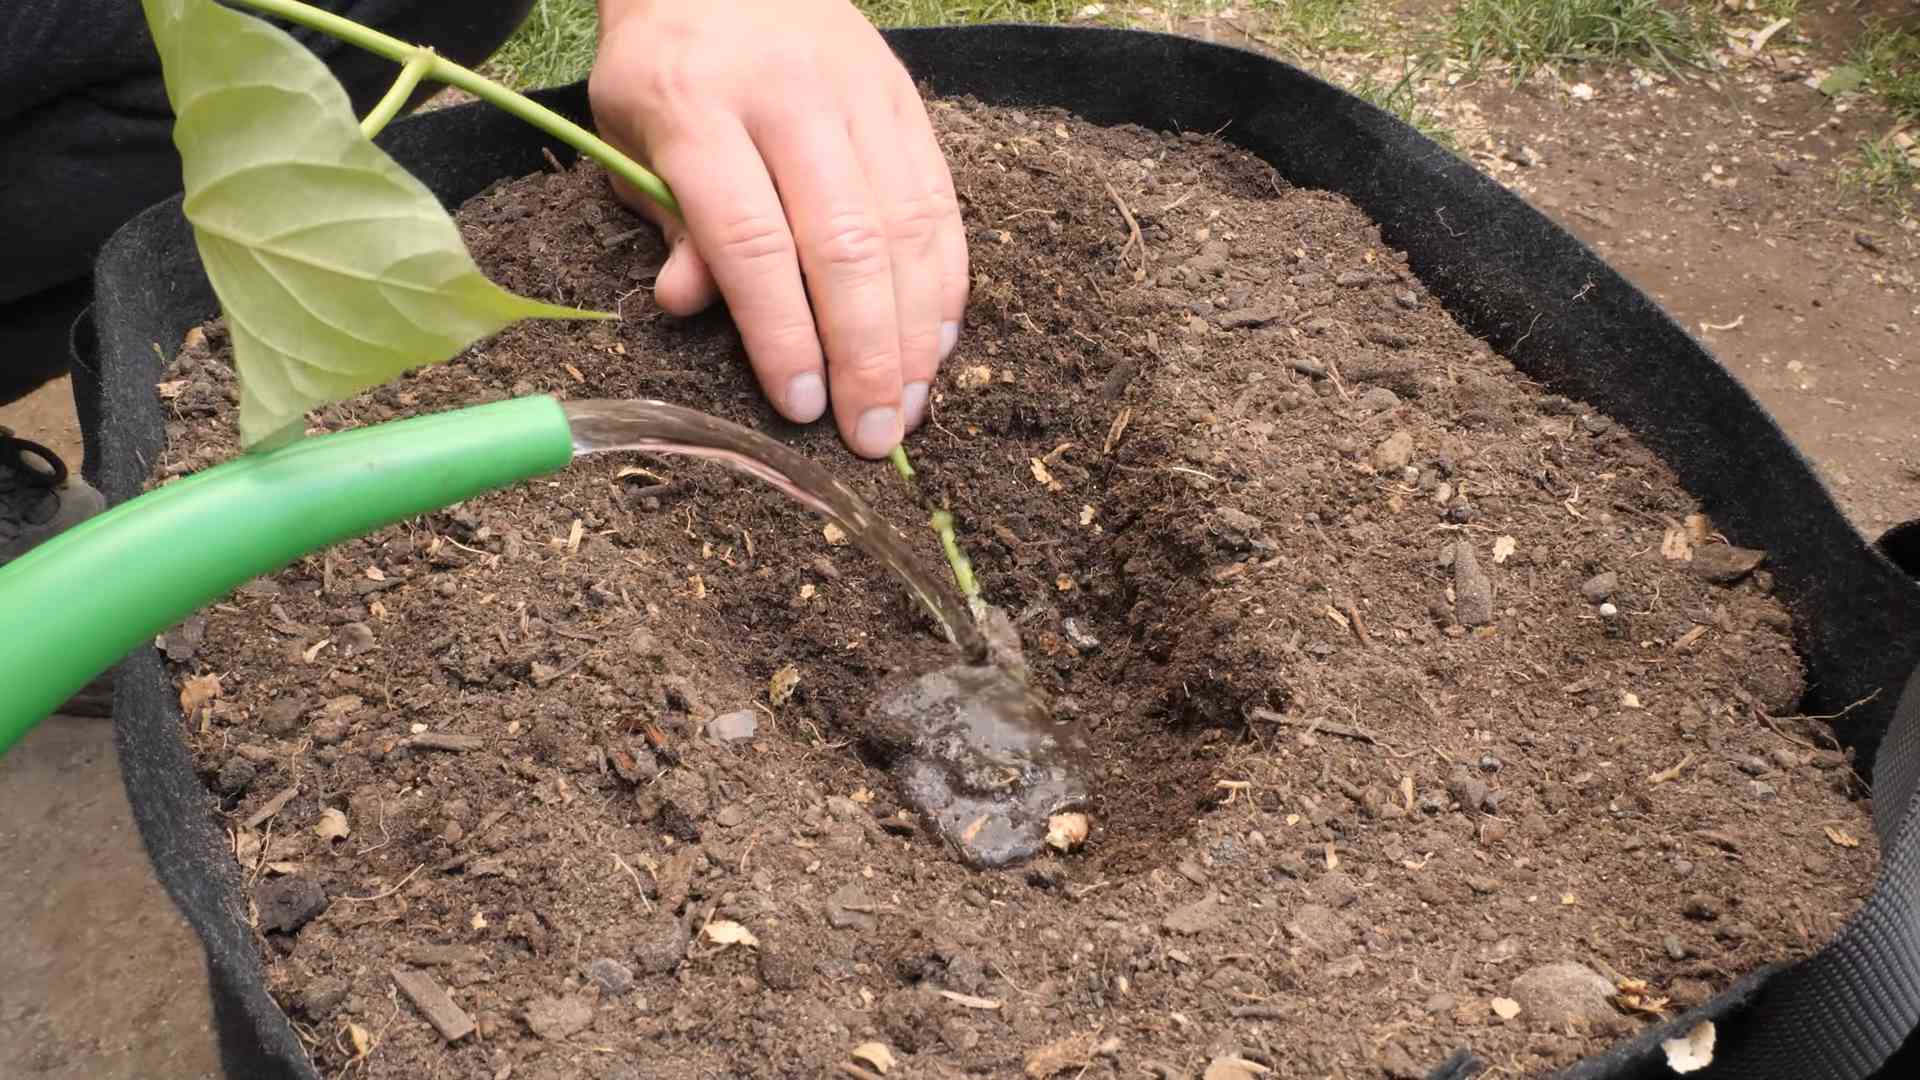
4. Water Thoroughly: Water the newly planted slips thoroughly to help them establish.
5. Mulch (Optional): Apply a layer of mulch around the plants to help retain moisture and suppress weeds. Straw, hay, or wood chips work well.
Caring for Your Sweet Potato Plants
Once your sweet potato plants are in the ground, they’ll need regular care to thrive.
* Watering: Water regularly, especially dur
Okay, so you want to grow sweet potatoes? Awesome! They’re delicious, nutritious, and surprisingly easy to cultivate once you get the hang of it. I’m going to walk you through everything you need to know, from sprouting your own slips (the little shoots that become your plants) to harvesting a bountiful crop. Let’s get started!
Getting Started: Sprouting Your Sweet Potato Slips
This is probably the most crucial part, and it needs to happen well before planting season. We’re essentially tricking the sweet potato into thinking it’s spring and time to grow.
* Timing is Key: Start this process about 6-8 weeks before your last expected frost. This gives the slips enough time to develop strong roots.
* Choosing Your Sweet Potato: Select organic sweet potatoes if possible. Non-organic ones are sometimes treated to prevent sprouting. Look for firm, healthy potatoes without any soft spots or blemishes. You can use sweet potatoes from the grocery store, but organic is always a safer bet.
* The Water Method: This is the classic and, in my opinion, easiest method.
* The Soil Method: This method involves burying the sweet potato in soil.
Step-by-Step: Water Method for Sprouting Slips
1. Gather Your Supplies: You’ll need a sweet potato (or several!), a wide-mouthed jar or glass, toothpicks, and water.
2. Prepare the Sweet Potato: Wash the sweet potato thoroughly to remove any dirt.
3. Insert Toothpicks: Insert 3-4 toothpicks evenly spaced around the middle of the sweet potato. These will act as supports to suspend the potato in the jar.
4. Fill the Jar with Water: Fill the jar with enough water so that the bottom third to half of the sweet potato is submerged.
5. Position the Sweet Potato: Carefully balance the sweet potato on the rim of the jar, using the toothpicks to hold it in place. Make sure the bottom end (the end that was attached to the plant) is submerged in water.
6. Find a Sunny Spot: Place the jar in a warm, sunny location. A windowsill is perfect.
7. Maintain Water Level: Check the water level daily and add more as needed to keep the bottom of the sweet potato submerged.
8. Wait and Watch: Be patient! It can take several weeks for the sweet potato to start sprouting. You’ll first see roots emerging from the bottom, followed by sprouts (slips) appearing on the top.
9. Harvesting the Slips: Once the slips are 6-8 inches long and have several leaves, they’re ready to be harvested. Gently twist or cut the slips off the sweet potato, being careful not to damage the roots.
10. Rooting the Slips: Place the harvested slips in a glass of water, making sure the bottom inch or two is submerged. Change the water every day or two. Within a week or so, the slips will develop their own roots.
Step-by-Step: Soil Method for Sprouting Slips
1. Gather Your Supplies: You’ll need a sweet potato (or several!), a container (like a seedling tray or pot), potting soil, and water.
2. Prepare the Container: Fill the container with potting soil, leaving about an inch of space at the top.
3. Bury the Sweet Potato: Lay the sweet potato horizontally on top of the soil and gently cover it with more soil, leaving the top inch or so exposed.
4. Water Thoroughly: Water the soil thoroughly until it’s evenly moist.
5. Find a Warm Spot: Place the container in a warm location, ideally around 75-85°F (24-29°C). You can use a heat mat to help maintain the temperature.
6. Keep the Soil Moist: Check the soil moisture regularly and water as needed to keep it consistently moist but not soggy.
7. Wait and Watch: Similar to the water method, it will take several weeks for the sweet potato to start sprouting.
8. Harvesting the Slips: Once the slips are 6-8 inches long and have several leaves, carefully dig them up from the soil, trying to keep as much of the root system intact as possible.
9. Planting the Slips: These slips are now ready to be planted directly into your garden.
Preparing Your Garden Bed
Sweet potatoes are sun-loving plants and need well-drained soil. Here’s how to get your garden bed ready:
* Sunlight: Choose a location that receives at least 6-8 hours of direct sunlight per day.
* Soil: Sweet potatoes prefer loose, sandy loam soil. Heavy clay soil can lead to misshapen potatoes. If you have clay soil, amend it with plenty of compost and sand to improve drainage.
* Soil pH: The ideal soil pH for sweet potatoes is between 5.5 and 6.5. You can test your soil pH with a soil testing kit.
* Fertilizing: Sweet potatoes don’t need a lot of nitrogen, as this can encourage leafy growth at the expense of tuber development. Instead, focus on phosphorus and potassium. Amend the soil with compost, bone meal, and wood ash before planting.
* Creating Ridges: Sweet potatoes grow best on raised ridges or mounds. This improves drainage and makes harvesting easier. Create ridges that are about 8-12 inches high and 12-18 inches wide.
Step-by-Step: Preparing the Garden Bed
1. Clear the Area: Remove any weeds, rocks, or debris from the planting area.
2. Amend the Soil: Dig in compost, bone meal, and wood ash to improve soil fertility and drainage.
3. Test the Soil pH: Use a soil testing kit to check the pH and adjust as needed.
4. Create Ridges: Use a hoe or shovel to create raised ridges or mounds in the planting area. Space the ridges about 3-4 feet apart.
5. Water the Soil: Water the soil thoroughly to moisten it before planting.
Planting Your Sweet Potato Slips
Now for the fun part – getting those slips into the ground!
* Timing: Plant your sweet potato slips after the last frost, when the soil has warmed up to at least 60°F (15°C).
* Spacing: Space the slips about 12-18 inches apart on the ridges.
* Planting Depth: Plant the slips deep enough so that only the top leaves are above the soil.
Step-by-Step: Planting the Slips
1. Dig a Hole: Dig a hole in the top of the ridge that is deep enough to accommodate the roots of the slip.
2. Plant the Slip: Gently place the slip in the hole, making sure the roots are spread out.
3. Cover the Roots: Cover the roots with soil and gently firm the soil around the base of the slip.
4. Water Thoroughly: Water the newly planted slips thoroughly to help them establish.
5. Mulch (Optional): Apply a layer of mulch around the plants to help retain moisture and suppress weeds. Straw, hay, or wood chips work well.
Caring for Your Sweet Potato Plants
Once your sweet potato plants are in the ground, they’ll need regular care to thrive.
* Watering: Water regularly, especially during dry periods. Sweet potatoes need about 1 inch of water per week.
* Weeding: Keep the garden bed free of weeds, as they can compete with the sweet potatoes for nutrients and water.
* Fertilizing: Side-dress the plants with a balanced fertilizer about 4-6 weeks after planting.
* Pest Control: Sweet potatoes are relatively pest-resistant, but watch out for common garden pests like aphids and flea beetles. Treat infestations with insecticidal soap or neem oil.
* Vine Training (Optional): Sweet potato vines can spread quite a bit. If you have limited space, you can train the vines to grow up a trellis or fence.
Step-by-Step: Caring for the Plants
1. Water Regularly: Water deeply and regularly, especially during hot, dry weather.
2. Weed Regularly: Remove weeds by hand or with a hoe.
3. Fertilize (Optional): Side-dress with a balanced fertilizer according to package directions.
4. Monitor for Pests: Check the plants regularly for signs of pests and treat as needed.
5. Train Vines (Optional): If desired, train the vines to grow up a trellis or fence.
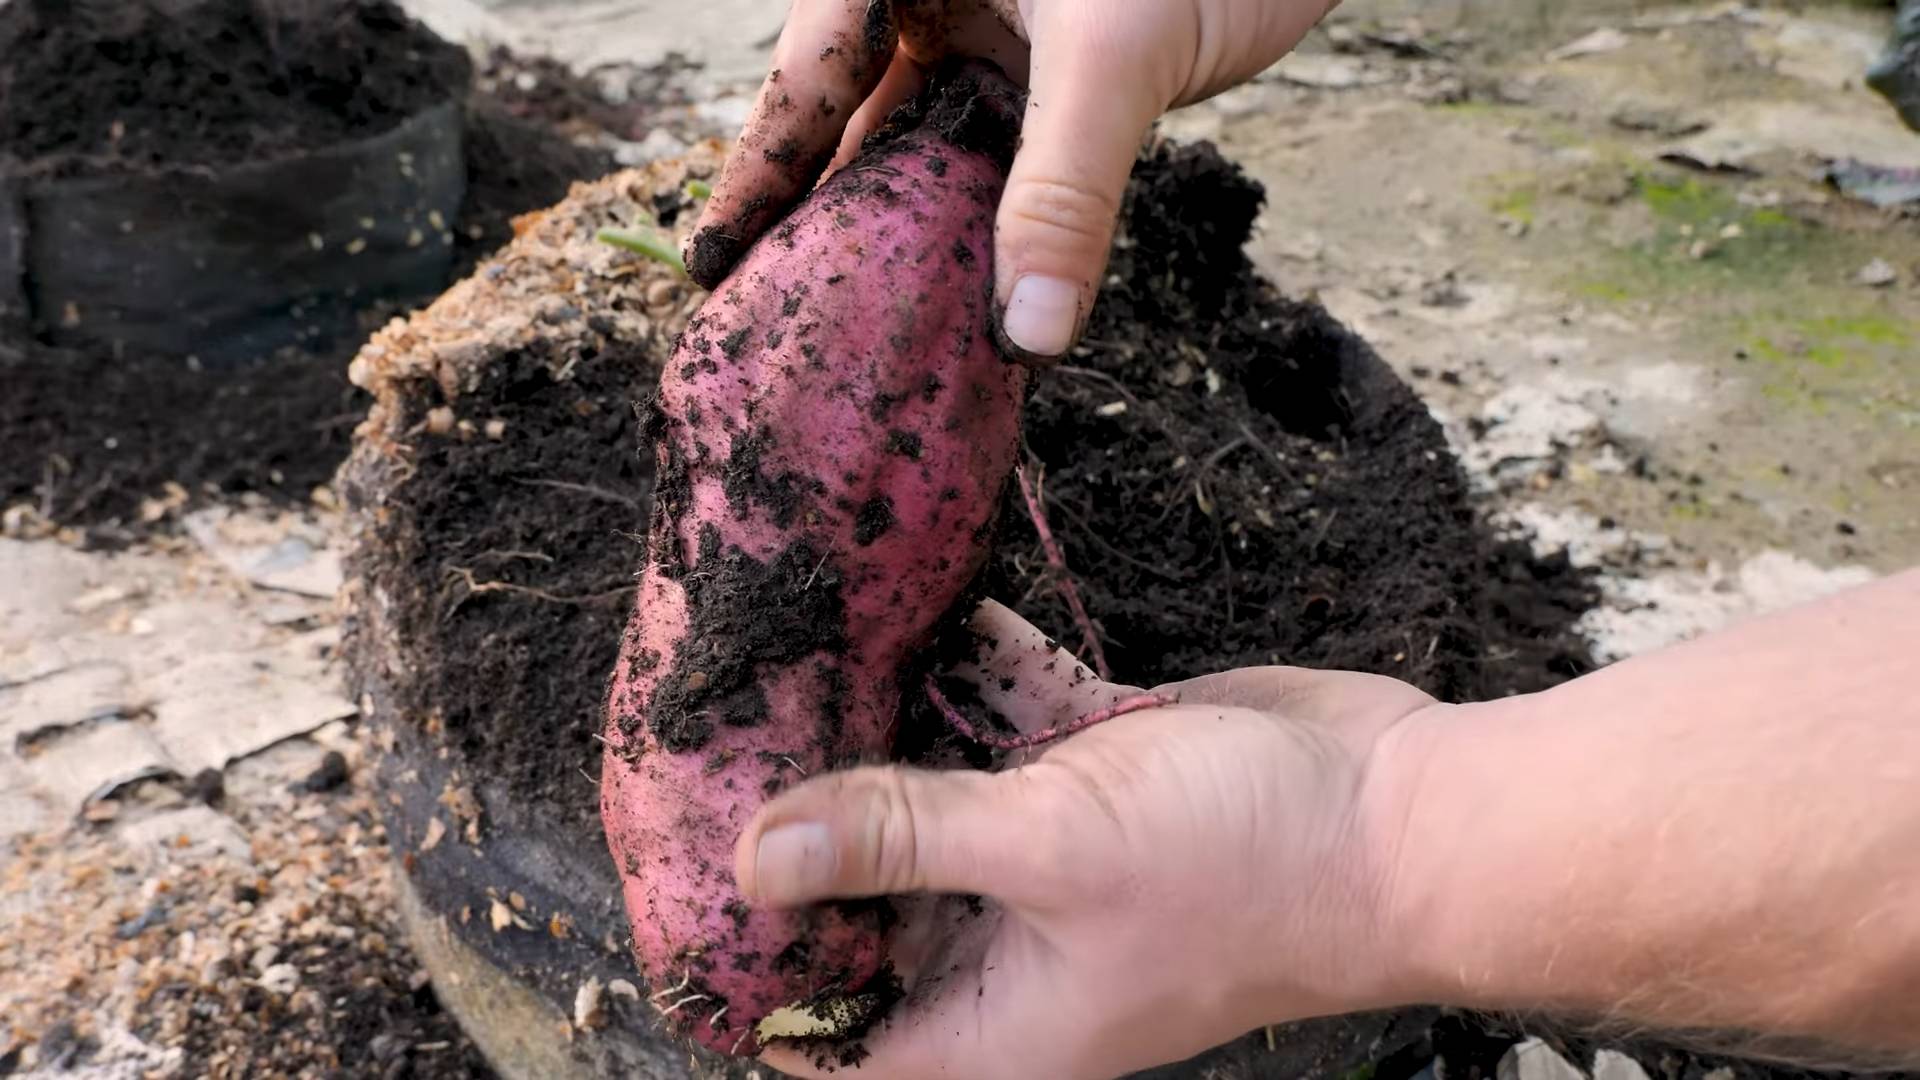
Harvesting Your Sweet Potatoes
This is the
Conclusion
So, there you have it! Growing sweet potatoes at home, while it might seem daunting at first, is surprisingly achievable and incredibly rewarding. We’ve walked you through the process, from sprouting slips to harvesting your own delicious, homegrown sweet potatoes. But why should you bother with this DIY project?
Simply put, the taste of a freshly harvested, homegrown sweet potato is unparalleled. The sweetness is more pronounced, the texture is smoother, and you have the satisfaction of knowing exactly where your food came from and how it was grown. Beyond the superior flavor, growing your own sweet potatoes allows you to cultivate varieties that you might not find in your local grocery store. Imagine enjoying the rich purple flesh of a ‘Stokes Purple’ sweet potato or the nutty flavor of a ‘Japanese’ variety – the possibilities are endless!
This DIY trick isn’t just about the taste; it’s about control. You control the soil, the water, and the nutrients, ensuring that your sweet potatoes are grown without harmful pesticides or herbicides. You’re contributing to a more sustainable food system and reducing your carbon footprint. Plus, the process of nurturing a plant from slip to harvest is incredibly therapeutic and connects you to the natural world in a meaningful way.
Ready to take your sweet potato game to the next level? Consider experimenting with different growing mediums. While we focused on traditional soil, you can also try growing sweet potatoes in raised beds, containers, or even hydroponically. Each method offers its own unique advantages and challenges. For example, raised beds can improve drainage and soil warmth, while containers allow you to move your plants to optimal sunlight locations.
Another variation to explore is companion planting. Sweet potatoes thrive when planted alongside certain other vegetables and herbs. Beans, peas, and rosemary are excellent companions that can help deter pests and improve soil health. Experiment with different combinations to see what works best in your garden.
Don’t be afraid to get your hands dirty and embrace the learning process. Growing sweet potatoes is a journey, and there will be successes and setbacks along the way. The key is to be patient, observant, and willing to adapt your approach as needed.
We wholeheartedly encourage you to try this DIY trick for growing sweet potatoes. It’s a fun, educational, and ultimately delicious experience. And most importantly, we want to hear about your adventures! Share your photos, tips, and stories with us in the comments below. Let’s build a community of sweet potato enthusiasts and learn from each other’s experiences. Happy growing!
Frequently Asked Questions (FAQ)
What are sweet potato slips, and where can I get them?
Sweet potato slips are sprouts that grow from a mature sweet potato. They are essentially baby sweet potato plants that are ready to be transplanted into the garden. You can purchase slips from nurseries, garden centers, or online retailers. Alternatively, you can easily grow your own slips by suspending a sweet potato in water or partially burying it in moist soil. Within a few weeks, sprouts will emerge from the potato, and these can be carefully removed and planted.
How much sunlight do sweet potatoes need?
Sweet potatoes are sun-loving plants and require at least 6-8 hours of direct sunlight per day to thrive. Choose a planting location that receives ample sunlight throughout the day. If you’re growing sweet potatoes in containers, you can move them around to ensure they get enough sun. Insufficient sunlight can result in smaller yields and less flavorful sweet potatoes.
What type of soil is best for growing sweet potatoes?
Sweet potatoes prefer well-drained, sandy loam soil that is rich in organic matter. Avoid heavy clay soils, as they can become waterlogged and hinder root development. Before planting, amend your soil with compost or other organic materials to improve drainage and fertility. A slightly acidic soil pH of 6.0 to 6.5 is ideal for sweet potato growth.
How often should I water my sweet potato plants?
Water sweet potato plants regularly, especially during dry periods. Keep the soil consistently moist, but avoid overwatering, which can lead to root rot. Water deeply at the base of the plants, rather than overhead, to prevent fungal diseases. As the sweet potatoes mature, you can gradually reduce watering to encourage tuber development.
When is the best time to harvest sweet potatoes?
Sweet potatoes are typically ready to harvest about 90-120 days after planting, depending on the variety and growing conditions. The best time to harvest is before the first frost, as frost can damage the tubers. Look for signs of maturity, such as yellowing leaves and a slight cracking of the soil around the base of the plants. Carefully dig up the sweet potatoes, being careful not to damage them.
How do I cure sweet potatoes after harvesting?
Curing sweet potatoes is essential for improving their flavor and storage life. After harvesting, gently brush off any excess soil and allow the sweet potatoes to dry in a warm, humid place (80-85°F and 85-90% humidity) for about 7-10 days. This process allows the skins to harden and any minor cuts or bruises to heal. After curing, store the sweet potatoes in a cool, dry, and well-ventilated place (55-60°F) for several months.
What are some common pests and diseases that affect sweet potatoes?
Sweet potatoes can be susceptible to various pests and diseases, including sweet potato weevils, wireworms, flea beetles, and fungal diseases like stem rot and black rot. Regularly inspect your plants for signs of infestation or disease. Use organic pest control methods, such as insecticidal soap or neem oil, to control pests. Ensure good soil drainage and air circulation to prevent fungal diseases. Crop rotation can also help reduce the risk of soilborne diseases.
Can I grow sweet potatoes in containers?
Yes, sweet potatoes can be successfully grown in containers, provided they are large enough to accommodate the developing tubers. Choose a container that is at least 12-18 inches deep and wide. Fill the container with well-drained potting mix and plant your sweet potato slips. Water regularly and fertilize as needed. Container-grown sweet potatoes may require more frequent watering and fertilization than those grown in the ground.
What are some good companion plants for sweet potatoes?
Several plants can benefit sweet potatoes when grown nearby. Beans and peas fix nitrogen in the soil, which can improve sweet potato growth. Rosemary repels certain pests, while thyme can help prevent fungal diseases. Marigolds are also effective at deterring nematodes, which can damage sweet potato roots. Avoid planting sweet potatoes near fennel, as it can inhibit their growth.
How can I improve the yield of my sweet potato crop?
To maximize your sweet potato yield, ensure that your plants receive adequate sunlight, water, and nutrients. Amend your soil with compost or other organic materials before planting. Fertilize regularly with a balanced fertilizer. Control pests and diseases promptly. Consider using row covers to protect your plants from early frosts. And finally, choose a high-yielding sweet potato variety that is well-suited to your climate.


Leave a Comment