
Grow Cherry Tomatoes Home, and unlock a world of fresh, flavorful goodness right at your fingertips! Imagine plucking sun-ripened, juicy cherry tomatoes straight from your own garden – a taste far superior to anything you can find in a store. For centuries, home gardening has been a source of sustenance and joy, connecting us to the earth and providing a sense of accomplishment. From ancient Roman courtyards to modern-day balconies, the desire to cultivate our own food has remained a constant.
But let’s be honest, sometimes gardening can feel a little intimidating, right? That’s where these DIY tricks and hacks come in! I’m here to share some simple, effective methods to help you grow cherry tomatoes home successfully, even if you’re a complete beginner. We’ll tackle common challenges like pests, watering, and maximizing your yield.
In today’s fast-paced world, knowing where your food comes from and having control over its quality is more important than ever. Plus, there’s nothing quite like the satisfaction of nurturing a plant from seed to harvest. So, get ready to roll up your sleeves, get your hands dirty, and discover the joy of growing your own delicious cherry tomatoes!
Growing Cherry Tomatoes at Home: A Beginner’s Guide
Hey there, fellow gardening enthusiasts! I’m so excited to share my tried-and-true method for growing delicious cherry tomatoes right in your own backyard (or even on your balcony!). Trust me, there’s nothing quite like popping a sun-warmed, homegrown cherry tomato into your mouth. It’s a burst of summer flavor! This guide will walk you through every step, from choosing the right variety to harvesting your bounty. Let’s get started!
Choosing the Right Cherry Tomato Variety
Before we even think about soil, let’s talk tomatoes! There are tons of cherry tomato varieties out there, each with its own unique flavor, size, and growth habit. Here’s a quick rundown of some popular choices:
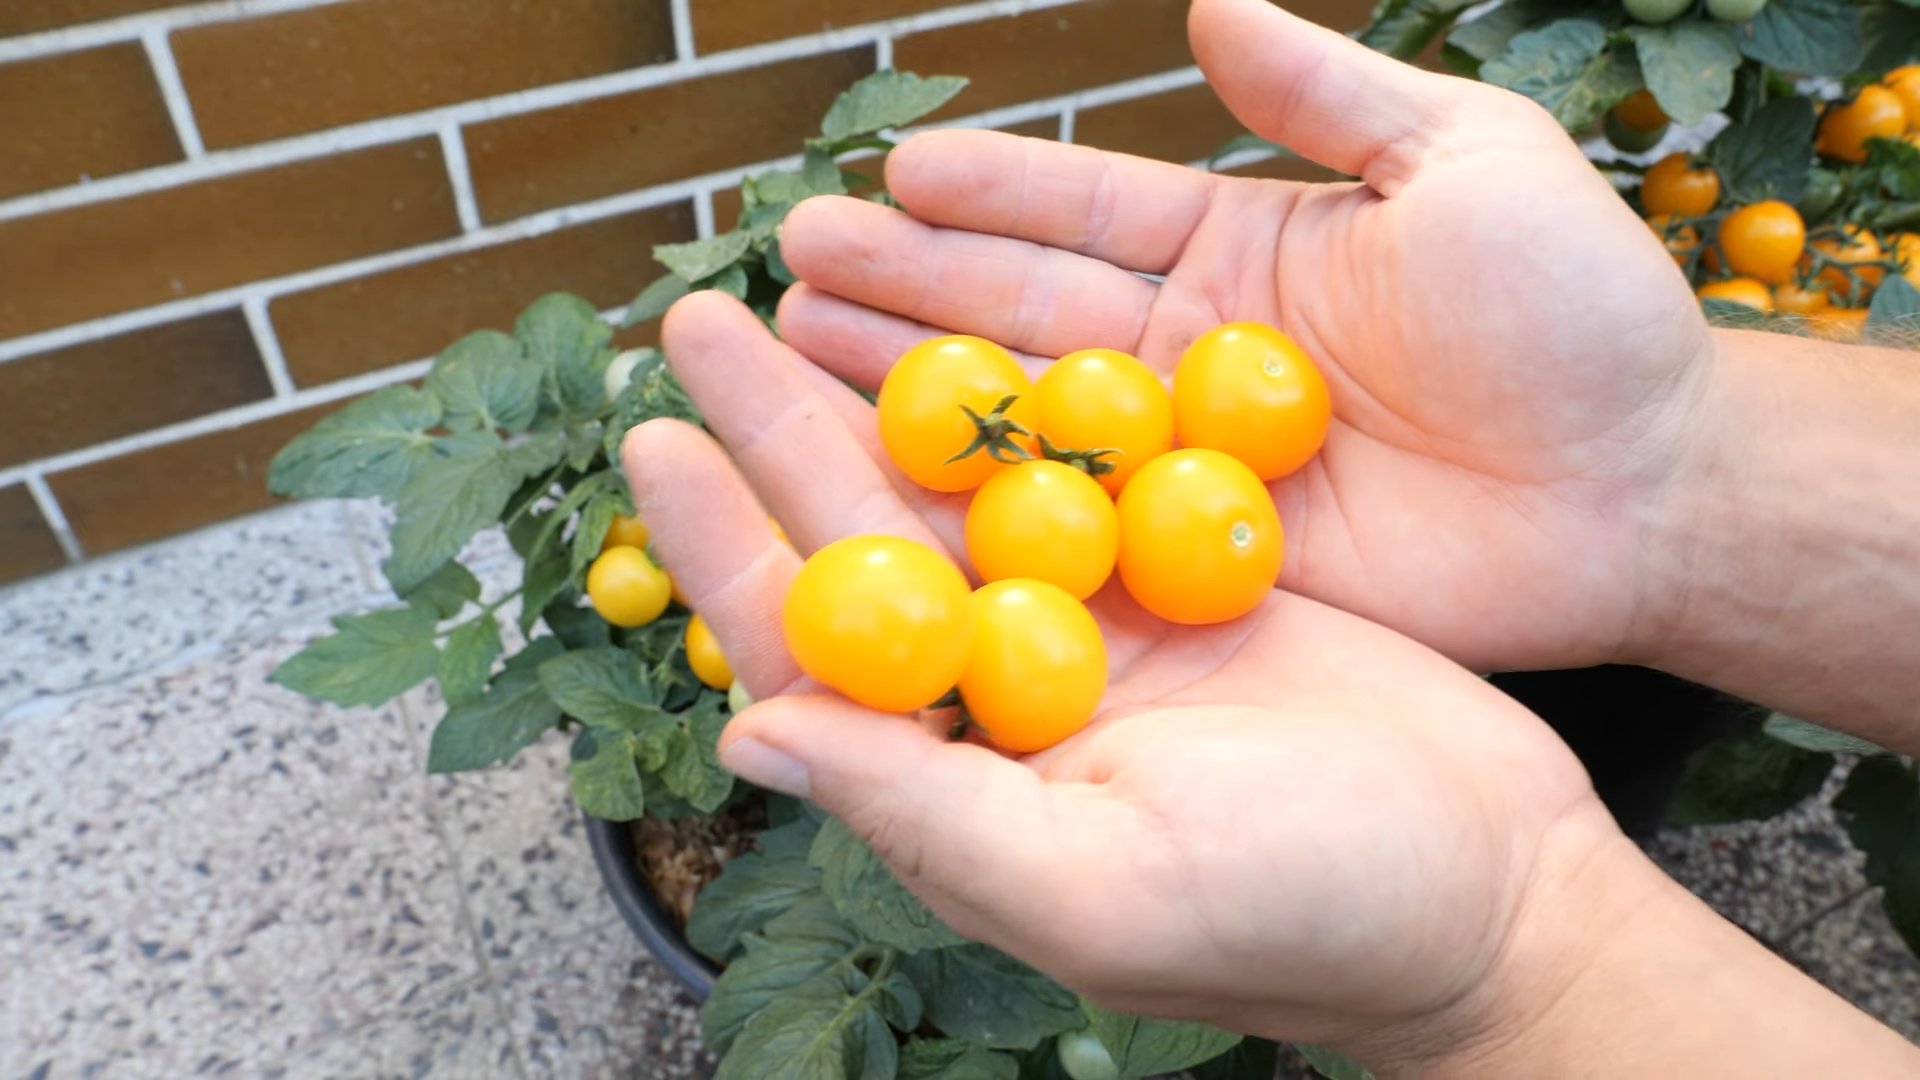
* ‘Sungold’: These are my absolute favorite! They’re incredibly sweet and have a beautiful golden-orange color. They tend to be prolific producers, too.
* ‘Sweet Million’: As the name suggests, these are super sweet and produce tons of small, red tomatoes. They’re also known for being disease-resistant.
* ‘Black Cherry’: These have a rich, complex flavor with a hint of smokiness. They’re a bit more unusual in color, being a deep reddish-purple.
* ‘Grape Tomato’: These are oblong-shaped and have a slightly firmer texture than other cherry tomatoes. They’re great for salads and snacking.
* ‘Yellow Pear’: These are adorable little pear-shaped tomatoes with a mild, sweet flavor. They add a fun visual element to your garden.
When choosing a variety, consider your climate, available space, and personal taste preferences. If you’re a beginner, I recommend starting with a disease-resistant variety like ‘Sweet Million’.
Starting Your Cherry Tomato Plants
You have two main options for starting your cherry tomato plants: buying seedlings from a nursery or starting them from seed indoors. I personally prefer starting from seed because it gives me more control over the process and allows me to choose from a wider variety of options.
Starting from Seed Indoors
This is the method I use most often, and it’s surprisingly easy!
1. Gather Your Supplies: You’ll need:
* Cherry tomato seeds
* Seed starting mix (a light, sterile potting mix)
* Seed starting trays or small pots
* A spray bottle
* A heat mat (optional, but helpful)
* A grow light (optional, but highly recommended)
2. Sow the Seeds: Fill your seed starting trays or pots with seed starting mix. Moisten the mix with a spray bottle until it’s damp but not soggy. Sow the seeds about 1/4 inch deep, placing 2-3 seeds in each cell or pot. Gently cover the seeds with more mix and mist again.
3. Provide Warmth and Light: Place the trays or pots on a heat mat (if using) and cover them with a clear plastic dome or plastic wrap to create a humid environment. Place them under a grow light or in a sunny window. The ideal temperature for germination is around 70-75°F (21-24°C).
4. Keep the Soil Moist: Check the soil daily and mist it with a spray bottle whenever it starts to dry out. Avoid overwatering, as this can lead to fungal diseases.
5. Thin the Seedlings: Once the seedlings have emerged and have a few sets of true leaves (the leaves that look like miniature tomato leaves), thin them to one seedling per cell or pot. Choose the strongest, healthiest-looking seedling and snip off the others at the soil line.
6. Harden Off the Seedlings: Before transplanting the seedlings outdoors, you’ll need to harden them off. This process gradually acclimates them to the outdoor environment. Start by placing the seedlings outdoors in a sheltered location for an hour or two each day, gradually increasing the amount of time they spend outside over the course of a week or two. Protect them from direct sunlight and strong winds.
Buying Seedlings from a Nursery
If you don’t have the time or space to start your own seedlings, buying them from a nursery is a great option.
1. Choose Healthy Seedlings: Look for seedlings that are healthy and vigorous, with sturdy stems and dark green leaves. Avoid seedlings that are leggy (tall and spindly), yellowing, or have any signs of disease or pests.
2. Check the Roots: Gently remove a seedling from its pot and inspect the roots. They should be white or light brown and well-developed. Avoid seedlings that are root-bound (the roots are tightly circling the pot).
3. Harden Off the Seedlings: Even if you buy seedlings from a nursery, it’s still a good idea to harden them off for a few days before transplanting them outdoors.
Transplanting Your Cherry Tomato Plants
Once your seedlings are hardened off and the weather is warm enough (nighttime temperatures consistently above 50°F or 10°C), it’s time to transplant them into their permanent home.
1. Choose a Sunny Location: Cherry tomatoes need at least 6-8 hours of sunlight per day to thrive. Choose a location in your garden that gets plenty of sun.
2. Prepare the Soil: Cherry tomatoes prefer well-drained soil that is rich in organic matter. Amend the soil with compost or aged manure before planting.
3. Dig the Holes: Dig holes that are slightly larger than the root balls of the seedlings. Space the holes about 2-3 feet apart, depending on the variety.
4. Plant the Seedlings: Gently remove the seedlings from their pots and loosen the roots slightly. Place the seedlings in the holes and backfill with soil. Bury the stems up to the first set of leaves. This will encourage the plants to develop more roots.
5. Water Thoroughly: Water the seedlings thoroughly after planting.
6. Add Support: Cherry tomato plants can get quite tall and heavy, so it’s important to provide them with support. You can use stakes, cages, or trellises. I personally prefer using tomato cages because they’re easy to install and provide good support.
Caring for Your Cherry Tomato Plants
Now that your cherry tomato plants are in the ground, it’s time to provide them with the care they need to thrive.
1. Watering: Water your cherry tomato plants regularly, especially during hot, dry weather. Aim to water deeply and less frequently, rather than shallowly and more often. Water at the base of the plants to avoid wetting the foliage, which can lead to fungal diseases.
2. Fertilizing: Cherry tomatoes are heavy feeders, so it’s important to fertilize them regularly. Use a balanced fertilizer that is specifically formulated for tomatoes. Follow the instructions on the fertilizer label. I like to use a liquid fertilizer every 2-3 weeks.
3. Pruning: Pruning can help to improve air circulation and prevent diseases. Remove any suckers (the small shoots that grow between the main stem and the branches) that appear below the first flower cluster. You can also remove any yellowing or diseased leaves.
4. Pest and Disease Control: Keep an eye out for pests and diseases. Common pests of cherry tomatoes include aphids, whiteflies, and tomato hornworms. Common diseases include early blight, late blight, and blossom end rot. Treat any problems promptly with appropriate organic or chemical controls. I prefer to use organic methods whenever possible.
5. Mulching: Mulching around your cherry tomato plants can help to conserve moisture, suppress weeds, and regulate soil temperature. Use organic mulch such as straw, wood chips, or shredded leaves.
Harvesting Your Cherry Tomatoes
The best part! You’ll know your cherry tomatoes are ready to harvest when they are fully colored and slightly soft to the touch. Gently twist the tomatoes off the vine. Harvest regularly to encourage the plants to produce more fruit.
* When to Harvest: Harvest your cherry tomatoes when they are fully colored and slightly soft to the touch.
* How to Harvest: Gently twist the tomatoes off the vine.
* Storage: Store your cherry tomatoes at room temperature for a few days or in the refrigerator for up to a week.
Troubleshooting Common Problems
Even with the best care, you may encounter some problems when growing cherry tomatoes. Here are some common issues and how to address them:
* Blossom End Rot: This is caused by a calcium deficiency and results in a dark, leathery spot on the bottom of the tomatoes. To prevent blossom end rot, make sure your soil is well-drained and that you’re watering your plants consistently. You can also add calcium to the soil by amending it with bone meal or crushed eggshells.
* Early Blight: This is a fungal disease that causes dark spots on the leaves. To prevent early blight, provide good air circulation around your plants and avoid wetting the foliage when watering. You can also treat early blight with a fungicide.

Conclusion
So, there you have it! Growing cherry tomatoes at home, even if you don’t have a sprawling garden, is not only achievable but incredibly rewarding. This DIY trick, focusing on maximizing sunlight and providing consistent support, is a game-changer for anyone who dreams of plucking sweet, juicy cherry tomatoes straight from their own plants. Forget those bland, store-bought varieties; imagine the burst of flavor from a sun-ripened, homegrown cherry tomato – the difference is truly remarkable.
This method isn’t just about convenience; it’s about control. You get to choose the variety of cherry tomato that best suits your taste, from the classic red to the vibrant yellow or even the intriguing black varieties. You control the soil, ensuring it’s rich in nutrients and free from harmful chemicals. You control the watering, preventing overwatering or underwatering, both of which can lead to disappointing results. And, perhaps most importantly, you control the entire growing process, nurturing your plants from tiny seedlings to bountiful producers.
But the beauty of this DIY approach lies in its adaptability. Feel free to experiment with different containers. While we’ve highlighted the benefits of using larger pots, you can also try hanging baskets for a cascading effect, perfect for patios or balconies. Consider adding companion plants like basil or marigolds to your tomato plants. Basil is known to improve the flavor of tomatoes, while marigolds deter pests. These additions not only enhance the growing environment but also add a touch of beauty to your little tomato garden.
Another variation to consider is the type of support you provide. While a simple stake works well, you can also use tomato cages or even create your own support system using bamboo poles and twine. The key is to ensure that your plants have adequate support as they grow taller and heavier with fruit.
Don’t be afraid to get creative with your fertilizer. While commercial tomato fertilizers are readily available, you can also use organic options like compost tea or diluted fish emulsion. These natural fertilizers provide essential nutrients without the risk of burning your plants.
Ultimately, the success of this DIY trick hinges on your willingness to experiment and learn. Pay attention to your plants, observe their growth patterns, and adjust your approach as needed. Remember, every growing season is a learning opportunity.
We wholeheartedly encourage you to give this DIY trick a try. It’s a simple, cost-effective, and incredibly satisfying way to enjoy fresh, delicious cherry tomatoes all season long. And once you’ve harvested your first batch, we’d love to hear about your experience! Share your photos, tips, and challenges in the comments below. Let’s build a community of home gardeners who are passionate about growing their own food. Let us know what variety of cherry tomatoes you decided to grow at home.
Ready to Grow Your Own?
Don’t wait any longer! Gather your supplies, follow our simple steps, and get ready to enjoy the taste of homegrown cherry tomatoes. You’ll be amazed at how easy and rewarding it is to grow your own food.
Share Your Success!
We can’t wait to see your cherry tomato plants thriving! Share your photos and stories with us in the comments below. Let’s inspire others to embrace the joy of home gardening.
Frequently Asked Questions (FAQ)
Q: What is the best time to start growing cherry tomatoes from seed?
A: The best time to start growing cherry tomatoes from seed depends on your local climate. In general, you should start seeds indoors 6-8 weeks before the last expected frost. This allows the seedlings to develop a strong root system before being transplanted outdoors. If you live in a warmer climate with a longer growing season, you can start seeds directly in the ground after the last frost. However, starting indoors provides a head start and allows you to control the growing environment.
Q: What kind of soil is best for growing cherry tomatoes?
A: Cherry tomatoes thrive in well-draining soil that is rich in organic matter. A good potting mix specifically formulated for vegetables is ideal. You can also amend your garden soil with compost or aged manure to improve its fertility and drainage. Avoid heavy clay soils, as they can become waterlogged and hinder root growth. The ideal soil pH for cherry tomatoes is between 6.0 and 6.8.
Q: How much sunlight do cherry tomatoes need?
A: Cherry tomatoes need at least 6-8 hours of direct sunlight per day to produce a bountiful harvest. Choose a location in your garden or on your patio that receives ample sunlight throughout the day. If you are growing cherry tomatoes indoors, you may need to supplement with grow lights to ensure they receive enough light. Insufficient sunlight can lead to leggy growth and reduced fruit production.
Q: How often should I water my cherry tomato plants?
A: Water your cherry tomato plants deeply and regularly, especially during hot, dry weather. The frequency of watering will depend on the weather conditions and the type of soil you are using. As a general rule, water when the top inch of soil feels dry to the touch. Avoid overwatering, as this can lead to root rot. It’s best to water in the morning to allow the foliage to dry before nightfall, which can help prevent fungal diseases.
Q: What are some common pests and diseases that affect cherry tomatoes?
A: Cherry tomatoes are susceptible to a variety of pests and diseases, including aphids, whiteflies, tomato hornworms, blossom end rot, and fungal diseases like early blight and septoria leaf spot. Regularly inspect your plants for signs of pests or diseases. Use organic pest control methods like insecticidal soap or neem oil to control pests. To prevent fungal diseases, ensure good air circulation around your plants, avoid overhead watering, and remove any infected leaves. Blossom end rot is caused by a calcium deficiency, so ensure your soil is rich in calcium or supplement with calcium nitrate.
Q: How do I know when my cherry tomatoes are ripe?
A: Cherry tomatoes are typically ready to harvest when they are fully colored and slightly soft to the touch. The color will vary depending on the variety, but they should be a deep, vibrant hue. Gently twist the tomato from the vine; if it comes off easily, it’s ripe. Ripe cherry tomatoes will also have a sweet, slightly tangy aroma.
Q: Can I grow cherry tomatoes in containers?
A: Yes, cherry tomatoes are well-suited for container gardening. Choose a large container that is at least 12 inches in diameter and depth. Ensure the container has drainage holes to prevent waterlogging. Use a high-quality potting mix and provide adequate support for the plants as they grow. Container-grown cherry tomatoes may require more frequent watering and fertilization than those grown in the ground.
Q: How do I prune cherry tomato plants?
A: Pruning cherry tomato plants can help improve air circulation, reduce disease, and encourage fruit production. Remove suckers, which are the small shoots that grow between the main stem and the branches. Prune away any yellowing or diseased leaves. You can also prune the lower leaves to prevent soil-borne diseases from splashing onto the foliage.
Q: What is the best fertilizer for cherry tomatoes?
A: Cherry tomatoes benefit from regular fertilization throughout the growing season. Use a balanced fertilizer that is specifically formulated for tomatoes. Look for a fertilizer with a higher phosphorus content, as this promotes fruit development. You can also use organic fertilizers like compost tea or diluted fish emulsion. Avoid over-fertilizing, as this can lead to excessive foliage growth and reduced fruit production.
Q: How can I prevent blossom end rot on my cherry tomatoes?
A: Blossom end rot is a common problem that affects tomatoes, causing a dark, leathery spot to appear on the bottom of the fruit. It is caused by a calcium deficiency, which can be due to insufficient calcium in the soil or inconsistent watering. To prevent blossom end rot, ensure your soil is rich in calcium and water your plants regularly and deeply. You can also add calcium nitrate to the soil or spray the plants with a calcium solution.

Leave a Comment