
Growing corn in a concrete yard might sound like an impossible dream, right? But trust me, it’s more achievable than you think! Forget the sprawling fields of Iowa; we’re bringing the farm-fresh goodness right to your doorstep, even if your doorstep is paved in concrete. For centuries, humans have cultivated corn, or maize, in diverse environments, adapting techniques to suit their surroundings. From the ingenious terrace farming of the Incas to modern urban agriculture initiatives, the spirit of growing food where you are has always persevered.
Let’s be honest, who wouldn’t love the taste of sweet, homegrown corn on the cob, especially when you know you nurtured it from a tiny seed? But many of us are limited by space, living in apartments or homes with limited or no traditional garden space. That’s where these DIY tricks and hacks come in! I’m going to show you how to overcome the concrete jungle and successfully growing corn in a concrete yard using simple, affordable methods. We’ll explore container gardening, soil selection, and even some clever DIY irrigation techniques. Get ready to transform your concrete space into a mini-cornfield and enjoy the satisfaction of harvesting your own delicious corn!
DIY: Maisanbau im Betonhof – So verwandelst du deinen grauen Garten in eine grüne Oase!
Hey Leute! Habt ihr auch genug von eurem tristen Betonhof und träumt von etwas Grün? Ich zeige euch, wie ihr selbst auf kleinstem Raum Mais anbauen könnt! Ja, richtig gehört, sogar im Betonhof! Es ist einfacher als ihr denkt und das Ergebnis ist nicht nur lecker, sondern auch ein echter Hingucker. Lasst uns loslegen!
Was du brauchst:
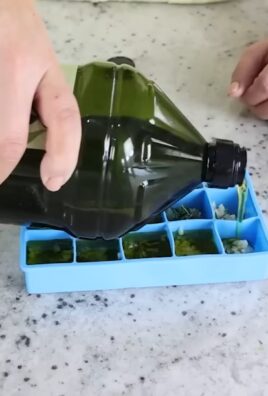
* Maissamen: Wählt eine Sorte, die für den Anbau in Containern geeignet ist. Ich empfehle Zwergmaissorten, da sie weniger Platz benötigen.
* Große Pflanzgefäße: Am besten sind Kübel mit einem Durchmesser von mindestens 45 cm und einer Tiefe von 45 cm. Je größer, desto besser!
* Hochwertige Blumenerde: Eine gute Mischung aus Gartenerde, Kompost und Sand sorgt für optimale Bedingungen.
* Dünger: Mais ist ein Starkzehrer, also braucht er ordentlich Nährstoffe. Ich verwende gerne organischen Dünger oder Langzeitdünger.
* Gießkanne oder Gartenschlauch: Für die regelmäßige Bewässerung.
* Mulchmaterial: Stroh, Holzhackschnitzel oder Rasenschnitt helfen, die Feuchtigkeit im Boden zu halten und Unkraut zu unterdrücken.
* Optional: Rankhilfe: Bei höheren Maissorten kann eine Rankhilfe sinnvoll sein, um die Pflanzen zu stützen.
* Schaufel oder Pflanzkelle: Zum Befüllen der Pflanzgefäße.
* Geduld und Liebe: Das Wichtigste!
Vorbereitung ist alles: Die Pflanzgefäße vorbereiten
1. Reinigung der Pflanzgefäße: Bevor ihr loslegt, solltet ihr die Pflanzgefäße gründlich reinigen. Entfernt alte Erde und Ablagerungen mit Wasser und einer Bürste. Das verhindert die Übertragung von Krankheiten und Schädlingen.
2. Drainage schaffen: Mais mag keine Staunässe. Legt deshalb eine Schicht Kies oder Blähton auf den Boden der Pflanzgefäße. Das sorgt für eine gute Drainage und verhindert, dass die Wurzeln faulen.
3. Erde einfüllen: Füllt die Pflanzgefäße mit der vorbereiteten Blumenerde. Lasst etwa 5 cm Platz bis zum Rand, damit ihr später noch gießen könnt, ohne dass die Erde überschwappt.
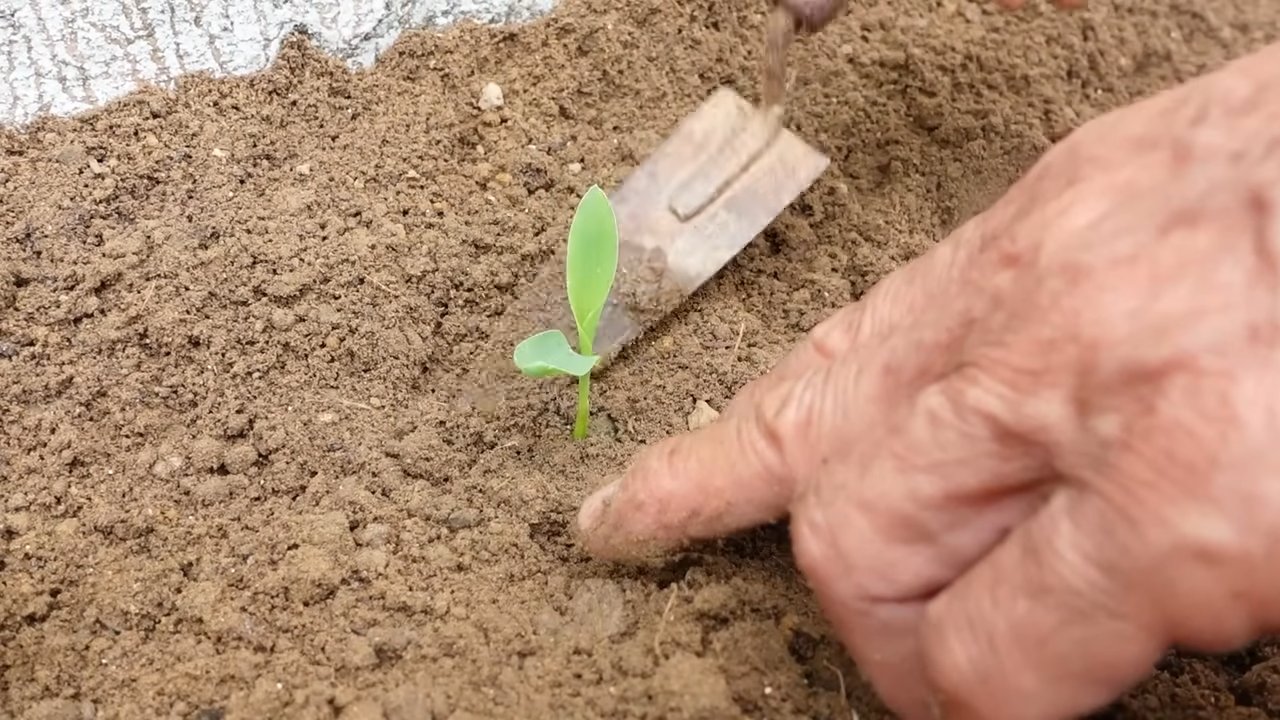
Aussaat: Die Samen in die Erde bringen
1. Aussaatzeitpunkt: Mais ist frostempfindlich. Wartet also, bis keine Frostgefahr mehr besteht, bevor ihr mit der Aussaat beginnt. In der Regel ist das ab Mitte Mai der Fall.
2. Aussaattiefe: Macht kleine Löcher in die Erde, etwa 2-3 cm tief. Legt in jedes Loch 2-3 Maissamen. Das erhöht die Wahrscheinlichkeit, dass mindestens ein Samen keimt.
3. Abdecken und Angießen: Bedeckt die Samen mit Erde und drückt sie leicht an. Gießt die Erde vorsichtig an, sodass sie gut durchfeuchtet ist.
4. Standortwahl: Stellt die Pflanzgefäße an einen sonnigen Standort. Mais braucht mindestens 6 Stunden Sonne pro Tag, um gut zu wachsen.
Pflege: Gießen, Düngen, Lieben!
1. Gießen: Mais braucht regelmäßig Wasser, besonders während der Wachstumsphase. Gießt die Pflanzen am besten morgens oder abends, wenn die Sonne nicht so stark scheint. Achtet darauf, dass die Erde immer feucht, aber nicht nass ist.
2. Düngen: Wie bereits erwähnt, ist Mais ein Starkzehrer. Düngt die Pflanzen regelmäßig, etwa alle 2-3 Wochen, mit einem geeigneten Dünger. Ich verwende gerne organischen Dünger, da er die Pflanzen schonend mit Nährstoffen versorgt.
3. Mulchen: Verteilt eine Schicht Mulchmaterial um die Pflanzen. Das hält die Feuchtigkeit im Boden, unterdrückt Unkraut und schützt die Wurzeln vor extremen Temperaturen.
4. Rankhilfe (optional): Wenn eure Maissorte höher wächst, kann eine Rankhilfe sinnvoll sein. Bindet die Pflanzen vorsichtig an die Rankhilfe, um sie vor dem Umknicken zu schützen.
5. Schädlinge und Krankheiten: Achtet auf Schädlinge wie Blattläuse oder Maiszünsler. Bei Befall könnt ihr natürliche Schädlingsbekämpfungsmittel einsetzen. Auch Pilzkrankheiten können auftreten. Sorgt für eine gute Belüftung und entfernt befallene Blätter.
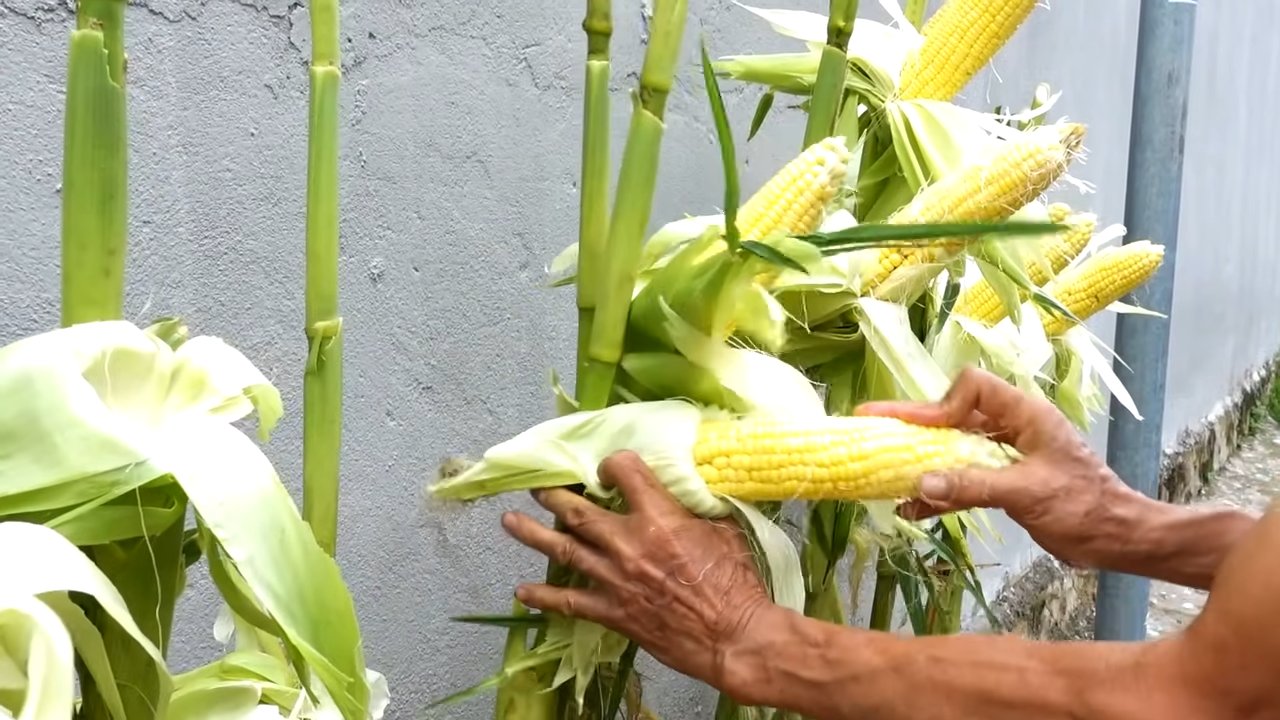
Ernte: Die Früchte deiner Arbeit genießen
1. Erntezeitpunkt: Der Erntezeitpunkt hängt von der Maissorte ab. In der Regel sind die Maiskolben erntereif, wenn die Fäden an den Kolben braun und trocken sind. Drückt vorsichtig auf die Körner. Wenn sie milchig sind, ist der Mais reif.
2. Ernten: Brecht die Maiskolben vorsichtig von den Pflanzen ab.
3. Zubereitung: Genießt euren selbst angebauten Mais! Ihr könnt ihn kochen, grillen, braten oder zu Popcorn verarbeiten. Lasst eurer Kreativität freien Lauf!
Zusätzliche Tipps für den erfolgreichen Maisanbau im Betonhof:
* Windschutz: Da Betonhöfe oft windig sind, solltet ihr eure Maispflanzen vor starkem Wind schützen. Stellt sie beispielsweise an eine Hauswand oder verwendet einen Windschutz.
* Bewässerungssystem: Wenn ihr wenig Zeit habt, könnt ihr ein automatisches Bewässerungssystem installieren. Das spart Zeit und sorgt dafür, dass eure Pflanzen immer ausreichend mit Wasser versorgt sind.
* Sortenwahl: Informiert euch vor dem Kauf über die verschiedenen Maissorten und wählt eine Sorte, die für den Anbau in Containern geeignet ist. Zwergmaissorten sind ideal für kleine Flächen.
* Nachbarn: Sprecht mit euren Nachbarn über euer Projekt. Vielleicht habt ihr Glück und sie unterstützen euch oder geben euch wertvolle Tipps.
* Dokumentation: Macht Fotos von euren Pflanzen und dokumentiert den Fortschritt. So könnt ihr später sehen, was gut funktioniert hat und was ihr beim nächsten Mal verbessern könnt.
Herausforderungen und Lösungen:
* Platzmangel: Im Betonhof ist oft wenig Platz. Nutzt vertikale Anbaumöglichkeiten wie Rankhilfen oder hängende Pflanzgefäße.
* Hitze: Beton kann sich im Sommer stark aufheizen. Stellt die Pflanzgefäße an einen schattigen Ort oder verwendet helle Pflanzgefäße, die weniger Wärme absorbieren.
* Bodenqualität: Der Boden im Betonhof ist oft verdichtet und nährstoffarm. Verwendet hochwertige Blumenerde und düngt die Pflanzen regelmäßig.
* Schädlinge: Schädlinge können im Betonhof leichter auftreten, da es weniger natürliche Feinde gibt. Kontrolliert die Pflanzen regelmäßig und setzt bei Befall natürliche Schädlingsbekämpfungsmittel ein.
Warum Maisanbau im Betonhof eine tolle Idee ist:
* Frisches Gemüse: Ihr habt immer frischen Mais zur Hand, ohne zum Supermarkt gehen zu müssen.
* Nachhaltigkeit: Ihr reduziert euren ökologischen Fußabdruck, da ihr keine langen Transportwege benötigt.
* Dekoration: Maispflanzen sind eine tolle Dekoration für euren Betonhof und bringen etwas Grün in die graue Umgebung.
* Entspannung: Die Gartenarbeit ist eine tolle Möglichkeit, um zu entspannen und Stress abzubauen.
* Lerneffekt: Ihr lernt viel über Pflanzen und den Anbau von Gemüse.
Ich hoffe, diese Anleitung hilft euch dabei, euren eigenen Mais im Betonhof anzubauen. Es ist ein tolles Projekt, das viel Freude bereitet und euch mit leckerem, selbst angebautem Mais belohnt. Viel Erfolg!
Conclusion
So, there you have it! Transforming your drab concrete yard into a vibrant, corn-growing oasis is not only possible, but surprisingly simple and rewarding. We’ve walked you through the steps, highlighting the key considerations and offering practical tips to ensure your success. But why should you even bother with this somewhat unconventional approach to gardening?
The answer is multifaceted. First and foremost, it’s about reclaiming unused space. That concrete slab sitting outside your back door represents potential – potential for fresh, homegrown corn, potential for a splash of green in an otherwise grey landscape, and potential for a unique conversation starter. Imagine the look on your neighbors’ faces when they see stalks of corn thriving where they least expect it!
Beyond the novelty, growing corn in a concrete yard offers a fantastic opportunity to connect with nature, even in the most urban settings. The process of nurturing a plant from seed to harvest is incredibly fulfilling, and the taste of freshly picked, homegrown corn is simply unparalleled. It’s a taste of summer that you can’t find in any supermarket.
Furthermore, this DIY project is a testament to resourcefulness and sustainability. By utilizing existing space and potentially repurposing materials like old containers or salvaged wood for raised beds, you’re minimizing waste and maximizing the potential of what you already have. It’s a small step towards a more eco-conscious lifestyle.
Don’t be afraid to experiment with variations! Consider planting companion herbs like basil or beans alongside your corn to deter pests and improve soil health. You could also explore different varieties of corn, from sweet corn for grilling to ornamental corn for fall decorations. The possibilities are endless.
This method of growing corn is a game-changer for urban gardeners.
We understand that the idea of growing corn in a concrete yard might seem daunting at first. But we assure you, with a little planning and effort, you can achieve remarkable results. The key is to provide your corn plants with the right conditions: ample sunlight, well-draining soil, and consistent watering.
So, what are you waiting for? Grab your seeds, gather your supplies, and get ready to transform your concrete yard into a corn-growing paradise. We’re confident that you’ll be amazed by what you can accomplish.
And most importantly, we want to hear about your experience! Share your photos, tips, and challenges in the comments below. Let’s create a community of urban gardeners who are pushing the boundaries of what’s possible. Together, we can prove that even the most unlikely spaces can be transformed into thriving gardens. Let us know how your **growing corn** project goes!
Frequently Asked Questions (FAQ)
Can I really grow corn directly on concrete?
No, you cannot grow corn directly on concrete. Concrete is an impermeable surface that doesn’t provide the necessary nutrients, drainage, or space for root development. The method described involves creating a suitable growing environment *on top* of the concrete, typically using raised beds, containers, or a similar structure filled with soil. The concrete simply serves as a base for this artificial growing space.
What kind of container or raised bed is best for growing corn in a concrete yard?
The ideal container or raised bed should be large enough to accommodate the mature size of corn plants. Corn needs space for its roots to spread and support the tall stalks. A good rule of thumb is to provide at least 12 inches of soil depth and 12 inches of width per plant. Consider using large plastic tubs, wooden crates, or even constructing your own raised beds from lumber. Ensure that the container has drainage holes to prevent waterlogging. If you’re using a raised bed, line the bottom with landscape fabric to prevent soil from seeping through the cracks in the concrete.
How much sunlight does corn need when grown in a concrete yard?
Corn requires at least 6-8 hours of direct sunlight per day to thrive. When choosing a location for your containers or raised beds, select the sunniest spot in your concrete yard. Observe the area throughout the day to ensure that it receives adequate sunlight. If your yard is shaded for part of the day, consider using reflective materials like white paint or aluminum foil to bounce sunlight onto your plants. You might also consider grow lights if natural sunlight is severely limited.
What type of soil should I use for growing corn in containers?
Use a well-draining, nutrient-rich soil mix specifically formulated for vegetables. Avoid using garden soil directly from the ground, as it can be too heavy and compacted for container gardening. A good mix typically consists of equal parts compost, peat moss (or coconut coir), and perlite or vermiculite. Compost provides essential nutrients, peat moss or coconut coir helps retain moisture, and perlite or vermiculite improves drainage. You can also add a slow-release fertilizer to the soil mix to provide a steady supply of nutrients throughout the growing season.
How often should I water corn grown in containers on concrete?
Corn needs consistent watering, especially during hot weather. Check the soil moisture regularly by sticking your finger about an inch into the soil. If the soil feels dry to the touch, it’s time to water. Water deeply until the water drains out of the drainage holes. Avoid overwatering, as this can lead to root rot. The frequency of watering will depend on the weather conditions, the size of the container, and the type of soil you’re using. In general, you may need to water daily or even twice a day during hot, dry spells.
How do I fertilize corn grown in containers?
Corn is a heavy feeder and requires regular fertilization to produce a good yield. Start by incorporating a slow-release fertilizer into the soil mix at planting time. Then, supplement with a liquid fertilizer every 2-3 weeks throughout the growing season. Choose a fertilizer that is high in nitrogen, which is essential for leaf growth. You can also use a balanced fertilizer with equal amounts of nitrogen, phosphorus, and potassium. Follow the instructions on the fertilizer label carefully to avoid over-fertilizing.
How do I prevent pests and diseases from affecting my corn plants?
Monitor your corn plants regularly for signs of pests and diseases. Common pests that affect corn include aphids, corn earworms, and Japanese beetles. You can control these pests by handpicking them off the plants, using insecticidal soap, or applying neem oil. Diseases that can affect corn include rust, smut, and leaf blight. Prevent these diseases by providing good air circulation, avoiding overhead watering, and using disease-resistant varieties. If you notice signs of disease, remove the affected leaves or plants immediately.
Can I grow different varieties of corn in containers?
Yes, you can grow different varieties of corn in containers, but it’s important to choose varieties that are well-suited for container gardening. Look for dwarf or compact varieties that don’t grow too tall. Sweet corn, popcorn, and ornamental corn are all good options for container gardening. Be aware that if you are growing different types of corn, cross-pollination can occur, which may affect the taste and appearance of the kernels.
What are some tips for ensuring successful pollination of corn in containers?
Corn is wind-pollinated, so it’s important to ensure that the pollen from the tassels (male flowers) reaches the silks (female flowers). If you’re growing corn in a sheltered location, you may need to hand-pollinate the plants. To do this, gently shake the tassels over the silks to release the pollen. You can also collect the pollen in a small container and use a paintbrush to apply it to the silks. Repeat this process every day for several days to ensure that all of the silks are pollinated.
How do I know when my corn is ready to harvest?
The time it takes for corn to mature will depend on the variety and the growing conditions. In general, sweet corn is ready to harvest about 20-25 days after the silks emerge. The silks will turn brown and dry, and the kernels will be plump and milky when you puncture them with your fingernail. Popcorn is ready to harvest when the stalks are completely dry and the kernels are hard. Ornamental corn is ready to harvest when the husks are dry and the kernels are brightly colored.
Leave a Comment