
Grow bottle gourds easily, even if you think you don’t have a green thumb! Have you ever dreamed of harvesting your own unique, homegrown bottle gourds, perfect for crafting into birdhouses, bowls, or even musical instruments? It might sound intimidating, but trust me, it’s more achievable than you think, and this DIY guide is here to show you how.
Bottle gourds, also known as calabash, boast a rich history, dating back thousands of years. Evidence suggests they were among the first cultivated plants, predating even pottery! Across cultures, they’ve served as essential tools, containers, and even held spiritual significance. Imagine connecting with that ancient tradition by nurturing your own gourd vine!
But why should you learn to grow bottle gourds easily? Well, beyond the historical connection, growing your own offers a fantastic sense of accomplishment. Plus, store-bought gourds can be expensive and lack the unique character of homegrown varieties. This DIY guide provides simple, step-by-step instructions and clever hacks to ensure a bountiful harvest, even in limited spaces. I’m going to share my favorite tips and tricks that I’ve learned over the years, so you can avoid common pitfalls and enjoy the satisfaction of creating something beautiful and useful from your own backyard. Let’s get started!
Flaschenkürbisse einfach selbst ziehen: Mein DIY-Leitfaden für Anfänger
Ich liebe es, meinen eigenen Garten zu bepflanzen, und Flaschenkürbisse sind eine meiner Lieblingspflanzen! Sie sind nicht nur unglaublich vielseitig, sondern auch relativ einfach anzubauen, selbst wenn du kein erfahrener Gärtner bist. In diesem Artikel zeige ich dir Schritt für Schritt, wie du deine eigenen Flaschenkürbisse erfolgreich anbauen kannst. Keine Angst, es ist einfacher als du denkst!
Was du für den Anbau von Flaschenkürbissen brauchst
Bevor wir loslegen, lass uns sicherstellen, dass du alles hast, was du brauchst. Hier ist eine Liste der wichtigsten Dinge:
* Flaschenkürbissamen: Du kannst sie in Gartencentern oder online kaufen. Achte darauf, dass du Samen von einer Sorte wählst, die dir gefällt. Es gibt viele verschiedene Formen und Größen!
* Anzuchttöpfe oder -schalen: Für die Voranzucht der Samen.
* Anzuchterde: Sie ist leichter und nährstoffärmer als normale Blumenerde und ideal für junge Pflanzen.
* Gartenerde: Für das Auspflanzen ins Freiland.
* Kompost oder organischer Dünger: Für eine gute Nährstoffversorgung.
* Gießkanne oder Gartenschlauch: Zum Bewässern.
* Pflanzstäbe oder Rankhilfe: Flaschenkürbisse sind Kletterpflanzen und brauchen Unterstützung.
* Gartengeräte: Spaten, Schaufel, Harke.
* Geduld: Der Anbau von Pflanzen braucht Zeit und Pflege!
Die Vorbereitung: Samen vorziehen
Die Voranzucht der Samen ist optional, aber ich empfehle sie, besonders wenn du in einer Region mit kurzen Sommern lebst. Sie gibt den Pflanzen einen Vorsprung.
1. Die Anzuchttöpfe vorbereiten: Fülle die Anzuchttöpfe oder -schalen mit Anzuchterde. Drücke die Erde leicht an.
2. Samen säen: Lege in jeden Topf ein bis zwei Samen, etwa 1-2 cm tief.
3. Gießen: Befeuchte die Erde vorsichtig mit einer Gießkanne oder Sprühflasche. Die Erde sollte feucht, aber nicht nass sein.
4. Warm stellen: Stelle die Töpfe an einen warmen, hellen Ort. Eine Temperatur von 20-25°C ist ideal. Ein Mini-Gewächshaus oder eine Fensterbank eignen sich gut.
5. Feucht halten: Halte die Erde feucht, aber vermeide Staunässe.
6. Keimung abwarten: Die Samen keimen in der Regel innerhalb von 1-2 Wochen.
7. Vereinzeln: Wenn mehrere Samen in einem Topf gekeimt sind, entferne den schwächsten Sämling, damit der stärkere genug Platz hat.
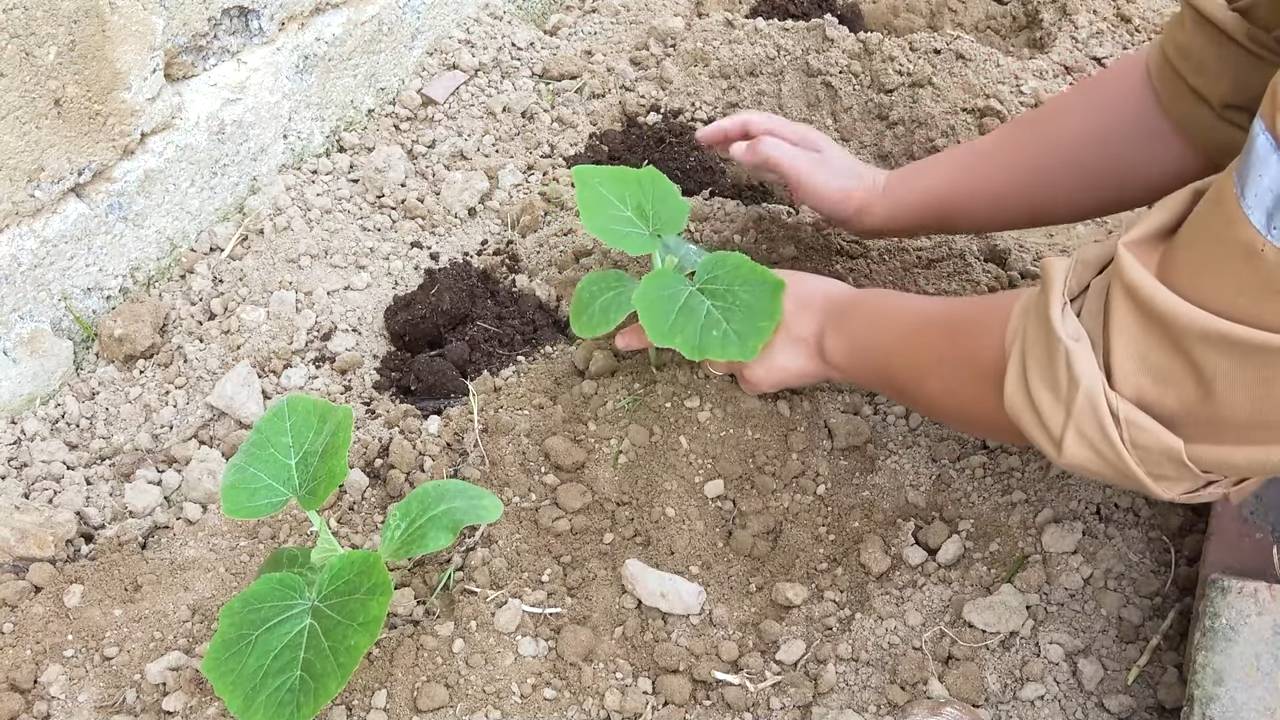
Der Umzug ins Freie: Auspflanzen der Jungpflanzen
Sobald die Jungpflanzen kräftig genug sind und keine Frostgefahr mehr besteht (in der Regel Mitte Mai), können sie ins Freiland umziehen.
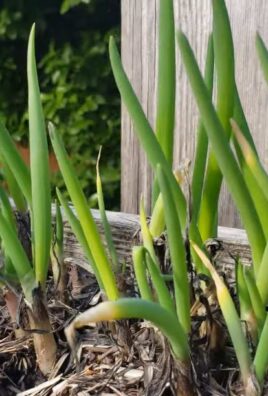
1. Den Standort vorbereiten: Wähle einen sonnigen Standort mit gut durchlässigem Boden. Flaschenkürbisse brauchen viel Sonne und Wärme.
2. Den Boden vorbereiten: Grabe den Boden um und reicher ihn mit Kompost oder organischem Dünger an. Das verbessert die Bodenstruktur und versorgt die Pflanzen mit Nährstoffen.
3. Pflanzlöcher graben: Grabe Pflanzlöcher, die etwas größer sind als die Anzuchttöpfe.
4. Pflanzen einsetzen: Nimm die Jungpflanzen vorsichtig aus den Töpfen und setze sie in die Pflanzlöcher. Achte darauf, die Wurzeln nicht zu beschädigen.
5. Angießen: Gieße die Pflanzen nach dem Einsetzen gründlich an.
6. Rankhilfe anbringen: Flaschenkürbisse sind Kletterpflanzen und brauchen eine Rankhilfe. Du kannst Pflanzstäbe, ein Rankgitter oder ein Spalier verwenden. Die Pflanzen werden sich selbstständig daran festhalten.
Die Pflege: Gießen, Düngen und mehr
Die richtige Pflege ist entscheidend für eine reiche Ernte.
1. Gießen: Gieße die Pflanzen regelmäßig, besonders während trockener Perioden. Die Erde sollte immer feucht, aber nicht nass sein. Gieße am besten morgens oder abends, um Verdunstung zu vermeiden.
2. Düngen: Dünge die Pflanzen regelmäßig mit einem organischen Dünger oder Kompost. Das versorgt sie mit den notwendigen Nährstoffen.
3. Unkraut entfernen: Halte den Bereich um die Pflanzen herum unkrautfrei. Unkraut konkurriert mit den Kürbissen um Nährstoffe und Wasser.
4. Schädlinge und Krankheiten kontrollieren: Achte auf Schädlinge und Krankheiten. Bei Bedarf kannst du biologische Schädlingsbekämpfungsmittel einsetzen.
5. Ausgeizen (optional): Einige Gärtner entfernen Seitentriebe, um die Energie der Pflanze auf die Fruchtbildung zu konzentrieren. Das ist aber nicht unbedingt notwendig.
6. Bestäubung unterstützen (optional): Wenn du feststellst, dass sich keine Früchte bilden, kannst du die Bestäubung unterstützen, indem du mit einem Pinsel Pollen von den männlichen Blüten auf die weiblichen Blüten überträgst. Die weiblichen Blüten erkennst du an dem kleinen Fruchtansatz direkt unter der Blüte.
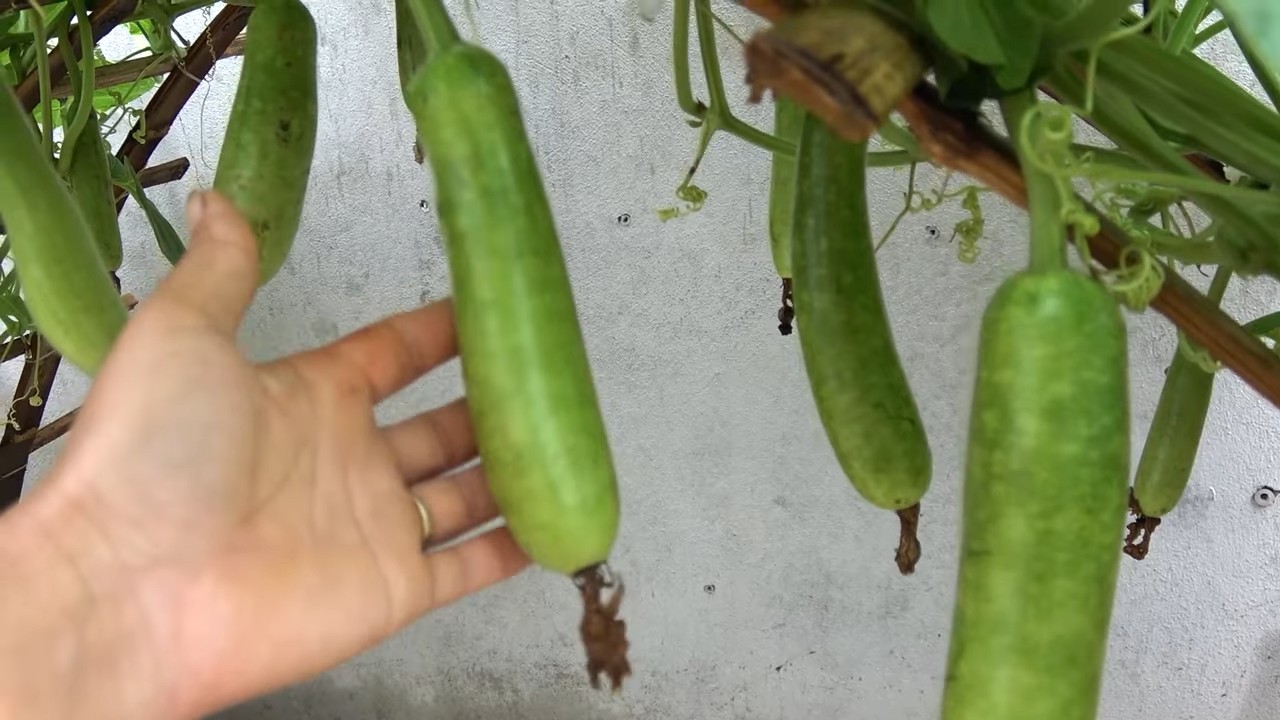
Die Ernte: Wann sind die Flaschenkürbisse reif?
Die Erntezeit hängt von der Sorte und den Wetterbedingungen ab. In der Regel sind Flaschenkürbisse im Herbst reif.
1. Reifezeichen: Die Schale der Kürbisse sollte hart und undurchdringlich sein. Wenn du mit dem Fingernagel darauf klopfst, sollte es hohl klingen. Die Ranke, die den Kürbis mit der Pflanze verbindet, sollte braun und trocken sein.
2. Ernten: Schneide die Kürbisse mit einem scharfen Messer oder einer Gartenschere ab. Lasse einen Stiel von etwa 5-10 cm Länge am Kürbis.
3. Trocknen: Lasse die geernteten Kürbisse an einem trockenen, gut belüfteten Ort für mehrere Wochen trocknen. Das Trocknen ist wichtig, damit die Kürbisse haltbar werden. Drehe die Kürbisse regelmäßig, damit sie gleichmäßig trocknen.
4. Lagern: Lagere die getrockneten Kürbisse an einem kühlen, trockenen und dunklen Ort. So halten sie sich mehrere Monate.
Kreative Ideen: Was du mit Flaschenkürbissen machen kannst
Flaschenkürbisse sind unglaublich vielseitig! Hier sind ein paar Ideen, was du damit machen kannst:
* Dekoration: Bemalen, bekleben oder schnitzen.
* Gebrauchsgegenstände: Schalen, Vasen, Lampen, Musikinstrumente.
* Vogelhäuser: Aushöhlen und mit einem Einflugloch versehen.
* Kunstprojekte: Deiner Fantasie sind keine Grenzen gesetzt!
Häufige Probleme und Lösungen
Auch beim Anbau von Flaschenkürbissen können Probleme auftreten. Hier sind einige der häufigsten und wie du sie lösen kannst:
* Schlechte Keimung: Verwende frische Samen und achte auf die richtige Temperatur und Feuchtigkeit.
* Schädlinge: Kontrolliere die Pflanzen regelmäßig und setze bei Bedarf biologische Schädlingsbekämpfungsmittel ein.
* Krankheiten: Achte auf eine gute Belüftung und vermeide Staunässe.
* Keine Fruchtbildung: Unterstütze die Bestäubung oder dünge die Pflanzen.
Zusätzliche Tipps für eine erfolgreiche Ernte
* Wähle die richtige Sorte: Es gibt viele verschiedene Sorten von Flaschenkürbissen. Informiere dich, welche Sorte für dein Klima und deine Bedürfnisse am besten geeignet ist.
* Sorge für ausreichend Platz: Flaschenkürbisse brauchen viel Platz. Plane genügend Abstand zwischen den Pflanzen ein.
* Sei geduldig: Der Anbau von Pflanzen braucht Zeit. Hab Geduld und gib nicht auf, wenn es nicht sofort klappt.
Ich hoffe, dieser Leitfaden hat dir geholfen, deine
Conclusion
So, there you have it! Growing bottle gourds doesn’t have to be a daunting task. By implementing this simple DIY trick, you’re not just planting seeds; you’re setting the stage for a thriving vine laden with these fascinating and versatile vegetables. This method, focusing on creating the optimal germination environment, significantly increases your chances of success, even if you’re a beginner gardener.
Why is this DIY trick a must-try? Because it addresses the most common hurdle in bottle gourd cultivation: inconsistent germination. By pre-sprouting your seeds in a controlled environment, you bypass the unpredictable conditions of the soil, ensuring that only the strongest, most viable seedlings make it into your garden. This translates to less wasted time, fewer wasted seeds, and a more bountiful harvest.
But don’t stop there! Feel free to experiment with variations. For instance, try adding a diluted seaweed extract to the water during the pre-sprouting phase to give your seedlings an extra boost of nutrients. Or, if you live in a particularly hot climate, consider using a slightly shaded area for germination to prevent overheating. You can also experiment with different types of growing mediums once the seedlings have sprouted, such as coco coir or a mix of compost and perlite, to see what works best for your specific soil conditions.
Remember, gardening is all about learning and adapting. This DIY trick is a fantastic starting point, but the real magic happens when you personalize it to suit your unique environment and preferences. The key is to observe your plants closely, pay attention to their needs, and don’t be afraid to try new things.
We are confident that this method will dramatically improve your success rate when you grow bottle gourds. We urge you to give it a try this growing season. And most importantly, we want to hear about your experiences! Share your photos, tips, and challenges in the comments below. Let’s build a community of bottle gourd enthusiasts and learn from each other’s successes and failures. Your insights could be invaluable to other gardeners embarking on this rewarding journey. Happy gardening!
Frequently Asked Questions (FAQ)
What exactly is the DIY trick you’re referring to?
The DIY trick involves pre-sprouting your bottle gourd seeds in a controlled environment before planting them directly into the soil. This typically involves soaking the seeds in water for 24-48 hours, then placing them in a damp paper towel or cloth inside a sealed container or plastic bag until they germinate. This method ensures that only viable seeds are planted, increasing your chances of a successful harvest.
Why is pre-sprouting bottle gourd seeds necessary?
Bottle gourd seeds often have a hard outer shell, which can make germination inconsistent and slow when planted directly in the soil. Pre-sprouting softens the shell and provides the ideal moisture and temperature conditions for germination, giving the seedlings a head start. This is especially beneficial in areas with shorter growing seasons or less-than-ideal soil conditions.
How long does it take for bottle gourd seeds to germinate using this method?
Generally, bottle gourd seeds will germinate within 3-7 days using the pre-sprouting method. However, this can vary depending on the temperature and the quality of the seeds. Keep the paper towel or cloth consistently moist, but not waterlogged, and maintain a warm environment (around 70-80°F or 21-27°C) for optimal results.
What do I do after the seeds have sprouted?
Once the seeds have sprouted and have a small root (about 1/2 inch long), they are ready to be transplanted into the soil. Handle the seedlings carefully to avoid damaging the delicate roots. Plant them in well-draining soil that is rich in organic matter. Ensure the seedlings receive adequate sunlight and water.
Can I use any type of container for pre-sprouting?
Yes, you can use various containers for pre-sprouting, such as plastic bags, plastic containers with lids, or even glass jars. The key is to ensure that the container is clean and can retain moisture. Avoid using containers that are too airtight, as this can lead to mold growth.
What type of soil is best for growing bottle gourds?
Bottle gourds thrive in well-draining soil that is rich in organic matter. A slightly acidic to neutral pH (6.0-7.0) is ideal. Amend your soil with compost, aged manure, or other organic materials to improve its fertility and drainage.
How much sunlight do bottle gourds need?
Bottle gourds require at least 6-8 hours of direct sunlight per day to thrive. Choose a planting location that receives ample sunlight throughout the day.
How often should I water bottle gourds?
Water bottle gourds regularly, especially during hot and dry weather. Keep the soil consistently moist, but avoid overwatering, which can lead to root rot. A good rule of thumb is to water deeply when the top inch of soil feels dry to the touch.
Do bottle gourds need fertilizer?
Yes, bottle gourds benefit from regular fertilization. Use a balanced fertilizer (e.g., 10-10-10) at planting time and then switch to a fertilizer that is higher in phosphorus and potassium during the flowering and fruiting stages. You can also supplement with organic fertilizers like compost tea or fish emulsion.
Are there any common pests or diseases that affect bottle gourds?
Yes, bottle gourds can be susceptible to pests such as aphids, squash bugs, and vine borers. Common diseases include powdery mildew and downy mildew. Monitor your plants regularly and take appropriate action if you notice any signs of infestation or disease. Organic pest control methods, such as neem oil or insecticidal soap, can be effective. Ensure good air circulation around the plants to prevent fungal diseases.
Can I grow bottle gourds in containers?
Yes, you can grow bottle gourds in containers, but you will need a large container (at least 20 gallons) to accommodate their extensive root system. Choose a container with good drainage and use a high-quality potting mix. Provide a sturdy trellis or support structure for the vines to climb.
How do I know when bottle gourds are ready to harvest?
The harvesting time for bottle gourds depends on their intended use. For ornamental purposes, harvest the gourds when they are mature and the skin is hard and dry. For culinary purposes, harvest the gourds when they are young and tender, before the skin becomes too tough.
Can I save seeds from my bottle gourds for future planting?
Yes, you can save seeds from your bottle gourds, but keep in mind that if you grew hybrid varieties, the seeds may not produce plants that are true to type. To save seeds, allow the gourds to mature fully on the vine. Once they are dry and hard, cut them open and remove the seeds. Clean the seeds thoroughly and allow them to dry completely before storing them in an airtight container in a cool, dry place.
What are some creative ways to use bottle gourds?
Bottle gourds are incredibly versatile and can be used for a variety of purposes. When young and tender, they can be cooked and eaten like squash. Mature gourds can be dried and used to make bowls, utensils, musical instruments, birdhouses, and other decorative items. The possibilities are endless!
Leave a Comment