
Water Only Lettuce Growing: Imagine harvesting crisp, fresh lettuce right from your kitchen counter, without ever touching soil! Sounds like something out of a futuristic garden, right? Well, it’s not only possible, but surprisingly easy with a simple DIY trick. For centuries, humans have toiled in the earth to cultivate their greens, but now, we’re taking a shortcut, and it’s a game-changer!
This isn’t just some fleeting trend; it’s a nod to hydroponics, a method of growing plants without soil that dates back to ancient civilizations. Think of the Hanging Gardens of Babylon – some historians believe they utilized early forms of hydroponics! While we might not be building elaborate gardens in the sky, we can certainly bring the essence of this innovative technique into our homes.
Why should you try water only lettuce growing? Because it’s perfect for anyone with limited space, a busy schedule, or simply a desire to experiment with a fun and rewarding project. Forget about weeding, soil-borne pests, and the constant need to monitor moisture levels. This method simplifies the process, making fresh, homegrown lettuce accessible to everyone. I’m excited to share this easy-to-follow guide that will have you enjoying delicious salads in no time!
DIY: Salat nur mit Wasser ziehen – So geht’s!
Hey Leute! Habt ihr Lust, euer eigenes knackiges Grünzeug anzubauen, aber keinen Platz für einen Garten oder wollt einfach mal was Neues ausprobieren? Dann habe ich genau das Richtige für euch: Salat nur mit Wasser ziehen! Ja, richtig gelesen. Ihr braucht keine Erde, keine komplizierten Dünger – nur Wasser, Licht und ein bisschen Geduld. Ich zeige euch, wie ihr das ganz einfach zu Hause hinbekommt. Es ist super befriedigend, zu sehen, wie aus einem kleinen Salatstrunk frische Blätter sprießen. Los geht’s!
Was ihr braucht:
* Einen Salatstrunk (Romana, Eisberg, Kopfsalat – alles geht!)
* Ein Glas oder eine Schüssel (am besten durchsichtig, damit ihr die Wurzeln beobachten könnt)
* Wasser (Leitungswasser ist völlig ausreichend)
* Einen hellen Standort (Fensterbank ist ideal)
* Geduld (ein paar Tage bis Wochen)
Schritt-für-Schritt-Anleitung:
1. Den Salat vorbereiten: Nachdem ihr euren Salat gegessen habt, schneidet den Strunk etwa 5-7 cm über der Wurzel ab. Achtet darauf, dass der Strunk noch fest und gesund aussieht. Braune oder matschige Stellen solltet ihr entfernen. Ich nehme dafür immer ein scharfes Messer, damit der Schnitt sauber ist.
2. Das Glas vorbereiten: Sucht euch ein passendes Glas oder eine Schüssel. Der Strunk sollte gut hineinpassen, aber nicht komplett darin versinken. Es ist wichtig, dass nur der untere Teil des Strunks im Wasser steht.
3. Wasser einfüllen: Füllt das Glas mit Wasser, sodass der untere Teil des Salatstrunks bedeckt ist. Achtet darauf, dass die Schnittfläche im Wasser ist, aber die oberen Blätter nicht.
4. Den Strunk ins Wasser setzen: Platziert den Salatstrunk vorsichtig in das Glas mit Wasser. Achtet darauf, dass er stabil steht und nicht umkippt.
5. Den Standort wählen: Stellt das Glas mit dem Salatstrunk an einen hellen Standort, aber vermeidet direkte Sonneneinstrahlung. Eine Fensterbank ist ideal, besonders wenn sie nach Osten oder Westen ausgerichtet ist. Zu viel Sonne kann den Salat verbrennen.
6. Wasser wechseln: Wechselt das Wasser alle ein bis zwei Tage, um die Bildung von Bakterien und Algen zu verhindern. Frisches Wasser hält den Salat gesund und fördert das Wachstum. Ich spüle das Glas dabei auch immer kurz aus.
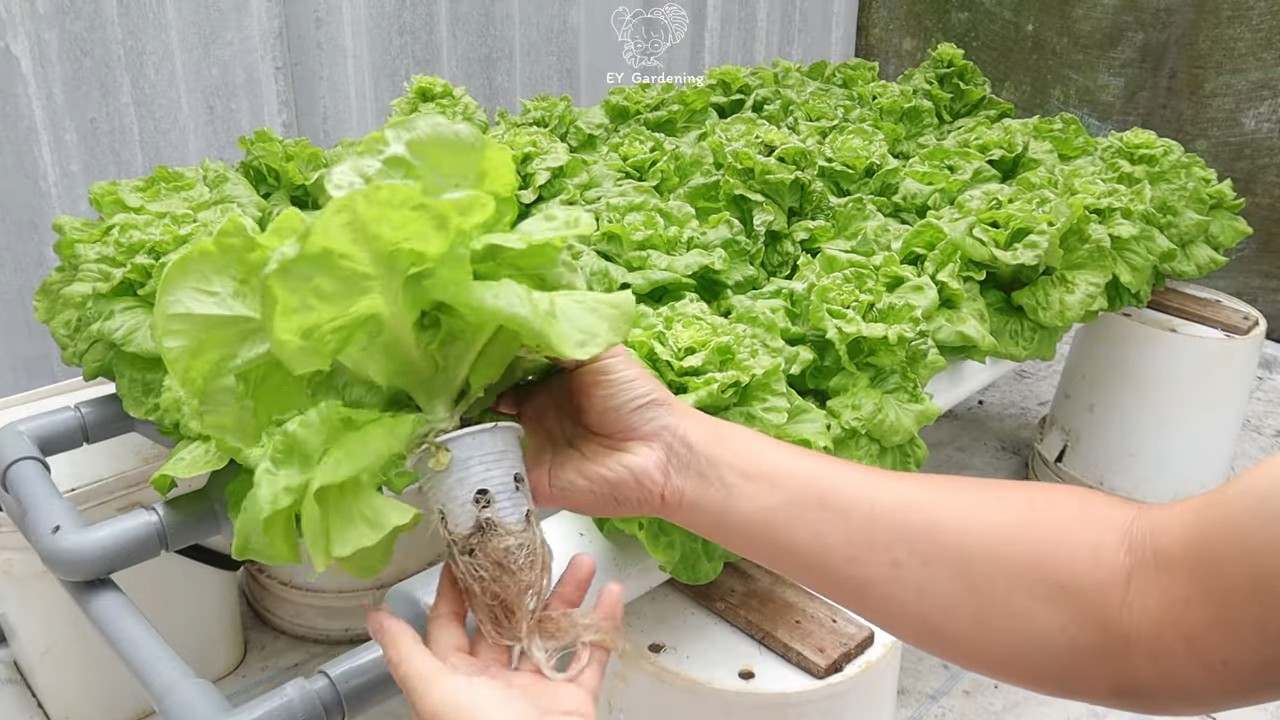
7. Geduld haben: Jetzt heißt es warten! Nach ein paar Tagen solltet ihr die ersten kleinen Wurzeln sehen. Nach ein bis zwei Wochen werden auch neue Blätter sprießen.
8. Die Blätter ernten: Sobald die neuen Blätter groß genug sind, könnt ihr sie ernten. Schneidet sie einfach mit einer Schere ab. Der Salatstrunk wird immer wieder neue Blätter produzieren, solange er genügend Wasser und Licht bekommt.
Tipps und Tricks für den Erfolg:
* Die richtige Salatsorte wählen: Romana-Salat und Kopfsalat eignen sich besonders gut für diese Methode, aber auch andere Sorten können funktionieren. Probiert einfach aus, was euch am besten gefällt.
* Auf die Wasserqualität achten: Leitungswasser ist in der Regel ausreichend, aber wenn ihr sehr hartes Wasser habt, könnt ihr auch gefiltertes Wasser verwenden.
* Schimmel vermeiden: Achtet darauf, dass der Salatstrunk nicht schimmelt. Wenn ihr Schimmel entdeckt, entfernt ihn sofort und wechselt das Wasser.
* Düngen (optional): Wenn ihr das Wachstum beschleunigen wollt, könnt ihr dem Wasser einen Tropfen Flüssigdünger hinzufügen. Aber Vorsicht, nicht zu viel!
* Den Salat umtopfen (optional): Wenn der Salatstrunk viele Wurzeln gebildet hat, könnt ihr ihn auch in einen Topf mit Erde umtopfen. So kann er noch größer und kräftiger werden.
Häufige Probleme und Lösungen:
* Der Salat fault: Das kann passieren, wenn das Wasser nicht oft genug gewechselt wird oder der Salatstrunk bereits beschädigt war. Achtet darauf, nur gesunde Strunke zu verwenden und das Wasser regelmäßig zu wechseln.
* Der Salat wächst nicht: Das kann an zu wenig Licht oder Nährstoffen liegen. Stellt den Salat an einen helleren Standort und gebt ihm gegebenenfalls etwas Dünger.
* Die Blätter werden gelb: Das kann an zu viel Sonne oder zu wenig Wasser liegen. Stellt den Salat an einen schattigeren Standort und achtet darauf, dass immer genügend Wasser im Glas ist.
Noch ein paar zusätzliche Infos:
* Warum funktioniert das überhaupt? Salatstrunke enthalten noch genügend Nährstoffe, um neue Blätter zu bilden. Das Wasser versorgt sie mit Feuchtigkeit und das Licht liefert die Energie für die Photosynthese.
* Wie lange kann man das machen? Solange der Salatstrunk gesund aussieht und neue Blätter produziert, könnt ihr ihn weiter im Wasser ziehen. Irgendwann wird er aber erschöpft sein und keine neuen Blätter mehr bilden.
* Ist das wirklich nachhaltig? Ja, absolut! Ihr spart nicht nur Geld, sondern reduziert auch euren Müll und tragt zu einer nachhaltigeren Lebensweise bei.
Noch ein paar kreative Ideen:
* Verschiedene Salatsorten kombinieren: Probiert es doch mal mit verschiedenen Salatsorten gleichzeitig. So habt ihr immer eine bunte Mischung für euren Salat.
* Kräuter hinzufügen: Ihr könnt auch Kräuter wie Basilikum oder Petersilie im Wasser ziehen. Das gibt eurem Salat eine besondere Note.
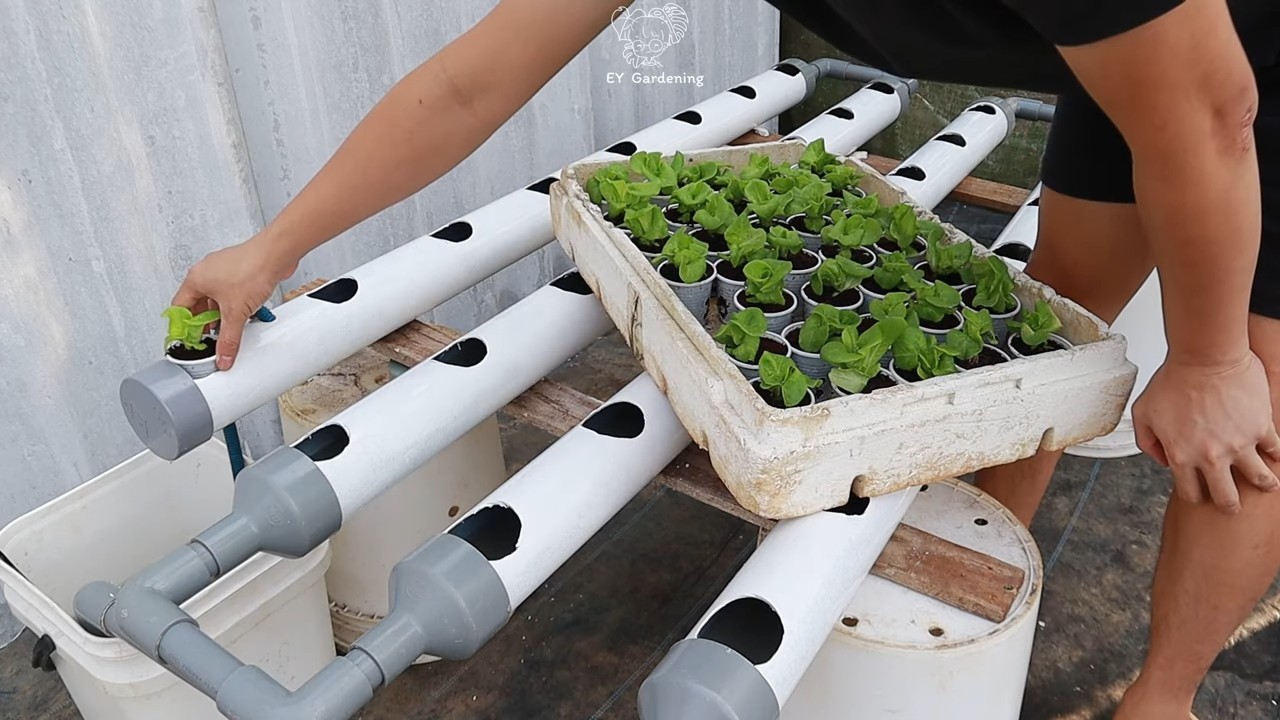
* Ein kleines Indoor-Gärtchen anlegen: Wenn ihr mehrere Salate und Kräuter im Wasser zieht, könnt ihr euch ein kleines Indoor-Gärtchen anlegen. Das sieht nicht nur toll aus, sondern sorgt auch für frische Luft in eurer Wohnung.
Salatpflege im Detail
Nachdem ihr euren Salat erfolgreich im Wasser gezogen habt, ist es wichtig, ihn richtig zu pflegen, damit er lange gesund und produktiv bleibt. Hier sind einige detailliertere Tipps zur Salatpflege:
1. Regelmäßiges Gießen: Auch wenn der Salat im Wasser steht, ist es wichtig, dass er ausreichend mit Feuchtigkeit versorgt wird. Achtet darauf, dass der Wasserstand immer ausreichend hoch ist, sodass die Wurzeln bedeckt sind.
2. Die richtige Beleuchtung: Salat benötigt viel Licht, um zu wachsen. Wenn ihr keinen hellen Standort habt, könnt ihr auch eine Pflanzenlampe verwenden. Achtet darauf, dass die Lampe nicht zu nah am Salat steht, da er sonst verbrennen kann.
3. Die Temperatur: Salat bevorzugt kühle Temperaturen. Vermeidet es, den Salat in der Nähe von Heizkörpern oder anderen Wärmequellen aufzustellen.
4. Schädlinge: Salat kann von verschiedenen Schädlingen befallen werden, wie z.B. Blattläusen oder Schnecken. Kontrolliert den Salat regelmäßig auf Schädlinge und entfernt sie gegebenenfalls.
5. Ernte: Erntet die Blätter regelmäßig, um das Wachstum neuer Blätter anzuregen. Schneidet die Blätter mit einer Schere ab, sodass der Salat weiterwachsen kann.
6. Düngung: Wenn der Salat nicht mehr so gut wächst, könnt ihr ihm etwas Dünger geben. Verwendet am besten einen organischen Flüssigdünger.
7. Umpflanzen: Wenn der Salat zu groß für das Glas geworden ist, könnt ihr ihn in einen Topf mit Erde umpflanzen. Achtet darauf, dass der Topf ausreichend groß ist und der Salat genügend Platz zum Wachsen hat.
Salat im Wasser ziehen – Eine nachhaltige Alternative
Das Ziehen von Salat im Wasser ist nicht nur eine einfache und kostengünstige Methode, um frisches Grünzeug zu Hause anzubauen, sondern auch eine nachhaltige Alternative zum herkömmlichen Anbau. Hier sind einige Gründe, warum das Ziehen von Salat im Wasser nachhaltiger ist:
1. Weniger Wasserverbrauch: Im Vergleich zum Anbau im Garten oder im Topf benötigt das Ziehen von Salat im Wasser deutlich weniger Wasser. Das Wasser wird recycelt und nur bei Bedarf nachgefüllt.
2. Keine Pestizide: Da der Salat in einer kontrollierten Umgebung wächst, ist er weniger anfällig für Schädlinge und Krankheiten. Daher ist der Einsatz von Pestiziden in der Regel nicht erforderlich.
3. Weniger Dünger: Salat, der im Wasser gezogen wird, benötigt weniger Dünger als Salat, der im Garten oder im Topf angebaut wird.
Conclusion
So, there you have it! Growing lettuce using only water might seem like a futuristic farming technique reserved for scientists, but as you’ve seen, it’s surprisingly accessible and rewarding for anyone with a sunny windowsill and a bit of patience. This method offers a fantastic way to enjoy fresh, homegrown lettuce without the mess and commitment of traditional soil gardening. Think about it: no weeding, no soil-borne pests, and a significantly reduced risk of overwatering or underwatering. It’s a win-win!
The beauty of this water-only lettuce growing method lies in its simplicity and adaptability. It’s perfect for urban dwellers with limited space, busy individuals who want a low-maintenance gardening project, and families looking for a fun and educational activity to do together. Imagine the satisfaction of harvesting your own crisp, vibrant lettuce leaves, knowing exactly where they came from and how they were grown.
But don’t just take our word for it. We wholeheartedly encourage you to give this DIY trick a try. Start small, perhaps with a single head of romaine or butter lettuce, and experiment with different varieties to see which ones thrive best in your environment. You can even get creative with your setup! Instead of using plastic containers, consider repurposing glass jars or even creating a small-scale hydroponic system using recycled materials.
Variations to Explore:
* Nutrient Boost: While this method focuses on water-only growing, you can experiment with adding a diluted hydroponic nutrient solution to the water every few weeks to see if it boosts growth and yield. Be sure to start with a very weak solution and monitor your lettuce closely for any signs of nutrient burn.
* Light Enhancement: If you don’t have a particularly sunny windowsill, consider supplementing with a grow light. This can be especially helpful during the winter months when natural light is limited.
* Different Lettuce Types: While romaine and butter lettuce are popular choices, don’t be afraid to experiment with other varieties like loose-leaf lettuce, spinach, or even herbs like basil or mint.
* Vertical Growing: Adapt the water-only method to a vertical setup using stacked containers or a DIY hydroponic tower. This is a great way to maximize space and create a visually appealing display.
Remember, gardening is all about experimentation and learning. Don’t be discouraged if your first attempt isn’t perfect. Observe your lettuce closely, adjust your approach as needed, and most importantly, have fun!
We’re confident that you’ll be amazed at how easy and rewarding it is to grow your own lettuce using only water. And we’d love to hear about your experiences! Share your photos, tips, and questions in the comments below. Let’s create a community of water-only lettuce growers and inspire others to embrace this innovative and sustainable gardening technique. Happy growing!
Frequently Asked Questions (FAQ)
What kind of lettuce works best for water-only growing?
Generally, loose-leaf varieties like romaine, butter lettuce, and oakleaf lettuce tend to thrive best in water-only setups. These types of lettuce have relatively shallow root systems and are efficient at absorbing nutrients from the water. However, don’t be afraid to experiment with other varieties to see what works best in your specific environment. Some gardeners have also had success with spinach and even certain herbs like basil and mint.
How often should I change the water?
It’s crucial to change the water regularly to prevent the buildup of algae and bacteria, which can harm your lettuce. We recommend changing the water every 2-3 days. When you change the water, gently rinse the roots of the lettuce to remove any debris. Use fresh, clean water that is at room temperature. Avoid using tap water that is heavily chlorinated, as this can damage the roots. If your tap water is chlorinated, let it sit out for 24 hours before using it to allow the chlorine to dissipate.
Do I need to add any nutrients to the water?
The beauty of this method is that it can be done with just water. However, if you want to boost growth and yield, you can experiment with adding a diluted hydroponic nutrient solution to the water every few weeks. Start with a very weak solution (about 1/4 to 1/2 the recommended strength) and monitor your lettuce closely for any signs of nutrient burn, such as yellowing or browning of the leaves. If you notice any signs of nutrient burn, immediately flush the roots with fresh water.
How much sunlight does the lettuce need?
Lettuce needs at least 6 hours of sunlight per day to thrive. Place your water-only lettuce setup in a sunny windowsill that receives direct sunlight for most of the day. If you don’t have a particularly sunny windowsill, consider supplementing with a grow light. A simple fluorescent or LED grow light can provide the necessary light for your lettuce to grow healthy and strong. Position the grow light a few inches above the lettuce leaves and keep it on for 12-16 hours per day.
How long does it take to grow lettuce using this method?
The time it takes to grow lettuce using the water-only method depends on several factors, including the variety of lettuce, the amount of sunlight it receives, and the temperature. Generally, you can expect to start harvesting leaves in about 2-3 weeks. You can harvest individual leaves as needed, or you can harvest the entire head of lettuce at once. To encourage continued growth, avoid cutting the lettuce too close to the base.
What if the lettuce starts to rot?
If you notice any signs of rot, such as slimy or discolored leaves, it’s important to take action immediately to prevent the rot from spreading. Remove any affected leaves and change the water. Make sure the lettuce is receiving adequate sunlight and that the water is being changed regularly. If the rot persists, you may need to discard the lettuce and start over.
Can I use this method to regrow lettuce from a store-bought head?
Yes, this method is perfect for regrowing lettuce from a store-bought head. Simply cut off the bottom of the lettuce head, leaving about 2 inches of the stem intact. Place the stem in a shallow dish of water, making sure that the cut end is submerged. Change the water every day and place the dish in a sunny location. Within a few days, you should start to see new leaves sprouting from the center of the stem. Once the new leaves have grown to a reasonable size, you can transplant the lettuce to a larger container of water.
Is this method sustainable?
Yes, growing lettuce using only water is a very sustainable method. It reduces water consumption compared to traditional soil gardening, eliminates the need for fertilizers and pesticides, and can be done using recycled materials. By growing your own lettuce, you can reduce your carbon footprint and contribute to a more sustainable food system.
What are the benefits of growing lettuce in water only?
There are numerous benefits to growing lettuce in water only. It’s a low-maintenance method that requires no soil, weeding, or pesticides. It’s perfect for urban dwellers with limited space and busy individuals who want a quick and easy way to grow their own food. It’s also a fun and educational activity for families. Plus, you get to enjoy fresh, homegrown lettuce that is free from harmful chemicals.
Can I use this method for other vegetables or herbs?
While this article focuses on lettuce, the water-only growing method can also be used for other vegetables and herbs, such as celery, bok choy, and basil. The key is to choose plants that have relatively shallow root systems and are efficient at absorbing nutrients from the water. Experiment with different varieties to see what works best in your environment.


Leave a Comment