
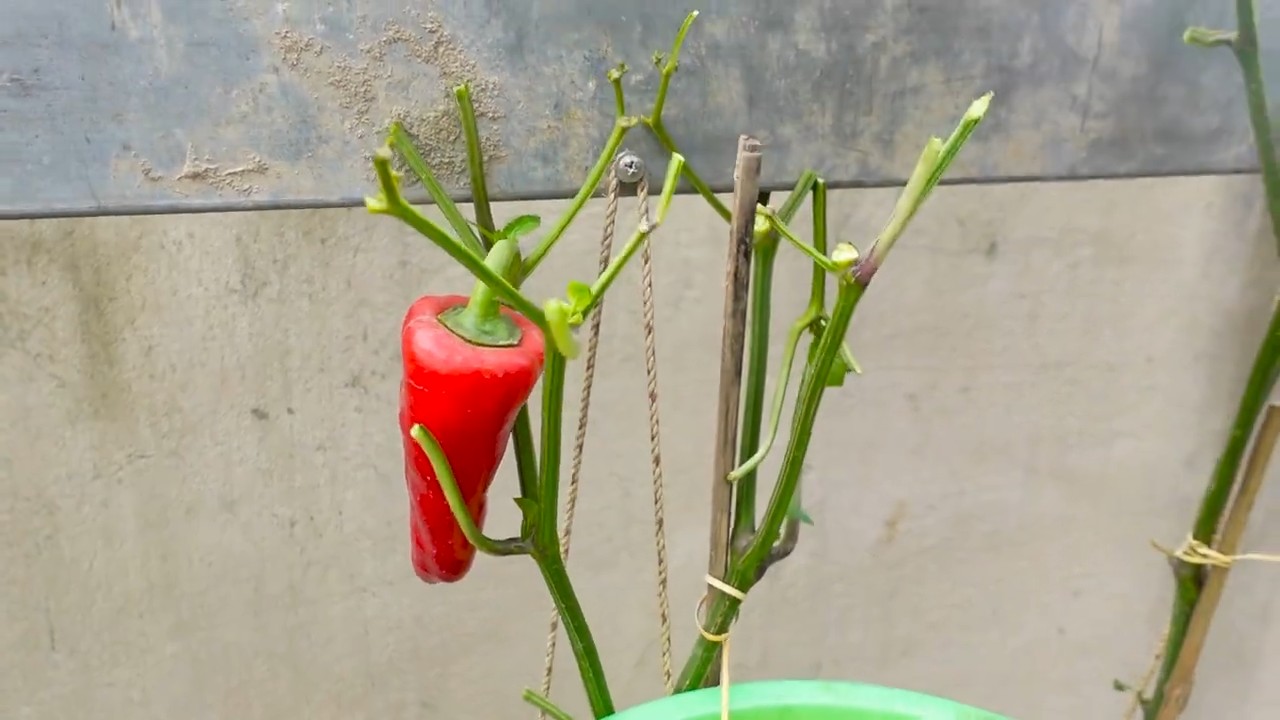
Chili pepper garden trick: Ever dream of a vibrant garden overflowing with fiery chili peppers, ready to spice up your meals and impress your friends? I know I have! But sometimes, despite our best efforts, those little peppers just don’t seem to thrive. They stay small, lack heat, or simply refuse to fruit. Don’t worry, you’re not alone, and I’m here to share a game-changing secret that will transform your chili pepper growing experience.
For centuries, chili peppers have been a staple in cuisines around the world, adding a kick to dishes from Mexico to Thailand. Their cultivation dates back thousands of years, with evidence suggesting their use in South America as early as 6,000 BC. These fiery fruits aren’t just about flavor; they’re packed with vitamins and antioxidants, making them a healthy addition to your diet. But getting a bountiful harvest can be tricky, especially if you’re new to gardening.
That’s where this DIY article comes in. I’m going to reveal a simple, yet incredibly effective, chili pepper garden trick that will boost your pepper production and unlock their full potential. This isn’t some complicated gardening technique requiring expensive equipment. It’s a clever hack that utilizes readily available materials and a little bit of know-how. If you’re tired of lackluster chili pepper harvests and ready to experience the joy of picking plump, fiery peppers straight from your garden, then keep reading! I promise, this is one trick you won’t want to miss.
Chili-Pflanzen-Booster: So bringst du deine Chilis zum Explodieren!
Hey Chili-Liebhaber! Ich bin total begeistert, euch heute meinen absoluten Geheimtipp für eine mega Chili-Ernte zu verraten. Ich habe jahrelang experimentiert, und dieser DIY-Hack hat meine Chili-Pflanzen wirklich auf das nächste Level gehoben. Keine Sorge, es ist super einfach und du brauchst keine teuren Spezialprodukte. Los geht’s!
Was du brauchst:
* Eierschalen: Sammle so viele Eierschalen wie möglich. Je mehr, desto besser!
* Kaffeesatz: Frischer oder gebrauchter Kaffeesatz ist perfekt.
* Bananenschalen: Die gelben Schalen, die normalerweise im Müll landen.
* Epsom-Salz (Bittersalz): Findest du in der Drogerie oder im Gartencenter.
* Wasser: Am besten Regenwasser, aber Leitungswasser geht auch.
* Gießkanne oder Sprühflasche: Zum Ausbringen des Chili-Boosters.
* Mörser und Stößel (optional): Zum Zerkleinern der Eierschalen.
* Gartenhandschuhe: Um deine Hände sauber zu halten.
* Geduld: Rom wurde auch nicht an einem Tag erbaut!
Warum diese Zutaten?
Bevor wir loslegen, kurz zur Erklärung, warum diese Zutaten so genial für Chili-Pflanzen sind:
* Eierschalen: Sie sind reich an Kalzium, was für starke Zellwände und eine gesunde Fruchtbildung unerlässlich ist. Kalziummangel kann zu Blütenendfäule führen, also wollen wir das unbedingt vermeiden!
* Kaffeesatz: Er liefert Stickstoff, der das Wachstum fördert, und ist leicht sauer, was Chili-Pflanzen lieben. Außerdem hält er Schnecken fern!
* Bananenschalen: Sie sind eine super Quelle für Kalium, das für die Blütenbildung und Fruchtentwicklung wichtig ist. Mehr Blüten bedeuten mehr Chilis!
* Epsom-Salz: Enthält Magnesium, das für die Photosynthese und die Aufnahme anderer Nährstoffe wichtig ist. Außerdem hilft es, Stress bei den Pflanzen zu reduzieren.
Der Chili-Booster in 3 Phasen: Vorbereitung, Herstellung und Anwendung
Wir teilen den Prozess in drei übersichtliche Phasen auf, damit du den Überblick behältst.
Phase 1: Vorbereitung der Zutaten
1. Eierschalen sammeln und vorbereiten:
* Sammle über mehrere Wochen Eierschalen. Spüle sie nach dem Gebrauch kurz aus, um Eiweißreste zu entfernen.
* Lass die Eierschalen vollständig trocknen. Das ist wichtig, damit sie nicht schimmeln.
* Zerkleinere die getrockneten Eierschalen. Du kannst sie entweder mit einem Mörser und Stößel zu feinem Pulver zermahlen (das ist ideal, aber etwas aufwendig) oder sie einfach mit den Händen zerbröseln. Je kleiner die Stücke, desto besser können die Pflanzen das Kalzium aufnehmen.
2. Kaffeesatz sammeln und trocknen:
* Sammle deinen Kaffeesatz nach dem Brühen.
* Breite den Kaffeesatz auf einem Backblech oder einem Stück Papier aus und lass ihn vollständig trocknen. Das verhindert Schimmelbildung.
* Wenn der Kaffeesatz trocken ist, kannst du ihn in einem luftdichten Behälter aufbewahren.
3. Bananenschalen vorbereiten:
* Iss deine Bananen und behalte die Schalen!
* Schneide die Bananenschalen in kleine Stücke.
* Du kannst die Bananenschalen entweder direkt verwenden oder sie trocknen. Zum Trocknen breitest du sie auf einem Backblech aus und lässt sie an der Luft trocknen oder du legst sie kurz in den Ofen bei niedriger Temperatur (ca. 50°C). Getrocknete Bananenschalen lassen sich besser lagern.
Phase 2: Herstellung des Chili-Boosters
Hier gibt es zwei Varianten, je nachdem, wie viel Zeit du investieren möchtest:
Variante 1: Der schnelle Chili-Booster (für ungeduldige Gärtner)
Diese Variante ist super einfach und schnell, aber nicht ganz so effektiv wie die zweite Variante.
1. Mischen der Zutaten:
* Nimm eine Handvoll zerkleinerte Eierschalen.
* Gib eine Handvoll getrockneten Kaffeesatz hinzu.
* Füge eine Handvoll zerkleinerte Bananenschalen hinzu.
* Mische alles gut durch.
2. Anwendung:
* Verteile die Mischung um die Basis deiner Chili-Pflanzen.
* Arbeite die Mischung leicht in die Erde ein.
* Gieße die Pflanzen anschließend gut.
Variante 2: Der fermentierte Chili-Booster (für maximale Power)
Diese Variante braucht etwas mehr Zeit, aber die Fermentation macht die Nährstoffe für die Pflanzen leichter verfügbar.
1. Zutaten in einen Behälter geben:
* Nimm einen Eimer oder einen großen Behälter.
* Gib alle vorbereiteten Zutaten (Eierschalen, Kaffeesatz, Bananenschalen) hinein.
* Fülle den Behälter mit Wasser auf. Am besten Regenwasser, aber Leitungswasser geht auch.
2. Fermentieren lassen:
* Decke den Behälter ab, aber nicht luftdicht. Es muss noch Luft zirkulieren können.
* Lass die Mischung 1-2 Wochen fermentieren. Rühre sie jeden Tag um. Du wirst sehen, dass sich Blasen bilden und die Mischung anfängt zu riechen (keine Sorge, das ist normal!).
3. Abseihen:
* Nach 1-2 Wochen seihe die Mischung ab. Die festen Bestandteile kannst du auf den Kompost geben.
4. Verdünnen:
* Verdünne die fermentierte Flüssigkeit mit Wasser im Verhältnis 1:10. Das bedeutet, auf einen Teil fermentierte Flüssigkeit kommen zehn Teile Wasser.
5. Anwendung:
* Gieße deine Chili-Pflanzen mit der verdünnten Flüssigkeit.
Phase 3: Anwendung und Dosierung
Egal für welche Variante du dich entschieden hast, hier sind ein paar Tipps zur Anwendung:
1. Wann düngen?
* Beginne mit der Düngung, sobald deine Chili-Pflanzen ins Freie kommen oder in größere Töpfe umgepflanzt werden.
* Wiederhole die Düngung alle 2-3 Wochen.
2. Wie viel düngen?
* Gieße deine Pflanzen so, dass die Erde gut durchfeuchtet ist, aber nicht im Wasser steht.
* Bei der schnellen Variante verteilst du einfach eine Handvoll der Mischung um jede Pflanze.
3. Zusätzlicher Magnesium-Boost:
* Löse einen Teelöffel Epsom-Salz in einem Liter Wasser auf.
* Besprühe deine Chili-Pflanzen alle 2-3 Wochen mit dieser Lösung. Das hilft ihnen, Magnesium aufzunehmen und Stress abzubauen.
4. Beobachte deine Pflanzen:
* Achte auf die Reaktion deiner Pflanzen. Wenn sie gut wachsen und viele Blüten bilden, machst du alles richtig.
* Wenn du Anzeichen von Überdüngung siehst (z.B. verbrannte Blattspitzen), reduziere die Düngermenge oder die Häufigkeit der Düngung.
Zusätzliche Tipps für eine erfolgreiche Chili-Ernte:
* Der richtige Standort: Chili-Pflanzen lieben die Sonne! Stelle sie an einen sonnigen Platz, wo sie mindestens 6 Stunden Sonne am Tag bekommen.
* Gute Erde: Verwende eine hochwertige Blumenerde oder eine spezielle Chili-Erde.
* Regelmäßiges Gießen: Gieße deine Chili-Pflanzen regelmäßig, aber vermeide Staunässe. Die Erde sollte immer leicht feucht sein.
* Schädlinge bekämpfen: Kontrolliere deine Pflanzen regelmäßig auf Schädlinge wie Blattläuse oder Spinnmilben. Bei Bedarf kannst du natürliche Schädlingsbekämpfungsmittel verwenden.
* Geduld haben:

Conclusion
So, there you have it! This simple yet incredibly effective chili pepper garden trick is a game-changer for anyone looking to boost their harvest and enjoy a spicier, more vibrant yield. We’ve explored how Epsom salt, a readily available and inexpensive ingredient, can work wonders in your garden, providing essential magnesium and sulfur that chili peppers crave. These nutrients are vital for chlorophyll production, leading to healthier, greener plants capable of absorbing more sunlight and producing more peppers. Furthermore, the magnesium helps strengthen cell walls, making your plants more resistant to diseases and pests.
But the benefits don’t stop there. By using Epsom salt, you’re not just increasing the quantity of your chili peppers; you’re also enhancing their quality. Expect to see brighter colors, thicker skins, and a more intense flavor profile. Imagine the satisfaction of harvesting a basket overflowing with fiery red, yellow, or orange peppers, knowing that you played a key role in their exceptional growth and taste.
This isn’t just about growing chili peppers; it’s about unlocking their full potential. It’s about experiencing the joy of nurturing your plants and reaping the rewards of your efforts. It’s about connecting with nature and understanding the simple yet powerful ways we can support its processes.
Why is this chili pepper garden trick a must-try? Because it’s easy, affordable, and delivers remarkable results. It’s a low-risk, high-reward strategy that can transform your chili pepper garden from ordinary to extraordinary.
Now, let’s talk about variations and suggestions. While the basic Epsom salt solution is highly effective, you can tailor it to your specific needs and preferences. For example, if you’re growing your chili peppers in containers, you might want to use a slightly weaker solution to avoid over-fertilizing. You can also combine Epsom salt with other organic fertilizers, such as compost tea or fish emulsion, to provide a more comprehensive nutrient boost.
Another variation involves foliar spraying. Instead of watering the soil with the Epsom salt solution, you can spray it directly onto the leaves of your chili pepper plants. This allows for faster absorption of the magnesium and sulfur, providing an immediate boost to their health and vitality. Just be sure to do this in the early morning or late evening to avoid burning the leaves in direct sunlight.
Consider the type of chili peppers you’re growing. Some varieties, like habaneros and Scotch bonnets, are known for their intense heat, while others, like bell peppers and poblano peppers, are milder. Adjust the frequency and concentration of the Epsom salt solution accordingly. For hotter varieties, you might want to use a slightly stronger solution to support their higher nutrient demands.
Experiment with different application methods and dosages to find what works best for your chili pepper plants and your specific growing conditions. Remember to observe your plants closely and adjust your approach as needed. Gardening is a learning process, and the more you experiment, the more you’ll learn about what your plants need to thrive.
We are confident that this chili pepper garden trick will revolutionize your gardening experience. We encourage you to try it out and see the amazing results for yourself. Don’t be afraid to experiment and adapt the technique to your specific needs and preferences.
Most importantly, we want to hear about your experiences! Share your photos, tips, and stories in the comments section below. Let us know what worked for you, what challenges you faced, and what you learned along the way. Together, we can create a community of chili pepper enthusiasts who are passionate about growing the best peppers possible. So, get out there, get your hands dirty, and start growing some amazing chili peppers! We can’t wait to see what you create.
FAQ
What exactly is Epsom salt, and why is it good for chili peppers?
Epsom salt is a naturally occurring mineral compound composed of magnesium sulfate (MgSO4). Magnesium is crucial for chlorophyll production, the pigment that allows plants to absorb sunlight for photosynthesis. Sulfur is also essential for various plant functions, including enzyme activation and protein synthesis. Chili peppers, like many other plants, require both magnesium and sulfur for optimal growth, fruit production, and overall health. Epsom salt provides these nutrients in a readily available form, allowing plants to absorb them easily through their roots or leaves.
How often should I apply Epsom salt to my chili pepper plants?
The frequency of application depends on several factors, including the size of your plants, the type of soil you’re using, and the overall health of your garden. As a general guideline, you can apply Epsom salt every two to four weeks. For young plants, use a weaker solution (e.g., 1 tablespoon per gallon of water) and apply it less frequently. As your plants mature and begin to produce fruit, you can increase the concentration and frequency of application. Always observe your plants closely for any signs of nutrient deficiencies or excesses and adjust your approach accordingly.
Can I use too much Epsom salt? What are the signs of over-fertilization?
Yes, it is possible to over-fertilize with Epsom salt. While it’s a relatively safe and gentle amendment, excessive amounts can lead to nutrient imbalances and other problems. Signs of over-fertilization include yellowing or browning of leaves, stunted growth, and salt buildup in the soil. If you suspect that you’ve used too much Epsom salt, flush the soil with plenty of water to remove excess minerals. In the future, be sure to follow the recommended dosages and application frequencies.
Is it better to water with Epsom salt or spray it on the leaves?
Both watering and foliar spraying are effective methods of applying Epsom salt to chili pepper plants. Watering allows the roots to absorb the magnesium and sulfur, providing a sustained release of nutrients over time. Foliar spraying, on the other hand, allows for faster absorption through the leaves, providing an immediate boost to plant health. The best approach depends on your specific needs and preferences. If you’re looking for a quick fix for nutrient deficiencies, foliar spraying is a good option. If you’re looking for a more long-term solution, watering is a better choice. You can also combine both methods for optimal results.
Can I use Epsom salt on other plants in my garden?
Yes, Epsom salt can be beneficial for many other plants in your garden, including tomatoes, roses, peppers, and herbs. However, not all plants require the same amount of magnesium and sulfur. Before applying Epsom salt to other plants, research their specific nutrient needs and adjust the dosage accordingly. Some plants, like acid-loving plants such as blueberries and azaleas, may not benefit from Epsom salt and could even be harmed by it.
My chili pepper plants are already producing peppers. Is it too late to use Epsom salt?
No, it’s never too late to use Epsom salt on your chili pepper plants. In fact, applying Epsom salt during the fruiting stage can be particularly beneficial, as it helps to improve the size, color, and flavor of the peppers. Just be sure to use a slightly weaker solution and apply it less frequently to avoid over-fertilizing.
Where can I buy Epsom salt?
Epsom salt is widely available at most drugstores, supermarkets, and garden centers. It’s typically sold in the bath and beauty section or in the gardening aisle. You can also purchase Epsom salt online from various retailers. Look for pure Epsom salt that is free of additives or fragrances.
Does the type of water I use matter when mixing the Epsom salt solution?
Yes, the type of water you use can affect the effectiveness of the Epsom salt solution. Avoid using hard water, which contains high levels of minerals that can interfere with the absorption of magnesium and sulfur. Ideally, use rainwater, distilled water, or filtered water to mix your Epsom salt solution.
How do I know if my chili pepper plants need Epsom salt?
The best way to determine if your chili pepper plants need Epsom salt is to observe them closely for signs of nutrient deficiencies. Common symptoms of magnesium deficiency include yellowing between the veins of older leaves, stunted growth, and reduced fruit production. Sulfur deficiency can manifest as pale green or yellow leaves, especially on new growth. If you notice any of these symptoms, try applying Epsom salt and see if it improves the health of your plants.
Can I use Epsom salt in hydroponic systems?
Yes, Epsom salt can be used in hydroponic systems to provide magnesium and sulfur to plants. However, the concentration and frequency of application will need to be adjusted based on the specific requirements of the hydroponic system and the type of plants you’re growing. Consult with a hydroponics expert or refer to a reliable hydroponics guide for specific recommendations.
Leave a Comment