
Concrete corn growing might sound like an oxymoron, a gardening impossibility! But what if I told you that even without acres of farmland, you could be enjoying the sweet taste of homegrown corn? Forget the sprawling fields; we’re bringing the farm to your patio, balcony, or even your sunny windowsill with these ingenious DIY tricks and hacks.
For centuries, corn has been a staple crop, deeply woven into the fabric of countless cultures. From the ancient civilizations of Mesoamerica, where it was revered as a sacred gift, to its modern-day ubiquity in our diets, corn’s journey is a testament to its resilience and adaptability. Now, we’re taking that adaptability to a whole new level!
Let’s face it, not everyone has access to vast gardens. Many of us are city dwellers, apartment residents, or simply have limited outdoor space. But that shouldn’t stop us from experiencing the joy of growing our own food. That’s where these DIY tricks come in. Imagine biting into a juicy ear of corn that you nurtured from a tiny seed, right in your own home! This article is your guide to mastering concrete corn growing, offering simple, effective, and space-saving solutions that will transform your gardening dreams into a delicious reality. Get ready to roll up your sleeves and discover the secrets to a bountiful harvest, no matter where you live!
DIY: Maisanbau im Beton – So geht’s!
Hey Leute, habt ihr auch so wenig Platz im Garten oder nur einen Balkon? Kein Problem! Ich zeige euch heute, wie ihr trotzdem leckeren Mais in Beton anbauen könnt. Klingt verrückt? Ist es vielleicht ein bisschen, aber es funktioniert super und ist ein echter Hingucker! Wir machen das Ganze nachhaltig und upcyceln alte Betongefäße. Los geht’s!
Was du brauchst:
* Alte Betongefäße (Blumentöpfe, Rohre, etc.) – Je größer, desto besser!
* Bohrmaschine mit Steinbohrer (falls keine Löcher vorhanden)
* Drainagematerial (Kies, Blähton, Tonscherben)
* Hochwertige Pflanzerde
* Maiskörner (am besten Zuckermais oder Popcornmais)
* Langzeitdünger (optional)
* Gießkanne
* Geduld und ein bisschen Liebe!
Vorbereitung der Betongefäße
Bevor wir mit dem Pflanzen loslegen, müssen wir unsere Betongefäße vorbereiten. Das ist wichtig, damit das Wasser gut ablaufen kann und die Maiswurzeln nicht faulen.
1. Reinigung: Zuerst reinige ich die Betongefäße gründlich. Mit einer Bürste und Wasser entferne ich Schmutz, Moos und andere Ablagerungen. Das ist wichtig, damit die Erde später nicht verunreinigt wird.
2. Drainagelöcher bohren (falls nötig): Wenn eure Betongefäße keine Löcher im Boden haben, müsst ihr welche bohren. Das ist super wichtig für die Drainage! Nehmt eure Bohrmaschine mit einem Steinbohrer und bohrt vorsichtig ein paar Löcher in den Boden. Achtet darauf, dass die Löcher nicht zu groß sind, damit die Erde nicht gleich wieder rausfällt. Ich empfehle mindestens drei bis vier Löcher, je nach Größe des Gefäßes.
3. Drainageschicht einfüllen: Jetzt kommt die Drainageschicht. Ich verwende dafür am liebsten Kies oder Blähton. Tonscherben gehen aber auch super. Füllt eine Schicht von etwa 5-10 cm in den Boden des Gefäßes. Diese Schicht sorgt dafür, dass das Wasser gut ablaufen kann und die Wurzeln nicht im Wasser stehen.
Die richtige Erde für deinen Mais
Die Wahl der richtigen Erde ist entscheidend für den Erfolg deines Maisanbaus. Mais ist ein Starkzehrer und braucht eine nährstoffreiche Erde.
1. Hochwertige Pflanzerde wählen: Ich empfehle euch, eine hochwertige Pflanzerde zu verwenden. Diese enthält bereits alle wichtigen Nährstoffe, die der Mais für ein gesundes Wachstum benötigt. Ihr könnt auch spezielle Gemüseerde verwenden.
2. Erde vorbereiten: Bevor ich die Erde in die Betongefäße fülle, lockere ich sie noch etwas auf. So können die Wurzeln besser eindringen. Wenn ihr wollt, könnt ihr auch noch etwas Langzeitdünger untermischen. Das ist aber optional.
3. Gefäße befüllen: Jetzt fülle ich die Betongefäße mit der Erde. Lasst oben noch ein paar Zentimeter Platz, damit ihr später noch gut gießen könnt.
Mais säen – Schritt für Schritt
Jetzt kommt der spannende Teil: das Säen der Maiskörner!
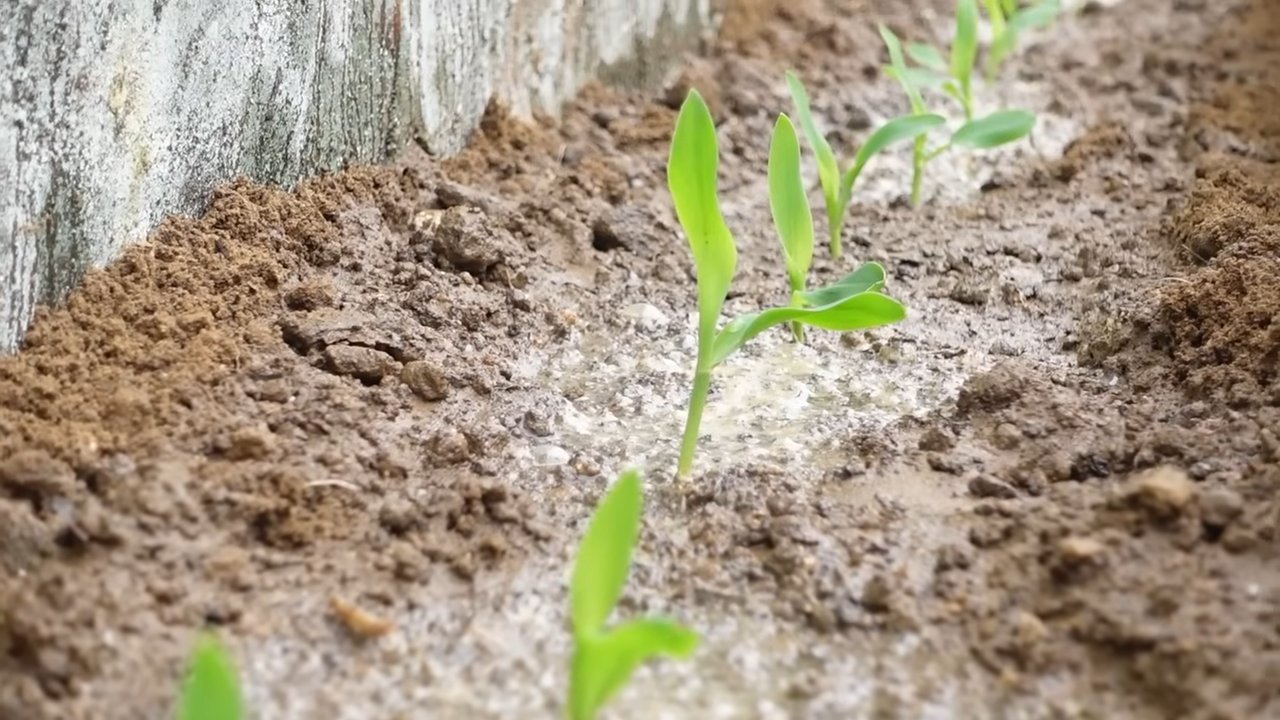
1. Saattiefe bestimmen: Maiskörner sollten etwa 2-3 cm tief in die Erde gesät werden.
2. Körner platzieren: Ich mache mit dem Finger kleine Löcher in die Erde und lege jeweils 2-3 Maiskörner hinein. Warum 2-3? Weil nicht jedes Korn keimt. So erhöhen wir die Wahrscheinlichkeit, dass mindestens eine Pflanze pro Loch wächst.
3. Mit Erde bedecken: Jetzt bedecke ich die Körner vorsichtig mit Erde und drücke sie leicht an.
4. Angießen: Zum Schluss gieße ich die Erde vorsichtig an. Achtet darauf, dass ihr die Körner nicht wieder ausspült.
Pflege des Maises
Nach dem Säen ist vor der Pflege! Mais braucht regelmäßige Pflege, damit er gut wächst und viele Kolben bildet.
1. Gießen: Mais braucht viel Wasser, besonders während der Wachstumsphase. Gießt regelmäßig, aber vermeidet Staunässe. Ich prüfe immer mit dem Finger, ob die Erde noch feucht ist. Wenn sie sich trocken anfühlt, ist es Zeit zum Gießen.
2. Düngen: Mais ist ein Starkzehrer und braucht regelmäßig Dünger. Ich dünge alle zwei Wochen mit einem Flüssigdünger für Gemüse. Ihr könnt auch Langzeitdünger verwenden, den ihr bereits beim Pflanzen in die Erde gemischt habt.
3. Unkraut entfernen: Entfernt regelmäßig Unkraut, damit der Mais nicht von ihm überwuchert wird.
4. Ausdünnen: Wenn mehrere Pflanzen aus einem Loch wachsen, solltet ihr die schwächste Pflanze entfernen. So haben die anderen Pflanzen mehr Platz und Nährstoffe.
5. Stützen: Wenn der Mais größer wird, kann es sein, dass er eine Stütze braucht. Besonders bei starkem Wind kann er sonst umknicken. Ich verwende dafür Bambusstäbe oder Holzpflöcke.
Bestäubung – So klappt’s mit den Kolben
Mais ist ein Windbestäuber. Das bedeutet, dass der Pollen vom männlichen Blütenteil (der Fahne oben an der Pflanze) zum weiblichen Blütenteil (den Seidenfäden, die aus den Kolben herausragen) gelangen muss, um die Kolben zu befruchten.
1. Hilfe bei der Bestäubung: Wenn ihr nur wenige Maispflanzen habt, kann es sein, dass die Bestäubung nicht optimal funktioniert. Ihr könnt aber nachhelfen! Schüttelt einfach die Maispflanzen vorsichtig, wenn die Fahnen Pollen abgeben. So verteilt ihr den Pollen besser.
2. Handbestäubung: Eine noch effektivere Methode ist die Handbestäubung. Sammelt den Pollen von den Fahnen mit einem Pinsel und streicht ihn auf die Seidenfäden der Kolben. Das solltet ihr am besten mehrmals wiederholen, um sicherzustellen, dass alle Seidenfäden bestäubt werden.
Erntezeit – Endlich Maiskolben!
Nach etwa 80-100 Tagen ist es endlich so weit: Die Maiskolben sind reif und können geerntet werden!
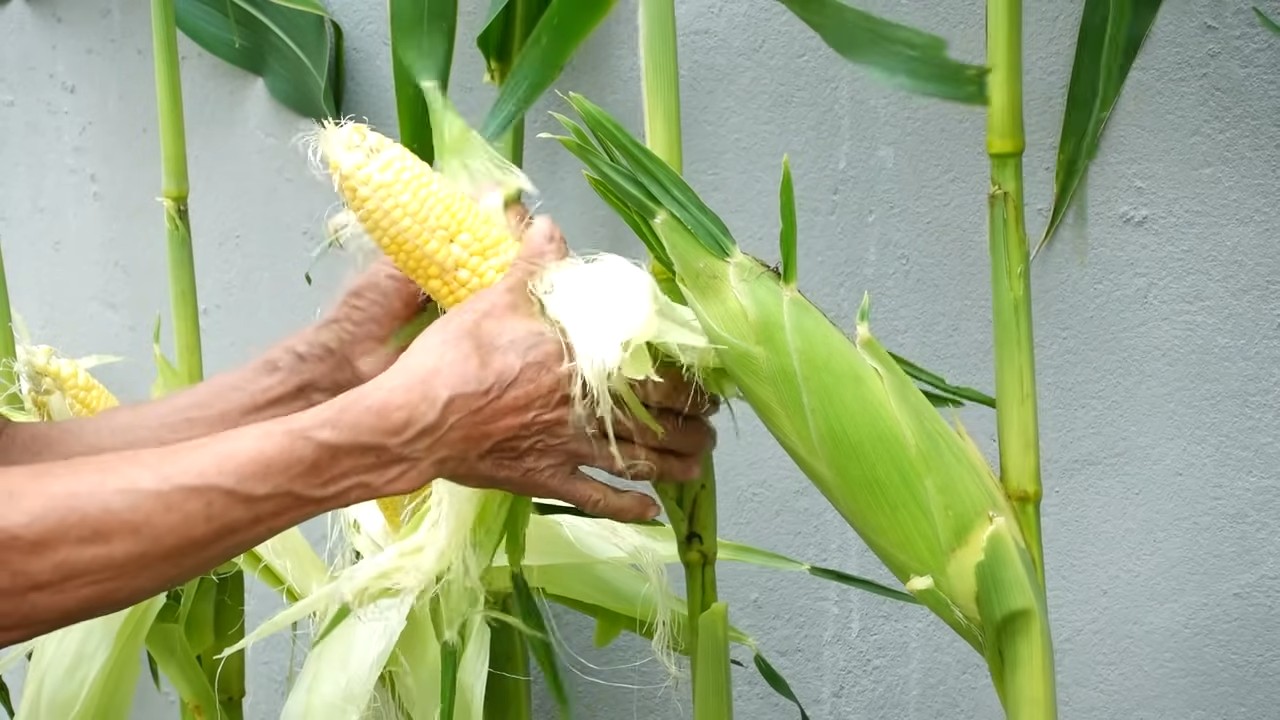
1. Reife erkennen: Die Maiskolben sind reif, wenn die Seidenfäden braun und trocken sind und die Kolben sich fest anfühlen. Ihr könnt auch ein Korn aufdrücken. Wenn es milchig ist, ist der Kolben reif.
2. Ernten: Um die Maiskolben zu ernten, dreht ihr sie einfach vorsichtig vom Stiel ab.
3. Genießen: Jetzt könnt ihr eure selbst angebauten Maiskolben genießen! Sie schmecken am besten frisch vom Grill oder gekocht mit Butter und Salz.
Zusätzliche Tipps und Tricks
* Sortenwahl: Wählt eine Maissorte, die für den Anbau im Topf geeignet ist. Zuckermais und Popcornmais sind gute Optionen. Es gibt auch spezielle Zwergmaissorten, die besonders gut für den Anbau im Topf geeignet sind.
* Standort: Mais braucht einen sonnigen Standort. Stellt eure Betongefäße also an einen Ort, an dem sie mindestens 6 Stunden Sonne am Tag bekommen.
* Schädlinge: Achtet auf Schädlinge wie Blattläuse oder Maiszünsler. Bei Befall könnt ihr natürliche Schädlingsbekämpfungsmittel verwenden.
* Windschutz: Wenn euer Balkon sehr windig ist, solltet ihr eure Maispflanzen vor Wind schützen. Das könnt ihr zum Beispiel mit einer Windschutzscheibe oder einem Sichtschutz machen.
* Upcycling: Verwendet alte Betongefäße, um Ressourcen zu schonen und euren Garten oder Balkon nachhaltiger zu gestalten.
* Kreativität: Seid kreativ bei der Gestaltung eurer Betongefäße! Ihr könnt sie bemalen, bekleben oder mit anderen Materialien verzieren.
Häufige Probleme und Lösungen
* Gelbe Blätter: Gelbe Blätter können ein Zeichen für Nährstoffmangel sein. Düngt eure Maispflanzen regelmäßig, um das Problem zu beheben.
* Schlechte Bestäubung: Wenn die Kolben nicht richtig befruchtet werden, können sie leer oder nur teilweise mit Körnern gefüllt sein. Helft bei der Bestäubung nach, indem
Conclusion
So, there you have it! Transforming your concrete landscape into a surprisingly fertile ground for corn might sound unconventional, but as we’ve explored, it’s entirely achievable with a little ingenuity and the right approach. This DIY method isn’t just about defying expectations; it’s about embracing sustainable practices, maximizing space, and enjoying the unparalleled satisfaction of harvesting your own homegrown corn, even in the most unlikely of environments.
Why is this a must-try? Because it opens up possibilities where you thought none existed. Imagine the delight of your children, the envy of your neighbors, and the sheer pride of serving corn on the cob that you nurtured from seed to table, all within the confines of your concrete jungle. It’s a conversation starter, a learning experience, and a testament to the power of resourcefulness.
But the benefits extend beyond the novelty. This method allows you to control the growing environment, minimizing pests and diseases that might plague traditional gardens. You can tailor the soil composition to perfectly suit your corn’s needs, ensuring optimal growth and flavor. Plus, it’s a fantastic way to repurpose old containers and reduce waste.
Looking for variations? Consider experimenting with different types of corn. Sweet corn is a classic choice, but you could also try growing popcorn kernels for a fun family activity or even ornamental corn for a touch of autumn color. You can also adjust the size of your containers to accommodate different varieties and growing spaces. For smaller spaces, consider dwarf corn varieties. Another variation is to incorporate companion planting. Marigolds can deter pests, while beans can help fix nitrogen in the soil, benefiting your corn plants.
Don’t be afraid to get creative with your container design. Use old tires, repurposed barrels, or even build your own raised beds on top of the concrete. The possibilities are endless! Just remember to ensure proper drainage and adequate sunlight.
We understand that venturing into uncharted territory can be daunting, but we encourage you to take the plunge and give this DIY concrete corn growing trick a try. The rewards are well worth the effort. From the first sprout to the final harvest, you’ll be amazed at what you can achieve.
And most importantly, we want to hear about your experience! Share your photos, tips, and challenges in the comments below. Let’s build a community of concrete corn growers and inspire others to embrace the unexpected. Your insights could be invaluable to someone just starting out. So, grab your seeds, gather your supplies, and get ready to transform your concrete into a cornucopia of deliciousness! Let us know how your concrete corn growing adventure unfolds!
Frequently Asked Questions (FAQ)
1. What kind of soil should I use for growing corn in containers on concrete?
The ideal soil mix for container-grown corn should be well-draining, nutrient-rich, and slightly acidic to neutral (pH 6.0-7.0). A good starting point is a mix of equal parts:
* **Potting soil:** Provides a light and airy base for root growth.
* **Compost:** Adds essential nutrients and improves soil structure.
* **Peat moss or coco coir:** Helps retain moisture and improve drainage.
You can also amend the soil with slow-release fertilizer to provide a steady supply of nutrients throughout the growing season. Avoid using garden soil directly in containers, as it can become compacted and poorly drained.
2. How much sunlight does corn need when grown in containers on concrete?
Corn is a sun-loving plant and requires at least 6-8 hours of direct sunlight per day to thrive. When growing corn in containers on concrete, position them in the sunniest spot available. If you don’t have enough natural sunlight, you can supplement with grow lights. Rotate the containers regularly to ensure even light exposure on all sides of the plants.
3. How often should I water corn grown in containers on concrete?
Watering frequency depends on several factors, including the size of the container, the weather, and the type of soil. Generally, you should water your corn plants when the top inch of soil feels dry to the touch. Water deeply, until water drains out of the bottom of the container. Avoid overwatering, as this can lead to root rot. During hot, dry weather, you may need to water daily. Check the soil moisture regularly and adjust your watering schedule accordingly.
4. What kind of fertilizer should I use for corn grown in containers on concrete?
Corn is a heavy feeder and requires a steady supply of nutrients, especially nitrogen, phosphorus, and potassium. You can use a balanced fertilizer (e.g., 10-10-10) or a fertilizer specifically formulated for vegetables. Apply fertilizer according to the package directions. You can also supplement with organic fertilizers, such as compost tea or fish emulsion. Side-dress your corn plants with fertilizer every few weeks throughout the growing season.
5. How do I pollinate corn grown in containers on concrete?
Corn is wind-pollinated, so if you’re growing multiple plants, they will usually pollinate each other naturally. However, if you’re only growing a few plants or if there’s not much wind, you may need to hand-pollinate them. To hand-pollinate, gently shake the tassels (the male flowers at the top of the plant) to release pollen. Then, brush the pollen onto the silks (the female flowers that emerge from the developing ears of corn). Repeat this process every day for several days to ensure pollination.
6. What are some common pests and diseases that affect corn grown in containers on concrete, and how can I prevent them?
Common pests that can affect corn include corn earworms, aphids, and spider mites. Diseases include corn smut and leaf blight. To prevent pests and diseases, choose disease-resistant varieties, practice good sanitation (remove dead leaves and debris), and monitor your plants regularly for signs of infestation or disease. You can also use organic pest control methods, such as insecticidal soap or neem oil. Ensure proper air circulation around the plants to prevent fungal diseases.
7. How do I know when my corn is ready to harvest when grown in containers on concrete?
Corn is typically ready to harvest about 60-90 days after planting, depending on the variety. The silks will turn brown and dry, and the ears will feel plump and full. To check for ripeness, peel back a portion of the husk and puncture a kernel with your fingernail. If the liquid is milky, the corn is ready to harvest. If the liquid is clear, it’s not quite ripe. If the liquid is doughy, it’s overripe.
8. Can I grow different varieties of corn together in containers on concrete?
While you can grow different varieties of corn together, keep in mind that they may cross-pollinate, which can affect the flavor and appearance of the kernels. If you want to grow different varieties and maintain their purity, you’ll need to isolate them by distance or by staggering their planting times.
9. What size container is best for growing corn on concrete?
A minimum of 10-gallon container is recommended for one corn stalk. Larger containers are always better, providing more room for root growth and nutrient uptake. Half-barrels or large tubs are excellent choices. Make sure the container has drainage holes to prevent waterlogging.
10. Can I reuse the soil from my corn containers for other plants?
Yes, you can reuse the soil, but it’s important to amend it with fresh compost and fertilizer to replenish the nutrients that were used by the corn plants. You may also want to sterilize the soil to kill any pests or diseases that may be present. You can do this by baking the soil in the oven at 180°F for 30 minutes or by solarizing it in a black plastic bag for several weeks.
Leave a Comment