
Malabar Spinach Growing Tips are what you need to unlock a vibrant, edible oasis right in your backyard! Have you ever dreamed of snipping fresh, leafy greens just steps from your kitchen? Imagine the satisfaction of serving a delicious, home-grown meal, knowing exactly where your ingredients came from. This isn’t just a dream; it’s an achievable reality with a little know-how.
Malabar spinach, also known as Basella alba, isn’t actually spinach, but a climbing vine with succulent leaves that have been enjoyed for centuries in Asian and African cuisines. It’s a nutritional powerhouse, packed with vitamins and minerals, and adds a unique, slightly peppery flavor to your dishes. Historically, it’s been valued not only for its culinary uses but also for its medicinal properties.
But why should you bother with Malabar spinach growing tips? Well, for starters, it’s incredibly easy to grow, even for beginners! Unlike traditional spinach, it thrives in warm weather, making it a perfect choice for those of us who struggle with bolting spinach in the summer heat. Plus, it’s a beautiful, vining plant that can add a touch of elegance to your garden or balcony. I’m going to share some simple, yet effective, DIY tricks and hacks that will help you cultivate a thriving Malabar spinach plant, ensuring a bountiful harvest and a touch of green goodness in your life. Let’s get started!

Growing Malabar Spinach: A Beginner’s Guide to Lush, Leafy Greens
Hey there, fellow gardening enthusiasts! I’m so excited to share my experience with growing Malabar spinach. This isn’t your typical spinach; it’s a heat-loving vine that thrives in warm weather, making it perfect for those of us who struggle to keep regular spinach alive during the summer months. Plus, it’s incredibly versatile in the kitchen! So, let’s dive into how you can cultivate your own bountiful supply of this delicious and nutritious green.
Understanding Malabar Spinach
Before we get our hands dirty, let’s talk a little about what Malabar spinach actually is. It’s not a true spinach, but rather a leafy green vine that goes by the scientific name *Basella alba* or *Basella rubra*. It comes in two main varieties: green-stemmed and red-stemmed. Both taste similar, but the red-stemmed variety adds a beautiful pop of color to your garden.
Why I love Malabar Spinach:
* It’s heat tolerant: Seriously, this stuff thrives when other greens are wilting.
* It’s a climbing vine: Perfect for adding vertical interest to your garden.
* It’s delicious: The leaves have a mild, slightly peppery flavor that’s great in salads, stir-fries, and soups.
* It’s easy to grow: Even if you’re a beginner gardener, you can totally succeed with Malabar spinach.
* It’s beautiful: The glossy leaves and vibrant stems add a touch of elegance to any garden.
Getting Started: Seeds vs. Cuttings
You can start Malabar spinach from either seeds or cuttings. I’ve had success with both methods, but I find that starting from seeds requires a little more patience.
Starting from Seeds:
* Pros: Seeds are readily available and relatively inexpensive.
* Cons: Germination can be slow and uneven.
Starting from Cuttings:
* Pros: Faster and more reliable than seeds. You’ll get a head start on the growing season.
* Cons: Requires access to an existing Malabar spinach plant.
Step-by-Step Guide: Growing Malabar Spinach from Seeds
If you’re opting for seeds, here’s how to get them started:
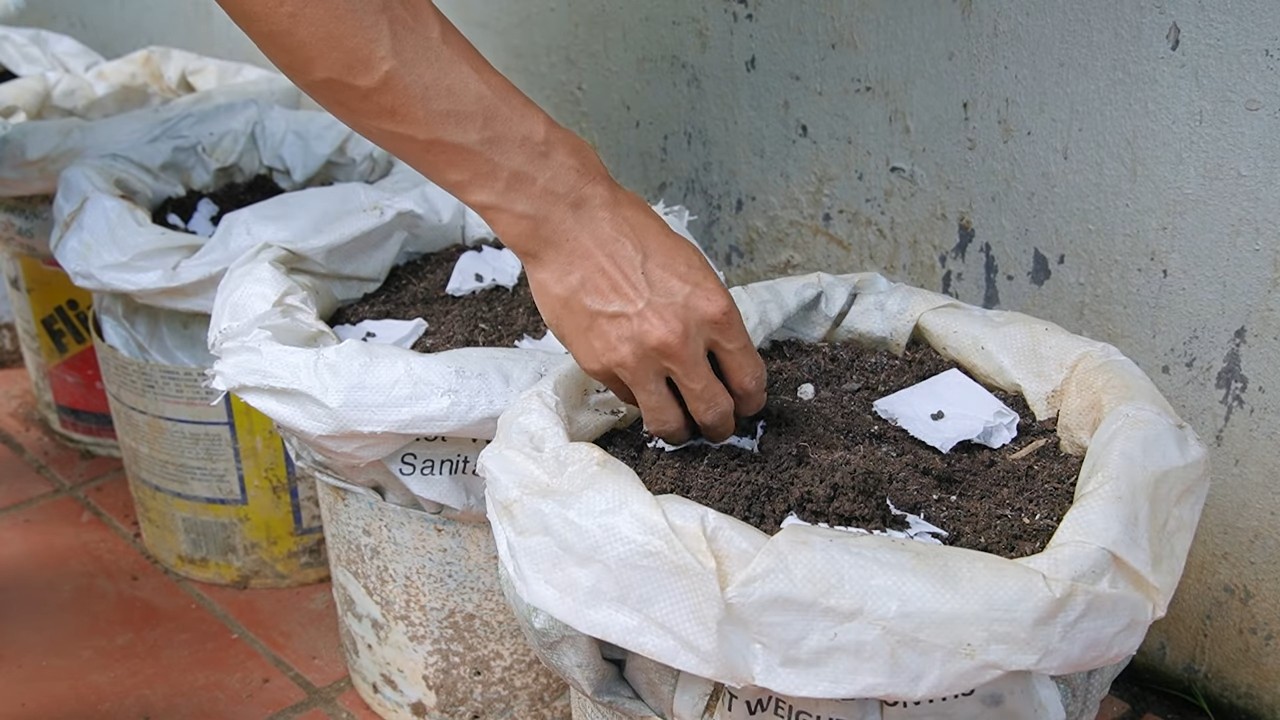
1. Soak the Seeds: Malabar spinach seeds have a hard outer coating, so soaking them in warm water for 24-48 hours before planting will significantly improve germination rates. I usually put them in a small bowl of water and leave them on my kitchen counter.
2. Prepare Your Seed Starting Mix: Use a well-draining seed starting mix. You can buy a pre-made mix or make your own by combining equal parts peat moss, perlite, and vermiculite.
3. Sow the Seeds: Fill your seed starting trays or pots with the mix and sow the seeds about 1/2 inch deep. I usually plant 2-3 seeds per cell to increase my chances of success.
4. Water Gently: Water the soil gently to avoid disturbing the seeds. A spray bottle works well for this.
5. Provide Warmth: Malabar spinach seeds need warmth to germinate. Aim for a soil temperature of 70-80°F (21-27°C). You can use a heat mat to help maintain the right temperature.
6. Be Patient: Germination can take anywhere from 10-21 days, so don’t get discouraged if you don’t see sprouts right away. Keep the soil consistently moist but not waterlogged.
7. Transplant Seedlings: Once the seedlings have developed a few sets of true leaves (the leaves that look like miniature versions of the adult leaves), they’re ready to be transplanted into larger pots or directly into the garden.
Step-by-Step Guide: Growing Malabar Spinach from Cuttings
If you have access to a mature Malabar spinach plant, taking cuttings is a breeze:
1. Select Healthy Stems: Choose healthy, vigorous stems that are about 4-6 inches long.
2. Make the Cut: Use clean, sharp scissors or pruning shears to make a clean cut just below a node (the point where a leaf or branch emerges from the stem).
3. Remove Lower Leaves: Remove the leaves from the bottom 1-2 inches of the stem. This will prevent them from rotting when you put the cutting in water.
4. Rooting in Water: Place the cuttings in a glass or jar of water, making sure that the nodes are submerged. Change the water every 1-2 days to keep it fresh.
5. Wait for Roots: Within a week or two, you should start to see roots emerging from the nodes.
6. Transplant Rooted Cuttings: Once the roots are about an inch long, you can transplant the cuttings into pots filled with well-draining potting mix.
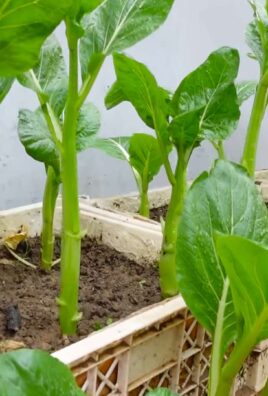
Preparing the Garden Bed
Whether you’re transplanting seedlings or rooted cuttings, proper soil preparation is key to success.
1. Choose a Sunny Location: Malabar spinach needs at least 6 hours of sunlight per day.
2. Amend the Soil: Amend the soil with plenty of compost or other organic matter to improve drainage and fertility. Malabar spinach prefers well-draining soil that is rich in nutrients.
3. Provide Support: Since Malabar spinach is a climbing vine, it needs a trellis, fence, or other support structure to grow on. I’ve used everything from bamboo stakes to old ladders with great success.
Planting and Spacing
1. Dig Holes: Dig holes that are slightly larger than the root balls of your seedlings or rooted cuttings.
2. Plant Carefully: Gently remove the plants from their pots and place them in the holes. Make sure the top of the root ball is level with the surrounding soil.
3. Space Plants: Space plants about 12-18 inches apart to allow them plenty of room to grow.
4. Water Thoroughly: Water the plants thoroughly after planting to help them settle in.
Caring for Your Malabar Spinach
Once your Malabar spinach is planted, here’s how to keep it happy and healthy:
1. Water Regularly: Malabar spinach needs consistent moisture, especially during hot weather. Water deeply whenever the top inch of soil feels dry.
2. Fertilize: Feed your plants with a balanced organic fertilizer every 4-6 weeks to promote healthy growth. I like to use compost tea or fish emulsion.
3. Mulch: Apply a layer of mulch around the base of the plants to help retain moisture, suppress weeds, and regulate soil temperature.
4. Prune Regularly: Pruning encourages bushier growth and prevents the vine from becoming too leggy. Simply pinch off the tips of the stems to promote branching.
5. Watch for Pests and Diseases: Malabar spinach is generally pest and disease resistant, but keep an eye out for aphids, spider mites, and fungal diseases. If you spot any problems, treat them promptly with an appropriate organic solution.
Harvesting Your Bounty
The best part about growing Malabar spinach is, of course, harvesting the delicious leaves!
1. Start Harvesting Early: You can start harvesting leaves as soon as the plants are large enough to spare a few.
2. Harvest Regularly: Regular harvesting encourages continued growth.
3. Pinch or Cut Leaves: Pinch or cut off the leaves and tender stems.
4. Enjoy Fresh: Malabar spinach is best enjoyed fresh, but you can also store it in the refrigerator for a few days.
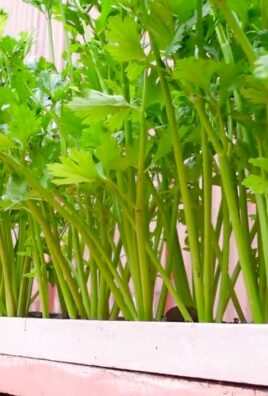
Culinary Uses for Malabar Spinach
Malabar spinach is incredibly versatile in the kitchen. Here are some of my favorite ways to use it:
* Salads: Add the tender young leaves to salads for a mild, slightly peppery flavor.
* Stir-fries: Use it in stir-fries as you would regular spinach.
* Soups and Stews: Add it to soups and stews for a nutritious boost.
* Smoothies: Blend it into smoothies for a healthy dose of vitamins and minerals.
* Steamed or Sautéed: Steam or sauté it as a side dish.
Troubleshooting
Even with the best care, you might encounter a few challenges along the way. Here are some common problems and how to address them:
* Slow Germination: If your seeds are slow to germinate, make sure the soil is warm enough and that you’ve soaked the seeds beforehand.
* Yellowing Leaves: Yellowing leaves can indicate a nutrient deficiency. Try fertilizing with a balanced organic fertilizer.
* Pest Infestations: If you have a pest infestation, try spraying the plants with insecticidal soap or neem oil.
* Fungal Diseases: If
Conclusion
So, there you have it! Mastering the art of growing Malabar spinach doesn’t require a green thumb blessed by the gardening gods. With these simple yet effective DIY tricks, you’re well on your way to harvesting a bountiful supply of this nutritious and delicious leafy green right from your own backyard. Forget those expensive, often wilted, bunches at the grocery store. Imagine stepping outside and picking fresh, vibrant Malabar spinach whenever you need it for your favorite stir-fries, soups, or salads.
Why is this a must-try? Because it’s empowering! You’re taking control of your food source, reducing your carbon footprint, and enjoying the unparalleled flavor of homegrown produce. Plus, growing Malabar spinach is incredibly rewarding. Watching those tiny seeds sprout and transform into lush vines is a testament to the magic of nature and your own gardening prowess.
But the fun doesn’t stop there! Feel free to experiment with different growing mediums. While we’ve highlighted the benefits of well-draining soil enriched with compost, you can also explore hydroponic systems for a faster growth rate. Consider companion planting. Basil, marigolds, and nasturtiums are known to deter pests and attract beneficial insects, creating a thriving ecosystem around your Malabar spinach.
For those in cooler climates, starting your seeds indoors a few weeks before the last expected frost is a game-changer. This gives your seedlings a head start and ensures a longer growing season. And if you’re feeling adventurous, try propagating Malabar spinach from cuttings. Simply snip off a healthy stem, remove the lower leaves, and place it in water until roots develop. Then, transplant it into soil and watch it flourish.
The key takeaway here is that growing Malabar spinach is an adaptable and forgiving process. Don’t be afraid to make mistakes and learn from them. Each season brings new challenges and opportunities to refine your techniques. The most important thing is to get started and enjoy the journey.
We’re confident that these DIY tricks will significantly improve your success rate and help you cultivate a thriving Malabar spinach patch. Now, it’s your turn! Grab your seeds, prepare your soil, and get ready to experience the joy of homegrown goodness.
We’re eager to hear about your experiences! Share your tips, tricks, and triumphs in the comments below. Let’s create a community of Malabar spinach enthusiasts and learn from each other. Don’t forget to post pictures of your flourishing vines and delicious dishes made with your homegrown harvest. Happy gardening! Let us know how your **Malabar spinach growing** goes!
Frequently Asked Questions (FAQ)
What are the ideal growing conditions for Malabar spinach?
Malabar spinach thrives in warm, sunny locations with well-draining soil. It needs at least 6-8 hours of direct sunlight per day. The ideal soil pH is between 6.5 and 7.5. Consistent moisture is crucial, but avoid waterlogging the soil. This plant is a heat-loving vine, so it will flourish in temperatures between 70°F and 90°F (21°C and 32°C). Protect it from frost, as it is not cold-hardy.
How often should I water my Malabar spinach?
Water your Malabar spinach regularly, especially during hot and dry periods. Aim to keep the soil consistently moist but not soggy. A good rule of thumb is to water deeply whenever the top inch of soil feels dry to the touch. Mulching around the base of the plant can help retain moisture and suppress weeds. In containers, you may need to water more frequently than in the ground.
What kind of fertilizer should I use for Malabar spinach?
Malabar spinach benefits from regular fertilization to support its rapid growth. Use a balanced, all-purpose fertilizer (e.g., 10-10-10) every 4-6 weeks during the growing season. Alternatively, you can amend the soil with compost or well-rotted manure before planting and then side-dress with compost tea every few weeks. Avoid over-fertilizing, as this can lead to excessive foliage growth at the expense of flavor.
How do I harvest Malabar spinach?
You can start harvesting Malabar spinach leaves as soon as the plant is established and has produced a good amount of foliage, typically about 6-8 weeks after planting. Harvest by snipping off the tender young leaves and stems. Regular harvesting encourages the plant to produce more leaves. Avoid removing more than one-third of the plant’s foliage at any one time. You can also harvest the entire vine by cutting it back to a few inches above the ground, allowing it to regrow.
What are some common pests and diseases that affect Malabar spinach?
Malabar spinach is generally resistant to pests and diseases, but it can occasionally be affected by aphids, spider mites, or leaf miners. These pests can be controlled with insecticidal soap or neem oil. Fungal diseases, such as leaf spot, can occur in humid conditions. Ensure good air circulation around the plants and avoid overhead watering to prevent these diseases. Remove any affected leaves promptly.
Can I grow Malabar spinach in containers?
Yes, Malabar spinach grows well in containers, making it a great option for gardeners with limited space. Choose a large container (at least 12 inches in diameter) with good drainage holes. Use a well-draining potting mix and provide a trellis or other support for the vines to climb. Water regularly and fertilize as needed. Place the container in a sunny location.
How do I save seeds from Malabar spinach?
To save seeds from Malabar spinach, allow some of the flowers to develop into mature berries. The berries will turn dark purple or black when they are ripe. Harvest the berries and remove the seeds from the pulp. Wash the seeds and allow them to dry completely before storing them in an airtight container in a cool, dry place. Note that Malabar spinach seeds can have a low germination rate, so it’s best to sow more seeds than you need.
Is Malabar spinach safe to eat?
Yes, Malabar spinach is safe to eat and is a nutritious addition to your diet. It is rich in vitamins A and C, iron, and calcium. However, some people may find the slightly mucilaginous texture of the leaves to be unusual. Cooking the leaves can help reduce the mucilage. If you have any concerns about allergies or sensitivities, it’s always best to consult with your doctor before trying a new food.
How can I encourage more branching and leaf production?
Pinching back the growing tips of the vines encourages branching and bushier growth, leading to more leaf production. Regular harvesting also stimulates new growth. Ensure the plant receives adequate sunlight, water, and nutrients to support vigorous growth.
What are some creative ways to use Malabar spinach in cooking?
Malabar spinach can be used in a variety of dishes, similar to regular spinach. It’s great in stir-fries, soups, stews, and salads. You can also use it to make smoothies or juice it. The leaves can be steamed, sautéed, or added to omelets and frittatas. In some cultures, the berries are also used to make dyes or inks, although they are not typically eaten. Experiment with different recipes and find your favorite ways to enjoy this versatile leafy green.

Leave a Comment