
Indoor Bok Choy Growing: Ever dreamt of harvesting fresh, crisp bok choy right from your kitchen, even when the snow is falling outside? I know I have! This humble vegetable, a staple in Asian cuisine, boasts a rich history dating back to the 5th century in China, where it was meticulously cultivated for its nutritional value and delicious flavor. Today, you don’t need acres of farmland to enjoy this leafy green.
Imagine skipping those grocery store trips and having a constant supply of organic bok choy at your fingertips. That’s the beauty of indoor bok choy growing! In this article, I’m going to share some simple, yet effective DIY tricks and hacks that will transform your windowsill into a mini bok choy farm. We’ll cover everything from seed selection and soil preparation to lighting and watering techniques.
Why is this so important? Well, beyond the convenience and freshness, growing your own bok choy indoors is incredibly rewarding. It’s a fantastic way to connect with nature, reduce your carbon footprint, and ensure you’re eating healthy, pesticide-free produce. Plus, it’s a fun and educational activity for the whole family! So, grab your gardening gloves, and let’s get started on this exciting journey of growing bok choy indoors!
Growing Bok Choy Indoors: A Beginner’s Guide
Hey there, fellow plant enthusiasts! Ever thought about growing your own bok choy indoors? It’s easier than you might think, and having fresh, crisp bok choy right at your fingertips is a total game-changer. I’ve been doing it for a while now, and I’m excited to share my tips and tricks with you. Let’s dive in!
What You’ll Need
Before we get started, let’s gather all the necessary supplies. Having everything ready beforehand will make the whole process smoother and more enjoyable.
* Bok Choy Seeds: Choose a variety that’s well-suited for indoor growing. Dwarf varieties are often a good choice.
* Seed Starting Tray or Small Pots: These will be used to germinate the seeds.
* Potting Mix: Use a well-draining potting mix specifically designed for vegetables. Avoid using garden soil, as it can be too heavy and compact.
* Larger Pots (at least 6 inches in diameter): These will be the final homes for your bok choy plants.
* Grow Lights: Bok choy needs plenty of light, so grow lights are essential for indoor growing.
* Watering Can or Spray Bottle: For gentle watering.
* Fertilizer: A balanced liquid fertilizer will help your bok choy thrive.
* Optional: Heat Mat: To speed up germination.
* Optional: Humidity Tray: To increase humidity around the plants.
Germinating Your Bok Choy Seeds
This is the first crucial step. Getting your seeds to sprout successfully sets the stage for a healthy harvest.
1. Prepare Your Seed Starting Tray or Pots: Fill your seed starting tray or small pots with the potting mix. Gently press down the soil to create a level surface.
2. Sow the Seeds: Sprinkle a few seeds (2-3) on top of the soil in each cell or pot. Don’t bury them too deep; about ¼ inch is perfect.
3. Cover the Seeds: Lightly cover the seeds with more potting mix.
4. Water Gently: Use a spray bottle to mist the soil thoroughly. You want the soil to be moist but not waterlogged.
5. Provide Warmth: If you have a heat mat, place the seed starting tray on top of it. This will help speed up germination. Otherwise, find a warm spot in your home.
6. Maintain Moisture: Keep the soil consistently moist by misting it regularly. You can also cover the tray with a clear plastic lid or plastic wrap to create a humid environment.
7. Wait for Germination: Bok choy seeds typically germinate within 5-10 days. Once the seedlings emerge, remove the plastic lid or wrap.
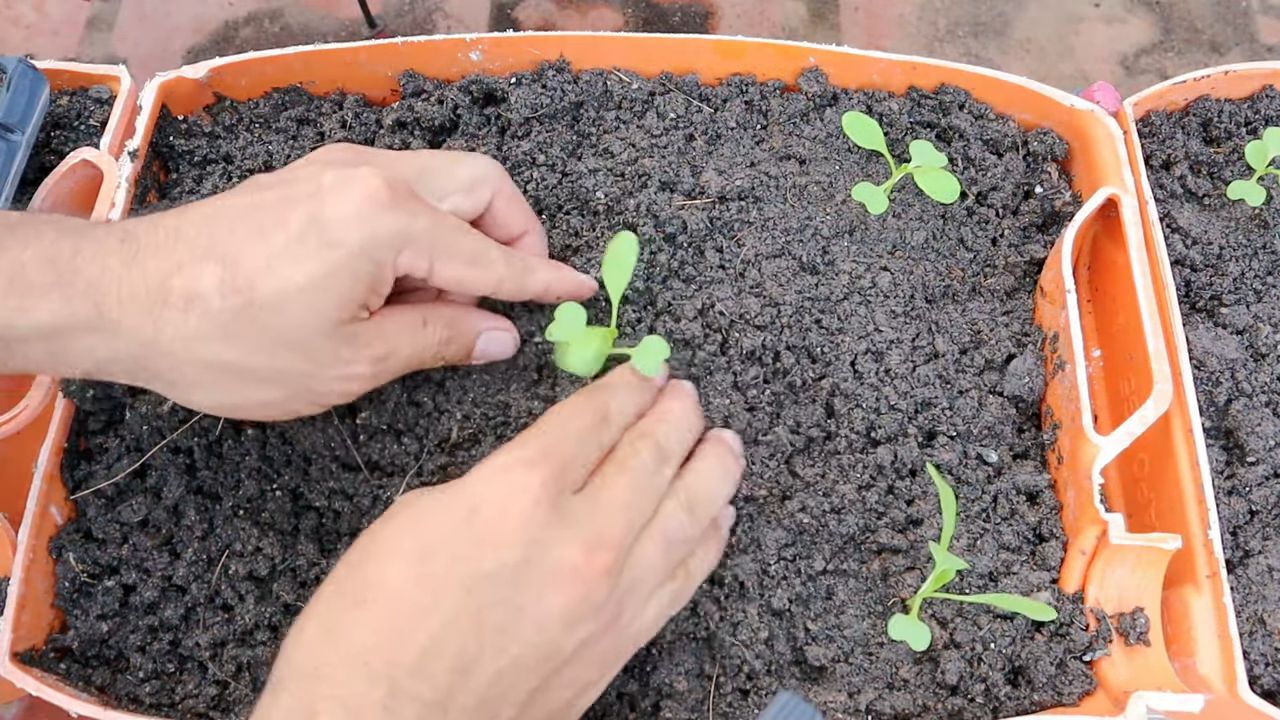
Transplanting Your Bok Choy Seedlings
Once your seedlings have developed a few true leaves (the second set of leaves that appear after the initial seed leaves), it’s time to transplant them into larger pots.
1. Prepare Your Larger Pots: Fill your larger pots with the potting mix. Make a small hole in the center of each pot, large enough to accommodate the seedling’s root ball.
2. Carefully Remove the Seedlings: Gently loosen the soil around the seedlings in the seed starting tray or small pots. Use a small spoon or your fingers to carefully lift the seedlings out, being careful not to damage the roots.
3. Transplant the Seedlings: Place each seedling into the hole in the larger pot. Make sure the top of the root ball is level with the soil surface.
4. Fill in the Gaps: Fill in the gaps around the seedling with more potting mix. Gently press down the soil to secure the seedling in place.
5. Water Thoroughly: Water the transplanted seedlings thoroughly.
6. Provide Adequate Light: Place the pots under your grow lights. Bok choy needs at least 6-8 hours of light per day.
Caring for Your Indoor Bok Choy
Now that your bok choy plants are in their final homes, it’s time to provide them with the care they need to thrive.
1. Light: As I mentioned earlier, bok choy needs plenty of light. Position your grow lights about 6-12 inches above the plants. If you notice the leaves are pale or leggy, it means they’re not getting enough light.
2. Watering: Water your bok choy plants regularly, keeping the soil consistently moist but not waterlogged. Check the soil moisture by sticking your finger into the soil. If the top inch feels dry, it’s time to water.
3. Fertilizing: Feed your bok choy plants with a balanced liquid fertilizer every 2-3 weeks. Follow the instructions on the fertilizer label.
4. Temperature: Bok choy prefers cooler temperatures, ideally between 60-70°F (15-21°C). Avoid placing your plants near heat sources or drafts.
5. Humidity: Bok choy appreciates higher humidity levels. If your home is dry, you can increase humidity by using a humidity tray or misting the plants regularly.
6. Air Circulation: Good air circulation helps prevent fungal diseases. Make sure there’s adequate airflow around your plants. You can use a small fan to improve air circulation.
7. Pest Control: Keep an eye out for pests such as aphids, spider mites, and whiteflies. If you notice any pests, treat them with an insecticidal soap or neem oil.
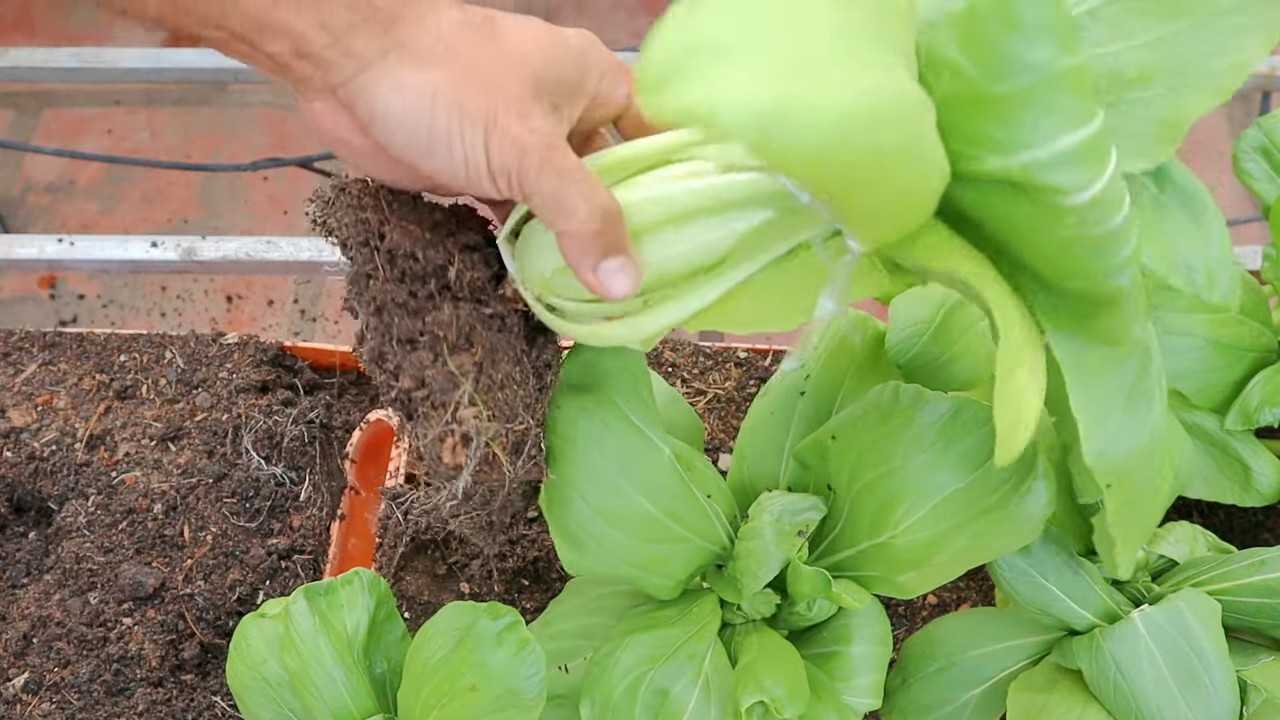
Harvesting Your Bok Choy
The best part! You can start harvesting your bok choy when the leaves are about 6-8 inches long.
1. Harvest Individual Leaves: You can harvest individual leaves as needed, starting with the outer leaves. This will allow the plant to continue producing new leaves.
2. Harvest the Entire Plant: Alternatively, you can harvest the entire plant by cutting it off at the base.
3. Wash and Enjoy: Wash the harvested bok choy thoroughly before using it in your favorite recipes.
Troubleshooting
Even with the best care, you might encounter some challenges along the way. Here are some common problems and how to address them:
* Leggy Growth: This is usually a sign of insufficient light. Make sure your plants are getting enough light from your grow lights.
* Yellowing Leaves: This could be due to overwatering, underwatering, or nutrient deficiencies. Check the soil moisture and adjust your watering accordingly. Fertilize your plants regularly.
* Pest Infestations: As mentioned earlier, keep an eye out for pests and treat them promptly with an appropriate insecticide.
* Fungal Diseases: Fungal diseases can be caused by poor air circulation and excessive moisture. Improve air circulation and avoid overwatering.
Choosing the Right Bok Choy Variety for Indoors
Not all bok choy varieties are created equal, especially when it comes to indoor growing. Some varieties are more compact and better suited for container gardening. Here are a few of my favorites:
* ‘Dwarf Pak Choi’: As the name suggests, this variety is compact and perfect for small spaces. It matures quickly and produces tender, flavorful leaves.
* ‘Toy Choy’: Another dwarf variety that’s ideal for indoor growing. It has a mild flavor and crisp texture.
* ‘Mei Qing Choi’: This variety is known for its beautiful light green leaves and delicate flavor. It’s relatively compact and easy to grow indoors.
* ‘Joi Choi’: While not a true dwarf variety, ‘Joi Choi’ is still manageable in containers and produces large, flavorful leaves.
Optimizing Your Indoor Growing Environment
To maximize your success with indoor bok choy growing, consider these tips for optimizing your growing environment:
* Reflective Surfaces: Use reflective surfaces, such as aluminum foil or white paint, to bounce light back onto your plants. This can help increase light intensity and promote growth.
* Air Circulation: As mentioned earlier, good air circulation is essential for preventing fungal diseases. Use a small fan to improve air circulation around your plants.
* Temperature Control: Maintain a consistent temperature between 60-70°F (15-21°C). Avoid placing your plants near heat sources or drafts.
* Humidity Control: If your home is dry, increase humidity by using a humidity tray or misting the plants regularly.
* Potting Mix: Use a high-quality, well-draining potting mix specifically designed for vegetables. Avoid using garden soil, as it can be too heavy and compact.
* Container Size: Choose pots that are at least 6 inches in diameter to provide enough room for the roots to grow.
* Drainage: Make sure your pots have drainage holes to prevent waterlogging.
Extending Your Harvest
Want to enjoy fresh bok choy for an extended period? Here are a few
Conclusion
So, there you have it! Growing your own bok choy indoors is not only achievable, but it’s also a remarkably rewarding experience. Forget those limp, overpriced heads of bok choy at the grocery store. With a little effort and this simple DIY trick, you can have a constant supply of fresh, crisp, and vibrant bok choy right at your fingertips.
Why is this a must-try? Because it puts you in control. You control the quality, you control the freshness, and you control the environmental impact. No more worrying about pesticides or long-distance transportation. You’re nurturing your own food source, contributing to a more sustainable lifestyle, and enjoying the unparalleled flavor of homegrown produce. Plus, let’s be honest, there’s something incredibly satisfying about watching those tiny seeds sprout and flourish into a beautiful, edible plant.
But the beauty of this DIY project lies in its adaptability. Feel free to experiment with different varieties of bok choy. Try growing baby bok choy for a more delicate flavor, or explore the vibrant colors of red bok choy. You can also adjust the lighting and nutrient levels to fine-tune the growth and flavor of your plants. Consider companion planting with herbs like basil or cilantro to enhance the flavor and deter pests. If you’re feeling adventurous, you can even try hydroponic growing for an even faster and more efficient yield.
Don’t be intimidated if you’re a beginner. This method is designed to be accessible to everyone, regardless of their gardening experience. The key is to be patient, observant, and willing to learn. Pay attention to your plants’ needs, adjust your approach as necessary, and don’t be afraid to make mistakes. Every failure is a learning opportunity, and every success is a cause for celebration.
We wholeheartedly encourage you to give this indoor bok choy growing method a try. Imagine the delicious stir-fries, soups, and salads you can create with your own homegrown bok choy. Think of the satisfaction of knowing that you’re providing your family with fresh, healthy food. And consider the joy of connecting with nature, even in the heart of your home.
Once you’ve embarked on your indoor bok choy adventure, we’d love to hear about your experience. Share your tips, tricks, and triumphs in the comments below. Let us know what worked for you, what challenges you faced, and what delicious dishes you created with your homegrown bok choy. Your feedback will not only help us improve this guide, but it will also inspire other readers to take the plunge and discover the joys of indoor gardening. So, grab your seeds, gather your supplies, and get ready to grow your own delicious bok choy! Happy gardening!
Frequently Asked Questions (FAQ)
What is the best type of bok choy to grow indoors?
While you can grow almost any variety of bok choy indoors, some tend to thrive better than others. Baby bok choy is a popular choice due to its smaller size and faster growth rate. Dwarf varieties are also well-suited for indoor containers. Experimenting with different types like Shanghai bok choy or red bok choy can also be fun, but be mindful of their mature size and adjust your container size accordingly. Ultimately, the best type depends on your personal preference and the space you have available. Consider starting with baby bok choy as it is generally more forgiving for beginners.
How much light does indoor bok choy need?
Bok choy requires ample light to grow properly. Ideally, aim for at least 6-8 hours of direct sunlight per day. If you don’t have a sunny windowsill, you’ll need to supplement with artificial lighting. Grow lights, either fluorescent or LED, are excellent options. Position the lights a few inches above the plants and keep them on for 12-14 hours a day. Insufficient light can lead to leggy growth and poor yields. Watch for signs of light deficiency, such as pale leaves or stretching towards the light source, and adjust your lighting accordingly.
What kind of soil is best for growing bok choy indoors?
Bok choy prefers well-draining, nutrient-rich soil. A good quality potting mix specifically formulated for vegetables is ideal. Avoid using garden soil, as it can be too heavy and may contain pests or diseases. You can also amend your potting mix with compost or other organic matter to improve drainage and fertility. Ensure the soil pH is slightly acidic to neutral, around 6.0 to 7.0.
How often should I water my indoor bok choy?
Water your bok choy regularly, keeping the soil consistently moist but not waterlogged. Check the soil moisture by sticking your finger about an inch deep. If it feels dry, it’s time to water. Avoid overwatering, as this can lead to root rot. The frequency of watering will depend on factors such as temperature, humidity, and the size of your container. In general, you may need to water every 2-3 days.
What kind of fertilizer should I use for indoor bok choy?
Bok choy is a heavy feeder and benefits from regular fertilization. Use a balanced liquid fertilizer, such as a 10-10-10 or 20-20-20, diluted to half strength. Fertilize every 2-3 weeks, following the instructions on the fertilizer label. You can also use organic fertilizers, such as compost tea or fish emulsion. Avoid over-fertilizing, as this can burn the roots and damage the plants.
How do I deal with pests and diseases on my indoor bok choy?
While indoor growing reduces the risk of pests and diseases, they can still occur. Common pests include aphids, spider mites, and whiteflies. Inspect your plants regularly for signs of infestation. If you find pests, you can try washing them off with a strong stream of water or using insecticidal soap or neem oil. For diseases, ensure good air circulation and avoid overwatering. Remove any infected leaves promptly.
When can I harvest my indoor bok choy?
You can harvest your bok choy when the leaves are large enough to eat, typically around 30-45 days after planting. You can harvest the entire plant at once or harvest individual leaves as needed. To harvest individual leaves, simply cut them off near the base of the plant. This will allow the plant to continue producing new leaves.
Can I grow bok choy indoors year-round?
Yes, you can grow bok choy indoors year-round, provided you have adequate lighting and temperature control. Bok choy prefers cooler temperatures, around 60-70°F (15-21°C). If your home is too warm, you may need to provide additional cooling, such as by placing the plants in a cooler room or using a fan.
What are some common problems when growing bok choy indoors?
Some common problems include leggy growth due to insufficient light, yellowing leaves due to nutrient deficiencies, and pest infestations. Addressing these issues promptly will help ensure a successful harvest. Remember to provide adequate light, fertilize regularly, and inspect your plants for pests.
How can I improve the flavor of my indoor grown bok choy?
The flavor of your indoor grown bok choy can be influenced by several factors. Ensure adequate light, as this is crucial for photosynthesis and sugar production. Proper fertilization is also important for overall plant health and flavor. Experiment with different varieties of bok choy to find one that suits your taste preferences. Finally, harvesting your bok choy at the right time can also impact its flavor. Younger leaves tend to be more tender and mild, while older leaves can be slightly more bitter.
Leave a Comment