
Pepper bottle garden: Ever dreamed of having a thriving garden, bursting with fresh herbs and vibrant flowers, even if you’re short on space or time? I know I have! Well, get ready to turn that dream into reality with a super fun and incredibly easy DIY project: creating a pepper bottle garden!
Believe it or not, the concept of container gardening, which our pepper bottle garden falls under, has roots stretching back centuries. From the Hanging Gardens of Babylon to the elaborate potted plant displays of ancient Rome, people have always found creative ways to cultivate greenery in limited spaces. Today, with urban living on the rise, the need for accessible and space-saving gardening solutions is greater than ever.
That’s where this DIY trick comes in. Let’s face it, gardening can sometimes feel intimidating. All those tools, the soil types, the watering schedules… it can be a lot! But a pepper bottle garden simplifies everything. It’s a fantastic way to recycle those plastic bottles cluttering your recycling bin, reduce your carbon footprint, and grow your own delicious produce or beautiful blooms, all without breaking the bank or needing a huge backyard. Plus, it’s a super rewarding project that anyone can do, regardless of their gardening experience. So, grab those empty pepper bottles, and let’s get started on creating your own miniature green oasis!

Turning Trash into Treasure: My DIY Pepper Bottle Garden
Hey there, fellow green thumbs! I’m so excited to share one of my favorite upcycling projects with you: creating a vibrant and productive garden using nothing but discarded pepper bottles! Not only is this a fantastic way to reduce waste, but it also allows you to grow fresh herbs, vegetables, or flowers in a small space, perfect for apartment dwellers or anyone looking to add a touch of green to their lives. Let’s dive in!
What You’ll Need: The Essential Supplies
Before we get started, let’s gather all the necessary materials. This will make the process smoother and more enjoyable.
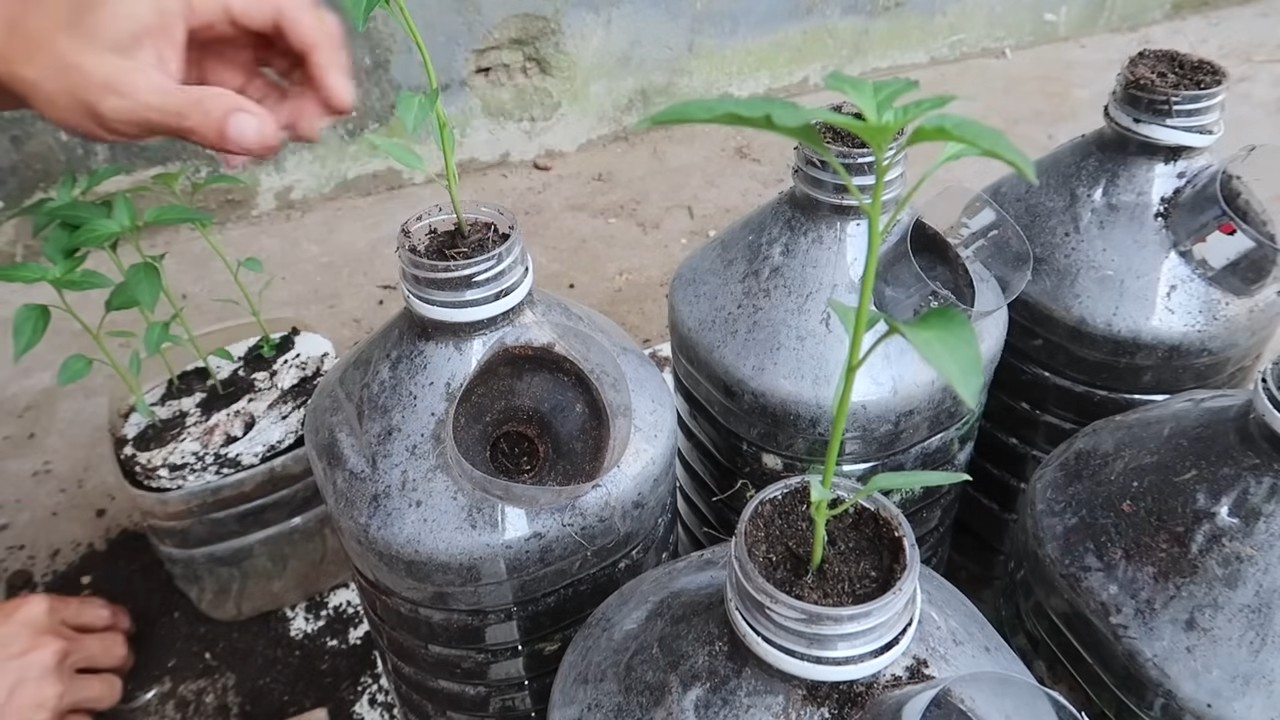
* **Pepper Bottles:** The stars of the show! You’ll need a collection of clean, empty pepper bottles. The number depends on the size of your garden you envision. I usually aim for at least 6-8 bottles to start. Make sure to wash them thoroughly with soap and water to remove any lingering pepper residue.
* **Scissors or Utility Knife:** For cutting the bottles. Be careful and always cut away from yourself!
* **Drill or Nail and Hammer:** To create drainage holes. A drill is faster and cleaner, but a nail and hammer work just as well.
* **Potting Soil:** Choose a good quality potting mix that’s well-draining. This is crucial for healthy plant growth.
* **Seeds or Seedlings:** Decide what you want to grow! Herbs like basil, mint, and parsley are great options, as are small vegetables like lettuce, spinach, and radishes. Flowers like pansies and petunias also thrive in containers.
* **Watering Can or Spray Bottle:** For watering your plants.
* **Measuring Tape or Ruler:** To ensure even spacing and cuts.
* **Permanent Marker:** For labeling your plants.
* **Optional: Spray Paint:** If you want to add a pop of color to your garden, grab some spray paint suitable for plastic.
* **Optional: Twine or Rope:** For hanging your bottles if you want a vertical garden.
* **Optional: Gravel or Small Stones:** For drainage at the bottom of the bottles.
Preparing the Pepper Bottles: The Foundation of Your Garden
This is where the magic begins! We’ll transform these ordinary bottles into mini-planters.
1. **Cleaning and Drying:** As I mentioned before, thoroughly wash each pepper bottle with soap and water. Rinse them well and let them dry completely. This is important to prevent mold or bacteria growth.
2. **Cutting the Bottles:** This step depends on the type of garden you want to create. Here are a few options:
* **Option 1: Simple Planters:** Cut the top portion of the bottle off, about 3-4 inches from the top. This creates a simple, open container. This is the easiest method and works well for most plants.
* **Option 2: Self-Watering Planters:** Cut the bottle in half. Invert the top half (the part with the cap) and place it inside the bottom half. This creates a self-watering system where the roots can draw water from the bottom reservoir. You’ll need to drill a hole in the cap for the water to wick up.
* **Option 3: Hanging Planters:** Cut a rectangular opening on one side of the bottle, leaving the top and bottom intact. This creates a little “window” for your plants to grow out of. You’ll also need to drill holes near the top for hanging.
Safety First! Always use caution when using scissors or a utility knife. Cut away from yourself and use a stable surface.
3. **Creating Drainage Holes:** Drainage is essential to prevent root rot. Use a drill or a nail and hammer to create several small holes in the bottom of each bottle. I usually make 4-5 holes, evenly spaced.
4. **Optional: Painting the Bottles:** If you want to add some color to your garden, now’s the time to spray paint the bottles. Choose a color that complements your plants or your outdoor space. Make sure to use spray paint that’s suitable for plastic and apply several thin coats for even coverage. Let the paint dry completely before moving on to the next step.
Planting Your Garden: Bringing Your Vision to Life
Now for the fun part: planting your seeds or seedlings!
1. **Adding Drainage Material (Optional):** If you’re using the simple planter method, you can add a layer of gravel or small stones to the bottom of each bottle to improve drainage. This helps prevent the soil from becoming waterlogged.
2. **Filling with Potting Soil:** Fill each bottle with high-quality potting soil, leaving about an inch of space at the top. Gently pat the soil down to remove any air pockets.
3. **Planting Seeds or Seedlings:**
* **Seeds:** Follow the instructions on the seed packet for planting depth and spacing. Generally, you’ll want to make a small hole in the soil, drop in the seed, and cover it gently with soil.
* **Seedlings:** Carefully remove the seedling from its container and gently loosen the roots. Dig a hole in the soil that’s large enough to accommodate the root ball. Place the seedling in the hole and cover the roots with soil. Gently pat the soil down.
4. **Labeling Your Plants:** Use a permanent marker to label each bottle with the name of the plant. This will help you keep track of what you’re growing. You can write directly on the bottle or create small labels to attach.
5. **Watering Your Plants:** Water your plants gently after planting. Use a watering can or spray bottle to avoid disturbing the soil. Water until the soil is moist but not soggy.
Caring for Your Pepper Bottle Garden: Nurturing Your Green Babies
Once your plants are in their new homes, it’s important to provide them with the care they need to thrive.
1. **Sunlight:** Most plants need at least 6 hours of sunlight per day. Place your pepper bottle garden in a sunny location, such as a windowsill, balcony, or patio. If you don’t have enough natural light, you can supplement with grow lights.
2. **Watering:** Water your plants regularly, but don’t overwater. The frequency of watering will depend on the type of plant, the weather, and the drainage of your containers. Check the soil moisture by sticking your finger into the soil. If the soil feels dry to the touch, it’s time to water.
3. **Fertilizing:** Plants need nutrients to grow. Fertilize your plants every 2-4 weeks with a balanced liquid fertilizer. Follow the instructions on the fertilizer label.
4. **Pruning:** Prune your plants regularly to encourage bushier growth and remove any dead or yellowing leaves.
5. **Pest Control:** Keep an eye out for pests, such as aphids, spider mites, and whiteflies. If you notice any pests, treat them with an organic insecticide or insecticidal soap.
Creating a Vertical Garden (Optional): Taking Your Garden to New Heights
If you’re short on space, consider creating a vertical garden using your pepper bottles. This is a great way to maximize your growing area and add a unique visual element to your space.
1. **Preparing the Bottles:** Use the hanging planter method described earlier. Cut a rectangular opening on one side of the bottle and drill holes near the top for hanging.
2. **Hanging the Bottles:** Use twine or rope to hang the bottles from a fence, wall, or railing. Make sure the bottles are securely attached and evenly spaced.
3. **Planting and Caring:** Plant and care for your plants as described above.
Troubleshooting: Addressing Common Issues
Even with the best care, you may encounter some challenges along the way. Here are a few common issues and how to address them:
* **Yellowing Leaves:** This can be caused by overwatering, underwatering, or nutrient deficiencies. Adjust your watering schedule and fertilize your plants regularly.
* **Root Rot:** This is caused by overwatering and poor drainage. Make sure your containers have adequate drainage holes and avoid overwatering.
* **Pests:** As mentioned earlier, keep an eye out for pests and treat them promptly.
* **Leggy Growth:** This is caused by insufficient sunlight. Move your plants to a sunnier location or supplement with grow lights.
Enjoying Your Harvest: The Fruits (and Vegetables!) of Your Labor
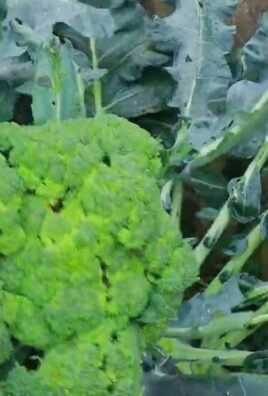
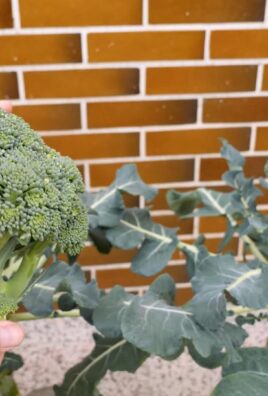
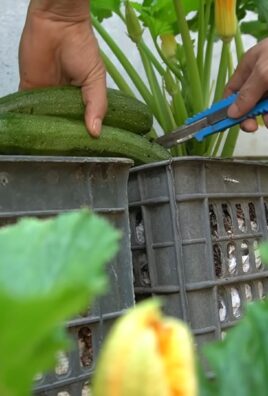
The best part of gardening is enjoying the fruits (and vegetables!) of your labor. Harvest your herbs, vegetables, or flowers as they ripen. Freshly grown produce tastes so much better than anything you can buy at the store!
I hope you’ve enjoyed this DIY tutorial on creating a pepper bottle garden. It’s a fun, rewarding, and sustainable way to grow your own food and add a touch of green to your life. Happy gardening!
Conclusion
So, there you have it! Transforming ordinary pepper bottles into a thriving miniature garden is not just a fun project; it’s a sustainable, space-saving, and incredibly rewarding way to bring a touch of green into your life. We’ve walked you through the simple steps, highlighting the ease and accessibility of this DIY project. But why is this pepper bottle garden a must-try?
Firstly, it’s an exercise in resourcefulness. Instead of discarding those empty pepper bottles, you’re giving them a new lease on life, reducing waste and contributing to a more eco-conscious lifestyle. In a world grappling with environmental concerns, every little bit helps, and this is a tangible way to make a difference.
Secondly, it’s incredibly versatile. Whether you live in a sprawling suburban home or a tiny city apartment, a pepper bottle garden can fit seamlessly into your space. Hang them on a balcony, line them up on a windowsill, or create a vertical garden on a wall – the possibilities are endless.
Thirdly, it’s a fantastic way to introduce children to the wonders of gardening. They can actively participate in the process, from planting the seeds to watering the seedlings, fostering a love for nature and a sense of responsibility.
But the benefits don’t stop there. Imagine the satisfaction of harvesting fresh herbs or vegetables grown right in your own home. Picture the vibrant colors of flowering plants brightening up your living space. Envision the conversations sparked by your unique and eye-catching pepper bottle garden.
Now, let’s talk about variations. While we’ve focused on a basic setup, feel free to get creative!
* Herb Heaven: Dedicate your pepper bottle garden to growing a variety of herbs like basil, mint, oregano, and thyme. This is perfect for adding fresh flavors to your culinary creations.
* Succulent Sanctuary: Succulents are low-maintenance and come in a wide range of shapes and colors. They thrive in well-draining soil, making them ideal for pepper bottle gardens.
* Strawberry Patch: With proper drainage and sunlight, you can even grow strawberries in your pepper bottle garden. Imagine the delight of picking your own sweet berries!
* Vertical Vegetable Garden: Grow smaller vegetables like lettuce, spinach, or radishes in your vertical pepper bottle garden. This is a great way to maximize space and enjoy fresh produce.
* A Splash of Color: Plant colorful flowers like petunias, pansies, or impatiens to add a vibrant touch to your indoor or outdoor space.
Don’t be afraid to experiment with different types of plants, soil mixtures, and watering techniques. The beauty of this DIY project is that it’s adaptable to your specific needs and preferences.
We truly believe that this pepper bottle garden project is a winner. It’s easy, affordable, sustainable, and incredibly rewarding. So, what are you waiting for? Gather your empty pepper bottles, grab some soil and seeds, and get started on your own miniature garden today!
We’re confident that you’ll love the results. And we’d love to hear about your experience! Share your photos, tips, and stories with us in the comments below. Let’s inspire each other to create beautiful and sustainable spaces, one pepper bottle at a time. Happy gardening!
Frequently Asked Questions (FAQ)
What kind of soil should I use for my pepper bottle garden?
The best type of soil to use for your pepper bottle garden depends on the plants you intend to grow. However, a good starting point is a well-draining potting mix. This type of soil retains moisture but also allows excess water to drain away, preventing root rot. You can also amend the potting mix with compost or other organic matter to provide additional nutrients for your plants. For succulents, use a cactus or succulent potting mix, which is specifically formulated for their needs. For herbs, a general-purpose potting mix will usually suffice.
How often should I water my pepper bottle garden?
The frequency of watering depends on several factors, including the type of plants, the climate, and the size of the pepper bottles. As a general rule, water your plants when the top inch of soil feels dry to the touch. Avoid overwatering, as this can lead to root rot. During hot weather, you may need to water more frequently. Conversely, during cooler weather, you may need to water less often. Always check the soil moisture before watering to ensure that your plants need it.
How much sunlight does my pepper bottle garden need?
The amount of sunlight your pepper bottle garden needs depends on the type of plants you are growing. Most plants need at least six hours of sunlight per day. However, some plants, such as leafy greens, can tolerate partial shade. If you are growing your pepper bottle garden indoors, place it near a sunny window. If you don’t have access to enough natural light, you can supplement with artificial grow lights.
How do I ensure proper drainage in my pepper bottle garden?
Proper drainage is essential for preventing root rot in your pepper bottle garden. Make sure to drill drainage holes in the bottom of each pepper bottle before planting. You can also add a layer of gravel or pebbles to the bottom of the bottles to improve drainage. When watering, avoid overwatering and allow excess water to drain away.
What types of plants are best suited for a pepper bottle garden?
Many different types of plants can thrive in a pepper bottle garden. Some popular choices include herbs, succulents, strawberries, leafy greens, and flowering plants. When choosing plants, consider the size of the pepper bottles, the amount of sunlight available, and your personal preferences. Smaller plants that don’t require a lot of space are generally the best choice.
How do I fertilize my pepper bottle garden?
Fertilizing your pepper bottle garden is important for providing your plants with the nutrients they need to grow and thrive. You can use a liquid fertilizer or a slow-release fertilizer. Follow the instructions on the fertilizer packaging carefully. Avoid over-fertilizing, as this can damage your plants.
How do I prevent pests and diseases in my pepper bottle garden?
To prevent pests and diseases in your pepper bottle garden, start with healthy plants and use a well-draining potting mix. Regularly inspect your plants for signs of pests or diseases. If you find any, take action immediately. You can use organic pest control methods, such as insecticidal soap or neem oil. Avoid overwatering, as this can create a favorable environment for diseases.
Can I grow my pepper bottle garden indoors?
Yes, you can definitely grow your pepper bottle garden indoors! Just make sure to provide your plants with enough sunlight or artificial grow lights. Also, be mindful of the temperature and humidity levels in your home. Some plants may require higher humidity levels than others.
How do I hang my pepper bottle garden?
There are several ways to hang your pepper bottle garden. You can use rope, twine, or wire to create a hanging system. Make sure to securely attach the pepper bottles to the hanging system. You can also purchase pre-made hanging planters that are designed for pepper bottles.
How long will my pepper bottle garden last?
With proper care, your pepper bottle garden can last for several months or even years. The lifespan of your garden will depend on the type of plants you are growing and how well you care for them. Regularly water, fertilize, and prune your plants to keep them healthy and thriving.
Can I reuse the pepper bottles for other purposes after the garden is finished?
Absolutely! Once you’re done with your pepper bottle garden, you can clean the bottles thoroughly and reuse them for other purposes. They can be used for storage, crafting projects, or even as seed starters for your next gardening adventure. The possibilities are endless!
Leave a Comment