
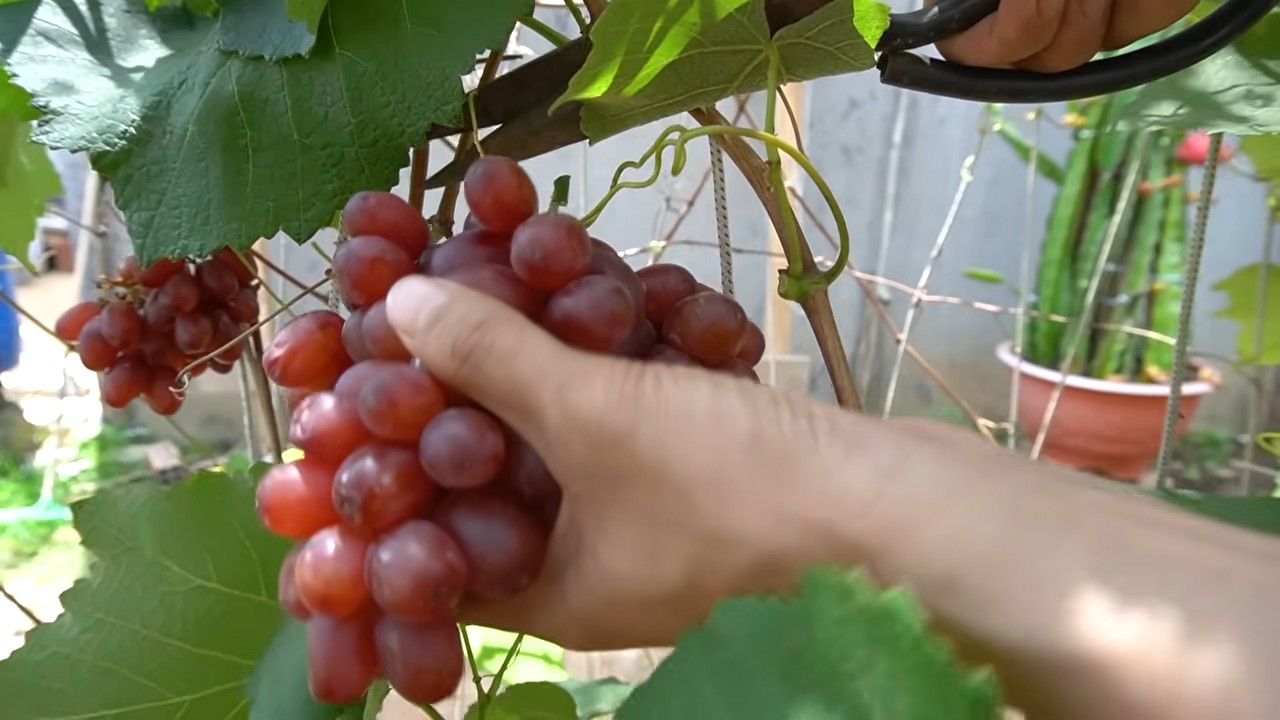
Backyard grapes health benefits are more than just a sweet treat waiting to be plucked from the vine! Imagine stepping into your backyard, the sun warming your face, and reaching out to harvest plump, juicy grapes bursting with flavor and goodness. Sounds idyllic, right? But did you know that growing your own grapes offers a treasure trove of health advantages beyond just a delicious snack?
For centuries, grapes have been celebrated not only for their taste but also for their medicinal properties. From ancient Egyptians using grapes to make wine and treat ailments to the Romans cultivating vineyards across their empire, the grape’s legacy is deeply intertwined with human history. Today, we’re rediscovering the power of this humble fruit, and I’m excited to share some simple DIY tricks to maximize the backyard grapes health benefits you can reap from your own garden.
In today’s busy world, it’s easy to overlook the importance of fresh, homegrown produce. But with a few clever hacks, you can transform your backyard into a personal wellness sanctuary. This article will guide you through easy-to-implement strategies to boost the nutritional value of your grapes, protect them from pests and diseases naturally, and ultimately, unlock the full potential of their health-boosting properties. So, let’s get started and cultivate a healthier, happier you, one grape at a time!
DIY Backyard Grape Trellis: From Seedling to Stunning Vineyard
Okay, grape lovers! So, you’re dreaming of a lush backyard vineyard, overflowing with juicy grapes ready for snacking, winemaking, or maybe even a little homemade jelly? I get it! I’ve been there, and trust me, building your own grape trellis is totally achievable. It’s a rewarding project that adds beauty and bounty to your outdoor space. This guide will walk you through the entire process, from choosing the right materials to planting your grapevines and training them to climb. Let’s get started!
Choosing Your Trellis Design
Before we dive into the construction, let’s talk about trellis designs. The best design for you will depend on the space you have, the type of grapes you’re growing, and your personal aesthetic. Here are a few popular options:
* Single-Wire Trellis: This is the simplest and most economical option, perfect for beginners or those with limited space. It consists of a single wire stretched between posts.
* Two-Wire Trellis: Similar to the single-wire, but with two wires spaced vertically. This provides more support and allows for better airflow.
* Arbor Trellis: A more decorative option that creates a shaded walkway or seating area. It requires more construction but adds a beautiful focal point to your garden.
* Overhead Trellis (Pergola): This type of trellis provides shade and creates a stunning visual effect. It’s ideal for larger spaces and can be used to grow grapes overhead.
* T-Post Trellis: Uses metal T-posts and wires, a very sturdy and cost-effective option, especially for larger vineyards.
For this guide, we’ll focus on building a **two-wire trellis**, as it’s a great balance of simplicity, functionality, and cost-effectiveness. It’s also a good starting point if you’re new to trellis construction.
Materials You’ll Need
Alright, time to gather your supplies! Here’s what you’ll need to build your two-wire grape trellis:
* Wooden Posts: 4×4 treated lumber is ideal. The length will depend on the desired height of your trellis. I recommend 8-foot posts, which will give you about 6 feet of above-ground height after burying them. You’ll need at least two posts, but more depending on the length of your row. Space them 8-10 feet apart for optimal grape growth.
* Gravel: For drainage around the base of the posts.
* Concrete Mix (Optional): For extra stability, especially in windy areas.
* Heavy-Gauge Wire: 12-gauge galvanized steel wire is a good choice. It’s strong, durable, and resistant to rust.
* Wire Tensioners (Turnbuckles): These are essential for tightening the wires and keeping them taut.
* Wire Staples or U-Nails: To secure the wire to the posts.
* Post Hole Digger or Shovel: For digging the post holes.
* Level: To ensure the posts are plumb.
* Measuring Tape: For accurate measurements.
* Hammer: For driving in the staples or U-nails.
* Wire Cutters: For cutting the wire to the desired length.
* Gloves: To protect your hands.
* Safety Glasses: To protect your eyes.
* Grapevines: Of course! Choose a variety that’s well-suited to your climate and growing conditions.
Step-by-Step Construction Guide
Okay, let’s get our hands dirty! Here’s how to build your two-wire grape trellis:
1. Planning and Layout
* Determine the Location: Choose a sunny spot in your backyard that receives at least 6-8 hours of direct sunlight per day. Grapes need plenty of sun to thrive. Also, consider the soil drainage. Grapes don’t like soggy roots.
* Mark the Post Locations: Use a measuring tape to mark the locations of your posts. Remember to space them 8-10 feet apart. If you’re building a longer trellis, make sure the row is straight.
* Consider End Posts: The end posts will bear the brunt of the wire tension, so they need to be extra sturdy. You might consider using larger posts (6×6) or bracing them with angled supports.
2. Digging the Post Holes
* Dig the Holes: Use a post hole digger or shovel to dig the post holes. The holes should be deep enough to bury about 2 feet of the posts. This will provide adequate support.
* Widen the Base (Optional): For extra stability, you can widen the base of the holes slightly. This will help prevent the posts from shifting over time.
3. Setting the Posts
* Add Gravel: Pour a few inches of gravel into the bottom of each hole. This will improve drainage and prevent the posts from rotting.
* Position the Posts: Place the posts in the holes and use a level to ensure they are plumb (perfectly vertical).
* Backfill with Soil or Concrete: If you’re using soil, pack it tightly around the posts. If you’re using concrete, mix it according to the manufacturer’s instructions and pour it into the holes.
* Brace the Posts (If Necessary): If you’re using concrete, you may need to brace the posts while the concrete sets. This will prevent them from shifting.
* Let it Cure: Allow the concrete to cure for at least 24-48 hours before proceeding.
4. Attaching the Wires
* Measure and Cut the Wire: Measure the distance between the end posts and cut the wire to the appropriate length, adding a few extra feet for attaching to the tensioners.
* Attach the First Wire: Start with the bottom wire. Position it about 3 feet above the ground. Use wire staples or U-nails to attach the wire to the posts. Leave enough slack to attach the wire tensioners.
* Attach the Second Wire: Position the second wire about 2 feet above the first wire (so about 5 feet above the ground). Attach it to the posts in the same way as the first wire.
* Install the Wire Tensioners: Attach the wire tensioners to the end posts. These will allow you to tighten the wires and keep them taut.
* Thread the Wire Through the Tensioners: Thread the wire through the tensioners and tighten them until the wires are taut. Be careful not to overtighten, as this could damage the posts or the wire.
5. Planting Your Grapevines
* Choose Your Grape Variety: Select a grape variety that is well-suited to your climate and growing conditions. Consider factors such as disease resistance, fruit quality, and ripening time.
* Prepare the Soil: Amend the soil with compost or other organic matter to improve drainage and fertility.
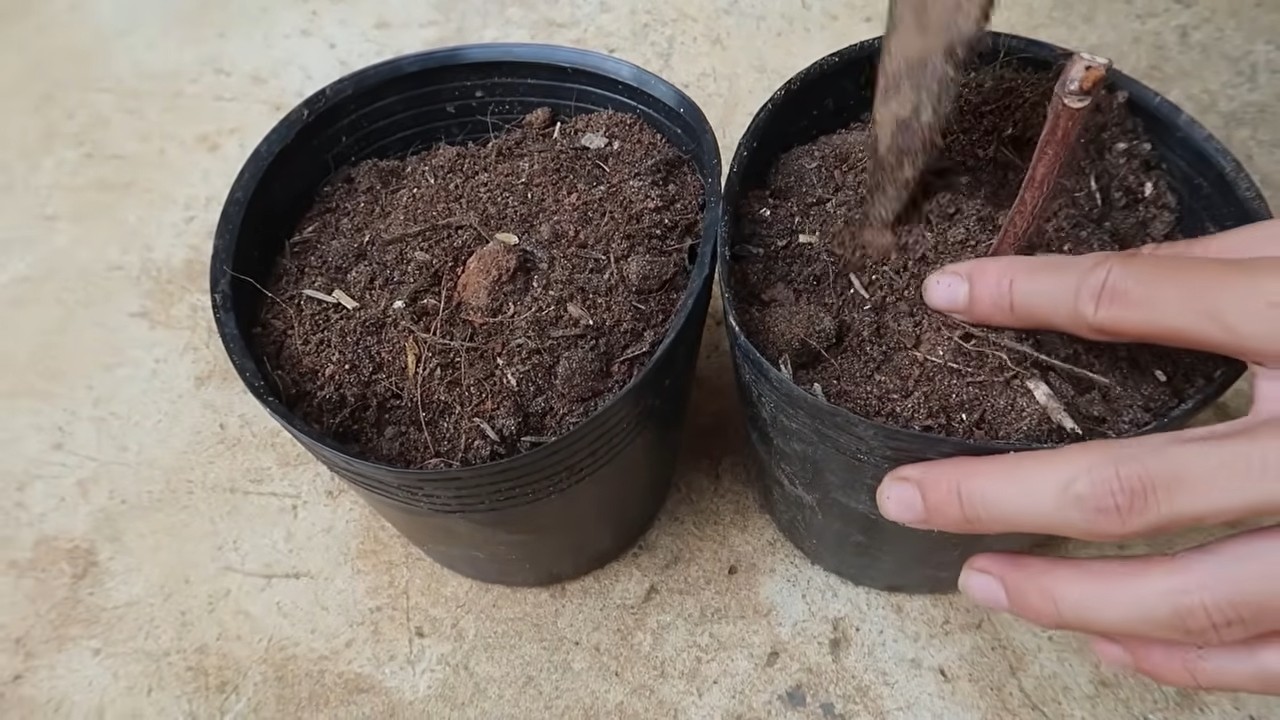
* Dig the Planting Holes: Dig planting holes that are large enough to accommodate the root balls of the grapevines.
* Plant the Grapevines: Carefully remove the grapevines from their containers and plant them in the holes. Make sure the top of the root ball is level with the surrounding soil.
* Water Thoroughly: Water the grapevines thoroughly after planting.
* Mulch: Apply a layer of mulch around the base of the grapevines to help retain moisture and suppress weeds.
6. Training Your Grapevines
This is a crucial step! Training your grapevines properly will ensure they grow strong and produce abundant fruit.
* First Year: Focus on establishing a strong trunk. Select the strongest shoot and tie it loosely to a stake or bamboo pole. Remove any other shoots that emerge from the base of the plant.
* Second Year: Continue training the main shoot upwards. Once it reaches the bottom wire, prune it back to just above the wire. This will encourage the growth of lateral shoots (cordons).
* Third Year and Beyond: Select two strong lateral shoots to become the cordons. Train them along the bottom wire in opposite directions. Prune the cordons each year to maintain their shape and encourage fruit production.
* Pruning: Pruning is essential for grape production. It helps to control the size and shape of the vine, improve airflow, and increase fruit yield. Learn about the specific pruning techniques for your grape variety.
Tips for Success
* Use High-Quality Materials: Investing in durable materials will ensure that your trellis lasts for many years.
* Proper Drainage is Key: Grapes don’t like wet feet, so make sure the soil drains well.
* Regular Pruning is Essential: Don’t neglect pruning! It’s crucial for grape production.
* Protect from Pests and Diseases: Monitor your grapevines regularly for pests and diseases and
Conclusion
So, there you have it! Transforming your backyard grapes into a powerhouse of health benefits is not only achievable but surprisingly simple. We’ve explored how to harness the goodness of these homegrown treasures, moving beyond just eating them fresh off the vine. From crafting potent grape seed extract to brewing antioxidant-rich grape leaf tea, the possibilities are truly exciting.
Why is this DIY approach a must-try? Because it puts you in control. You know exactly where your grapes come from, how they were grown (or not grown, if you’re going organic!), and what goes into the final product. This level of transparency is invaluable in a world increasingly concerned with the origins and quality of our food and supplements. Plus, it’s incredibly rewarding to create something beneficial from your own backyard.
Beyond the methods we’ve discussed, feel free to experiment! Consider drying your grapes for homemade raisins, perfect for snacking or adding to baked goods. Infuse grape leaves in olive oil for a flavorful and healthy cooking oil. You could even try making a simple grape skin scrub for gentle exfoliation. The key is to be creative and adapt these techniques to your own preferences and needs.
We’ve focused on maximizing the health benefits of your backyard grapes, and we believe that incorporating these DIY tricks into your routine can make a significant difference. Remember, consistency is key. Regularly consuming grape seed extract or sipping on grape leaf tea can contribute to improved cardiovascular health, enhanced skin radiance, and a stronger immune system.
Don’t just take our word for it, though. We wholeheartedly encourage you to try these DIY methods and experience the benefits firsthand. Start small, perhaps with a batch of grape leaf tea, and gradually explore the other options as you become more comfortable.
And most importantly, we want to hear about your experiences! Share your successes, your challenges, and your own unique variations in the comments below. Let’s build a community of backyard grape enthusiasts, learning from each other and celebrating the incredible potential of this humble fruit. Unlock the full potential of your backyard grapes and embark on a journey of health and well-being. This is more than just a recipe; it’s a lifestyle.
Now, let’s address some frequently asked questions to ensure you have all the information you need to get started.
Frequently Asked Questions (FAQ)
What are the specific health benefits of using backyard grapes compared to store-bought grapes?
Backyard grapes offer a distinct advantage: you control their cultivation. This means you can avoid pesticides and herbicides, ensuring a cleaner, more natural product. Organically grown backyard grapes are particularly beneficial, as they are free from synthetic chemicals that can negate some of the health benefits. Furthermore, harvesting your grapes at peak ripeness allows you to capture the maximum concentration of nutrients and antioxidants. Store-bought grapes, on the other hand, may have been treated with chemicals and harvested before they were fully ripe to extend their shelf life.
How do I know if my backyard grapes are safe to use for these DIY projects?
Safety is paramount. First, positively identify your grape variety. Some ornamental grapes are not edible and can be toxic. Consult with a local gardening expert or use a reliable plant identification app. Second, ensure your grapes haven’t been sprayed with any harmful chemicals. If you’ve used pesticides or herbicides, refrain from using the grapes for consumption or DIY projects for at least the recommended withdrawal period specified on the product label. Thoroughly wash your grapes before using them, even if you haven’t sprayed them, to remove any dirt or debris. If you have any concerns about the safety of your grapes, err on the side of caution and consult with a professional.
Can I use any type of grape for grape seed extract?
While all grapes contain seeds, some varieties are better suited for grape seed extract production than others. Darker grapes, such as Concord or Cabernet Sauvignon, tend to have higher concentrations of beneficial compounds like proanthocyanidins, which are the active ingredients in grape seed extract. However, you can still use other grape varieties, including green grapes, although the potency of the extract may be slightly lower. The key is to use ripe, healthy grapes for the best results.
How do I properly dry grape leaves for tea?
Proper drying is crucial to prevent mold growth and preserve the flavor and nutrients of the grape leaves. Harvest young, tender leaves in the spring or early summer. Wash them thoroughly and pat them dry. You can dry them in several ways:
* **Air Drying:** Spread the leaves in a single layer on a clean screen or tray in a well-ventilated, shaded area. Turn them occasionally to ensure even drying. This method can take several days to a week, depending on the humidity.
* **Oven Drying:** Preheat your oven to the lowest possible setting (ideally below 170°F or 77°C). Spread the leaves in a single layer on a baking sheet and dry them for 2-4 hours, or until they are brittle. Check them frequently to prevent burning.
* **Dehydrator:** Use a food dehydrator according to the manufacturer’s instructions. This is the most efficient and controlled method.
Once the leaves are completely dry, store them in an airtight container in a cool, dark place.
How much grape seed extract or grape leaf tea should I consume daily?
Dosage recommendations vary depending on individual factors such as age, health condition, and the concentration of the extract or tea. It’s always best to consult with a healthcare professional or registered dietitian before starting any new supplement regimen. As a general guideline, a typical dose of grape seed extract is between 100-300 mg per day. For grape leaf tea, start with one cup per day and gradually increase as tolerated. Pay attention to your body’s response and adjust the dosage accordingly.
Are there any potential side effects or interactions with medications?
Grape seed extract and grape leaf tea are generally considered safe for most people when consumed in moderation. However, some individuals may experience mild side effects such as nausea, headache, or dizziness. Grape seed extract may also interact with certain medications, such as blood thinners, by increasing the risk of bleeding. If you are taking any medications, have any underlying health conditions, or are pregnant or breastfeeding, it’s essential to consult with your doctor before using grape seed extract or grape leaf tea.
How long will homemade grape seed extract last?
The shelf life of homemade grape seed extract depends on how it’s prepared and stored. If you’re making an alcohol-based tincture, it can last for several years if stored in a dark glass bottle in a cool, dark place. If you’re making a water-based extract, it will have a shorter shelf life, typically a few weeks, and should be stored in the refrigerator. Always check for signs of spoilage, such as mold growth or an off odor, before using the extract.
Can I use frozen grapes for these DIY projects?
Yes, you can use frozen grapes for most of these DIY projects. Freezing grapes doesn’t significantly affect their nutrient content. However, frozen grapes may be softer and release more juice when thawed, which could affect the texture of some products. For example, frozen grapes might be too mushy for making raisins. For grape seed extract or grape leaf tea, frozen grapes are perfectly acceptable.
What if I don’t have a backyard grape vine? Can I still try these methods?
While the article focuses on backyard grapes, you can certainly adapt these methods using store-bought grapes, especially if you can find organically grown varieties. Look for grapes that are ripe and free from blemishes. Keep in mind that the quality and nutrient content of store-bought grapes may vary depending on the source and growing practices.
How can I ensure my backyard grapes are organically grown?
Growing organic grapes requires a commitment to natural pest control and soil management. Avoid using synthetic pesticides, herbicides, and fertilizers. Instead, focus on building healthy soil with compost and other organic matter. Use natural pest control methods such as introducing beneficial insects or using organic sprays like neem oil. Regularly monitor your vines for signs of pests or diseases and take action promptly. Research organic grape growing practices specific to your region for the best results.
Leave a Comment