
Balcony chili gardening tips are your secret weapon to adding a fiery kick to your meals, right from the comfort of your own home! Imagine plucking fresh, vibrant chilies just steps from your kitchen – no more bland dinners or expensive grocery store runs. But let’s be honest, the idea of gardening, especially in a limited space like a balcony, can feel daunting.
Chili peppers have a rich history, dating back thousands of years in South America, where they were not only a food source but also held cultural and medicinal significance. Today, their popularity has exploded worldwide, and thankfully, you don’t need acres of land to cultivate your own.
That’s where these DIY balcony chili gardening tips come in! I’m going to share simple, effective hacks that will transform your balcony into a thriving chili pepper paradise, even if you’ve never grown anything before. We’ll cover everything from choosing the right varieties for container gardening to maximizing sunlight and preventing common problems. Why spend money on store-bought chilies when you can have a constant supply of fresh, organic peppers at your fingertips? Let’s get started and unleash your inner chili gardener!

Balkon-Chili-Garten: Dein Leitfaden für eine feurige Ernte
Hallo liebe Chili-Enthusiasten! Träumst du auch von einer üppigen Chili-Ernte direkt auf deinem Balkon? Dann bist du hier genau richtig! Ich zeige dir, wie du auch auf kleinstem Raum eine beeindruckende Chili-Oase erschaffen kannst. Keine Angst, es ist einfacher als du denkst!
Was du für deinen Balkon-Chili-Garten brauchst
Bevor wir loslegen, lass uns sicherstellen, dass wir alles Nötige beisammen haben. Hier ist eine Liste der wichtigsten Dinge:
* Chili-Samen oder Jungpflanzen: Wähle Sorten, die dir schmecken und für den Anbau im Topf geeignet sind.
* Töpfe oder Kübel: Achte auf eine ausreichende Größe (mindestens 10 Liter pro Pflanze) und gute Drainage.
* Hochwertige Erde: Chili-Pflanzen lieben nährstoffreiche, gut durchlässige Erde. Spezielle Chili-Erde ist ideal, aber auch eine Mischung aus Blumenerde, Kompost und Sand funktioniert gut.
* Dünger: Flüssigdünger für Chili-Pflanzen oder Langzeitdünger sind perfekt, um deine Pflanzen mit allen wichtigen Nährstoffen zu versorgen.
* Gießkanne oder Schlauch: Zum regelmäßigen Gießen deiner Chili-Pflanzen.
* Pflanzenschilder: Damit du den Überblick behältst, welche Sorte wo wächst.
* Pflanzstäbe oder Rankhilfen: Einige Chili-Sorten werden recht hoch und brauchen Unterstützung.
* Sprühflasche: Zum Besprühen der Blätter, besonders bei trockener Luft.
* Gartenschere: Zum Entfernen von abgestorbenen Blättern und zum Ernten der Chilis.
* Handschuhe: Schützen deine Hände beim Umgang mit Erde und scharfen Chilis.
* Sonniger Standort: Chilis lieben die Sonne!
Die richtige Chili-Sorte für deinen Balkon
Die Auswahl der richtigen Chili-Sorte ist entscheidend für den Erfolg deines Balkon-Chili-Gartens. Nicht alle Sorten sind gleich gut für den Anbau im Topf geeignet. Hier sind einige Empfehlungen:
* Jalapeño: Ein Klassiker, der relativ einfach anzubauen ist und eine moderate Schärfe hat.
* Serrano: Etwas schärfer als Jalapeño und ebenfalls gut für den Anbau im Topf geeignet.
* Habanero: Für alle, die es richtig scharf mögen! Braucht etwas mehr Pflege, aber die Mühe lohnt sich.
* Thai-Chilis: Kleine, aber feurige Chilis, die sich gut für den Anbau im Topf eignen.
* Pimientos de Padrón: Milde Chilis, die oft grün geerntet und gebraten werden. Eine tolle Abwechslung!
* Busch-Chilis: Speziell gezüchtete Sorten, die kompakt wachsen und sich ideal für den Balkon eignen. Achte beim Kauf auf die Beschreibung “Busch-Chili” oder “Balkon-Chili”.
Tipp: Informiere dich vor dem Kauf über die Schärfe der jeweiligen Sorte. Die Schärfe wird in Scoville-Einheiten (SHU) angegeben.
Aussaat oder Jungpflanzen?
Du hast zwei Möglichkeiten, deinen Chili-Garten zu starten: mit Samen oder mit Jungpflanzen. Beide haben ihre Vor- und Nachteile.
* Aussaat: Die Aussaat ist günstiger und bietet eine größere Auswahl an Sorten. Allerdings ist sie auch etwas zeitaufwendiger und erfordert etwas mehr Geduld.
* Jungpflanzen: Jungpflanzen sind teurer, aber du sparst Zeit und Mühe. Außerdem hast du sofort eine Pflanze, die du auf deinem Balkon bewundern kannst.
Wenn du dich für die Aussaat entscheidest, solltest du im Februar oder März beginnen. Die Samen brauchen Wärme und Licht, um zu keimen. Du kannst sie in einem Mini-Gewächshaus oder auf der Fensterbank vorziehen.
Schritt-für-Schritt-Anleitung: Chili-Pflanzen auf dem Balkon anbauen
Jetzt geht’s ans Eingemachte! Hier ist eine detaillierte Anleitung, wie du deine Chili-Pflanzen erfolgreich auf dem Balkon anbaust:
1. Vorbereitung der Töpfe
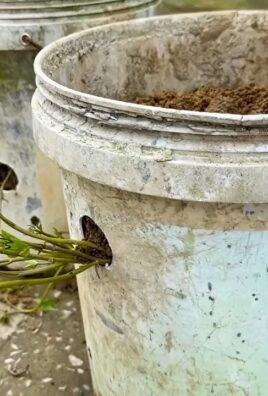
* Wähle Töpfe oder Kübel mit einem Volumen von mindestens 10 Litern pro Pflanze. Größere Töpfe sind besser, da sie mehr Erde aufnehmen und die Pflanzen stabiler stehen.
* Achte darauf, dass die Töpfe Abzugslöcher haben, damit überschüssiges Wasser ablaufen kann.
* Fülle die Töpfe mit hochwertiger Chili-Erde oder einer Mischung aus Blumenerde, Kompost und Sand. Lass oben einen Rand von etwa 5 cm frei.
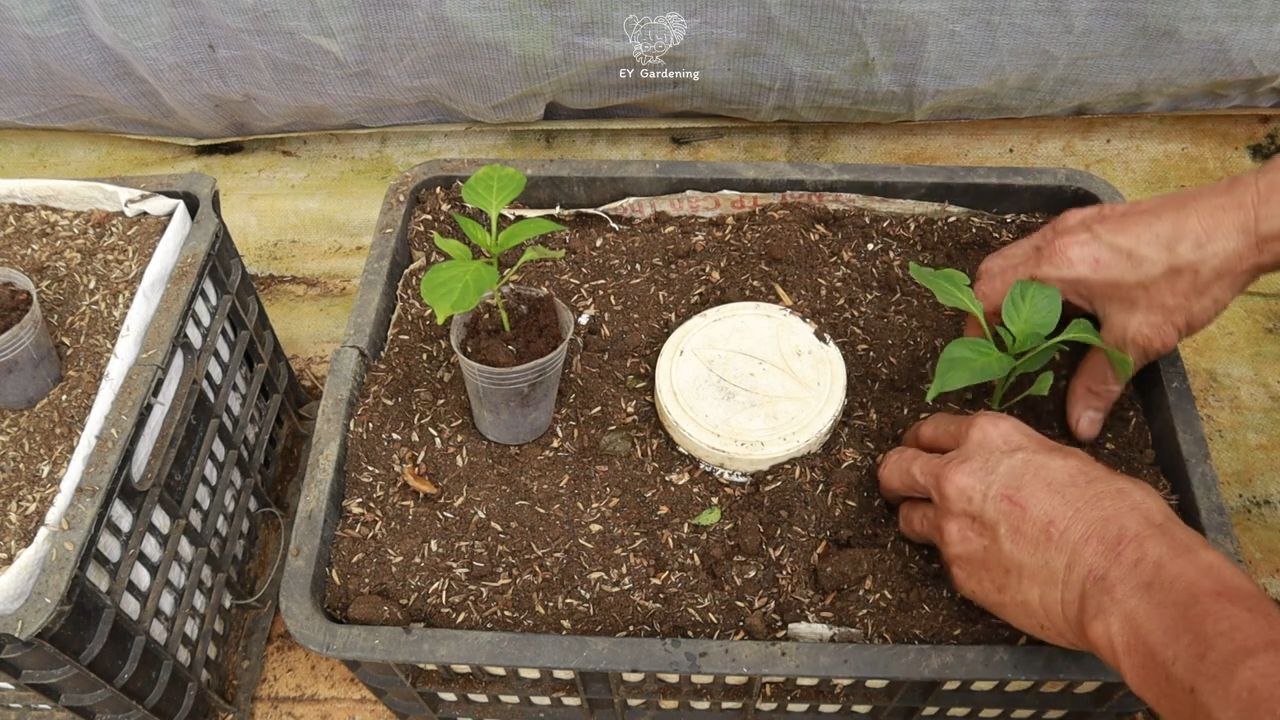
2. Einpflanzen der Chili-Pflanzen
* Wenn du Jungpflanzen gekauft hast, nimm sie vorsichtig aus dem Anzuchttopf. Lockere den Wurzelballen etwas auf.
* Setze die Pflanzen in die vorbereiteten Töpfe. Die Oberkante des Wurzelballens sollte mit der Erdoberfläche abschließen.
* Fülle die Töpfe mit Erde auf und drücke sie leicht an.
* Gieße die Pflanzen gründlich an.
3. Standortwahl
* Chili-Pflanzen lieben die Sonne! Stelle die Töpfe an einen sonnigen Standort auf deinem Balkon. Ideal sind mindestens 6 Stunden Sonne pro Tag.
* Achte darauf, dass der Standort windgeschützt ist. Starke Winde können die Pflanzen beschädigen.
4. Gießen und Düngen
* Gieße deine Chili-Pflanzen regelmäßig, besonders an heißen Tagen. Die Erde sollte immer leicht feucht sein, aber nicht nass. Vermeide Staunässe.
* Dünge deine Pflanzen regelmäßig mit einem Flüssigdünger für Chili-Pflanzen oder einem Langzeitdünger. Beginne etwa 2 Wochen nach dem Einpflanzen.
* Befolge die Anweisungen auf der Düngerpackung.
5. Pflege der Chili-Pflanzen
* Entferne regelmäßig abgestorbene Blätter und Triebe.
* Kontrolliere deine Pflanzen regelmäßig auf Schädlinge und Krankheiten.
* Besprühe die Blätter regelmäßig mit Wasser, besonders bei trockener Luft. Das erhöht die Luftfeuchtigkeit und beugt Schädlingen vor.
* Stütze hohe Chili-Sorten mit Pflanzstäben oder Rankhilfen.
6. Ernte der Chilis
* Die Erntezeit hängt von der jeweiligen Sorte ab. In der Regel kannst du ab Juli oder August mit der Ernte beginnen.
* Ernte die Chilis, wenn sie ihre endgültige Farbe erreicht haben.
* Trage beim Ernten Handschuhe, um deine Hände vor der Schärfe zu schützen.
* Schneide die Chilis mit einer Gartenschere ab.
Häufige Probleme und Lösungen
Auch beim Chili-Anbau auf dem Balkon können Probleme auftreten. Hier sind einige der häufigsten Probleme und wie du sie lösen kannst:
* Blattläuse: Blattläuse saugen an den Blättern und können die Pflanzen schwächen. Du kannst sie mit einem Wasserstrahl abspülen oder mit einem biologischen Insektizid bekämpfen.
* Spinnmilben: Spinnmilben sind winzige Schädlinge, die feine Netze auf den Blättern bilden. Du kannst sie mit einem Wasserstrahl abspülen oder mit einem speziellen Spinnmilbenmittel bekämpfen.
* Pilzkrankheiten: Pilzkrankheiten können durch zu hohe Luftfeuchtigkeit oder Staunässe entstehen. Sorge für eine gute Belüftung und vermeide Staunässe.
* Gelbe Blätter: Gelbe Blätter können ein Zeichen für Nährstoffmangel sein. Dünge deine Pflanzen regelmäßig.
* Blütenfall: Blütenfall kann durch zu hohe Temperaturen, Wassermangel oder Nährstoffmangel verursacht werden. Sorge für ausreichend Wasser und Nährstoffe und schütze die Pflanzen vor extremer Hitze.
Chili-Pflanzen überwintern
Wenn du deine Chili-Pflanzen überwintern möchtest, solltest du sie vor dem ersten Frost ins Haus holen. Stelle sie an einen hellen und kühlen Ort (ca. 10-15 Grad Celsius). Gie
Conclusion
So, there you have it! Transforming your balcony into a vibrant chili garden is not only achievable but also incredibly rewarding. We’ve explored the essential steps, from selecting the right chili varieties to nurturing your plants for a bountiful harvest. This DIY balcony chili gardening approach is a must-try for several compelling reasons.
Firstly, it’s a fantastic way to enjoy fresh, homegrown chilies right at your fingertips. Imagine adding a fiery kick to your meals with chilies you’ve personally cultivated. The flavor is simply unmatched compared to store-bought options. Secondly, balcony chili gardening is a space-saving solution for urban dwellers. You don’t need a sprawling backyard to indulge in the joys of gardening; a sunny balcony is all you need. Thirdly, it’s a therapeutic and engaging hobby. Tending to your chili plants can be a relaxing and fulfilling experience, providing a welcome escape from the stresses of daily life.
But the benefits don’t stop there. Growing your own chilies allows you to control the growing process, ensuring that your plants are free from harmful pesticides and chemicals. You can choose organic methods and enjoy chilies that are both delicious and healthy. Plus, it’s a sustainable practice that reduces your carbon footprint by minimizing the need for transportation and packaging.
Now, let’s talk about variations and suggestions. Feel free to experiment with different chili varieties to find your favorites. From mild jalapeños to scorching habaneros, the possibilities are endless. You can also try companion planting to enhance the growth and flavor of your chilies. Basil, tomatoes, and carrots are excellent companions that can deter pests and improve soil health.
Consider using different types of containers to add visual appeal to your balcony garden. Terracotta pots, hanging baskets, and repurposed containers can all be used to create a unique and personalized space. Don’t forget to label your plants so you can easily identify them and track their progress.
Furthermore, you can explore different growing techniques, such as hydroponics or aquaponics, to take your balcony chili gardening to the next level. These methods can be more efficient and require less space than traditional soil-based gardening.
Ultimately, the key to successful balcony chili gardening is to be patient, observant, and willing to learn. Pay attention to your plants’ needs and adjust your care routine accordingly. Don’t be afraid to experiment and try new things. And most importantly, have fun!
We wholeheartedly encourage you to embark on this exciting journey of balcony chili gardening. It’s a rewarding experience that will bring you fresh chilies, a sense of accomplishment, and a connection to nature. Once you’ve harvested your first batch of homegrown chilies, you’ll be hooked!
We’d love to hear about your experiences with balcony chili gardening. Share your tips, tricks, and photos with us in the comments section below. Let’s create a community of chili enthusiasts and inspire others to grow their own! What chili varieties are you planning to grow? What challenges have you faced, and how did you overcome them? Your insights will be invaluable to other readers who are just starting out.
So, grab your seeds, pots, and soil, and get ready to transform your balcony into a chili paradise. Happy gardening!
Frequently Asked Questions (FAQ)
What are the best chili varieties to grow on a balcony?
The best chili varieties for balcony gardening are those that are compact and well-suited to container growing. Some popular choices include:
* Jalapeños: These are relatively easy to grow and produce a moderate level of heat.
* Serranos: Similar to jalapeños but with a slightly higher heat level.
* Thai chilies: These are small but pack a punch of heat and are ideal for Asian cuisine.
* Habaneros: For those who like it hot, habaneros are a great option, but they require more care and attention.
* Cayenne peppers: These are versatile chilies that can be used in a variety of dishes.
* Poblano peppers: Milder and larger, these are great for stuffing.
* Bell peppers: While not spicy, they are easy to grow and add color to your balcony garden.
Consider the size of your balcony and the amount of sunlight it receives when choosing your chili varieties. Also, think about your personal preferences and the types of dishes you enjoy cooking.
How much sunlight do chili plants need?
Chili plants need at least 6-8 hours of direct sunlight per day to thrive. If your balcony doesn’t receive enough sunlight, you may need to supplement with grow lights. Place your chili plants in the sunniest spot on your balcony and rotate them regularly to ensure that all sides receive adequate sunlight.
What type of soil is best for balcony chili gardening?
Use a well-draining potting mix that is specifically formulated for container gardening. Avoid using garden soil, as it can become compacted and waterlogged in containers. A good potting mix will provide adequate drainage and aeration for your chili plants’ roots. You can also amend your potting mix with compost or other organic matter to improve its fertility.
How often should I water my chili plants?
Water your chili plants regularly, especially during hot and dry weather. Check the soil moisture level by sticking your finger into the soil. If the top inch of soil feels dry, it’s time to water. Water deeply until the water drains out of the bottom of the container. Avoid overwatering, as this can lead to root rot.
What kind of fertilizer should I use for my chili plants?
Use a balanced fertilizer that is specifically formulated for vegetables. Look for a fertilizer with an NPK ratio (nitrogen, phosphorus, potassium) of around 10-10-10 or 14-14-14. Fertilize your chili plants every 2-3 weeks during the growing season. Follow the instructions on the fertilizer package carefully.
How do I protect my chili plants from pests and diseases?
Inspect your chili plants regularly for signs of pests and diseases. Common pests include aphids, spider mites, and whiteflies. You can control these pests with insecticidal soap or neem oil. Diseases such as powdery mildew and fungal leaf spots can be prevented by providing good air circulation and avoiding overwatering. If you notice any signs of disease, remove the affected leaves and treat the plant with a fungicide.
When should I harvest my chilies?
Harvest your chilies when they have reached their mature color and size. The exact timing will depend on the variety of chili you are growing. Use scissors or pruning shears to cut the chilies from the plant, leaving a small stem attached.
Can I grow chilies indoors?
Yes, you can grow chilies indoors, but you will need to provide them with adequate light and warmth. Place your chili plants near a sunny window or use grow lights to supplement the natural light. Keep the temperature consistent and avoid drafts.
How do I overwinter my chili plants?
If you live in a cold climate, you can overwinter your chili plants indoors. Before the first frost, prune back the plants and move them to a cool, bright location. Water sparingly during the winter months. In the spring, gradually acclimate the plants to outdoor conditions before moving them back to your balcony.
What are some common problems with balcony chili gardening and how can I fix them?
Some common problems include:
* Yellowing leaves: This can be caused by overwatering, underwatering, nutrient deficiencies, or pests. Adjust your watering schedule, fertilize your plants, and inspect them for pests.
* Blossom end rot: This is caused by a calcium deficiency. Add calcium to the soil or use a calcium-rich fertilizer.
* Lack of fruit: This can be caused by insufficient sunlight, poor pollination, or nutrient deficiencies. Ensure that your plants are getting enough sunlight, hand-pollinate the flowers if necessary, and fertilize your plants.
* Pest infestations: Treat pests with insecticidal soap, neem oil, or other appropriate methods.
* Diseases: Prevent diseases by providing good air circulation, avoiding overwatering, and using disease-resistant varieties. Treat diseases with a fungicide if necessary.
By addressing these common problems promptly, you can ensure a successful and rewarding balcony chili gardening experience.

Leave a Comment