
Bell Peppers Bucket Gardening: Imagine harvesting vibrant, juicy bell peppers right from your own patio, balcony, or even a sunny windowsill! Sounds amazing, right? Well, it’s more achievable than you think, even without a sprawling garden. For centuries, humans have cultivated food in containers, adapting to limited spaces and urban environments. From ancient rooftop gardens in Babylon to modern-day apartment dwellers growing herbs, the desire to connect with nature and grow our own food is deeply ingrained.
But let’s face it, traditional gardening can be intimidating. All that digging, weeding, and specialized knowledge can feel overwhelming. That’s where Bell Peppers Bucket Gardening comes in! I’m here to show you how to bypass the complexities and enjoy the satisfaction of growing your own delicious bell peppers with minimal effort and maximum reward. This DIY guide will provide you with simple, step-by-step instructions, clever hacks, and insider tips to ensure your bucket garden thrives.
Why do you need this? Because fresh, homegrown bell peppers taste infinitely better than anything you’ll find in the store. Plus, you’ll know exactly what went into growing them – no mystery pesticides or questionable practices. Get ready to transform your small space into a productive and beautiful edible oasis! Let’s get started!
Bell Peppers in Buckets: A Beginner’s Guide to Container Gardening
Hey there, fellow gardening enthusiasts! I’m so excited to share my experience with growing bell peppers in buckets. It’s a fantastic way to enjoy fresh, homegrown peppers even if you don’t have a sprawling garden. Trust me, if I can do it, you can too! This guide will walk you through every step, from choosing the right bucket to harvesting your delicious peppers.
Choosing Your Peppers and Buckets
Before we dive into the nitty-gritty, let’s talk about the stars of the show: the bell peppers and their cozy homes, the buckets!
* Pepper Variety: Think about what kind of bell peppers you love to eat. Green, red, yellow, orange – the choice is yours! Some varieties, like ‘Ace’ or ‘California Wonder,’ are known for being reliable and productive in containers. I personally love growing ‘Sweet Banana’ peppers alongside my bell peppers for a bit of variety.
* Bucket Size: This is crucial! You’ll need a bucket that’s at least 5 gallons in size. I prefer using 5-gallon buckets because they provide enough space for the roots to grow and thrive. Larger buckets (like 10-gallon) are even better, especially if you’re planning on growing multiple plants in one container.
* Bucket Material: Food-grade plastic buckets are the safest option. You can often find these at bakeries, restaurants, or even hardware stores. Avoid using buckets that previously held chemicals, as these could contaminate your soil and harm your plants.
* Drainage is Key: Make sure your buckets have adequate drainage holes. We’ll cover this in detail later, but it’s essential to prevent waterlogging, which can lead to root rot.
Gathering Your Supplies
Okay, now that we’ve chosen our peppers and buckets, let’s gather everything else we’ll need. Here’s a checklist:
* Bell pepper seedlings (or seeds, if you’re starting from scratch)
* 5-gallon (or larger) food-grade plastic buckets
* Drill (for drainage holes)
* Potting mix (specifically designed for containers)
* Slow-release fertilizer (14-14-14 is a good general-purpose option)
* Watering can or hose
* Trowel or small shovel
* Optional: Stakes or tomato cages (for support as the plants grow)
* Optional: Mulch (to help retain moisture and suppress weeds)
Preparing Your Buckets
This step is all about creating the perfect environment for your pepper plants to flourish.
1. Drill Drainage Holes: This is non-negotiable! Use your drill to create at least 4-5 drainage holes in the bottom of each bucket. I usually space them evenly around the perimeter. The holes should be about 1/4 to 1/2 inch in diameter.
2. Clean Your Buckets: Give your buckets a good scrub with soap and water to remove any dirt or debris. Rinse them thoroughly to ensure no soap residue remains.
3. Add Potting Mix: Fill each bucket with high-quality potting mix, leaving about 2-3 inches of space at the top. Don’t use garden soil, as it’s too heavy and doesn’t drain well in containers. Container potting mix is specifically formulated to provide good drainage and aeration.
4. Mix in Fertilizer: Incorporate a slow-release fertilizer into the potting mix according to the package directions. This will provide your pepper plants with a steady supply of nutrients throughout the growing season. I like to use a balanced fertilizer like 14-14-14.
Planting Your Pepper Seedlings
Now for the fun part – planting your pepper seedlings!
1. Dig a Hole: Use your trowel to dig a hole in the center of each bucket, large enough to accommodate the root ball of your pepper seedling.
2. Gently Remove Seedling: Carefully remove the pepper seedling from its container. Gently loosen the roots with your fingers to encourage them to spread out.
3. Place Seedling in Hole: Position the seedling in the hole, ensuring that the top of the root ball is level with the surrounding soil.
4. Fill and Pat Down: Fill in the hole with potting mix and gently pat down the soil around the base of the plant.
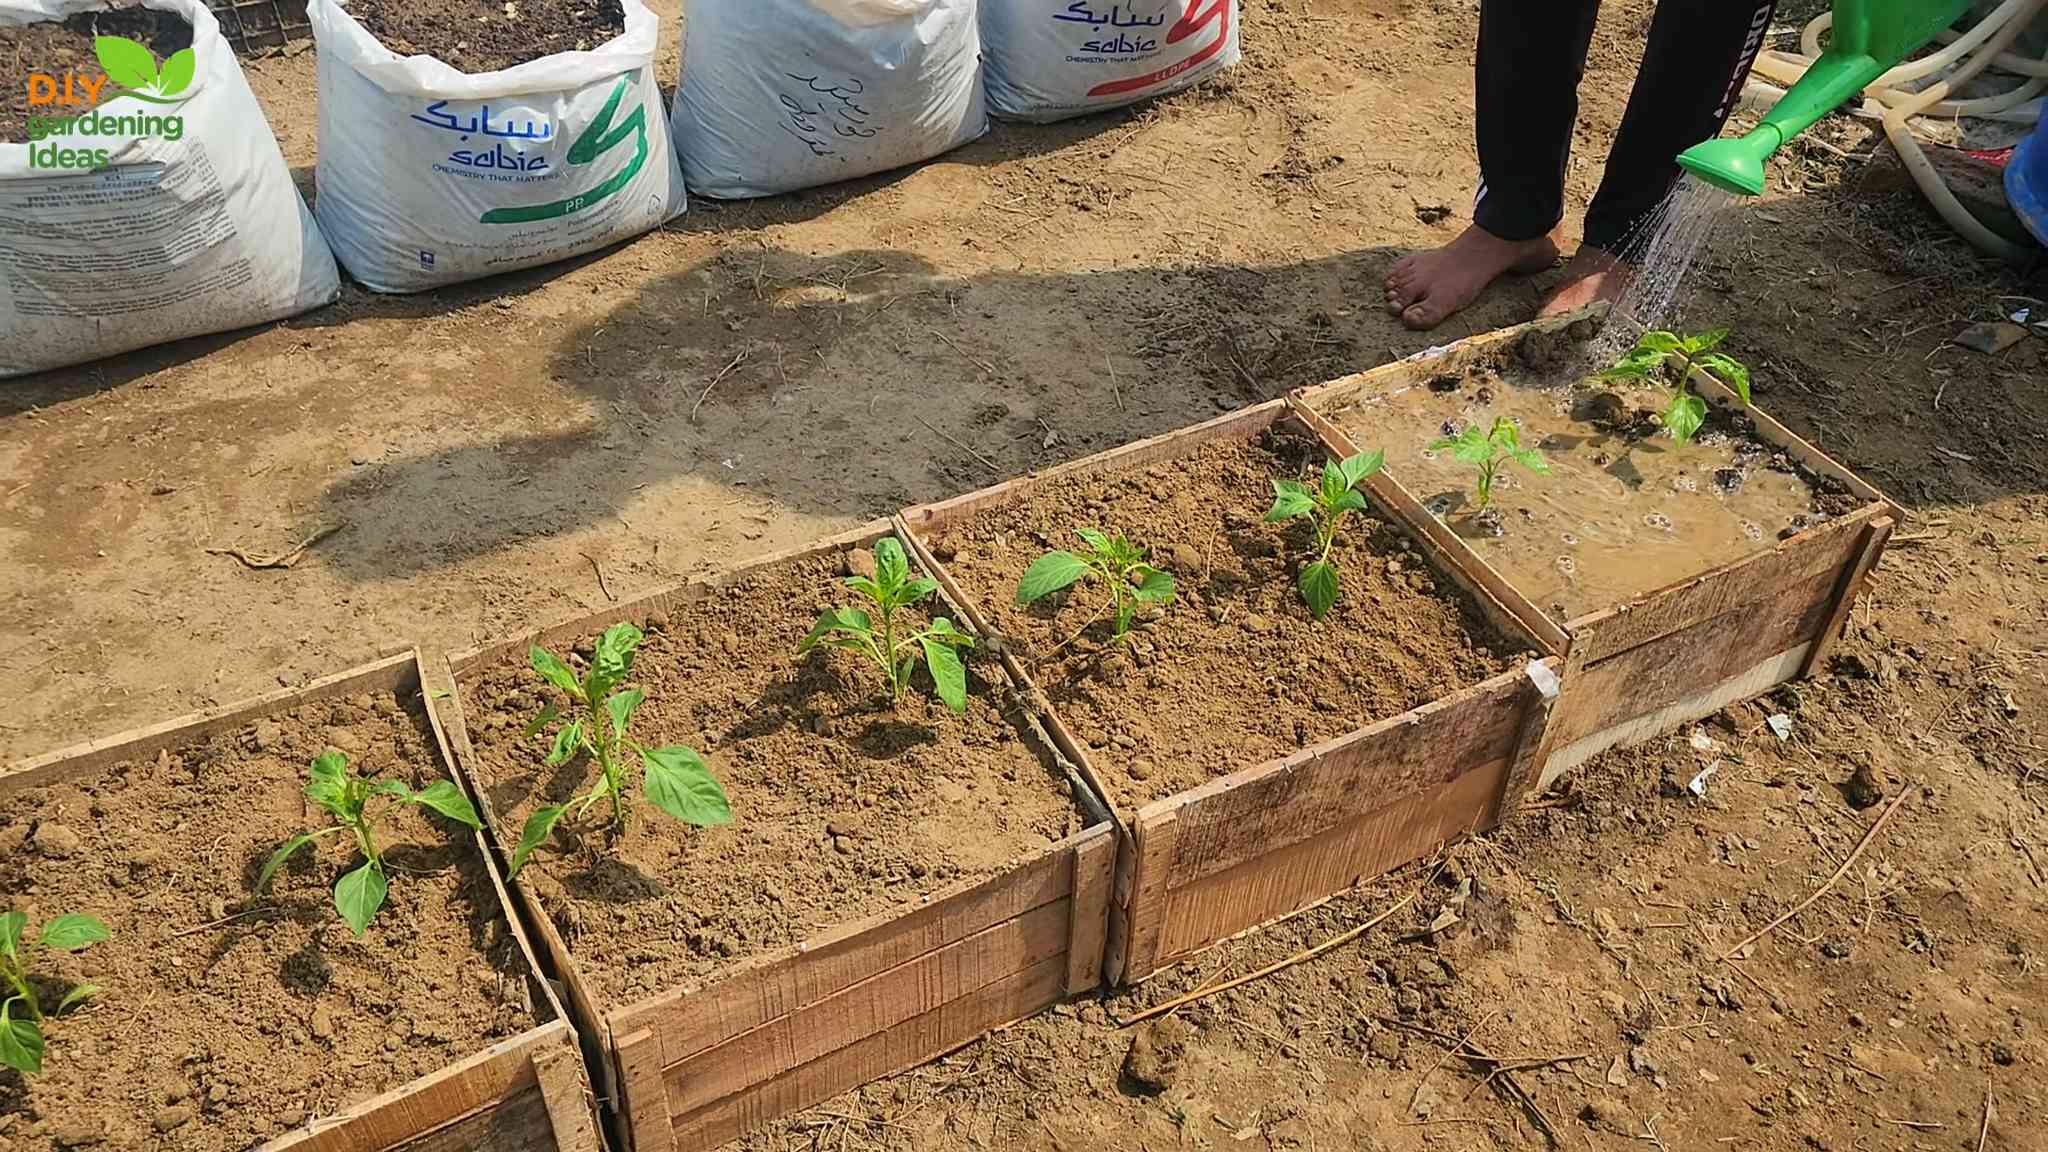
5. Water Thoroughly: Water the newly planted seedling thoroughly until water drains out of the drainage holes. This will help settle the soil and ensure that the roots are well-hydrated.
Caring for Your Bell Pepper Plants
Consistent care is key to a bountiful harvest. Here’s what you need to do to keep your pepper plants happy and healthy:
* Watering: Water your pepper plants regularly, especially during hot, dry weather. Check the soil moisture by sticking your finger about an inch into the soil. If it feels dry, it’s time to water. Avoid overwatering, as this can lead to root rot. I usually water deeply every 2-3 days, but this will depend on your climate and the size of your buckets.
* Sunlight: Bell peppers need at least 6-8 hours of sunlight per day. Choose a sunny location for your buckets. If you live in a particularly hot climate, you may need to provide some afternoon shade to prevent the plants from getting scorched.
* Fertilizing: Even with slow-release fertilizer, your pepper plants will benefit from supplemental feedings throughout the growing season. I like to use a liquid fertilizer diluted to half strength every 2-3 weeks. Look for a fertilizer that’s specifically formulated for vegetables.
* Support: As your pepper plants grow, they may need some support to prevent them from toppling over, especially when they’re loaded with fruit. You can use stakes or tomato cages to provide support. Insert the stakes or cages into the buckets early in the growing season to avoid damaging the roots later on.
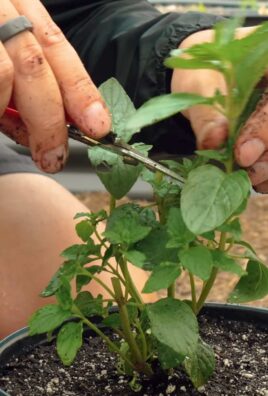
* Pruning: Pruning isn’t strictly necessary, but it can help improve air circulation and encourage bushier growth. You can remove any suckers (small shoots that grow from the base of the plant) to direct more energy to fruit production.
* Pest and Disease Control: Keep an eye out for common pests like aphids, whiteflies, and spider mites. You can often control these pests with insecticidal soap or neem oil. Preventative measures, such as good air circulation and proper watering, can also help reduce the risk of disease.
Troubleshooting Common Problems
Even with the best care, you might encounter some challenges along the way. Here are a few common problems and how to address them:
* Yellowing Leaves: This could be a sign of nutrient deficiency, overwatering, or underwatering. Check the soil moisture and adjust your watering accordingly. If the soil is consistently wet, allow it to dry out slightly before watering again. If the leaves are yellowing from the bottom up, it could be a sign of nitrogen deficiency. Try fertilizing with a balanced fertilizer.
* Blossom End Rot: This is a common problem in tomatoes and peppers, characterized by a dark, sunken spot on the bottom of the fruit. It’s usually caused by calcium deficiency, which can be exacerbated by inconsistent watering. Ensure that your plants are getting consistent moisture and consider adding calcium to the soil.
* Lack of Fruit: If your pepper plants are flowering but not producing fruit, it could be due to a lack of pollination. Bell peppers are self-pollinating, but sometimes they need a little help. You can gently shake the plants or use a small paintbrush to transfer pollen from one flower to another. High temperatures can also inhibit fruit set.
* Pests: As mentioned earlier, keep an eye out for pests. Early detection and treatment are key to preventing infestations from getting out of control.
Harvesting Your Bell Peppers
The moment you’ve been waiting for – harvesting your delicious bell peppers!
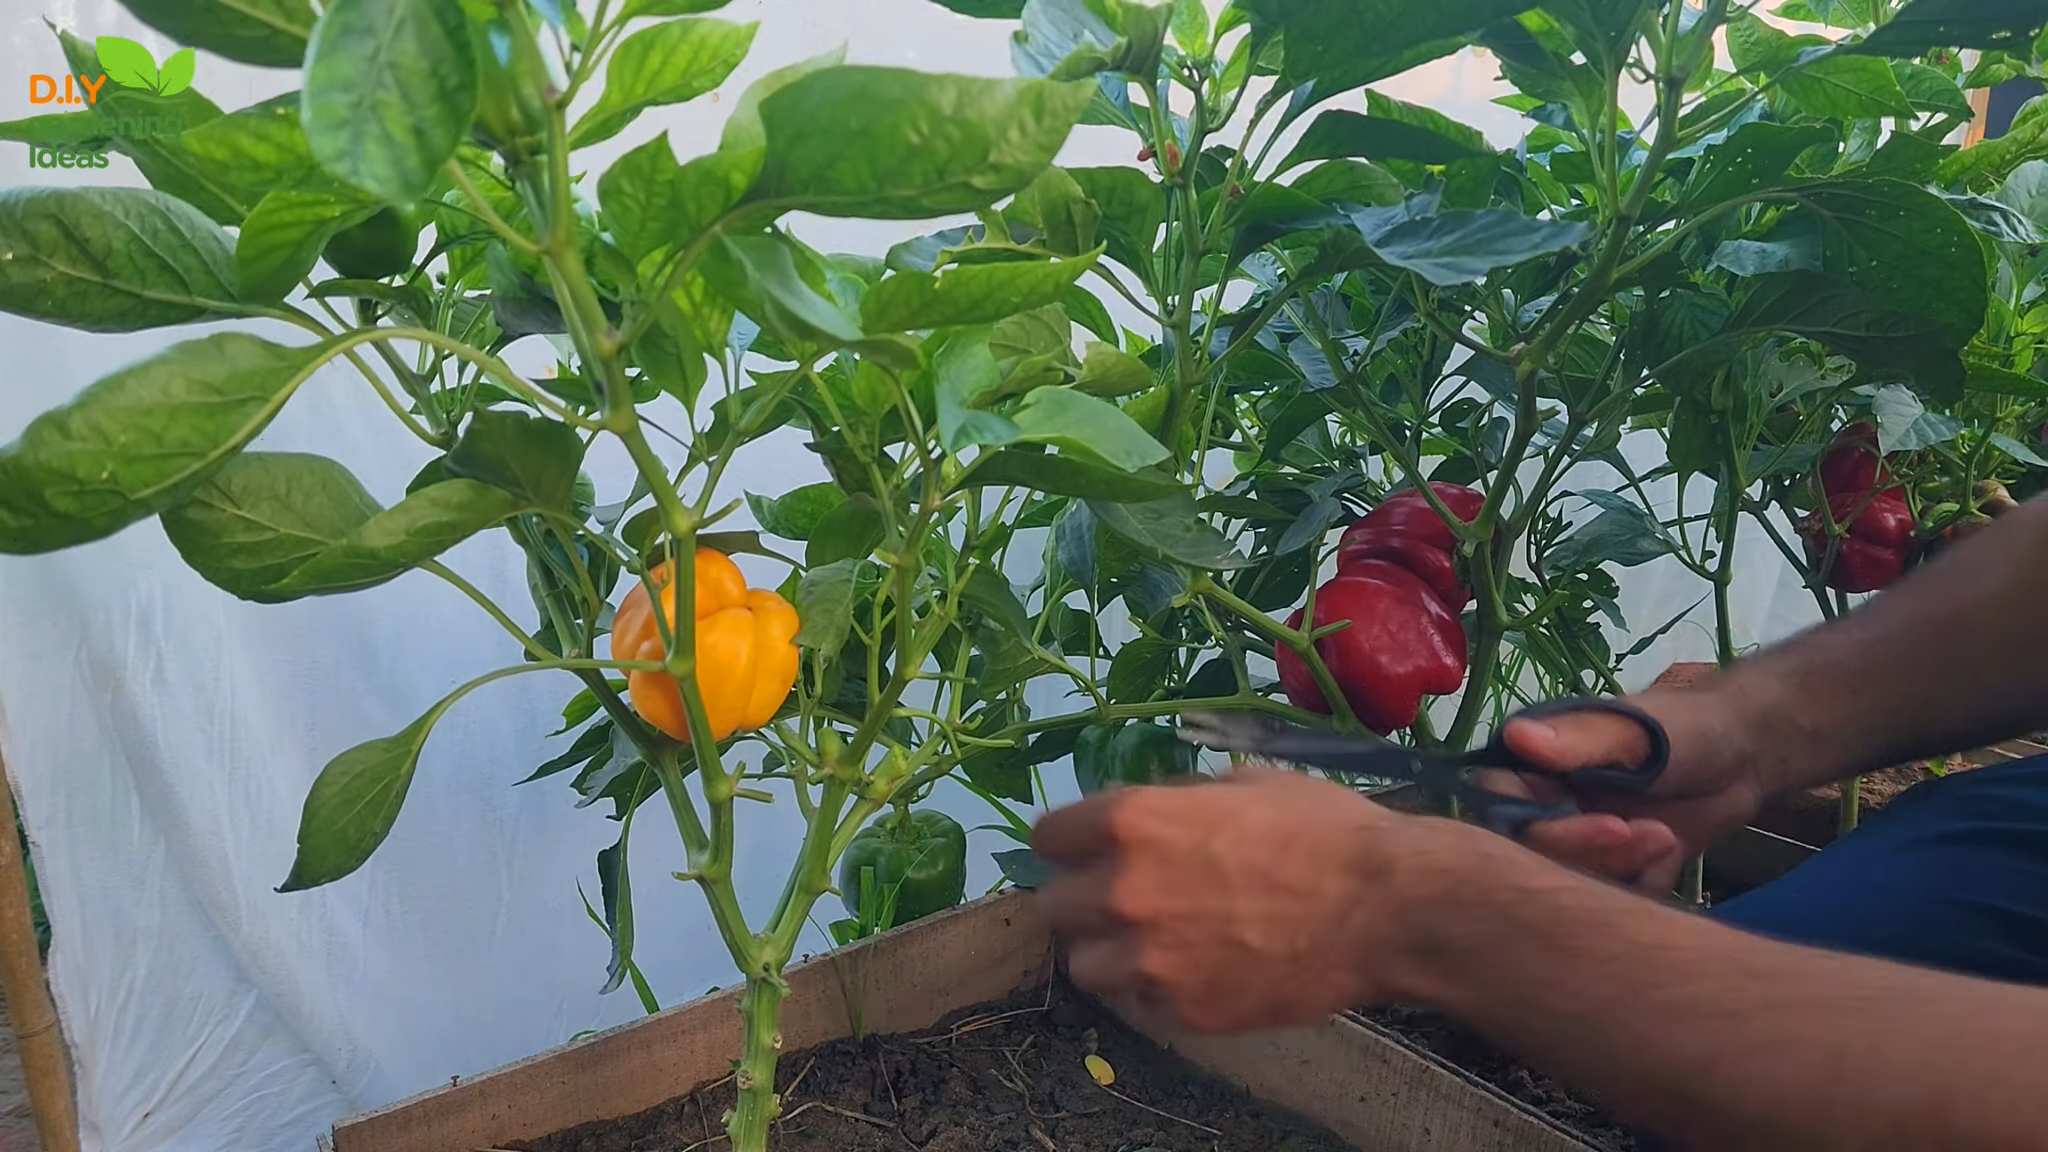
* Timing: Bell peppers are typically ready to harvest about 60-90 days after transplanting, depending on the variety. The peppers should be firm, glossy, and fully colored.
* Harvesting Technique: Use a sharp knife or pruning shears to cut the peppers from the plant. Leave a small piece of stem attached to the pepper.
* Enjoy! Once you’ve harvested your bell peppers, you can enjoy them fresh in salads, stir-fries, or stuffed peppers. You can also freeze or can them for later use.
Extending the Growing Season
Want to keep your pepper plants producing for as long as possible? Here are a few tips for extending the growing season:
* Cold Frames or Greenhouses: If you live in a colder climate, you can use cold frames or greenhouses to protect your pepper plants from frost.
* Row Covers: Row covers are lightweight fabrics that can be placed over your plants to provide extra warmth and protection from frost.
* Bring Indoors: If you have a sunny spot indoors, you can bring your pepper plants inside before the first frost. They
Conclusion
So, there you have it! Growing your own bell peppers in buckets is not just a fun project; it’s a genuinely rewarding experience that puts fresh, vibrant produce right at your fingertips. We’ve walked through the simple steps, from choosing the right bucket and soil to nurturing your plants and harvesting your bounty. But why is this DIY trick a must-try?
Firstly, it’s incredibly accessible. Whether you have a sprawling garden or just a small balcony, bucket gardening allows you to cultivate bell peppers virtually anywhere. It’s perfect for apartment dwellers, renters, or anyone with limited space. Secondly, it’s cost-effective. Starting with inexpensive buckets and readily available soil amendments, you can grow a substantial amount of bell peppers for a fraction of the cost of buying them at the grocery store. And let’s not forget the satisfaction of knowing exactly where your food comes from and what went into growing it. No more worrying about pesticides or questionable farming practices!
Beyond the practical benefits, bucket gardening offers a unique connection to nature. Watching your bell pepper plants sprout, grow, and produce colorful fruit is a deeply gratifying experience. It’s a chance to slow down, get your hands dirty, and appreciate the miracle of life.
Now, let’s talk about variations. While we’ve focused on the standard method, there’s plenty of room for experimentation. Try using different types of buckets – perhaps some repurposed containers you already have on hand. Explore different soil mixes to find what works best for your climate and growing conditions. Consider adding companion plants like basil or marigolds to deter pests and attract beneficial insects. You can even experiment with different varieties of bell peppers, from the classic green to the sweeter red, yellow, and orange.
For those looking to maximize their yield, consider using a self-watering bucket system. These systems provide a consistent supply of water to the roots, reducing the risk of over or under-watering. You can also add a trellis or support structure to help your plants stay upright and prevent the peppers from weighing down the branches.
Ultimately, the key to successful bell peppers bucket gardening is to be patient, observant, and willing to learn. Pay attention to your plants’ needs, adjust your watering and fertilizing schedule as necessary, and don’t be afraid to experiment.
We wholeheartedly encourage you to give this DIY trick a try. It’s a simple, affordable, and rewarding way to grow your own delicious bell peppers, no matter where you live. And once you’ve harvested your first crop, we’d love to hear about your experience! Share your photos, tips, and stories with us in the comments below. Let’s create a community of bucket gardening enthusiasts and inspire others to grow their own food. Happy gardening!
Frequently Asked Questions (FAQs)
What size bucket is best for growing bell peppers?
The ideal bucket size for growing bell peppers is typically 5 gallons or larger. A 5-gallon bucket provides enough space for the root system to develop properly and allows the plant to access sufficient nutrients and water. While you can technically use smaller buckets, the plant may become root-bound, which can stunt its growth and reduce its yield. Larger buckets, such as 10-gallon containers, can provide even more space for the roots and may result in larger, more productive plants. However, keep in mind that larger buckets will also be heavier and more difficult to move.
What type of soil should I use for bell peppers in buckets?
Bell peppers thrive in well-draining, nutrient-rich soil. A good potting mix is essential for successful bucket gardening. Avoid using garden soil, as it can be too heavy and compact, hindering drainage and root development. Instead, opt for a high-quality potting mix specifically formulated for container gardening. You can also create your own soil mix by combining equal parts of potting soil, compost, and perlite or vermiculite. Compost provides essential nutrients, while perlite or vermiculite improves drainage and aeration. Adding a slow-release fertilizer to the soil mix can also help provide a steady supply of nutrients throughout the growing season.
How often should I water my bell pepper plants in buckets?
The frequency of watering depends on several factors, including the weather, the size of the bucket, and the type of soil. Generally, you should water your bell pepper plants whenever the top inch of soil feels dry to the touch. During hot, dry weather, you may need to water daily, while during cooler, wetter weather, you may only need to water every few days. Be sure to water thoroughly, allowing the water to drain out of the bottom of the bucket. Avoid overwatering, as this can lead to root rot. A good way to check if your plants need water is to stick your finger into the soil. If the soil feels dry an inch or two below the surface, it’s time to water.
How much sunlight do bell pepper plants need?
Bell peppers require at least 6-8 hours of direct sunlight per day to thrive. Choose a location that receives plenty of sunlight throughout the day. If you live in a particularly hot climate, you may need to provide some afternoon shade to prevent the plants from overheating. If you don’t have access to a sunny location, you can supplement with grow lights. Place the grow lights a few inches above the plants and keep them on for 12-16 hours per day.
What kind of fertilizer should I use for bell peppers?
Bell peppers are heavy feeders and require regular fertilization to produce a good yield. Use a balanced fertilizer with a ratio of 5-10-10 or 10-10-10. Apply the fertilizer according to the package directions, typically every 2-3 weeks. You can also use a liquid fertilizer, such as fish emulsion or seaweed extract, to provide a quick boost of nutrients. Avoid over-fertilizing, as this can lead to excessive foliage growth and reduced fruit production.
How do I prevent pests and diseases on my bell pepper plants?
To prevent pests and diseases, start with healthy plants and provide them with optimal growing conditions. Inspect your plants regularly for signs of pests or diseases. Common pests that affect bell peppers include aphids, spider mites, and whiteflies. You can control these pests with insecticidal soap or neem oil. Diseases that can affect bell peppers include blossom end rot, fungal leaf spot, and powdery mildew. Blossom end rot is caused by a calcium deficiency and can be prevented by adding calcium to the soil. Fungal leaf spot and powdery mildew can be controlled with fungicides. Good air circulation and proper watering practices can also help prevent these diseases.
How long does it take for bell peppers to mature?
Bell peppers typically take 60-90 days to mature, depending on the variety. Green bell peppers can be harvested when they are firm and green, while colored bell peppers should be allowed to ripen fully on the plant. The color will change from green to red, yellow, or orange, depending on the variety. To harvest bell peppers, use a sharp knife or pruning shears to cut the stem just above the pepper.
Can I grow bell peppers indoors in buckets?
Yes, you can grow bell peppers indoors in buckets, but you will need to provide them with adequate light and warmth. Place the buckets in a sunny window or use grow lights to provide at least 12-16 hours of light per day. Maintain a temperature of 70-80°F during the day and 60-70°F at night. You will also need to pollinate the flowers manually, as there will be no bees or other insects to do it for you. Use a small paintbrush to transfer pollen from one flower to another.
What are some good companion plants for bell peppers?
Companion planting can help improve the growth and yield of your bell pepper plants. Some good companion plants for bell peppers include basil, marigolds, onions, garlic, and carrots. Basil helps repel pests, while marigolds attract beneficial insects. Onions and garlic deter aphids, and carrots improve soil drainage. Avoid planting bell peppers near fennel, as it can inhibit their growth.
Can I reuse the soil from my bell pepper buckets?
You can reuse the soil from your bell pepper buckets, but it’s important to amend it with fresh compost and fertilizer. Over time, the soil will become depleted of nutrients, so adding compost and fertilizer will help replenish them. You should also remove any old roots or plant debris from the soil before reusing it. If you suspect that the soil is contaminated with pests or diseases, it’s best to discard it and start with fresh soil.
Leave a Comment