
Bell Peppers and Recycled Bottles: Who knew these two seemingly unrelated items could be the key to unlocking a thriving home garden? I’m excited to share some ingenious DIY tricks that will not only help you grow the most vibrant bell peppers you’ve ever seen, but also put those empty plastic bottles to good use!
For centuries, resourceful gardeners have sought innovative ways to maximize their yields and minimize waste. From ancient composting techniques to ingenious irrigation systems, the spirit of DIY has always been at the heart of successful gardening. Today, we’re carrying on that tradition with a modern twist, combining the age-old practice of growing your own food with the urgent need for sustainable solutions.
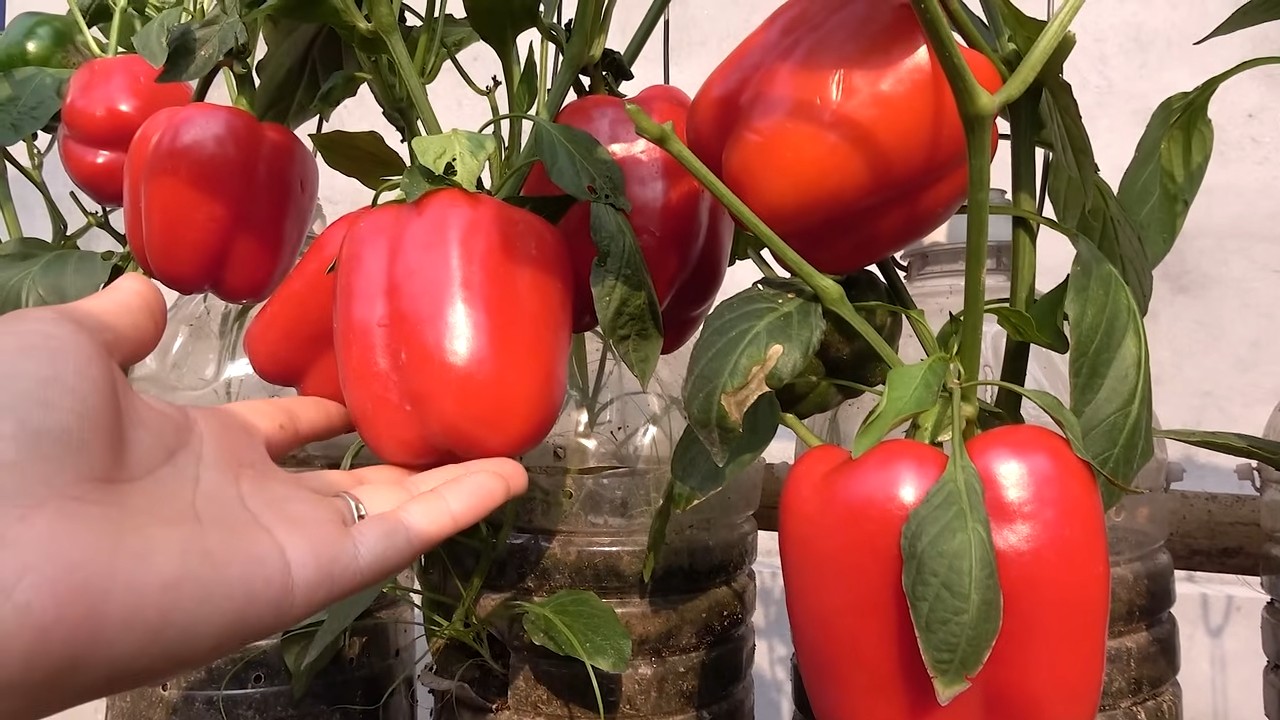
Let’s face it, growing bell peppers can be a bit tricky. They need the right amount of sunlight, consistent watering, and protection from pests. But what if I told you that recycled bottles could help you achieve all of that, and more? These simple DIY hacks will show you how to create mini-greenhouses, self-watering planters, and even pest deterrents, all from materials you probably already have lying around. Not only will you be saving money and reducing waste, but you’ll also be amazed at how much easier it is to grow delicious, healthy bell peppers with these clever techniques. So, grab your scissors, gather your bottles, and let’s get gardening!
DIY: Paprika-Pflanzgefäße aus recycelten Plastikflaschen
Hallo liebe Gartenfreunde! Habt ihr auch immer so viele Plastikflaschen zu Hause rumstehen? Anstatt sie wegzuwerfen, zeige ich euch heute, wie ihr daraus super praktische und stylische Pflanzgefäße für eure Paprikapflanzen basteln könnt. Das ist nicht nur gut für die Umwelt, sondern spart auch noch Geld! Und das Beste: Es ist wirklich kinderleicht. Lasst uns loslegen!
Benötigte Materialien
Bevor wir starten, hier eine Liste mit allem, was ihr braucht:
* Leere Plastikflaschen: Am besten eignen sich 1,5- oder 2-Liter-Flaschen. Je größer die Flasche, desto mehr Platz haben eure Paprikapflanzen.
* Schere oder Cuttermesser: Achtet bitte auf eure Sicherheit!
* Bohrmaschine oder Nagel und Hammer: Für die Entwässerungslöcher.
* Erde: Am besten spezielle Gemüseerde oder Anzuchterde.
* Paprikasamen oder Jungpflanzen: Je nachdem, ob ihr von Grund auf neu anfangen oder etwas schneller zum Ziel kommen wollt.
* Wasserfester Stift oder Etiketten: Zum Beschriften der Flaschen.
* Optional: Sprühfarbe: Um die Flaschen zu verschönern.
* Optional: Kieselsteine oder Tonscherben: Für eine bessere Drainage.
Schritt-für-Schritt-Anleitung
So, jetzt haben wir alles zusammen. Los geht’s mit dem Basteln!
1. Flaschen vorbereiten: Zuerst müsst ihr die Plastikflaschen gründlich reinigen. Entfernt alle Etiketten und Klebereste. Ich spüle sie immer mit heißem Wasser und etwas Spülmittel aus. Lasst sie danach gut trocknen.
2. Flaschen zuschneiden: Jetzt kommt der spannende Teil! Ihr habt zwei Möglichkeiten:
* Option 1: Horizontaler Schnitt: Schneidet die Flasche horizontal durch, etwa 10-15 cm unterhalb des Flaschenhalses. Der obere Teil (mit dem Flaschenhals) wird später umgedreht und in den unteren Teil gesteckt. So entsteht ein Bewässerungssystem.
* Option 2: Vertikaler Schnitt: Schneidet die Flasche vertikal auf, sodass ihr zwei Hälften erhaltet. Jede Hälfte wird zu einem separaten Pflanzgefäß. Diese Option ist ideal, wenn ihr viele kleine Pflänzchen habt.
Wichtig: Seid beim Schneiden vorsichtig! Benutzt eine scharfe Schere oder ein Cuttermesser und arbeitet am besten auf einer Schneidunterlage.
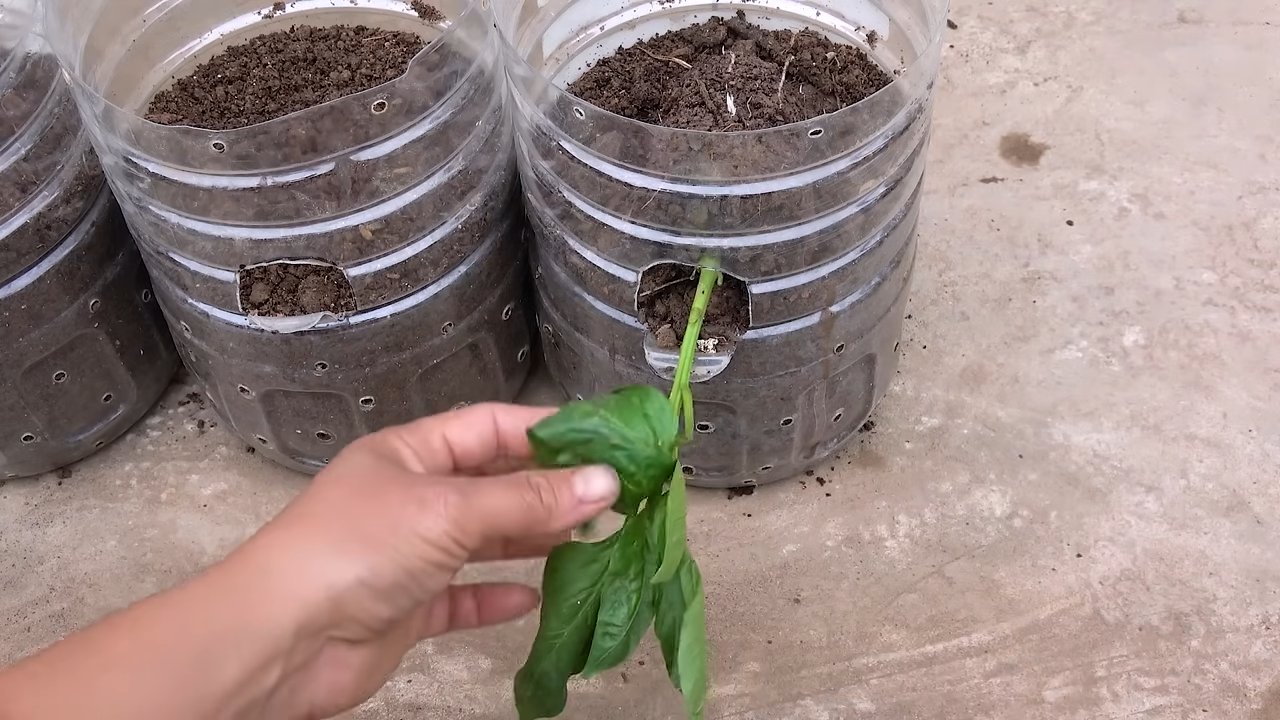
3. Entwässerungslöcher bohren: Damit das Wasser gut ablaufen kann und eure Paprikapflanzen nicht im Wasser stehen, müsst ihr Entwässerungslöcher in den Boden der Flaschen bohren. Ich mache immer 3-4 Löcher mit einer Bohrmaschine. Wenn ihr keine Bohrmaschine habt, könnt ihr auch einen Nagel und einen Hammer verwenden. Achtet darauf, dass die Löcher nicht zu groß sind, damit keine Erde herausfällt.
4. Optional: Flaschen bemalen: Wenn ihr eure Pflanzgefäße etwas aufpeppen wollt, könnt ihr sie jetzt mit Sprühfarbe bemalen. Ich verwende am liebsten Farben, die für den Außenbereich geeignet sind. Lasst die Farbe gut trocknen, bevor ihr mit dem nächsten Schritt fortfahrt. Ihr könnt auch Muster aufmalen oder die Flaschen mit Stickern bekleben – eurer Fantasie sind keine Grenzen gesetzt!
5. Drainage vorbereiten: Um Staunässe zu vermeiden, lege ich immer eine Schicht Kieselsteine oder Tonscherben auf den Boden der Flaschen. Das sorgt für eine gute Drainage und verhindert, dass die Wurzeln der Paprikapflanzen faulen.
6. Erde einfüllen: Füllt die Flaschen mit Erde. Lasst oben etwa 2-3 cm Platz. Ich verwende am liebsten spezielle Gemüseerde, da diese alle wichtigen Nährstoffe für das Wachstum der Paprikapflanzen enthält.
7. Paprikapflanzen einsetzen: Jetzt kommt der schönste Teil! Wenn ihr Paprikasamen verwendet, könnt ihr diese direkt in die Erde säen. Achtet darauf, die Samen nicht zu tief zu vergraben. Wenn ihr Jungpflanzen habt, nehmt diese vorsichtig aus ihren Töpfen und setzt sie in die vorbereiteten Flaschen. Drückt die Erde leicht an.
8. Bewässerung: Gießt die Paprikapflanzen vorsichtig an. Achtet darauf, dass die Erde gleichmäßig feucht ist, aber nicht zu nass.
9. Beschriftung: Vergesst nicht, eure Pflanzgefäße zu beschriften! So wisst ihr immer, welche Paprikasorte in welcher Flasche wächst. Ich verwende dafür wasserfeste Stifte oder Etiketten.
10. Aufstellen: Sucht euren Paprikapflanzen einen sonnigen Platz. Paprika lieben die Sonne! Stellt die Flaschen auf einen Balkon, eine Terrasse oder in den Garten.
Spezielle Tipps für die horizontale Schnitt-Variante (mit Bewässerungssystem)
Wenn ihr euch für die horizontale Schnitt-Variante entschieden habt, gibt es noch ein paar zusätzliche Tipps:
1. Oberen Teil umdrehen: Dreht den oberen Teil der Flasche (mit dem Flaschenhals) um und steckt ihn in den unteren Teil. Der Flaschenhals sollte dabei in die Erde eintauchen.
2. Wasserreservoir füllen: Füllt den unteren Teil der Flasche mit Wasser. Das Wasser wird durch den Flaschenhals langsam in die Erde gesaugt und versorgt die Paprikapflanzen mit Feuchtigkeit.
3. Regelmäßig kontrollieren: Kontrolliert regelmäßig den Wasserstand im unteren Teil der Flasche und füllt ihn bei Bedarf nach.
4. Düngen: Vergesst nicht, eure Paprikapflanzen regelmäßig zu düngen. Ich verwende am liebsten organischen Dünger.
Pflege der Paprikapflanzen
Damit eure Paprikapflanzen gut gedeihen, solltet ihr folgende Punkte beachten:
* Standort: Paprika lieben die Sonne. Stellt eure Pflanzgefäße an einen sonnigen und warmen Ort.
* Bewässerung: Gießt die Paprikapflanzen regelmäßig, aber vermeidet Staunässe.
* Düngung: Düngt die Paprikapflanzen regelmäßig mit einem speziellen Gemüsedünger.
* Schutz vor Schädlingen: Kontrolliert eure Paprikapflanzen regelmäßig auf Schädlinge wie Blattläuse oder Spinnmilben. Bei Bedarf könnt ihr natürliche Schädlingsbekämpfungsmittel verwenden.
* Ausgeizen: Entfernt regelmäßig die Seitentriebe (Geiztriebe) der Paprikapflanzen. Das fördert das Wachstum der Haupttriebe und sorgt für eine bessere Ernte.
Erntezeit
Je nach Sorte und Standort könnt ihr eure Paprika etwa 2-3 Monate nach dem Einpflanzen ernten. Die Paprika sind reif, wenn sie ihre typische Farbe haben und sich leicht vom Stiel lösen lassen.
Fazit
Ich hoffe, diese Anleitung hat euch gefallen und ihr habt jetzt Lust bekommen, eure eigenen Paprika-Pflanzgefäße aus recycelten Plastikflaschen zu basteln. Es ist wirklich eine tolle Möglichkeit, etwas für die Umwelt zu tun und gleichzeitig frisches Gemüse anzubauen. Viel Spaß beim Gärtnern! Und vergesst nicht: Mit etwas Kreativität und ein paar alten Plastikflaschen könnt ihr eurem Garten oder Balkon einen ganz besonderen Touch verleihen.
Conclusion
So, there you have it! Transforming discarded plastic bottles into self-watering planters for your bell peppers isn’t just a clever upcycling project; it’s a game-changer for your gardening experience. This simple DIY trick addresses several common gardening challenges, from inconsistent watering to space constraints, all while giving a new lease on life to materials that would otherwise end up in landfills.
Why is this a must-try? Because it’s efficient, economical, and environmentally conscious. You’re saving money on expensive watering systems, reducing your plastic waste, and ensuring your bell peppers receive the consistent moisture they need to thrive. Imagine the satisfaction of harvesting plump, juicy bell peppers grown using a system you built yourself from something you were about to throw away!
But the beauty of this DIY project lies in its adaptability. Feel free to experiment with different bottle sizes depending on the size of your bell pepper plants and the available space. You can also add a layer of mulch on top of the soil in the bottle to further retain moisture and suppress weeds. Consider using colored bottles for a more decorative touch, or even painting the bottles to match your garden aesthetic. For larger bell pepper plants, you might want to use larger bottles or even combine multiple bottles to create a more robust self-watering system. You can also add a slow-release fertilizer to the soil mix for an extra boost of nutrients.
Don’t be afraid to get creative and personalize your self-watering planters. The key is to ensure proper drainage and a good connection between the water reservoir and the soil. This DIY bell pepper self-watering planter is not just a project; it’s an invitation to connect with nature, reduce waste, and enjoy the fruits (or vegetables!) of your labor.
We wholeheartedly encourage you to give this DIY trick a try. It’s a rewarding project that will not only benefit your bell pepper plants but also contribute to a more sustainable lifestyle. Once you’ve created your own self-watering planters, we’d love to hear about your experience! Share your photos, tips, and variations in the comments below. Let’s build a community of resourceful gardeners who are passionate about growing their own food and protecting our planet. Happy gardening!
Frequently Asked Questions (FAQ)
What type of plastic bottles are best for this project?
Ideally, you should use PET (Polyethylene Terephthalate) plastic bottles, which are commonly used for water and soda bottles. These are generally considered food-safe and are readily available. Avoid using bottles that have contained harsh chemicals or cleaning products, as these could contaminate the soil and harm your plants. Make sure to thoroughly clean the bottles before using them. Also, consider the thickness of the plastic. Thicker bottles will be more durable and less likely to crack or break down over time, especially when exposed to sunlight.
How often do I need to refill the water reservoir?
The frequency of refilling depends on several factors, including the size of the bottle, the weather conditions, and the size of your bell pepper plant. In hot, sunny weather, you may need to refill the reservoir every day or two. In cooler, more humid conditions, you may only need to refill it once a week. The best way to determine when to refill is to check the water level in the reservoir regularly. You can do this by simply lifting the bottle or using a dipstick. If the water level is low, it’s time to refill. Over time, you’ll get a feel for how quickly your plants are using the water and can adjust your watering schedule accordingly.
What kind of soil should I use for my bell pepper plants in these self-watering planters?
A well-draining potting mix is essential for bell pepper plants in self-watering planters. Avoid using garden soil, as it can become compacted and prevent proper drainage. A good potting mix will typically contain a blend of peat moss, perlite, and vermiculite. You can also add compost to the mix for added nutrients. The ideal soil pH for bell peppers is between 6.0 and 6.8. You can test the pH of your soil using a soil testing kit and adjust it accordingly.
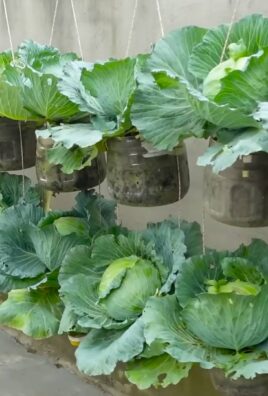
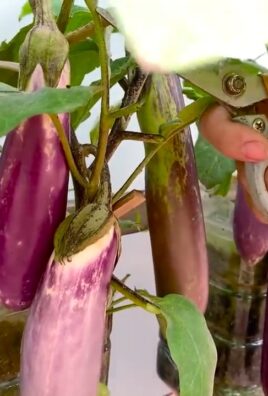
Can I use this self-watering system for other plants besides bell peppers?
Yes, this self-watering system can be used for a variety of other plants, especially those that prefer consistent moisture. Tomatoes, cucumbers, herbs like basil and mint, and even some flowers can benefit from this system. However, it’s important to consider the specific needs of each plant. Some plants prefer drier conditions, while others need more water. Adjust the size of the bottle and the frequency of refilling accordingly. For plants that prefer drier conditions, you can use a smaller bottle or add more drainage holes to the bottle.
How do I prevent algae growth in the water reservoir?
Algae growth can occur in the water reservoir, especially if the bottle is exposed to sunlight. To prevent algae growth, you can paint the bottle or wrap it in opaque material to block out the light. You can also add a small amount of hydrogen peroxide to the water reservoir. Hydrogen peroxide is a natural algaecide that is safe for plants. Use a diluted solution (about 1 tablespoon per gallon of water). Regularly cleaning the bottle can also help prevent algae buildup.
What if the soil in the bottle becomes waterlogged?
Waterlogging can occur if the drainage holes in the bottle are clogged or if the soil is too dense. To prevent waterlogging, make sure the drainage holes are clear and that you are using a well-draining potting mix. If the soil becomes waterlogged, you can try gently aerating it with a chopstick or other small tool. You can also add more perlite or vermiculite to the soil to improve drainage. In severe cases, you may need to repot the plant in fresh soil.
How do I fertilize my bell pepper plants in these self-watering planters?
You can fertilize your bell pepper plants in these self-watering planters by adding a slow-release fertilizer to the soil mix when you plant them. You can also use a liquid fertilizer diluted in the water reservoir. Follow the instructions on the fertilizer package for proper dosage. Avoid over-fertilizing, as this can damage your plants. Bell peppers are heavy feeders, so regular fertilization is important for optimal growth and fruit production.
What if my bell pepper plants are not growing well in these self-watering planters?
If your bell pepper plants are not growing well, there could be several reasons. First, make sure they are getting enough sunlight. Bell peppers need at least 6-8 hours of sunlight per day. Second, check the soil pH and nutrient levels. Third, make sure the plants are not being overwatered or underwatered. Fourth, check for pests and diseases. If you identify any problems, take appropriate action to address them. With a little troubleshooting, you can get your bell pepper plants thriving in their self-watering planters.
Leave a Comment