
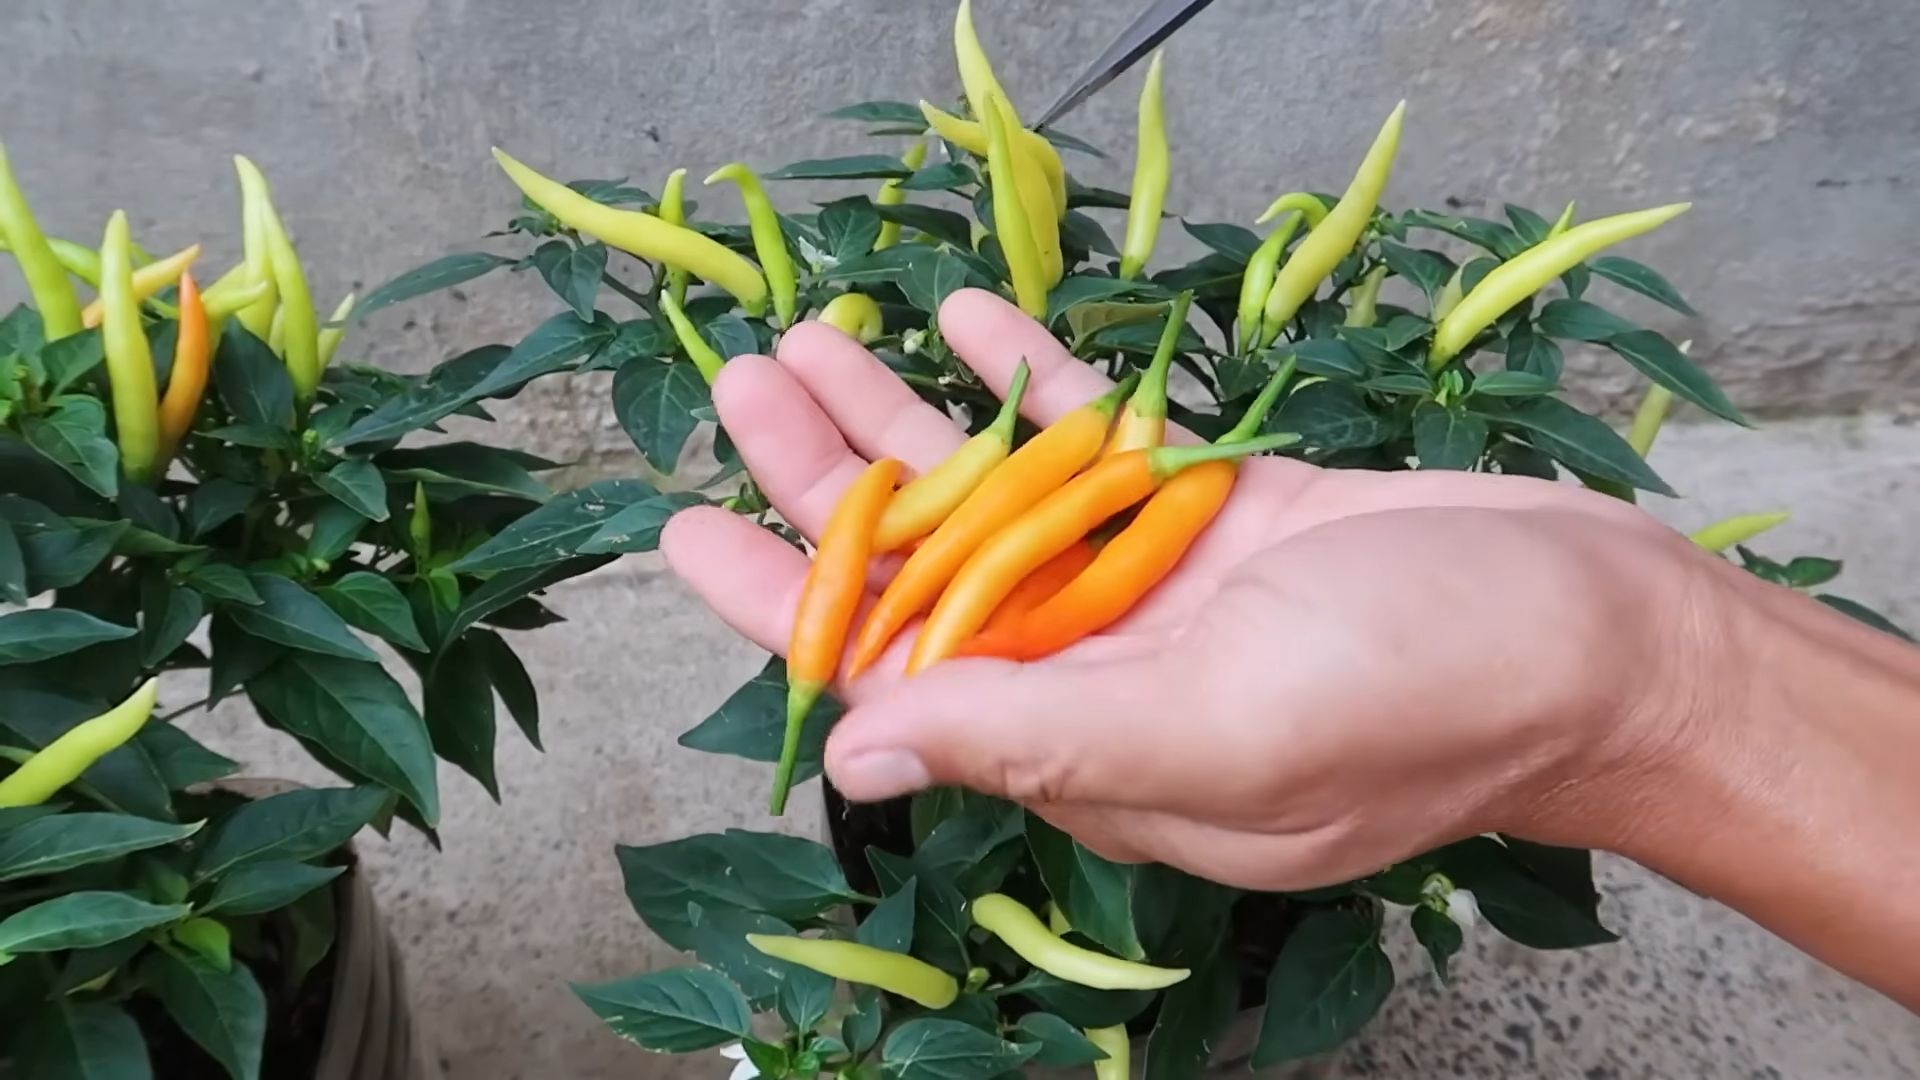
Best Chili Growing Tip: Unlock the secrets to a fiery harvest right in your own backyard! Have you ever dreamed of whipping up the perfect chili, bursting with flavor from peppers you nurtured yourself? I know I have! But let’s be honest, growing chili peppers can sometimes feel like a gamble. You might end up with a few sad, scrawny peppers instead of the vibrant, spicy bounty you envisioned.
Chili peppers have a rich history, dating back thousands of years in South America, where they were not only a culinary staple but also held cultural and medicinal significance. Today, their popularity has exploded worldwide, adding zest to dishes across countless cuisines. But why settle for store-bought when you can cultivate your own personalized heat?
That’s where this DIY guide comes in! I’m going to share my absolute best chili growing tip, a simple yet incredibly effective trick that will dramatically improve your pepper production. Whether you’re a seasoned gardener or just starting out, this hack will help you achieve a thriving chili pepper patch, overflowing with delicious, fiery goodness. Say goodbye to disappointing harvests and hello to a chili pepper paradise!
Unlock Chili Pepper Paradise: My Foolproof Guide to Bumper Crops!
Hey chiliheads! I’m so excited to share my absolute favorite chili growing tip that has consistently given me the most amazing harvests. Forget struggling with stunted plants and meager yields. This method focuses on creating the perfect microclimate for your chili peppers, leading to healthier plants, earlier fruiting, and a ton of fiery goodness!
The Secret Weapon: Reflective Mulch
The key to this chili growing magic is using reflective mulch. Now, you might be thinking, “Mulch? I already use mulch!” But trust me, this isn’t your average wood chip situation. Reflective mulch, specifically silver or white plastic mulch, works wonders by bouncing sunlight back up onto the plant. This extra light exposure does several amazing things:
* Boosts Photosynthesis: More light equals more energy for the plant, leading to faster growth and bigger peppers.
* Warms the Soil: Chili peppers love warm soil! Reflective mulch helps retain heat, especially during cooler nights, creating the ideal environment for root development.
* Deters Pests: The reflected light confuses many common garden pests, like aphids and thrips, keeping them away from your precious plants.
* Improves Fruit Set: The increased light and warmth encourage better pollination and fruit set, meaning more peppers for you!
* Earlier Harvest: Because of the faster growth and improved fruit set, you’ll be harvesting your chilies weeks earlier than you would without reflective mulch.
Getting Started: What You’ll Need
Before we dive into the step-by-step instructions, let’s gather our supplies. This is a pretty straightforward project, so you probably have most of these items already:
* Chili Pepper Seedlings: Choose your favorite varieties! I personally love growing jalapenos, habaneros, and serranos.
* Reflective Mulch: You can find silver or white plastic mulch at most garden centers or online. Make sure it’s thick enough to withstand the elements. I prefer a thickness of at least 1.5 mil.
* Gardening Gloves: Protect your hands!
* Trowel or Shovel: For digging planting holes.
* Measuring Tape or Ruler: To ensure proper spacing.
* Scissors or Utility Knife: For cutting the mulch.
* Landscape Staples or Rocks: To secure the mulch in place.
* Well-Draining Soil: Chili peppers need soil that drains well to prevent root rot. Amend your soil with compost or other organic matter if needed.
* Watering Can or Hose: For watering your newly planted seedlings.
* Fertilizer (Optional): A balanced fertilizer can give your plants an extra boost, but it’s not essential.
Step-by-Step Guide: Planting Your Chili Peppers with Reflective Mulch
Alright, let’s get our hands dirty! Here’s how I plant my chili peppers using reflective mulch for maximum yields:
1. Prepare the Soil:
* First, I clear the planting area of any weeds, rocks, or debris.
* Then, I loosen the soil with a garden fork or tiller to a depth of about 12 inches. This helps the roots penetrate easily.
* If your soil is heavy clay or sandy, amend it with compost, well-rotted manure, or other organic matter to improve drainage and fertility. I usually add a generous amount of compost – about 2-3 inches worked into the topsoil.
2. Lay the Reflective Mulch:
* Unroll the reflective mulch over the prepared soil. Make sure it covers the entire planting area.
* Overlap the edges of the mulch by a few inches if you’re using multiple strips.
* Secure the edges of the mulch with landscape staples or rocks. This will prevent the wind from blowing it away. I like to use landscape staples every foot or so along the edges.
3. Mark Planting Locations:
* Decide on the spacing between your chili pepper plants. I usually space mine about 18-24 inches apart, depending on the variety. Larger varieties like bell peppers need more space.
* Use a measuring tape or ruler to mark the planting locations on the mulch. I use a permanent marker to make a small dot at each location.
4. Cut Planting Holes:
* Using scissors or a utility knife, carefully cut an “X” or a circle at each marked planting location. Make the hole large enough to accommodate the root ball of your chili pepper seedlings.
* Be careful not to cut yourself! A sharp utility knife is best for this.
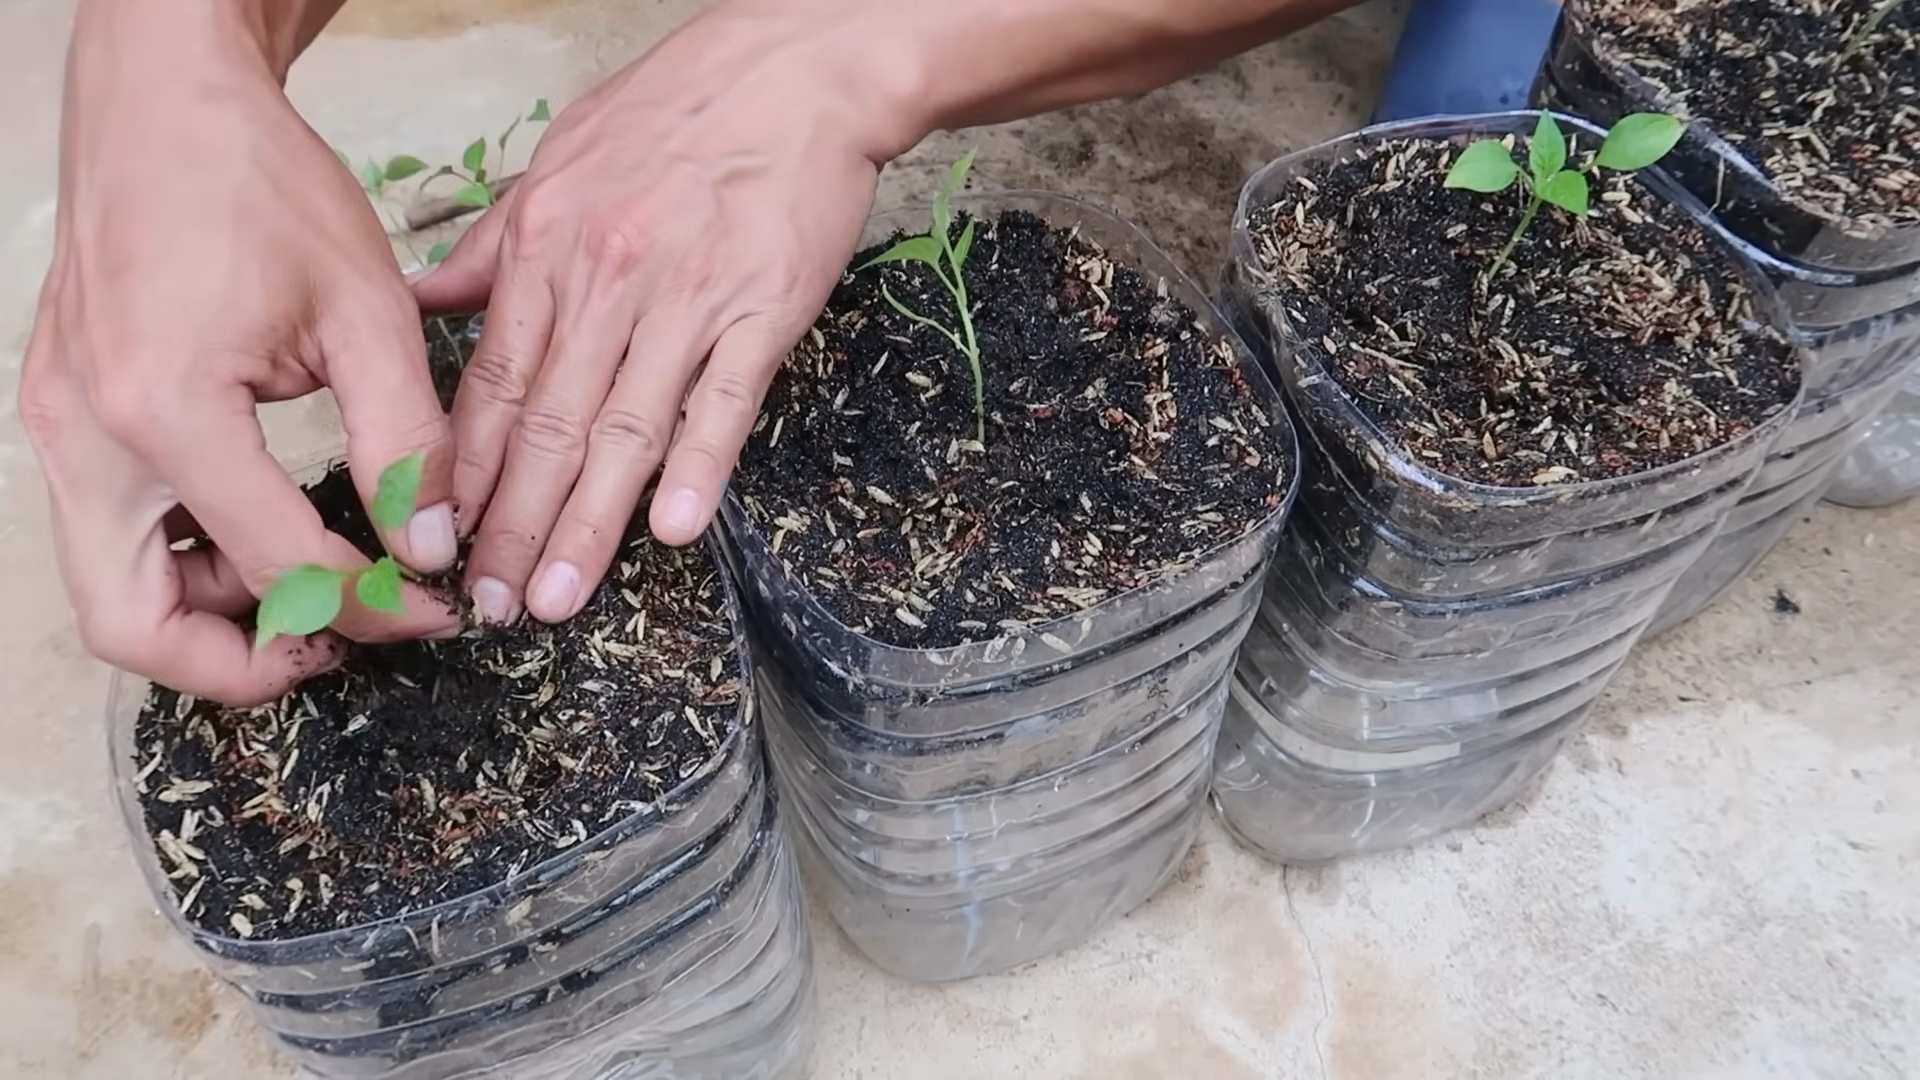
5. Plant the Chili Pepper Seedlings:
* Gently remove the chili pepper seedlings from their containers.
* Loosen the root ball slightly to encourage root growth.
* Place each seedling into the prepared planting hole.
* Make sure the top of the root ball is level with the surrounding soil.
* Fill in the hole with soil, gently firming it around the base of the plant.
6. Water Thoroughly:
* Water the newly planted chili pepper seedlings thoroughly. This will help settle the soil and encourage root growth.
* Water at the base of the plants, avoiding wetting the foliage.
7. Fertilize (Optional):
* If you choose to fertilize, apply a balanced fertilizer according to the package instructions. I usually use a liquid fertilizer diluted to half strength.
* Avoid over-fertilizing, as this can burn the roots.
8. Maintain and Monitor:
* Water your chili pepper plants regularly, especially during hot, dry weather. Check the soil moisture by sticking your finger into the soil. If it feels dry, it’s time to water.
* Monitor your plants for pests and diseases. Treat any problems promptly.
* Remove any weeds that grow around the base of the plants.
* As the plants grow, you may need to add more landscape staples or rocks to secure the mulch in place.
Extra Tips for Chili Pepper Success
Here are a few extra tips that I’ve learned over the years that can help you maximize your chili pepper harvest:
* Choose the Right Location: Chili peppers need at least 6-8 hours of sunlight per day. Choose a location that gets plenty of sun.
* Start Seeds Indoors: If you live in a colder climate, start your chili pepper seeds indoors 6-8 weeks before the last expected frost. This will give them a head start.
* Harden Off Seedlings: Before transplanting your seedlings outdoors, harden them off by gradually exposing them to outdoor conditions over a period of 1-2 weeks.
* Provide Support: As your chili pepper plants grow, they may need support to prevent them from falling over. Use stakes or cages to support the plants.
* Pinch Off Early Flowers: Pinching off the first few flowers that appear on your chili pepper plants can encourage them to focus on vegetative growth, leading to a stronger plant and a bigger harvest later on.
* Water Deeply and Infrequently: Water your chili pepper plants deeply and infrequently, rather than shallowly and frequently. This encourages deep root growth.
* Mulch with Organic Matter: In addition to reflective mulch, you can also add a layer of organic mulch, such as straw or shredded leaves, around the base of the plants to help retain moisture and suppress weeds.
* Fertilize Regularly: Fertilize your chili pepper plants regularly with a balanced fertilizer. Avoid over-fertilizing, as this can burn the roots.
* Harvest Regularly: Harvest your chili peppers regularly as they ripen. This will encourage the plants to produce more peppers.
* Protect from Frost: If you live in an area with occasional frosts, protect your chili pepper plants by covering them with a blanket or tarp.
Troubleshooting Common Chili Pepper Problems
Even with the best care, you might encounter some problems with your chili pepper plants. Here are a few common issues and how to address them:
* Aphids: These tiny pests can suck the sap from your plants, causing them to weaken and become distorted. Spray aphids with a strong stream of water or use insecticidal soap.
* Whiteflies: Similar to aphids, whiteflies can also suck the sap from your plants. Use yellow sticky traps to catch whiteflies or spray them with insecticidal soap.
* Spider Mites: These tiny pests can cause yellowing and stippling on the leaves of your chili pepper plants. Spray spider mites with a strong stream of water or use miticidal soap.
* Blossom End Rot: This condition causes the bottom of the chili peppers to rot. It’s usually caused by calcium deficiency. Add calcium to the soil or use a calcium-rich fertilizer.
* Sunscald: This condition causes white or tan patches on the chili peppers. It’s caused by excessive sun exposure. Provide
Conclusion
So, there you have it! This simple, yet incredibly effective DIY trick is a game-changer for anyone serious about growing chili peppers. Forget struggling with stunted growth, disappointing yields, or bland-tasting peppers. This method provides the perfect environment for your chili plants to thrive, resulting in a bountiful harvest of fiery, flavorful peppers that will elevate your culinary creations.
Why is this a must-try? Because it addresses the core needs of chili plants: consistent moisture, optimal soil temperature, and protection from harsh elements. By implementing this technique, you’re essentially creating a microclimate that mimics the ideal growing conditions for these heat-loving plants. You’ll see a noticeable difference in the vigor of your plants, the size and quantity of your peppers, and, most importantly, the intensity of their flavor.
But don’t stop there! This is just the starting point. Feel free to experiment with variations to suit your specific needs and growing conditions. For example, if you live in a particularly hot climate, consider using a lighter-colored material for your DIY setup to reflect some of the heat. Alternatively, if you’re growing in a cooler region, you might want to add a layer of insulation to retain even more warmth. You can also adjust the size and shape of your setup to accommodate different types of chili plants, from compact varieties to sprawling bushes.
Consider adding companion plants around your chili peppers to further enhance their growth and flavor. Basil, for example, is known to repel pests and improve the taste of chili peppers. Marigolds are another excellent choice, as they attract beneficial insects that prey on common chili pests.
Another variation to consider is the type of soil you use. While the basic recipe calls for a well-draining potting mix, you can further customize it to meet the specific needs of your chili variety. For example, some chili peppers prefer a slightly acidic soil, while others thrive in a more alkaline environment. Research the specific requirements of your chili variety and adjust your soil mix accordingly.
Don’t be afraid to get creative and adapt this DIY trick to your own unique circumstances. The key is to understand the underlying principles and then experiment until you find what works best for you.
We are confident that this DIY chili growing tip will revolutionize your chili growing experience. It’s easy to implement, cost-effective, and delivers remarkable results. So, what are you waiting for? Give it a try and see for yourself the difference it can make.
We’re eager to hear about your experiences! Share your results, variations, and tips in the comments below. Let’s create a community of chili enthusiasts who are passionate about growing the best possible peppers. Your insights could help others achieve chili-growing success, and we can all learn from each other’s experiences. Let us know what kind of chili you are growing and how this tip improved your yield. Did you notice a difference in the heat level? Did you try any variations? We want to know it all!
Remember, growing chili peppers is a journey, not a destination. There will be challenges along the way, but with a little experimentation and perseverance, you can achieve chili-growing success. And with this DIY trick in your arsenal, you’ll be well on your way to harvesting a bumper crop of delicious, fiery peppers.
Frequently Asked Questions (FAQ)
What exactly does this DIY chili growing tip involve?
This DIY chili growing tip focuses on creating a more controlled and optimal environment for your chili plants. While the specific method can vary depending on the original article, it generally involves using materials like plastic sheeting, containers, or other readily available items to improve soil temperature, moisture retention, and protection from pests and harsh weather. The core idea is to mimic the ideal growing conditions that chili peppers thrive in, leading to healthier plants and a better yield.
What are the benefits of using this DIY chili growing tip?
The benefits are numerous! Firstly, it helps to maintain a more consistent soil temperature, which is crucial for chili pepper growth, especially in regions with fluctuating temperatures. Secondly, it improves moisture retention, reducing the need for frequent watering and preventing the soil from drying out. Thirdly, it provides a barrier against pests and diseases, protecting your plants from damage. Finally, it can help to extend the growing season, allowing you to harvest peppers earlier and later in the year. Ultimately, this DIY trick leads to healthier, more productive chili plants and a more abundant harvest.
Is this DIY chili growing tip suitable for all types of chili peppers?
Yes, this DIY trick is generally suitable for all types of chili peppers, from mild bell peppers to scorching hot habaneros. However, you may need to adjust the specific method based on the needs of your particular chili variety. For example, some chili peppers prefer a slightly acidic soil, while others thrive in a more alkaline environment. Research the specific requirements of your chili variety and adjust your soil mix accordingly. Also, consider the size and growth habit of your chili plants when designing your DIY setup.
What materials do I need to implement this DIY chili growing tip?
The materials you need will depend on the specific method outlined in the original article. However, some common materials include:
* Plastic sheeting or clear plastic containers: To create a mini-greenhouse effect and trap heat.
* Potting mix: A well-draining potting mix is essential for healthy chili pepper growth.
* Containers: To grow your chili plants in.
* Mulch: To help retain moisture and suppress weeds.
* Stakes or supports: To support your chili plants as they grow.
* Thermometer: To monitor soil temperature.
You may also need other materials depending on the specific DIY trick you’re implementing.
How often should I water my chili plants when using this DIY trick?
The frequency of watering will depend on several factors, including the weather, the type of soil you’re using, and the size of your plants. However, as a general rule, you should water your chili plants when the top inch of soil feels dry to the touch. Avoid overwatering, as this can lead to root rot. The DIY setup will help retain moisture, so you may need to water less frequently than you would otherwise.
Can I use this DIY chili growing tip in a container garden?
Absolutely! This DIY trick is particularly well-suited for container gardening. In fact, it can be even more effective in containers, as it allows you to more easily control the growing environment. Just make sure to choose containers that are large enough to accommodate the root systems of your chili plants.
Will this DIY chili growing tip protect my plants from frost?
While this DIY trick can provide some protection from frost, it’s not a foolproof solution. If you live in an area with severe frosts, you may need to take additional measures to protect your plants, such as covering them with blankets or moving them indoors.
How long will it take to see results from this DIY chili growing tip?
You should start to see results within a few weeks of implementing this DIY trick. Your plants should appear healthier and more vigorous, and you may notice an increase in the number of flowers and peppers. However, the exact timing will depend on the specific method you’re using, the variety of chili peppers you’re growing, and the growing conditions in your area.
Can I combine this DIY chili growing tip with other chili growing techniques?
Yes, absolutely! This DIY trick is designed to complement other chili growing techniques, such as fertilizing, pruning, and pest control. In fact, combining this DIY trick with other proven methods will likely lead to even better results.
What if I don’t have all the materials listed? Can I still try this?
Absolutely! The beauty of DIY is its adaptability. Don’t let a missing item stop you. Get creative! Use what you have on hand. For example, if you don’t have plastic sheeting, you could use old shower curtains or even clear trash bags. The key is to understand the principle behind the trick – creating a warmer, more humid environment – and then find ways to achieve that with the materials you have available. The best chili growing tip is the one you adapt to your own needs and resources.
Leave a Comment