
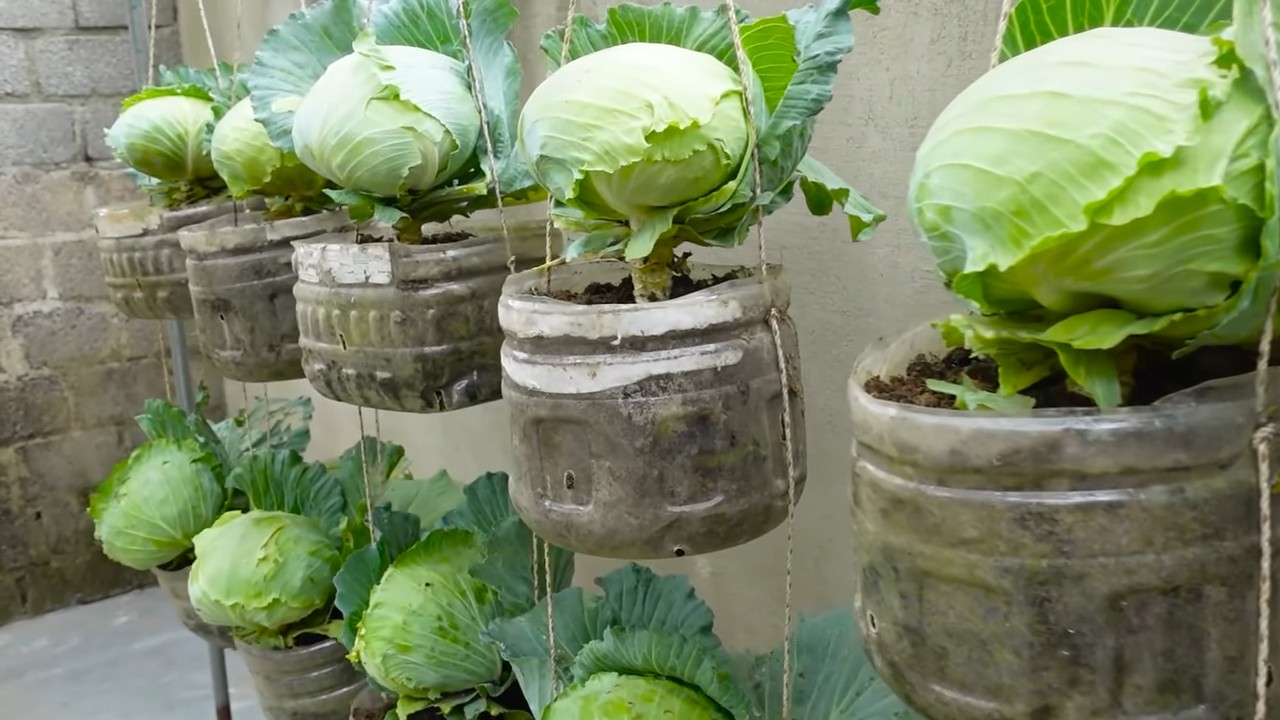
Bottle garden cabbage: Sounds intriguing, right? Forget sprawling fields and back-breaking labor! We’re diving into the surprisingly simple and incredibly rewarding world of growing cabbage in a bottle. Yes, you read that correctly! Imagine harvesting fresh, crisp cabbage right from your windowsill, all thanks to a clever DIY project.
For centuries, humans have cultivated cabbage, a staple in cuisines across the globe. From sauerkraut in Germany to kimchi in Korea, this humble vegetable has nourished generations. But who says you need acres of land to enjoy its benefits? This DIY bottle garden method brings the joy of growing your own food to even the smallest spaces.
Why would you want to try this? Well, for starters, it’s incredibly space-saving, perfect for apartment dwellers or anyone with limited gardening space. Plus, it’s a fantastic way to recycle those plastic bottles we all seem to accumulate. But the real magic lies in the control you have over the growing environment. You can easily monitor moisture levels, protect your cabbage from pests, and even extend the growing season. So, if you’re looking for a fun, sustainable, and rewarding gardening project, let’s explore how to create your very own bottle garden cabbage oasis!
DIY Bottle Garden for Cabbage: A Fun and Sustainable Project
Hey there, fellow gardening enthusiasts! Ever thought about growing your own cabbage in a recycled plastic bottle? It’s a fantastic way to reuse materials, save space, and enjoy fresh, homegrown veggies. I’m going to walk you through the entire process, step-by-step, so you can create your own thriving bottle garden for cabbage. Let’s get started!
Materials You’ll Need
Before we dive in, let’s gather all the necessary materials. Trust me, having everything ready beforehand will make the whole process much smoother.
* Large Plastic Bottle: A 2-liter soda bottle or a similar-sized water bottle works perfectly. Make sure it’s clean and free of any residue.
* Cabbage Seeds or Seedlings: You can start from seeds or purchase young cabbage seedlings from your local nursery. I personally prefer seedlings for a quicker harvest.
* Potting Soil: Use a high-quality potting mix that’s well-draining and rich in nutrients. Cabbage needs a good foundation to grow strong.
* Scissors or Utility Knife: For cutting the plastic bottle. Be careful!
* Drill or Nail: To create drainage holes in the bottle.
* Watering Can or Spray Bottle: For watering your cabbage plants.
* Optional:
* Gravel or Small Stones: For drainage at the bottom of the bottle.
* Fertilizer: A balanced, slow-release fertilizer to boost growth.
* Gloves: To protect your hands.
* Marker: To mark cutting lines on the bottle.
Preparing the Bottle
This is where we transform the humble plastic bottle into a mini-garden.
1. Clean the Bottle: Thoroughly wash the plastic bottle with soap and water to remove any dirt or residue. Rinse it well and let it dry completely. This is crucial for preventing any contamination that could harm your cabbage plants.
2. Cut the Bottle: Decide how you want to cut the bottle. There are a couple of options:
* Option 1: Horizontal Cut: Cut the bottle horizontally about two-thirds of the way up from the bottom. This creates a larger planting area. You’ll essentially be using the bottom part as a pot and the top part as a potential cover (more on that later).
* Option 2: Vertical Cut: Cut the bottle vertically down one side, stopping a few inches from the bottom. This creates a flap that you can open and close for easy access to the soil and plants.
I usually go with the horizontal cut because it provides more space for the cabbage to grow. Use a marker to draw a clear cutting line before you start. This will help you make a clean and even cut.
3. Create Drainage Holes: This is super important! Cabbage plants don’t like sitting in soggy soil. Use a drill or a heated nail to create several drainage holes in the bottom of the bottle. I usually make about 5-6 holes, evenly spaced. If you’re using a nail, heat it up with a lighter or stove (be careful!) and then poke it through the plastic.
4. Optional: Add Drainage Layer: To further improve drainage, you can add a layer of gravel or small stones to the bottom of the bottle before adding the soil. This helps prevent the drainage holes from getting clogged.
Planting Your Cabbage
Now for the fun part – planting your cabbage!
1. Fill with Potting Soil: Fill the prepared bottle with high-quality potting soil. Leave about an inch or two of space at the top. Gently pat down the soil to remove any air pockets.
2. Plant the Seeds or Seedlings:
* From Seeds: Sow the cabbage seeds according to the instructions on the seed packet. Generally, you’ll want to plant them about ¼ inch deep. Water gently after planting.
* From Seedlings: Carefully remove the cabbage seedlings from their containers. Gently loosen the roots with your fingers. Dig a small hole in the soil and place the seedling in the hole. Backfill with soil and gently pat it down. Water thoroughly after planting.
When planting seedlings, make sure the top of the root ball is level with the surrounding soil. Don’t bury the stem too deep, as this can cause it to rot.
3. Water Thoroughly: After planting, water the soil thoroughly until water drains out of the drainage holes. This helps settle the soil and ensures that the roots are well-hydrated.
Caring for Your Cabbage
Cabbage plants need consistent care to thrive. Here’s what you need to do:
1. Sunlight: Cabbage needs at least 6 hours of sunlight per day. Place your bottle garden in a sunny location, such as a windowsill, balcony, or patio. If you don’t have enough natural sunlight, you can supplement with a grow light.
2. Watering: Water your cabbage plants regularly, especially during hot and dry weather. The soil should be consistently moist but not waterlogged. Check the soil moisture by sticking your finger into the soil. If the top inch feels dry, it’s time to water.
3. Fertilizing: Cabbage plants are heavy feeders, so they need regular fertilization. Use a balanced, slow-release fertilizer according to the instructions on the package. You can also use a liquid fertilizer every few weeks.
4. Pest Control: Keep an eye out for pests such as aphids, cabbage worms, and slugs. You can control these pests with organic methods such as hand-picking, insecticidal soap, or Bacillus thuringiensis (Bt).
5. Temperature: Cabbage prefers cool temperatures, ideally between 60°F and 70°F (15°C and 21°C). Protect your plants from extreme heat or cold. If you’re using the top part of the bottle as a cover, make sure to ventilate it regularly to prevent overheating.
6. Support: As your cabbage grows, it may need some support to prevent it from falling over. You can use stakes or a small trellis to support the plant.
Harvesting Your Cabbage
The moment you’ve been waiting for!
1. Harvest Time: Cabbage is typically ready to harvest in 60-100 days, depending on the variety. The head should be firm and compact.
2. Harvesting: To harvest your cabbage, use a sharp knife to cut the head from the stem. Leave a few outer leaves on the plant, as these can continue to produce smaller heads.
3. Enjoy Your Harvest: Enjoy your fresh, homegrown cabbage in salads, soups, stews, or any other dish you like.
Troubleshooting
Even with the best care, you might encounter some problems. Here are a few common issues and how to address them:
* Yellowing Leaves: This could be a sign of overwatering, underwatering, or nutrient deficiency. Check the soil moisture and adjust your watering accordingly. Fertilize your plants with a balanced fertilizer.
* Stunted Growth: This could be caused by poor soil, lack of sunlight, or pests. Make sure your plants are getting enough sunlight and nutrients. Check for pests and treat them accordingly.
* Bolting: Bolting is when the cabbage plant starts to flower prematurely. This is usually caused by hot weather or stress. To prevent bolting, keep your plants cool and well-watered.
Tips and Tricks for Success
Here are a few extra tips to help you succeed with your bottle garden:
* Choose the Right Variety: Select a cabbage variety that’s well-suited to container gardening. Smaller varieties like ‘Dwarf Morden’ or ‘Golden Acre’ are good choices.
* Rotate Your Crops: Don’t plant cabbage in the same bottle year after year. Rotate your crops to prevent soilborne diseases.
* Use Companion Planting: Plant companion plants such as marigolds or nasturtiums to deter pests.
* Recycle and Reuse: Get creative with your bottle garden! Use different sizes and shapes of bottles to create a unique and sustainable garden.
And there you have it! Growing cabbage in a bottle garden is a rewarding and sustainable project that anyone can do. With a little bit of care and attention, you can enjoy fresh, homegrown cabbage right from your own backyard (or balcony!). Happy gardening!

Conclusion
So, there you have it! Transforming a simple plastic bottle into a thriving mini-garden for your cabbage is not just a fun project; it’s a sustainable, space-saving, and incredibly rewarding way to grow your own fresh produce. We’ve walked you through the steps, highlighting the ease and accessibility of this DIY trick. Forget expensive gardening equipment or sprawling garden beds. With a little creativity and resourcefulness, you can enjoy the satisfaction of harvesting your own homegrown cabbage, right from your windowsill or balcony.
This method isn’t just about saving money; it’s about connecting with nature, understanding the growth cycle, and reducing your environmental footprint. By repurposing plastic bottles, you’re actively participating in waste reduction and promoting a more sustainable lifestyle. Plus, imagine the joy of sharing your homegrown cabbage with friends and family, knowing that you nurtured it from seed to harvest using a simple, eco-friendly technique.
But the beauty of this DIY project lies in its adaptability. Feel free to experiment with different varieties of cabbage. Red cabbage, Savoy cabbage, or even Chinese cabbage – the possibilities are endless! You can also explore companion planting by adding herbs like rosemary or thyme to your bottle garden. These herbs not only enhance the flavor of your cabbage but also act as natural pest repellents.
Consider adding a small trellis made from bamboo skewers or twigs to support the growth of your cabbage as it matures. This will prevent the plant from becoming top-heavy and ensure that it receives adequate sunlight. You can also adjust the size of the bottle to accommodate different cabbage varieties. For smaller varieties, a standard soda bottle might suffice, while larger varieties may require a larger water bottle or even a repurposed milk jug.
Don’t be afraid to get creative with the design of your bottle garden. Paint the bottle with vibrant colors, add decorative stones or pebbles, or even create a miniature landscape around the base of the plant. This is your chance to express your personality and create a unique and eye-catching addition to your home or garden.
We understand that gardening can sometimes seem daunting, especially for beginners. But this bottle garden cabbage project is designed to be simple, accessible, and fun for everyone. It’s a perfect way to introduce children to the wonders of gardening and teach them about the importance of sustainability.
We strongly encourage you to give this DIY trick a try. You’ll be amazed at how easy it is to create your own thriving cabbage garden with just a few simple materials. And once you’ve experienced the joy of harvesting your own homegrown cabbage, you’ll be hooked!
We’d love to hear about your experiences with this DIY project. Share your photos, tips, and tricks in the comments section below. Let’s create a community of bottle garden enthusiasts and inspire others to embrace sustainable gardening practices. Together, we can make a difference, one bottle garden at a time. So, grab a bottle, some soil, and some cabbage seeds, and get ready to embark on a rewarding gardening adventure!
Frequently Asked Questions (FAQ)
What kind of cabbage is best for growing in a bottle garden?
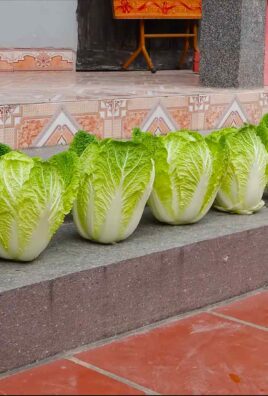
While you can technically grow any type of cabbage in a bottle garden, smaller varieties tend to thrive best. Consider varieties like dwarf cabbage, baby cabbage, or even Chinese cabbage (Napa cabbage). These varieties are less likely to outgrow the space and will be easier to manage in a confined environment. Red cabbage also works well and adds a splash of color to your indoor garden. Experiment and see what works best for you!
How often should I water my bottle garden cabbage?
Watering frequency depends on several factors, including the size of the bottle, the type of soil, the climate, and the stage of growth. As a general rule, water your cabbage when the top inch of soil feels dry to the touch. Avoid overwatering, as this can lead to root rot. Ensure that the bottle has adequate drainage holes to prevent water from accumulating at the bottom. During hot weather, you may need to water more frequently. Check the soil moisture daily and adjust your watering schedule accordingly.
What kind of soil should I use for my bottle garden cabbage?
A well-draining potting mix is essential for growing healthy cabbage in a bottle garden. Avoid using garden soil, as it can be too heavy and may not provide adequate drainage. A good potting mix should contain a blend of peat moss, perlite, and vermiculite. You can also add compost to enrich the soil and provide essential nutrients for your cabbage plants. Ensure that the soil is loose and airy to allow for proper root development.
How much sunlight does my bottle garden cabbage need?
Cabbage plants require at least six hours of sunlight per day to thrive. Place your bottle garden in a sunny location, such as a south-facing window or balcony. If you don’t have access to enough natural sunlight, you can supplement with artificial grow lights. LED grow lights are an energy-efficient option that can provide the necessary light spectrum for healthy plant growth. Rotate the bottle garden regularly to ensure that all sides of the plant receive adequate sunlight.
How do I fertilize my bottle garden cabbage?
Cabbage plants are heavy feeders and require regular fertilization to produce healthy growth. Use a balanced liquid fertilizer diluted to half strength. Fertilize your cabbage every two to three weeks, following the instructions on the fertilizer label. You can also add compost tea to the soil to provide additional nutrients. Avoid over-fertilizing, as this can lead to nutrient burn.
How do I protect my bottle garden cabbage from pests?
While bottle gardens are less susceptible to pests than traditional gardens, they can still be affected by aphids, cabbage worms, and other common garden pests. Inspect your plants regularly for signs of infestation. If you notice any pests, you can try removing them by hand or spraying the plants with insecticidal soap or neem oil. You can also introduce beneficial insects, such as ladybugs, to control pest populations. Companion planting with herbs like rosemary or thyme can also help to repel pests.
How long does it take to grow cabbage in a bottle garden?
The time it takes to grow cabbage in a bottle garden depends on the variety of cabbage, the growing conditions, and your level of care. Generally, it takes about 60 to 90 days from planting to harvest. You can start harvesting the outer leaves of the cabbage as soon as they reach a usable size. The entire head of cabbage can be harvested when it is firm and compact.
Can I grow other vegetables in a bottle garden besides cabbage?
Absolutely! Bottle gardens are a versatile way to grow a variety of vegetables, herbs, and flowers. Some other vegetables that thrive in bottle gardens include lettuce, spinach, kale, radishes, and herbs like basil, mint, and parsley. Choose plants that are compact and have shallow root systems. Experiment with different combinations of plants to create a thriving and diverse bottle garden.
What do I do with the plastic bottle after I harvest the cabbage?
One of the best things about this DIY project is its sustainability. After you harvest your cabbage, you can reuse the plastic bottle for another planting project. Alternatively, you can recycle the bottle or repurpose it for other uses around your home. Consider using it as a storage container, a bird feeder, or even a decorative planter. The possibilities are endless!
Leave a Comment