
DIY Container Pumpkins: Imagine vibrant, plump pumpkins gracing your porch this autumn, all grown by your own hand, even if you don’t have a sprawling garden! I’m so excited to share some simple and effective DIY tricks that will allow you to cultivate these autumnal beauties right in containers.
Pumpkins, symbols of harvest and Halloween, have a rich history. Originating in North America, they’ve been cultivated for thousands of years, providing sustenance and becoming deeply ingrained in our cultural traditions. From Native American cuisine to the jack-o’-lanterns we carve today, pumpkins hold a special place in our hearts. But what if you thought growing them was only for those with acres of land? Think again!
Many of us dream of a bountiful harvest, but lack the space for a traditional garden. That’s where these DIY container pumpkins hacks come in. I’ll guide you through selecting the right pumpkin variety, choosing the perfect container, and providing the essential care your little pumpkin patch needs to thrive. No more pumpkin envy – you can have your own homegrown gourds, adding a touch of autumnal charm to your home, regardless of your space constraints. Plus, imagine the satisfaction of carving a jack-o’-lantern from a pumpkin you nurtured from seed! Let’s get started and transform your balcony, patio, or even a sunny windowsill into a pumpkin paradise!
DIY Adorable Container Pumpkins: A Step-by-Step Guide
Hey there, fellow DIY enthusiasts! Are you ready to add a touch of autumnal charm to your porch, patio, or even your indoor spaces? I’m going to walk you through creating the cutest container pumpkins you’ve ever seen. These aren’t your average jack-o’-lanterns; we’re talking about living, breathing (well, almost!) pumpkin displays that will last all season long. Get ready to get your hands dirty – in the best way possible!
What You’ll Need: The Essential Supplies
Before we dive in, let’s gather our supplies. This is crucial for a smooth and enjoyable crafting experience. Trust me, nothing’s worse than realizing you’re missing a key ingredient halfway through!
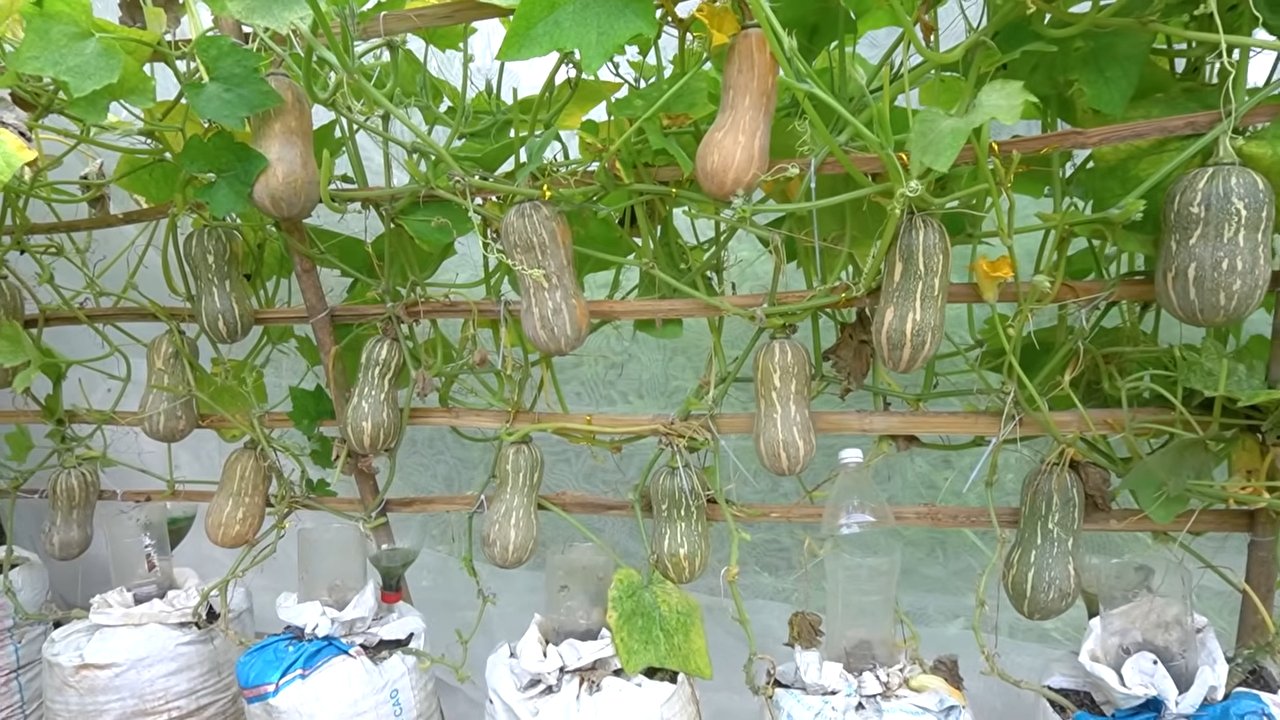
* Containers: This is where the magic happens! You can use terracotta pots, plastic planters, baskets (lined, of course!), or even repurposed buckets. The size depends on the look you’re going for. I personally love using a mix of sizes for a more dynamic display. Consider the mature size of the plants you’ll be using when choosing your container.
* Potting Soil: Don’t skimp on this! Use a high-quality potting mix that drains well. Avoid garden soil, as it can compact and suffocate your plants. I usually go for a mix specifically formulated for containers.
* Pumpkin Seedlings or Small Pumpkin Plants: You can start from seeds, but buying small plants from a nursery will give you a head start. Look for varieties that are suitable for container gardening, like ‘Baby Boo’ (white), ‘Jack Be Little’ (orange), or ‘Wee Be Little’ (miniature).
* Companion Plants (Optional): This is where you can get creative! Think about adding trailing plants like ivy or creeping Jenny to cascade over the edges of your container. Mums, pansies, kale, and ornamental peppers also make fantastic additions.
* Gardening Gloves: Protect those precious hands!
* Trowel or Small Shovel: For scooping and planting.
* Watering Can or Hose: To keep your pumpkins happy and hydrated.
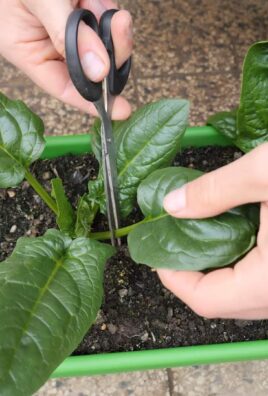
* Scissors or Pruning Shears: For trimming and shaping.
* Optional Decorations: Think moss, twigs, pinecones, small gourds, or even miniature scarecrows. These will add extra personality to your pumpkin containers.
* Slow-Release Fertilizer: To give your pumpkins a boost of nutrients throughout the season.
Step-by-Step Planting Guide: From Empty Container to Pumpkin Paradise
Alright, let’s get planting! Follow these steps, and you’ll have gorgeous container pumpkins in no time.
1. Prepare Your Container: If you’re using a new terracotta pot, consider soaking it in water for a few hours beforehand. This will help prevent it from drawing moisture away from the soil. Make sure your container has drainage holes. If not, you’ll need to drill some. Proper drainage is essential to prevent root rot.
2. Add Potting Soil: Fill your container about two-thirds full with potting soil. Don’t pack it down too tightly. You want the soil to be loose and airy to allow for good root growth.
3. Position Your Pumpkin Plant(s): Gently remove your pumpkin seedling or plant from its nursery pot. Loosen the roots slightly with your fingers. Place the pumpkin plant in the center of the container. If you’re using multiple pumpkin plants, space them evenly apart.
4. Add Companion Plants (Optional): Now’s the time to add your companion plants. Arrange them around the pumpkin plant, keeping in mind their mature size and growth habits. Trailing plants should be placed near the edge of the container so they can cascade over the sides.
5. Fill with Soil: Fill in the remaining space in the container with potting soil, leaving about an inch or two of space at the top. Gently pat down the soil around the plants.
6. Water Thoroughly: Water your newly planted container pumpkins thoroughly until water drains out of the drainage holes. This will help settle the soil and ensure that the roots are well-hydrated.
7. Add Slow-Release Fertilizer: Sprinkle a slow-release fertilizer around the base of the plants, following the instructions on the package. This will provide your pumpkins with a steady supply of nutrients throughout the growing season.
8. Decorate (Optional): Now comes the fun part! Add your optional decorations to personalize your pumpkin container. Arrange moss around the base of the plants, tuck in twigs and pinecones, or add a miniature scarecrow. Let your creativity shine!
Caring for Your Container Pumpkins: Keeping Them Happy and Healthy
Once your container pumpkins are planted, it’s important to provide them with the proper care to ensure they thrive. Here’s what you need to know:
* Watering: Water your container pumpkins regularly, especially during hot, dry weather. Check the soil moisture by sticking your finger into the soil. If the top inch or two feels dry, it’s time to water. Avoid overwatering, as this can lead to root rot.
* Sunlight: Pumpkins need at least six hours of sunlight per day. Place your container pumpkins in a sunny location where they will receive plenty of light.
* Fertilizing: Continue to fertilize your container pumpkins every few weeks with a balanced liquid fertilizer. This will provide them with the nutrients they need to grow and produce pumpkins.
* Pruning: As your pumpkin plants grow, you may need to prune them to keep them from becoming too unruly. Remove any dead or yellowing leaves. You can also pinch back the tips of the vines to encourage bushier growth.
* Pest Control: Keep an eye out for pests such as aphids, squash bugs, and vine borers. If you notice any pests, treat them promptly with an appropriate insecticide or organic pest control method.
* Support: As your pumpkins grow larger, they may need some support. You can use stakes or trellises to support the vines and prevent the pumpkins from touching the ground. This will help prevent rot and ensure that your pumpkins ripen properly.
* Harvesting: Your pumpkins will be ready to harvest when they are fully colored and the stems are dry and hard. Cut the pumpkins from the vine with a sharp knife, leaving a few inches of stem attached.
Choosing the Right Pumpkin Variety: Size Matters!
Not all pumpkins are created equal, especially when it comes to container gardening. Choosing the right variety is crucial for success. Here’s a breakdown of some popular container-friendly pumpkin varieties:
* ‘Baby Boo’: These adorable white pumpkins are perfect for small containers. They’re compact and easy to manage, making them a great choice for beginners.
* ‘Jack Be Little’: These classic orange pumpkins are slightly larger than ‘Baby Boo’ but still manageable in containers. They’re perfect for adding a touch of traditional fall color to your display.
* ‘Wee Be Little’: As the name suggests, these are tiny pumpkins that are perfect for miniature container gardens. They’re incredibly cute and add a whimsical touch to any space.
* ‘Spookies’: These small, round pumpkins are known for their vibrant orange color and smooth skin. They’re a great choice for adding a pop of color to your container garden.
* ‘Rouge Vif d’Etampes’: Also known as the Cinderella pumpkin, this variety is larger but can still be grown in a large container. Its flattened shape and vibrant red-orange color make it a stunning centerpiece.
When choosing your pumpkin variety, consider the size of your container and the amount of space you have available. It’s also important to choose a variety that is well-suited to your climate.
Companion Planting Ideas: Creating a Harmonious Display
Companion planting is the practice of planting different plants together to benefit each other. In the case of container pumpkins, companion plants can add visual interest, attract pollinators, and even deter pests. Here are some ideas for companion plants to include in your pumpkin container:
* Mums: These classic fall flowers add a burst of color and complement the orange hues of pumpkins.
* Pansies: These cheerful flowers come in a variety of colors and bloom throughout the fall.
* Kale: Ornamental kale adds texture and visual interest to your container garden. Its ruffled leaves come in a variety of colors, including purple, green, and white.
* Ornamental Peppers: These colorful peppers add a spicy touch to your container garden. They come in a variety of shapes and colors, including red, orange, yellow, and purple.
* Ivy: Trailing ivy adds a touch of elegance to your container garden. It cascades over the edges of the container, creating a lush and verdant display.
* Creeping Jenny: Similar to ivy, creeping Jenny is a trailing plant that adds a touch of whimsy to your container garden. Its bright green leaves create a vibrant contrast with the pumpkins.
* Marigolds: Marigolds are known for their

Conclusion
So, there you have it! Transforming ordinary containers into charming, festive container pumpkins is not only incredibly easy and budget-friendly, but it’s also a fantastic way to add a personal touch to your fall décor. Forget those generic, mass-produced decorations – with just a few simple materials and a little creativity, you can craft unique and eye-catching pumpkins that will impress your neighbors and bring a warm, autumnal vibe to your home.
This DIY project is a must-try for several reasons. First, it’s incredibly versatile. You can adapt the size, shape, and color of your container pumpkins to perfectly match your existing décor and personal preferences. Want a rustic, farmhouse look? Use burlap and twine. Prefer a modern, minimalist aesthetic? Opt for sleek, metallic paint and clean lines. The possibilities are truly endless.
Second, it’s a sustainable and eco-conscious choice. By repurposing old containers, you’re reducing waste and giving new life to items that might otherwise end up in the landfill. This is a small but meaningful way to contribute to a more sustainable lifestyle, all while creating beautiful decorations.
Third, it’s a fun and engaging activity for the whole family. Get your kids involved in painting, decorating, and adding their own creative touches. It’s a great way to spend quality time together and create lasting memories.
Variations to Explore:
* Gourd-geous Textures: Experiment with different textures by adding layers of fabric, paper mache, or even dried leaves to your container pumpkins.
* Light Up the Night: Incorporate battery-operated fairy lights inside your container pumpkins to create a warm and inviting glow.
* Stack ‘Em High: Create a stunning pumpkin tower by stacking different sized container pumpkins on top of each other. Secure them with strong adhesive or twine.
* Personalized Pumpkins: Add monograms, stencils, or hand-painted designs to personalize your container pumpkins and make them truly one-of-a-kind.
* Themed Pumpkins: Create themed container pumpkins based on your favorite movies, books, or holidays. Think spooky Halloween pumpkins, elegant Thanksgiving pumpkins, or even whimsical Christmas pumpkins.
We are confident that you’ll love the process and the results of making your own container pumpkins. It’s a simple, rewarding, and incredibly satisfying project that will add a touch of autumnal charm to your home.
So, what are you waiting for? Gather your supplies, unleash your creativity, and get ready to transform those ordinary containers into extraordinary pumpkins. We can’t wait to see what you create!
Don’t forget to share your creations with us on social media using #DIYContainerPumpkins. We’d love to see your unique designs and get inspired by your creativity. Happy crafting!
FAQ
Frequently Asked Questions About DIY Container Pumpkins
Q: What types of containers are best for making container pumpkins?
A: Almost any type of container can be used! Plastic pots, metal buckets, tin cans, even old laundry detergent bottles can be transformed into charming pumpkins. Consider the size and shape of the container when choosing, as this will determine the overall look of your finished pumpkin. Make sure the containers are clean and dry before you start decorating.
Q: What kind of paint should I use for my container pumpkins?
A: Acrylic paint is a great option for painting container pumpkins. It’s durable, water-resistant, and comes in a wide range of colors. You can also use spray paint for a quicker and more even finish. If you’re using metal containers, make sure to use a primer first to prevent rust. For plastic containers, consider using a paint specifically designed for plastic to ensure proper adhesion. Chalk paint is another excellent choice for a rustic, matte finish.
Q: How do I create the pumpkin stem?
A: There are several ways to create a pumpkin stem. You can use a real pumpkin stem from a discarded pumpkin, a piece of driftwood, a cinnamon stick, a twig, or even a tightly rolled piece of brown paper. Attach the stem to the top of the container using hot glue or strong adhesive. You can also paint or decorate the stem to match your pumpkin’s overall design.
Q: What are some creative ways to decorate my container pumpkins?
A: The possibilities are endless! You can use paint, fabric scraps, buttons, beads, twine, ribbon, leaves, glitter, and anything else you can think of to decorate your container pumpkins. Consider using stencils to create intricate designs, or try adding texture with paper mache or burlap. You can also personalize your pumpkins with monograms, names, or favorite quotes.
Q: How can I make my container pumpkins waterproof?
A: To make your container pumpkins waterproof, apply a sealant or varnish after you’ve finished decorating them. This will protect the paint and decorations from the elements and ensure that your pumpkins last longer. Choose a sealant that is appropriate for the type of paint and materials you’ve used.
Q: Can I use my container pumpkins outdoors?
A: Yes, you can use your container pumpkins outdoors, but it’s important to take precautions to protect them from the elements. Make sure to use waterproof paint and sealant, and consider placing them in a sheltered location to prevent them from being damaged by wind or rain. If you live in an area with harsh weather conditions, you may want to bring your container pumpkins indoors during the winter months.
Q: How do I clean my container pumpkins?
A: To clean your container pumpkins, simply wipe them down with a damp cloth. Avoid using harsh chemicals or abrasive cleaners, as these can damage the paint and decorations. If your pumpkins are heavily soiled, you can use a mild soap and water solution.
Q: How long will my container pumpkins last?
A: With proper care, your container pumpkins can last for several years. The lifespan of your pumpkins will depend on the materials you’ve used, the weather conditions, and how well you maintain them. By using durable materials, applying a sealant, and storing your pumpkins properly, you can ensure that they bring you joy for many autumns to come.
Q: Can I use real plants inside my container pumpkins?
A: Yes, you can! Just make sure your container has drainage holes. If not, you can add some by drilling a few small holes in the bottom. Choose plants that are appropriate for the size of the container and the amount of sunlight it will receive. Succulents, herbs, and small flowering plants are all great options.
Q: Where can I find inspiration for my container pumpkin designs?
A: There are tons of resources available online for container pumpkin inspiration. Check out Pinterest, Instagram, and other social media platforms for ideas. You can also browse home décor magazines and websites for inspiration. Don’t be afraid to experiment and put your own personal touch on your container pumpkins.
Leave a Comment