
DIY Lettuce Vertical Garden: Imagine stepping outside your door and harvesting fresh, crisp lettuce for your salad, sandwich, or even a quick snack. No sprawling garden needed! That’s the magic of a DIY lettuce vertical garden, and I’m here to show you how incredibly easy it is to create your own.
Vertical gardening, in general, isn’t exactly new. Think of the Hanging Gardens of Babylon, one of the Seven Wonders of the Ancient World! While we might not be building anything quite that grand, the principle is the same: maximizing space and bringing greenery into our lives. In modern times, vertical gardening has seen a huge resurgence, particularly in urban areas where space is at a premium.
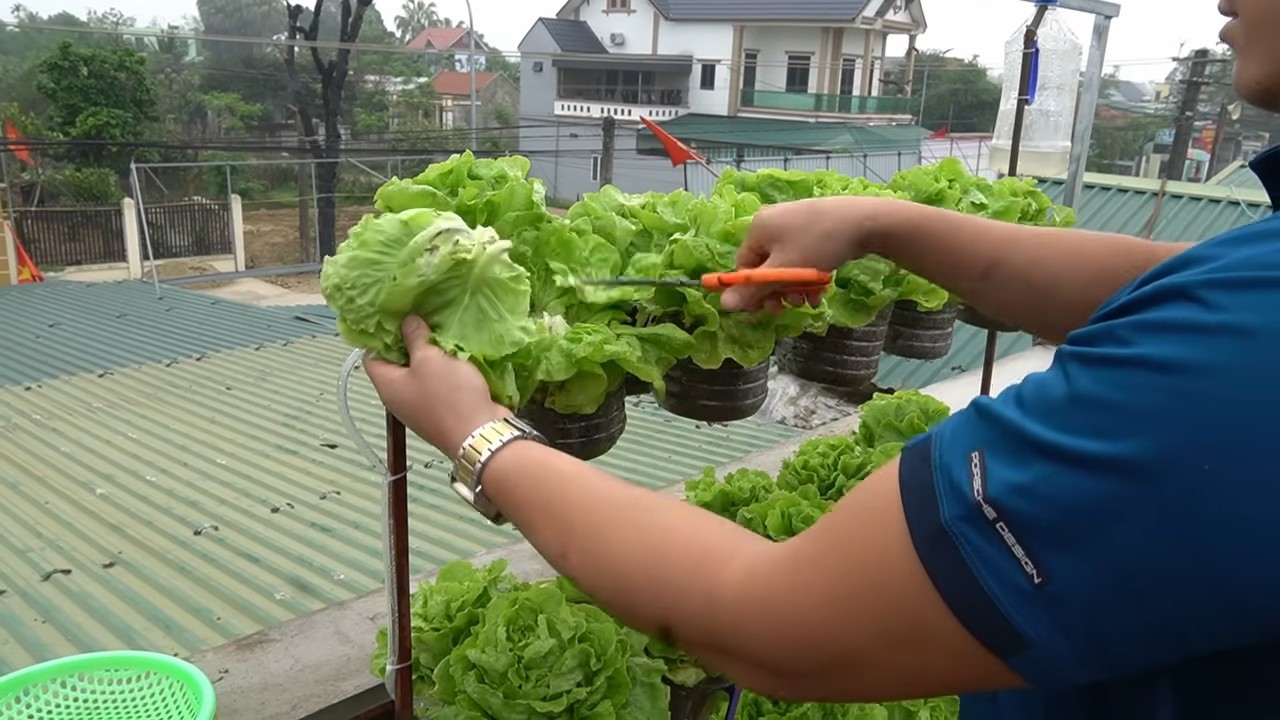
But why a DIY lettuce vertical garden specifically? Well, lettuce is a relatively easy crop to grow, even for beginners. Plus, growing vertically protects your lettuce from ground-dwelling pests like slugs and snails, and it keeps the leaves cleaner. More importantly, it’s a fantastic way to add a touch of green to a balcony, patio, or even a sunny wall indoors. I’ve found that having fresh lettuce readily available encourages me to eat healthier and reduces my trips to the grocery store. Ready to get started? Let’s dive into the simple steps to create your own thriving vertical lettuce oasis!
DIY Vertikaler Salatgarten: Frischer Salat auf kleinstem Raum
Hallo Gartenfreunde! Habt ihr auch so wenig Platz, aber trotzdem Lust auf frischen Salat aus dem eigenen Anbau? Dann habe ich hier genau das Richtige für euch: einen vertikalen Salatgarten! Das ist nicht nur platzsparend, sondern sieht auch noch super aus und ist ein echter Hingucker auf dem Balkon, der Terrasse oder sogar im Garten. Ich zeige euch, wie ihr das ganz einfach selber bauen könnt. Los geht’s!
Was du brauchst: Die Materialliste
Bevor wir loslegen, hier eine Liste mit allen Materialien und Werkzeugen, die du für deinen vertikalen Salatgarten benötigst:
* PVC-Rohr (ca. 15-20 cm Durchmesser): Die Länge hängt davon ab, wie hoch dein Garten werden soll. Ich empfehle, nicht höher als 1,50 Meter zu gehen, damit du noch gut an alle Salatköpfe herankommst.
* PVC-Rohr (ca. 5-7 cm Durchmesser): Für die Bewässerung im Inneren. Die Länge sollte etwas kürzer sein als das große Rohr.
* PVC-Endkappe: Passend für das große PVC-Rohr, um den Boden zu verschließen.
* PVC-Kleber: Zum Verkleben der Endkappe.
* Bohrmaschine mit Lochsäge oder Bohraufsatz: Für die Löcher, in die später die Salatpflanzen kommen. Die Größe der Löcher sollte etwa dem Durchmesser der Salatpflanzen entsprechen, die du einsetzen möchtest.
* Bohrmaschine mit kleinem Bohrer: Für die Bewässerungslöcher im inneren Rohr.
* Maßband oder Zollstock: Zum Abmessen der Abstände.
* Bleistift oder wasserfester Stift: Zum Anzeichnen der Löcher.
* Feile oder Schleifpapier: Zum Entgraten der Löcher.
* Gartenerde oder spezielle Pflanzerde für Gemüse: Am besten eine lockere, nährstoffreiche Erde.
* Kieselsteine oder Blähton: Für die Drainage am Boden des Rohrs.
* Salatpflanzen: Am besten Jungpflanzen, die du im Gartencenter oder Baumarkt bekommst. Du kannst natürlich auch Salat selbst aussäen und die Jungpflanzen dann umsetzen.
* Gießkanne oder Gartenschlauch: Zum Bewässern.
* Optional: Sprühfarbe oder wetterfeste Farbe, um das PVC-Rohr zu verschönern.
* Optional: Eine kleine Pumpe für die Bewässerung (wenn du eine automatische Bewässerung möchtest).
Schritt-für-Schritt-Anleitung: So baust du deinen vertikalen Salatgarten
Jetzt geht’s ans Eingemachte! Hier ist eine detaillierte Anleitung, wie du deinen vertikalen Salatgarten selber bauen kannst:
1. Vorbereitung des großen PVC-Rohrs
1. Reinigung: Zuerst solltest du das große PVC-Rohr gründlich reinigen, um Staub und Schmutz zu entfernen.
2. Anzeichnen der Löcher: Jetzt kommt der spaßige Teil! Überlege dir, wie viele Salatpflanzen du in dein Rohr setzen möchtest und verteile die Löcher entsprechend. Ich empfehle, die Löcher versetzt anzuordnen, damit die Pflanzen genügend Platz haben und sich nicht gegenseitig das Licht wegnehmen. Markiere die Positionen der Löcher mit einem Bleistift oder wasserfesten Stift. Achte darauf, dass die Löcher groß genug sind, damit die Salatpflanzen gut hineinpassen, aber nicht zu groß, damit die Erde nicht herausfällt. Ich habe für meine Salatpflanzen Löcher mit einem Durchmesser von ca. 8 cm gebohrt.
3. Bohren der Löcher: Nimm deine Bohrmaschine mit der Lochsäge oder dem Bohraufsatz und bohre die Löcher an den markierten Stellen. Sei vorsichtig und arbeite langsam, damit das PVC-Rohr nicht reißt.
4. Entgraten der Löcher: Nachdem du alle Löcher gebohrt hast, solltest du die Kanten mit einer Feile oder Schleifpapier entgraten, damit sie nicht scharf sind und die Salatpflanzen nicht beschädigen.
2. Vorbereitung des Bewässerungsrohrs
1. Reinigung: Auch das kleinere PVC-Rohr solltest du zuerst reinigen.
2. Bohren der Bewässerungslöcher: Jetzt bohrst du kleine Löcher in das kleinere PVC-Rohr. Diese Löcher dienen dazu, das Wasser gleichmäßig im Inneren des großen Rohrs zu verteilen. Bohre die Löcher in regelmäßigen Abständen (z.B. alle 5-10 cm) und achte darauf, dass sie nicht zu groß sind, damit das Wasser nicht zu schnell abläuft.
3. Verschließen des unteren Endes: Das untere Ende des kleineren Rohrs solltest du verschließen, damit das Wasser nicht direkt unten herausläuft. Du kannst das mit einem Stück Klebeband oder Silikon machen.
3. Zusammenbau des vertikalen Salatgartens
1. Verkleben der Endkappe: Trage PVC-Kleber auf die Innenseite der PVC-Endkappe und auf das untere Ende des großen PVC-Rohrs auf. Stecke die Endkappe auf das Rohr und lasse den Kleber gut trocknen.
2. Einsetzen des Bewässerungsrohrs: Stelle das große PVC-Rohr auf die Endkappe. Fülle eine Schicht Kieselsteine oder Blähton als Drainage auf den Boden des Rohrs. Setze das kleinere PVC-Rohr in die Mitte des großen Rohrs.
3. Befüllen mit Erde: Fülle das große PVC-Rohr mit Gartenerde oder Pflanzerde. Achte darauf, dass die Erde locker ist und nicht zu stark verdichtet ist. Lasse oben einen kleinen Rand frei.
4. Bepflanzen des Salatgartens
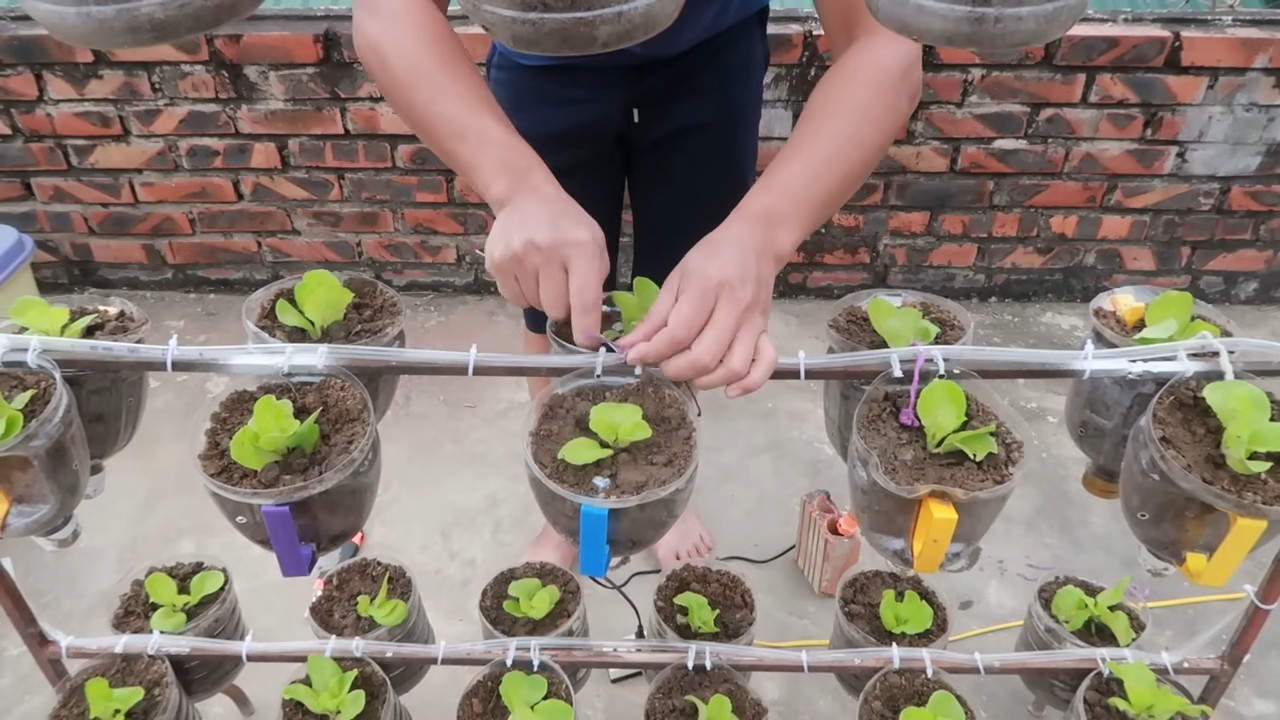
1. Einsetzen der Salatpflanzen: Nimm die Salatpflanzen aus ihren Töpfen und setze sie vorsichtig in die Löcher im PVC-Rohr. Fülle die Löcher mit Erde auf und drücke die Erde leicht an.
2. Angießen: Gieße die Salatpflanzen gründlich an. Achte darauf, dass das Wasser auch das Innere des Rohrs erreicht, indem du es in das kleinere PVC-Rohr gießt.
5. Optional: Verschönerung des Salatgartens
1. Anstreichen: Wenn du möchtest, kannst du das PVC-Rohr mit Sprühfarbe oder wetterfester Farbe anstreichen, um es optisch aufzuwerten. Lass die Farbe gut trocknen, bevor du den Salatgarten bepflanzt.
2. Dekoration: Du kannst den Salatgarten auch mit anderen Deko-Elementen verschönern, z.B. mit kleinen Schildern, auf denen die Namen der Salatsorten stehen, oder mit bunten Bändern.
Pflege deines vertikalen Salatgartens
Damit dein vertikaler Salatgarten lange Freude bereitet und du eine reiche Ernte einfahren kannst, solltest du ihn regelmäßig pflegen:
* Bewässerung: Gieße den Salatgarten regelmäßig, besonders an heißen Tagen. Achte darauf, dass die Erde immer leicht feucht ist, aber nicht zu nass. Gieße das Wasser am besten direkt in das kleinere PVC-Rohr, damit es sich gleichmäßig verteilt.
* Düngung: Dünge die Salatpflanzen regelmäßig mit einem Flüssigdünger für Gemüse. Beachte dabei die Anweisungen auf der Verpackung.
* Sonneneinstrahlung: Stelle den Salatgarten an einen sonnigen Standort, aber nicht in die pralle Mittagssonne. Salat mag es hell, aber nicht zu heiß.
* Schutz vor Schädlingen: Kontrolliere die Salatpflanzen regelmäßig auf Schädlinge wie Schnecken oder Blattläuse. Bei Bedarf kannst du biologische Schädlingsbekämpfungsmittel einsetzen.
* Ernte: Ernte den Salat, sobald er groß genug ist. Du kannst entweder ganze Salatköpfe ernten oder nur einzelne Blätter abzupfen.
Zusätzliche Tipps und Tricks
* Automatische Bewässerung: Wenn du keine Lust hast, den Salatgarten regelmäßig zu gießen, kannst du eine kleine Pumpe an das kleinere PVC-Rohr anschließen und eine automatische Bewässerung installieren.
* Verschiedene Salatsorten: Du kannst verschiedene Salatsorten in deinem vertikalen Salatgarten anbauen, z.B. Kopfs
Conclusion
So, there you have it! Creating your own DIY Lettuce Vertical Garden isn’t just a fun weekend project; it’s a game-changer for anyone looking to enjoy fresh, homegrown lettuce regardless of space constraints. We’ve walked you through the simple steps, highlighting how accessible and rewarding this endeavor can be. But why is this DIY trick a must-try?
Firstly, consider the sheer convenience. Imagine stepping outside your door and harvesting crisp, vibrant lettuce leaves whenever you need them. No more last-minute trips to the grocery store or settling for wilted, pre-packaged greens. You control the quality, ensuring your lettuce is free from harmful pesticides and bursting with flavor. This is especially crucial for those who prioritize healthy eating and sustainable living.
Secondly, the space-saving aspect is undeniable. Whether you have a sprawling backyard or a tiny balcony, a vertical garden allows you to maximize your growing potential. It’s an ingenious solution for urban dwellers and apartment residents who crave the joys of gardening but lack the traditional space. Think of all the other herbs and vegetables you could grow alongside your lettuce, creating a miniature edible oasis.
Thirdly, let’s talk about aesthetics. A DIY Lettuce Vertical Garden is not only practical but also visually appealing. It adds a touch of greenery and charm to any outdoor space, transforming a dull wall or fence into a living work of art. You can customize the design to match your personal style, using different containers, colors, and arrangements to create a truly unique and eye-catching feature.
But the benefits don’t stop there. Gardening, in general, is known to be therapeutic and stress-relieving. The simple act of nurturing plants, watching them grow, and harvesting your own food can be incredibly rewarding and fulfilling. It’s a chance to connect with nature, unwind from the daily grind, and cultivate a sense of accomplishment.
Now, for some suggestions and variations to take your DIY Lettuce Vertical Garden to the next level:
* Experiment with different lettuce varieties: From crisp romaine to buttery butterhead, there’s a whole world of lettuce to explore. Try growing a mix of varieties for a diverse and flavorful salad bowl.
* Incorporate companion plants: Certain herbs and flowers can help deter pests and attract beneficial insects to your lettuce garden. Consider planting basil, marigolds, or nasturtiums alongside your lettuce.
* Get creative with your containers: Don’t limit yourself to traditional pots and planters. You can repurpose old pallets, plastic bottles, or even hanging shoe organizers to create a unique and eco-friendly vertical garden.
* Add a self-watering system: To simplify maintenance and ensure your lettuce stays hydrated, consider installing a simple drip irrigation system or using self-watering containers.
* Consider the lighting: Lettuce needs adequate sunlight to thrive. If you’re growing your vertical garden in a shady area, you may need to supplement with artificial lighting.
We are confident that you will find this project rewarding. We encourage you to embark on this exciting journey and create your own DIY Lettuce Vertical Garden. Don’t be afraid to experiment, get creative, and most importantly, have fun! And once you’ve reaped the rewards of your labor, we’d love to hear about your experience. Share your photos, tips, and stories with us in the comments below. Let’s inspire each other to grow more food and create more beautiful and sustainable spaces. Happy gardening!
Frequently Asked Questions (FAQ)
What type of lettuce grows best in a vertical garden?
Many lettuce varieties thrive in vertical gardens. Loose-leaf varieties like Black Seeded Simpson, Salad Bowl, and Red Sails are excellent choices because they are easy to harvest and continue to produce leaves throughout the growing season. Butterhead varieties like Buttercrunch and Tom Thumb also do well, offering a tender and flavorful option. Romaine lettuce can be grown vertically, but it may require slightly larger containers to accommodate its larger size. Ultimately, the best type of lettuce depends on your personal preferences and the specific growing conditions in your area. Experiment with different varieties to see which ones perform best in your DIY Lettuce Vertical Garden.
How often should I water my vertical lettuce garden?
Watering frequency depends on several factors, including the type of container you’re using, the weather conditions, and the type of soil. Generally, you should water your lettuce when the top inch of soil feels dry to the touch. During hot, dry weather, you may need to water daily or even twice a day. In cooler, more humid conditions, you may only need to water every few days. Overwatering can lead to root rot, so it’s important to ensure that your containers have adequate drainage. Consider using a moisture meter to accurately gauge the moisture level in the soil. Also, remember that vertical gardens tend to dry out faster than traditional gardens due to increased air circulation.
What kind of soil should I use for my DIY Lettuce Vertical Garden?
A well-draining, nutrient-rich potting mix is ideal for growing lettuce in a vertical garden. Avoid using garden soil, as it can be too heavy and compact, hindering drainage and root growth. Look for a potting mix that contains a blend of peat moss, perlite, and vermiculite. You can also amend your potting mix with compost or other organic matter to improve its fertility and water-holding capacity. Consider using a potting mix specifically formulated for vegetables, as it will contain the necessary nutrients for healthy lettuce growth.
How much sunlight does lettuce need in a vertical garden?
Lettuce needs at least six hours of sunlight per day to thrive. However, it can tolerate partial shade, especially during the hottest part of the day. If you’re growing your vertical garden in a location that receives less than six hours of sunlight, you may need to supplement with artificial lighting. Grow lights can provide the necessary light spectrum for healthy lettuce growth. When positioning your vertical garden, consider the direction of the sun and choose a location that receives ample sunlight throughout the day.
How do I protect my lettuce from pests and diseases in a vertical garden?
Vertical gardens can be less susceptible to certain pests and diseases compared to traditional gardens, but it’s still important to take preventative measures. Regularly inspect your lettuce plants for signs of pests, such as aphids, slugs, and snails. Handpick any pests you find or use organic pest control methods, such as insecticidal soap or neem oil. To prevent diseases, ensure that your lettuce plants have good air circulation and avoid overwatering. Remove any diseased leaves promptly to prevent the spread of infection. Consider using companion planting to deter pests and attract beneficial insects.
How do I harvest lettuce from my vertical garden?
Harvesting lettuce from a vertical garden is easy. For loose-leaf varieties, simply snip off the outer leaves as needed, leaving the inner leaves to continue growing. This cut-and-come-again method allows you to harvest lettuce continuously throughout the growing season. For head lettuce varieties, wait until the head is firm and well-formed before harvesting. Cut the head at the base of the plant, leaving about an inch of stem. Harvest lettuce in the morning, when the leaves are crisp and hydrated.
Can I grow lettuce in a vertical garden year-round?
Whether you can grow lettuce year-round in a vertical garden depends on your climate. Lettuce is a cool-season crop that prefers temperatures between 60°F and 70°F. In areas with mild winters, you may be able to grow lettuce outdoors year-round. In colder climates, you can extend the growing season by using cold frames, greenhouses, or indoor grow lights. Consider growing lettuce indoors during the winter months to enjoy fresh greens year-round.
How do I fertilize my lettuce in a vertical garden?
Lettuce needs regular fertilization to thrive in a vertical garden. Use a balanced, water-soluble fertilizer specifically formulated for vegetables. Follow the instructions on the fertilizer package for application rates and frequency. You can also amend your potting mix with compost or other organic matter to provide slow-release nutrients. Avoid over-fertilizing, as this can lead to leggy growth and bitter-tasting leaves. Consider using a liquid seaweed fertilizer to provide micronutrients and promote healthy growth.


Leave a Comment