
DIY stainless steel cleaner: sounds intimidating, right? But trust me, it’s easier than you think, and the results are dazzling! Forget those expensive, chemical-laden cleaners from the store. I’m going to show you how to whip up a powerful, eco-friendly solution using ingredients you probably already have in your pantry.
For generations, resourceful homemakers have relied on simple, natural ingredients to keep their homes sparkling. Think about it – before the age of mass-produced cleaning products, vinegar, baking soda, and lemon juice were the go-to grime fighters. This tradition of DIY cleaning isn’t just about saving money; it’s about connecting with a simpler, more sustainable way of life. And let’s be honest, there’s a certain satisfaction in knowing exactly what’s going into the products you use in your home.
Why do you need this DIY stainless steel cleaner trick? Because stainless steel, while beautiful and durable, can be a magnet for fingerprints, smudges, and water spots. Store-bought cleaners can be harsh and leave behind streaks. My simple recipe will not only clean your stainless steel appliances and surfaces effectively, but it will also leave them with a brilliant, streak-free shine. Plus, you’ll be avoiding harmful chemicals and saving money – it’s a win-win! So, let’s get started and transform your dull stainless steel into a gleaming masterpiece!
DIY Stainless Steel Cleaner: Shine Like New Without the Harsh Chemicals!
Hey everyone! I’m so excited to share my go-to recipe for a sparkling clean stainless steel finish. Forget those expensive, chemical-laden cleaners – this DIY method is not only super effective but also uses ingredients you probably already have in your pantry. I’ve been using this for years on my appliances, sinks, and even stainless steel cookware, and it always delivers amazing results. Let’s get started!
What You’ll Need
Before we dive in, let’s gather our supplies. This is a pretty simple list, which is one of the things I love about this method!
* **White Vinegar:** This is our main cleaning agent. Vinegar’s acidity helps cut through grease and grime.
* **Olive Oil:** This is the secret ingredient for that beautiful, streak-free shine.
* **Spray Bottle:** For easy application of the vinegar.
* **Two Microfiber Cloths:** One for cleaning and one for polishing. Microfiber is key for avoiding scratches.
* **Optional: Essential Oil (Lemon, Orange, or Lavender):** A few drops can help mask the vinegar smell, although it dissipates quickly.
Step-by-Step Instructions
Okay, let’s get cleaning! I promise, it’s easier than you think.
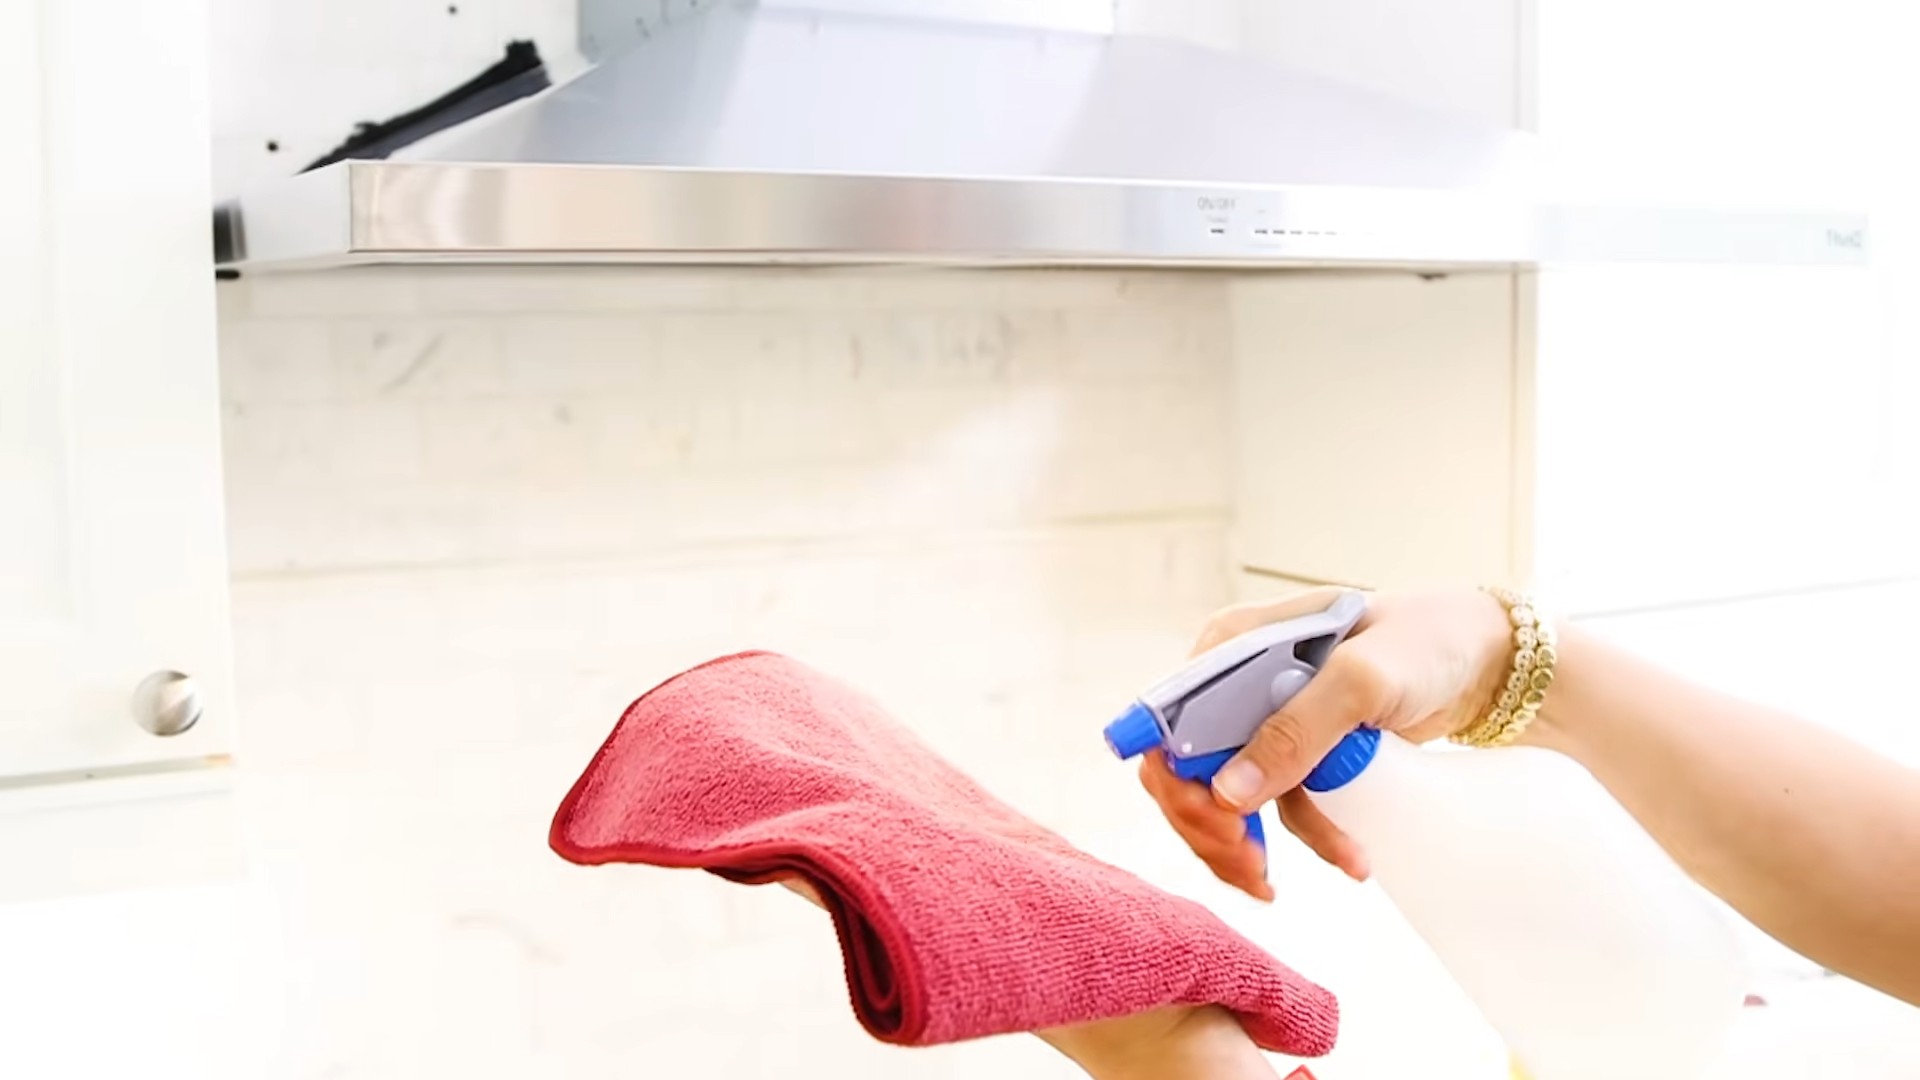
1. **Prepare Your Vinegar Solution:** Pour white vinegar into your spray bottle. I usually use it straight, but if you’re sensitive to the smell, you can dilute it with equal parts water. However, I find the undiluted vinegar works best for stubborn stains. If you’re adding essential oils, now’s the time! Just a few drops will do – I usually go for about 5-10 drops per bottle.
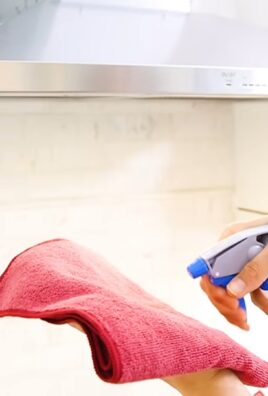
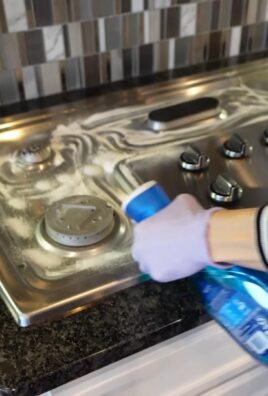
2. **Spray the Surface:** Generously spray the stainless steel surface with the vinegar solution. Make sure you cover the entire area you want to clean. Don’t be shy!
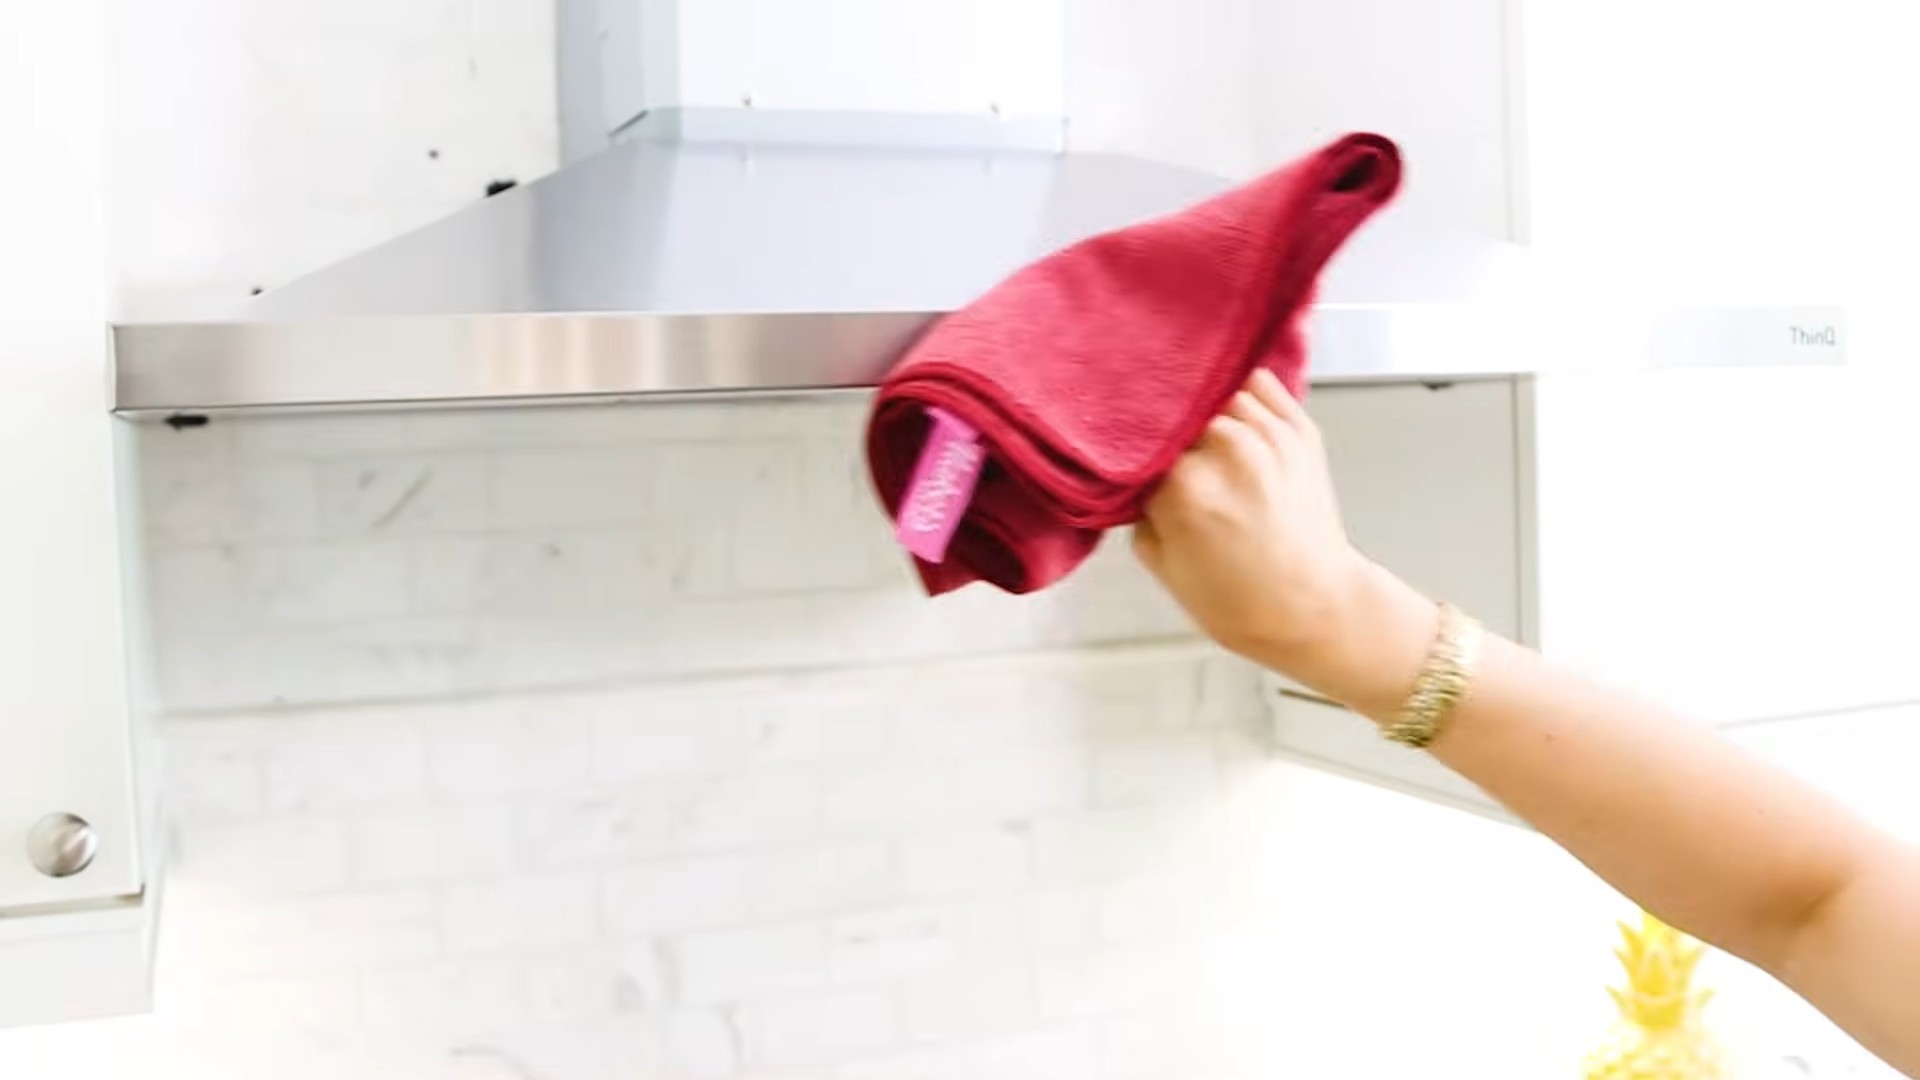
3. **Wipe Down with a Microfiber Cloth:** Using one of your microfiber cloths, wipe down the surface in the direction of the grain. This is important! Stainless steel has a grain, and wiping with it helps prevent streaks. Apply a little pressure to remove any stuck-on food or grime. For really tough spots, let the vinegar sit for a few minutes before wiping.
4. **Inspect and Repeat (If Necessary):** Take a look at the surface. Are there any areas you missed or that need a little extra attention? If so, repeat steps 2 and 3. Sometimes, especially with older appliances, you might need a second pass.
5. **The Olive Oil Magic:** Now for the secret weapon! Pour a *very* small amount of olive oil onto your second, clean microfiber cloth. I’m talking just a few drops – you don’t want to overdo it.
6. **Polish to Perfection:** Using the olive oil-dampened cloth, buff the stainless steel surface, again following the grain. This is where the magic happens! The olive oil will fill in any micro-scratches and leave a beautiful, streak-free shine.
7. **Admire Your Work!** Step back and admire your sparkling clean stainless steel! It should look brand new.
Tackling Specific Stainless Steel Challenges
Sometimes, you’ll encounter specific issues that require a slightly different approach. Here are a few tips for dealing with common stainless steel cleaning challenges:
Water Spots
Water spots are a common annoyance, especially around sinks and faucets. The vinegar solution usually takes care of them, but if you have hard water, you might need a little extra help.
* **For Mild Water Spots:** Follow the steps above, but pay extra attention to the water spot areas. You might need to apply a little more pressure when wiping.
* **For Stubborn Water Spots:** Create a paste of baking soda and water. Gently rub the paste onto the water spots, again following the grain. Rinse with water and dry thoroughly before applying the olive oil polish.
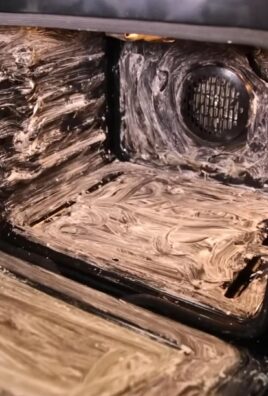
Burnt-On Food on Cookware
Burnt-on food can be a real pain to remove from stainless steel cookware. Here’s my method:
1. **Soak the Pan:** Fill the pan with hot, soapy water and let it soak for at least 30 minutes, or even overnight for really stubborn messes.
2. **Boil a Vinegar Solution:** Drain the soapy water and add a cup of vinegar to the pan. Add enough water to cover the burnt-on food. Bring the mixture to a boil and let it simmer for 10-15 minutes.
3. **Scrub Gently:** After simmering, carefully scrub the burnt-on food with a non-abrasive sponge or a nylon scrubber. The vinegar should have loosened the food, making it easier to remove.
4. **Baking Soda Paste (If Needed):** If some food remains, create a paste of baking soda and water and gently scrub the affected areas.
5. **Wash and Polish:** Wash the pan with soap and water, dry thoroughly, and then polish with a small amount of olive oil to restore the shine.
Fingerprints
Fingerprints are the bane of every stainless steel appliance owner’s existence! Luckily, the vinegar and olive oil method works wonders for removing them.
* **Quick Fix:** For a quick fingerprint fix, simply spray the affected area with the vinegar solution and wipe with a microfiber cloth. Follow with a light polish of olive oil.
* **Prevention:** While you can’t completely prevent fingerprints, regularly cleaning your stainless steel appliances will make them less noticeable.
Important Considerations
Before you start cleaning, keep these points in mind:
* **Always Test in an Inconspicuous Area:** Before cleaning your entire appliance, test the vinegar solution in a small, hidden area to ensure it doesn’t damage the finish. While I’ve never had any issues, it’s always better to be safe than sorry.
* **Avoid Abrasive Cleaners:** Never use abrasive cleaners, steel wool, or scouring pads on stainless steel. These can scratch the surface and ruin the finish.
* **Follow the Grain:** I can’t stress this enough! Always wipe and polish in the direction of the grain to avoid streaks.
* **Use Microfiber Cloths:** Microfiber cloths are gentle and effective at cleaning and polishing stainless steel. Avoid using paper towels, as they can leave lint behind.
* **Don’t Overdo the Olive Oil:** A little olive oil goes a long way. Using too much will leave a greasy residue.
Why This Method Works
So, why does this simple DIY cleaner work so well? It’s all about the properties of the ingredients:
* **Vinegar:** The acetic acid in vinegar is a natural degreaser and disinfectant. It helps to break down grease, grime, and hard water stains.
* **Olive Oil:** Olive oil is a natural polish that helps to fill in micro-scratches and create a smooth, shiny surface. It also helps to protect the stainless steel from future stains and fingerprints.
* **Microfiber Cloths:** Microfiber cloths are designed to trap dirt and grime without scratching the surface. They are also highly absorbent, which helps to remove excess cleaner and polish.
Maintaining Your Sparkling Stainless Steel
Once you’ve cleaned your stainless steel, you’ll want to keep it looking its best. Here are a few tips for maintaining your sparkling finish:
* **Regular Cleaning:** Clean your stainless steel appliances and surfaces regularly to prevent the buildup of dirt and grime. A quick wipe down with the vinegar solution and a polish with olive oil once a week should be sufficient.
* **Wipe Up Spills Immediately:** Wipe up spills immediately to prevent staining.
* **Avoid Harsh Chemicals:** Avoid using harsh chemicals or abrasive cleaners on your stainless steel.
* **Protect from Scratches:** Be careful not to scratch your stainless steel with sharp objects.
Troubleshooting
Even with the best methods, sometimes things don’t go exactly as planned. Here are a few troubleshooting tips:
* **Streaks:** If you’re seeing streaks after polishing, you’re likely using too much olive oil. Try using a clean microfiber cloth to buff away the excess oil.
* **Dull Finish:** If your stainless steel looks dull after cleaning, it could be due to hard water buildup. Try using a water softener or a water filter to reduce the mineral content of your water.
* **Rust:** While stainless steel is resistant to rust, it can still occur in certain conditions. If you see rust, try using a stainless steel cleaner specifically designed to remove rust.
I hope you found this guide helpful! I’m confident that this DIY stainless steel cleaner will leave your appliances and surfaces looking their absolute best. Happy cleaning!
Conclusion
So, there you have it! Ditching the expensive, chemical-laden store-bought cleaners and embracing this simple, effective DIY stainless steel cleaner is a game-changer for your kitchen and beyond. Not only will you save money and reduce your environmental impact, but you’ll also achieve a streak-free shine that rivals, and often surpasses, commercial products. The beauty of this method lies in its simplicity and the readily available ingredients you likely already have in your pantry.
Think of the possibilities! Beyond your refrigerator and dishwasher, this cleaner works wonders on stainless steel sinks, cookware, and even outdoor grills. For tougher stains or baked-on grease, consider letting the baking soda paste sit for a longer period before scrubbing. You can also experiment with adding a few drops of your favorite essential oil, like lemon or tea tree, for an extra boost of freshness and antibacterial properties. Just be sure to test it in an inconspicuous area first to ensure it doesn’t react with the stainless steel finish.
Another variation to consider is using white vinegar instead of distilled water for an extra degreasing punch. The acidity of the vinegar helps to cut through grease and grime, leaving your stainless steel sparkling clean. However, be mindful of the smell, which can be quite strong. Ensure adequate ventilation when using vinegar and rinse thoroughly with water afterward.
This isn’t just about cleaning; it’s about taking control of the products you use in your home and making conscious choices that benefit both your health and the environment. It’s about rediscovering the power of simple, natural ingredients and achieving exceptional results.
We wholeheartedly encourage you to give this DIY stainless steel cleaner a try. You’ll be amazed at how easy it is to make and how effectively it cleans. Don’t be surprised if you find yourself reaching for this homemade solution over your old store-bought cleaner time and time again.
But don’t just take our word for it! We want to hear about your experiences. Did you try any of the variations we suggested? Did you discover any new uses for this cleaner? Share your tips, tricks, and before-and-after photos in the comments below. Let’s build a community of DIY enthusiasts who are passionate about creating a cleaner, healthier home. Your feedback is invaluable and will help others discover the magic of this simple yet powerful cleaning solution. So go ahead, give it a whirl, and let us know what you think! We’re confident you’ll be thrilled with the results.
Frequently Asked Questions (FAQ)
1. What type of stainless steel is this DIY cleaner safe for?
This DIY stainless steel cleaner is generally safe for most types of stainless steel finishes commonly found in household appliances and cookware. However, it’s always a good idea to test it in an inconspicuous area first, especially if you have a brushed or specialty finish. Apply a small amount of the cleaner to a hidden spot, let it sit for a few minutes, and then wipe it away. If you don’t notice any discoloration or damage, it’s likely safe to use on the rest of the surface. Avoid using abrasive scrub brushes on brushed stainless steel, as this can scratch the surface. Opt for a soft cloth or sponge instead.
2. Can I use tap water instead of distilled water?
While distilled water is recommended for the best results, tap water can be used as a substitute. However, tap water often contains minerals that can leave spots or streaks on stainless steel. If you use tap water, be sure to dry the surface thoroughly with a clean, dry cloth to prevent water spots. Distilled water is preferred because it is free of these minerals, resulting in a cleaner, streak-free finish. If you have hard water, using distilled water will make a noticeable difference in the final result.
3. How often should I clean my stainless steel appliances with this DIY cleaner?
The frequency of cleaning depends on how often you use your appliances and how prone they are to smudges and fingerprints. For appliances that are frequently touched, such as refrigerators and dishwashers, cleaning once or twice a week is generally sufficient. For less frequently used items, such as stainless steel cookware, cleaning after each use is recommended to prevent food buildup and stains. Regular cleaning will also help to maintain the shine and prevent the buildup of stubborn grime.
4. What if I don’t have baking soda? Can I use something else?
Baking soda is a key ingredient in this DIY stainless steel cleaner due to its mild abrasive properties, which help to remove dirt and grime without scratching the surface. If you don’t have baking soda on hand, you can try using cream of tartar as a substitute. Cream of tartar is also a mild abrasive and can help to remove stains and polish stainless steel. However, it may not be as effective as baking soda for removing tougher stains. Another option is to use a mild dish soap diluted in water, but this may not provide the same level of cleaning power as baking soda.
5. How do I remove stubborn water spots from my stainless steel?
Stubborn water spots can be a challenge to remove from stainless steel. For persistent water spots, try using a solution of equal parts white vinegar and water. Spray the solution onto the affected area, let it sit for a few minutes, and then wipe it away with a clean, dry cloth. You can also try using a commercial stainless steel cleaner specifically designed to remove water spots. Be sure to follow the manufacturer’s instructions carefully. Another tip is to dry your stainless steel appliances immediately after cleaning to prevent water spots from forming in the first place.
6. Can I use this cleaner on stainless steel sinks?
Yes, this DIY stainless steel cleaner is excellent for cleaning stainless steel sinks. The baking soda helps to remove food particles and stains, while the water helps to rinse away the residue. For extra cleaning power, you can sprinkle baking soda directly into the sink and scrub with a damp sponge. Rinse thoroughly with water and dry with a clean cloth to prevent water spots. You can also use the vinegar variation mentioned earlier for extra degreasing power in the sink.
7. Is this cleaner safe for use around children and pets?
Yes, this DIY stainless steel cleaner is generally safe for use around children and pets, as it is made with natural ingredients. However, it’s always a good idea to keep cleaning products out of reach of children and pets to prevent accidental ingestion. While the ingredients are non-toxic, consuming large amounts of baking soda or vinegar can cause stomach upset. As with any cleaning product, it’s best to exercise caution and supervise children and pets when cleaning.
8. How should I store the leftover DIY stainless steel cleaner?
If you have leftover DIY stainless steel cleaner, you can store it in an airtight container at room temperature. It’s best to use it within a few days, as the baking soda may settle to the bottom of the container over time. Before using, simply shake the container to redistribute the ingredients. You can also store the cleaner in a spray bottle for easy application. Be sure to label the container clearly to avoid confusion.
9. My stainless steel has scratches. Will this cleaner remove them?
Unfortunately, this DIY stainless steel cleaner will not remove existing scratches from stainless steel. While it can help to clean and polish the surface, it will not repair any physical damage. For removing scratches, you may need to use a specialized stainless steel scratch repair kit or consult with a professional. These kits typically contain abrasive compounds that can help to buff out the scratches. However, it’s important to use these kits carefully, as improper use can cause further damage.
10. Can I add essential oils to this cleaner? Which ones are best?
Yes, you can add a few drops of essential oil to this DIY stainless steel cleaner for added fragrance and antibacterial properties. Some popular choices include lemon, tea tree, lavender, and eucalyptus. Lemon essential oil is known for its degreasing properties, while tea tree oil has antibacterial and antifungal benefits. Lavender and eucalyptus essential oils can provide a pleasant scent and help to create a calming atmosphere. When adding essential oils, start with just a few drops and adjust the amount to your preference. Be sure to test the cleaner in an inconspicuous area first to ensure that the essential oil doesn’t react with the stainless steel finish.
Leave a Comment