
DIY Vertical Vegetable Garden: Imagine stepping outside your door and harvesting fresh, flavorful vegetables, even if you only have a tiny balcony or patio! For centuries, humans have sought innovative ways to cultivate food in limited spaces. From the Hanging Gardens of Babylon to the ingenious terrace farming techniques of ancient civilizations, the desire to maximize yields in minimal areas is deeply ingrained in our history.
But you don’t need to be an ancient engineer to enjoy the benefits of space-saving gardening. In today’s world, where urban living is increasingly common, and access to fresh produce can be a challenge, a DIY vertical vegetable garden offers a fantastic solution. It’s not just about growing food; it’s about connecting with nature, reducing your carbon footprint, and enjoying the satisfaction of nurturing your own little ecosystem.
This article is your ultimate guide to creating your own thriving vertical garden. I’ll walk you through everything from choosing the right materials and plants to building your structure and maintaining your garden for a bountiful harvest. Get ready to transform your small space into a green oasis and enjoy the delicious rewards of homegrown vegetables!
DIY Vertikaler Gemüsegarten: Platzsparend und Ertragreich!
Hallo liebe Gartenfreunde! Habt ihr auch das Problem, dass euer Garten zu klein ist, aber ihr trotzdem frisches Gemüse anbauen wollt? Keine Sorge, ich habe die perfekte Lösung für euch: einen vertikalen Gemüsegarten! Das ist nicht nur platzsparend, sondern sieht auch noch richtig schick aus. Und das Beste: Ihr könnt ihn ganz einfach selbst bauen. Los geht’s!
Was ihr für euren vertikalen Garten braucht:
* Holzpaletten: Am besten sind Euro-Paletten, da sie stabil und leicht zu bearbeiten sind. Achtet darauf, dass sie unbehandelt sind und keine Schadstoffe enthalten.
* Gartenvlies: Zum Auskleiden der Pflanzkästen.
* Tackergerät: Zum Befestigen des Gartenvlieses.
* Tackerklammern: Passend zum Tackergerät.
* Erde: Hochwertige Pflanzerde für Gemüse.
* Gemüsepflanzen oder Samen: Je nachdem, was ihr anbauen möchtet.
* Handschuhe: Zum Schutz eurer Hände.
* Schere oder Cuttermesser: Zum Zuschneiden des Gartenvlieses.
* Schleifpapier: Zum Glätten der Holzpalette (optional).
* Holzschutzlasur: Zum Schutz des Holzes vor Witterungseinflüssen (optional).
* Messwerkzeug: Zollstock oder Maßband
* Bohrmaschine mit Holzbohrer: Für eventuelle Reparaturen oder Verstärkungen.
* Schrauben: Passend zur Bohrmaschine, für eventuelle Reparaturen oder Verstärkungen.
Schritt-für-Schritt-Anleitung: So baut ihr euren vertikalen Garten
1. Palette vorbereiten: Zuerst solltet ihr die Palette gründlich reinigen. Entfernt lose Holzsplitter und Erde. Wenn ihr möchtet, könnt ihr die Palette auch abschleifen, um sie glatter zu machen. Das ist aber kein Muss. Ich persönlich finde den rustikalen Look ganz charmant.
2. Palette prüfen und reparieren (optional): Überprüft die Palette auf Beschädigungen. Lockere Bretter könnt ihr mit Schrauben und der Bohrmaschine wieder befestigen. So stellt ihr sicher, dass euer vertikaler Garten stabil ist.
3. Holzschutz auftragen (optional): Wenn ihr die Palette vor Witterungseinflüssen schützen möchtet, könnt ihr eine Holzschutzlasur auftragen. Lasst die Lasur gut trocknen, bevor ihr mit dem nächsten Schritt fortfahrt. Das verlängert die Lebensdauer eures vertikalen Gartens erheblich.
4. Pflanzkästen auskleiden: Jetzt kommt der wichtigste Teil: das Auskleiden der Pflanzkästen mit Gartenvlies. Schneidet das Gartenvlies so zu, dass es die einzelnen Fächer der Palette komplett auskleidet. Lasst dabei etwas Überstand, damit ihr das Vlies gut festtackern könnt.
5. Gartenvlies befestigen: Mit dem Tackergerät befestigt ihr das Gartenvlies an den Innenseiten der Pflanzkästen. Achtet darauf, dass das Vlies gut sitzt und keine Löcher entstehen. Das Vlies verhindert, dass die Erde herausfällt und schützt das Holz vor Feuchtigkeit.
6. Erde einfüllen: Füllt die Pflanzkästen mit hochwertiger Pflanzerde. Achtet darauf, dass die Erde locker und luftig ist, damit die Wurzeln der Pflanzen gut wachsen können. Ich empfehle spezielle Gemüseerde, da diese bereits mit wichtigen Nährstoffen angereichert ist.
7. Pflanzen einsetzen: Jetzt könnt ihr eure Gemüsepflanzen oder Samen einsetzen. Achtet darauf, dass die Pflanzen genügend Platz haben und die Erde gut angedrückt wird. Gießt die Pflanzen anschließend gründlich.
8. Gießen und pflegen: Gießt eure Pflanzen regelmäßig und düngt sie bei Bedarf. Achtet darauf, dass die Erde nicht austrocknet, aber auch nicht zu nass ist. Entfernt regelmäßig Unkraut und achtet auf Schädlinge.
Welches Gemüse eignet sich für den vertikalen Garten?
Nicht jedes Gemüse ist für den vertikalen Anbau geeignet. Besonders gut funktionieren:
* Kräuter: Basilikum, Petersilie, Schnittlauch, Thymian, Rosmarin
* Salat: Pflücksalat, Feldsalat, Rucola
* Erdbeeren: Hängeerdbeeren sind besonders dekorativ
* Radieschen: Wachsen schnell und sind unkompliziert
* Spinat: Braucht nicht viel Platz
* Kleine Tomatensorten: Buschtomaten oder Cocktailtomaten
* Paprika: Kleine Sorten sind ideal
* Chili: Bringt Farbe in den Garten
Tipps und Tricks für euren vertikalen Garten
* Standort: Wählt einen sonnigen Standort für euren vertikalen Garten. Die meisten Gemüsesorten brauchen mindestens sechs Stunden Sonne pro Tag.
* Bewässerung: Achtet darauf, dass die Erde gleichmäßig feucht ist. Besonders an heißen Tagen müsst ihr möglicherweise mehrmals täglich gießen. Eine automatische Bewässerung kann hier sehr hilfreich sein.
* Düngen: Düngt eure Pflanzen regelmäßig, um sie mit ausreichend Nährstoffen zu versorgen. Organischer Dünger ist besonders gut geeignet.
* Schädlinge: Kontrolliert eure Pflanzen regelmäßig auf Schädlinge. Bei Bedarf könnt ihr natürliche Schädlingsbekämpfungsmittel einsetzen.
* Sortenwahl: Wählt Gemüsesorten, die für den Anbau im Topf geeignet sind. Kleine Sorten sind oft besser geeignet als große.
* Kombination: Kombiniert verschiedene Gemüsesorten und Kräuter, um euren Garten abwechslungsreich zu gestalten.
* Dekoration: Verschönert euren vertikalen Garten mit kleinen Dekorationselementen wie Steinen, Muscheln oder kleinen Figuren.
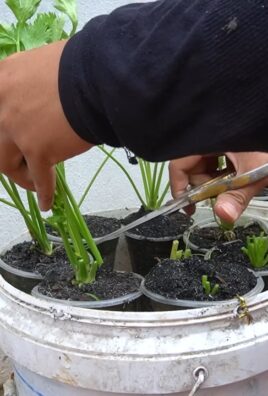
* Upcycling: Verwendet alte Töpfe, Dosen oder andere Behälter, um euren Garten noch individueller zu gestalten.
* Saison: Achtet auf die Saisonzeiten der verschiedenen Gemüsesorten. Nicht jedes Gemüse kann das ganze Jahr über angebaut werden.
* Erde: Verwendet hochwertige Pflanzerde, die speziell für Gemüse geeignet ist. Diese Erde enthält alle wichtigen Nährstoffe, die eure Pflanzen zum Wachsen brauchen.
Weitere Ideen für euren vertikalen Garten
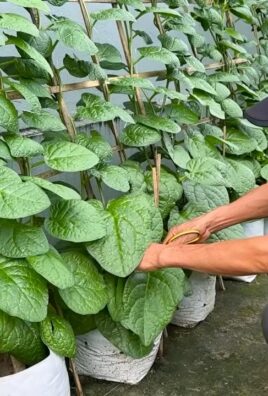
* Hängende Gärten: Ihr könnt auch einzelne Töpfe oder Körbe an einer Wand oder einem Geländer aufhängen.
* Regal-Gärten: Baut ein Regal und stellt eure Pflanzen darauf.
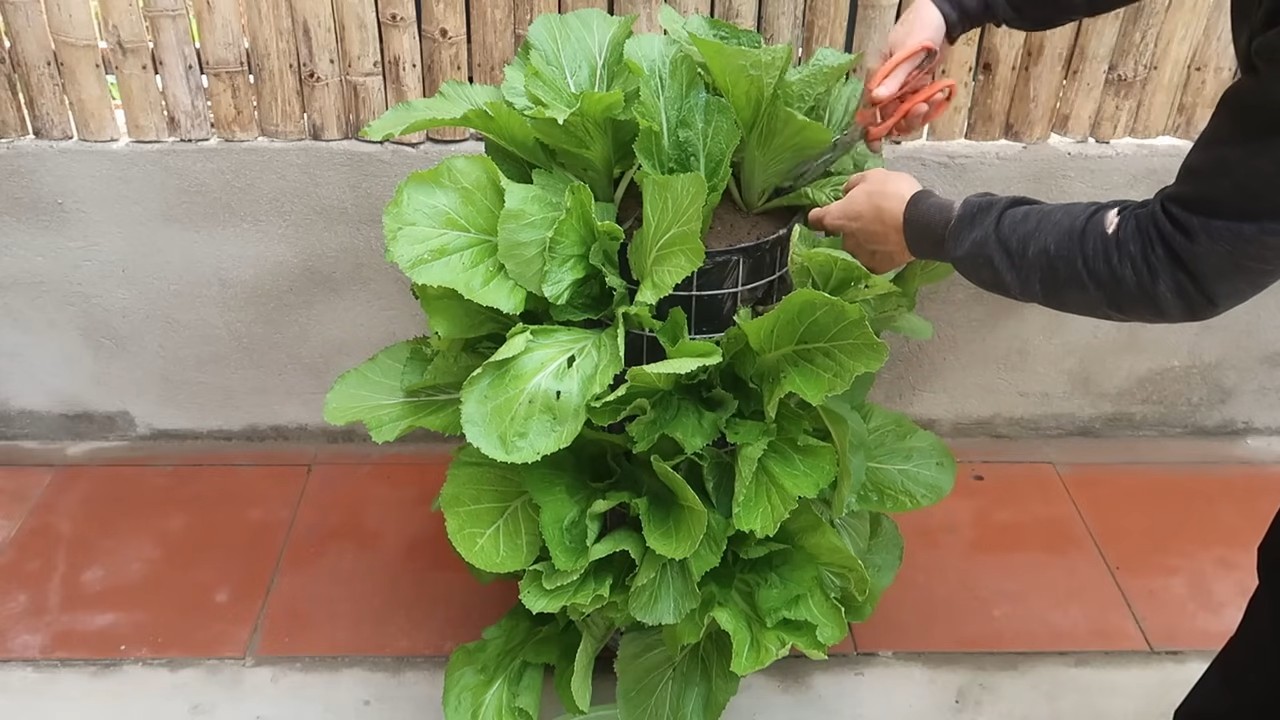
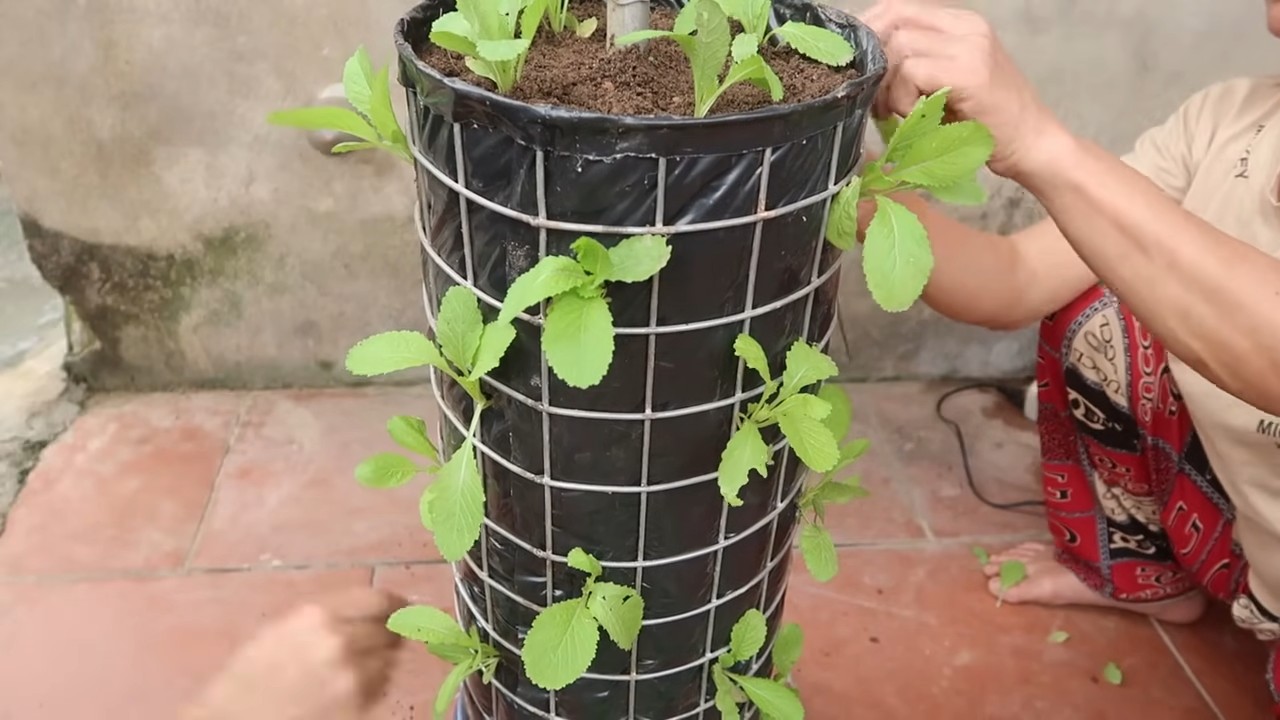
* Rohr-Gärten: Verwendet PVC-Rohre, um vertikale Pflanzgefäße zu bauen.
* Flaschen-Gärten: Schneidet Plastikflaschen auf und bepflanzt sie.
* Paletten-Gärten (Variante): Anstatt die Palette hinzustellen, könnt ihr sie auch an die Wand hängen.
Häufige Fehler vermeiden
* Falsche Erde: Verwendet keine normale Gartenerde, da diese oft zu schwer und verdichtet ist.
* Zu wenig Wasser: Achtet darauf, dass die Erde immer feucht ist, besonders an heißen Tagen.
* Zu viel Wasser: Vermeidet Staunässe, da dies zu Wurzelfäule führen kann.
* Falscher Standort: Wählt einen sonnigen Standort, aber vermeidet pralle Mittagssonne.
* Zu wenig Dünger: Düngt eure Pflanzen regelmäßig, um sie mit ausreichend Nährstoffen zu versorgen.
* Vernachlässigung: Kontrolliert eure Pflanzen regelmäßig auf Schädlinge und entfernt Unkraut.
Fazit
Ein vertikaler Gemüsegarten ist eine tolle Möglichkeit, auch auf kleinem Raum frisches Gemüse anzubauen. Mit etwas Kreativität und handwerklichem Geschick könnt ihr euren eigenen vertikalen Garten ganz einfach selbst bauen. Ich hoffe, diese Anleitung hat euch geholfen und inspiriert. Viel Spaß beim Gärtnern! Und denkt daran: Gärtnern ist nicht nur ein Hobby, sondern auch eine Lebenseinstellung! Es ist entspannend, befriedigend und gesund. Also, worauf wartet ihr noch? Ran an die Paletten und los geht’s! Ich bin gespannt auf eure Ergebnisse! Teilt eure Projekte
Conclusion
So, there you have it! Creating your own DIY vertical vegetable garden isn’t just a trendy project; it’s a game-changer for anyone looking to maximize space, enjoy fresh produce, and add a touch of green to their lives. We’ve walked you through the process, highlighting the ease and affordability of building your own vertical garden.
But why is this DIY trick a must-try? Beyond the obvious space-saving benefits, a vertical garden offers a unique opportunity to connect with nature, even in the most urban environments. Imagine stepping outside your door and harvesting fresh herbs for dinner, or plucking ripe tomatoes for a lunchtime salad. The satisfaction of growing your own food is unparalleled, and a vertical garden makes it accessible to everyone, regardless of their living situation.
Furthermore, a vertical garden is an aesthetically pleasing addition to any home. It transforms dull walls and balconies into vibrant, living art pieces. The visual appeal alone is worth the effort, but the added benefits of fresh produce and improved air quality make it an irresistible project.
Don’t be afraid to experiment with variations! Consider using different materials for your vertical structure. Repurposed pallets, stacked planters, or even hanging shoe organizers can all be transformed into functional and beautiful vertical gardens. Think about the types of plants you want to grow. Leafy greens like lettuce and spinach thrive in vertical gardens, as do herbs like basil, mint, and parsley. Strawberries and cherry tomatoes are also excellent choices for adding a pop of color and flavor.
For a truly unique touch, incorporate flowering plants into your vertical garden. Nasturtiums, petunias, and pansies not only add beauty but also attract pollinators, benefiting your vegetable plants. You can also customize your watering system. While hand-watering is perfectly acceptable, consider installing a drip irrigation system for more efficient and consistent watering, especially during hot summer months. This will save you time and ensure your plants receive the hydration they need.
Remember to choose a location that receives adequate sunlight. Most vegetables require at least six hours of sunlight per day, so select a spot that meets this requirement. If you’re limited on sunlight, consider using grow lights to supplement natural light.
The possibilities are endless when it comes to creating your own DIY vertical vegetable garden. It’s a project that’s both rewarding and sustainable, allowing you to enjoy fresh, homegrown produce while minimizing your environmental impact.
We wholeheartedly encourage you to give this DIY trick a try. It’s easier than you think, and the benefits are immeasurable. Once you’ve built your own vertical garden, we’d love to hear about your experience! Share your photos, tips, and challenges in the comments below. Let’s create a community of vertical gardeners and inspire others to embrace this innovative and rewarding way of growing food. Let us know what kind of **DIY vertical vegetable garden** you created!
FAQ
What are the best vegetables to grow in a DIY vertical vegetable garden?
The best vegetables for a vertical garden are those that don’t require a lot of space for their root systems and can tolerate being grown in containers. Leafy greens like lettuce, spinach, kale, and arugula are excellent choices. Herbs such as basil, mint, parsley, chives, and oregano also thrive in vertical gardens. Smaller fruiting vegetables like strawberries, cherry tomatoes, peppers (especially smaller varieties), and bush beans are also well-suited for vertical growing. Avoid large, sprawling vegetables like pumpkins, watermelons, and corn, as they require too much space and support. Consider the mature size of the plant when selecting your vegetables to ensure they have enough room to grow.
How much sunlight does my DIY vertical vegetable garden need?
Most vegetables require at least six hours of direct sunlight per day to thrive. However, some leafy greens and herbs can tolerate partial shade (4-6 hours of sunlight). Observe the sunlight patterns in your chosen location throughout the day to determine if it’s suitable for your desired plants. If you don’t have enough natural sunlight, you can supplement with grow lights. LED grow lights are energy-efficient and can provide the necessary light spectrum for healthy plant growth. Place the grow lights close enough to the plants to provide adequate illumination, but not so close that they burn the leaves.
What type of soil should I use for my DIY vertical vegetable garden?
Use a high-quality potting mix specifically formulated for container gardening. Avoid using garden soil, as it can be too heavy and compacted for containers, hindering drainage and root growth. A good potting mix should be lightweight, well-draining, and contain essential nutrients for plant growth. You can also amend your potting mix with compost or other organic matter to improve its fertility and water retention. Consider adding perlite or vermiculite to further enhance drainage and aeration.
How often should I water my DIY vertical vegetable garden?
The frequency of watering depends on several factors, including the type of plants, the weather conditions, and the type of containers you’re using. Generally, you should water your vertical garden when the top inch of soil feels dry to the touch. Water thoroughly until water drains out of the bottom of the containers. Avoid overwatering, as this can lead to root rot. During hot, dry weather, you may need to water your plants more frequently. Consider using a moisture meter to accurately assess the moisture level in the soil. A drip irrigation system can also be a convenient way to ensure consistent watering.
How do I fertilize my DIY vertical vegetable garden?
Vegetables grown in containers require regular fertilization, as the nutrients in the potting mix are quickly depleted. Use a balanced, water-soluble fertilizer specifically formulated for vegetables. Follow the instructions on the fertilizer packaging for application rates and frequency. You can also use organic fertilizers such as compost tea, fish emulsion, or seaweed extract. Apply fertilizer every 2-4 weeks during the growing season. Avoid over-fertilizing, as this can burn the roots of your plants.
How do I prevent pests and diseases in my DIY vertical vegetable garden?
Prevention is key when it comes to pests and diseases. Start by using healthy, disease-resistant plants. Inspect your plants regularly for signs of pests or diseases. Remove any infected leaves or plants immediately. Encourage beneficial insects such as ladybugs and lacewings, which prey on common garden pests. You can also use organic pest control methods such as insecticidal soap, neem oil, or diatomaceous earth. Ensure good air circulation around your plants to prevent fungal diseases. Avoid overcrowding your plants and water them in the morning to allow the foliage to dry before nightfall.
Can I grow a DIY vertical vegetable garden indoors?
Yes, you can grow a vertical vegetable garden indoors, but you’ll need to provide adequate light. As mentioned earlier, use grow lights to supplement natural light. Choose vegetables that tolerate lower light conditions, such as lettuce, spinach, kale, and herbs. Ensure good air circulation and proper drainage to prevent fungal diseases. You may also need to pollinate your plants manually if you’re growing fruiting vegetables indoors.
What are some creative ideas for building a DIY vertical vegetable garden?
The possibilities are endless when it comes to building a vertical garden! Repurpose old pallets by attaching fabric or plastic liners to create planting pockets. Use stacked planters to create a tiered effect. Hang planters from a fence or balcony railing. Create a living wall by attaching planters to a vertical surface. Use repurposed plastic bottles or tin cans as individual planters. Build a frame from wood or metal and attach wire mesh to create a climbing structure for vining vegetables. Get creative and use materials you already have on hand to build a unique and functional vertical garden.

Leave a Comment