
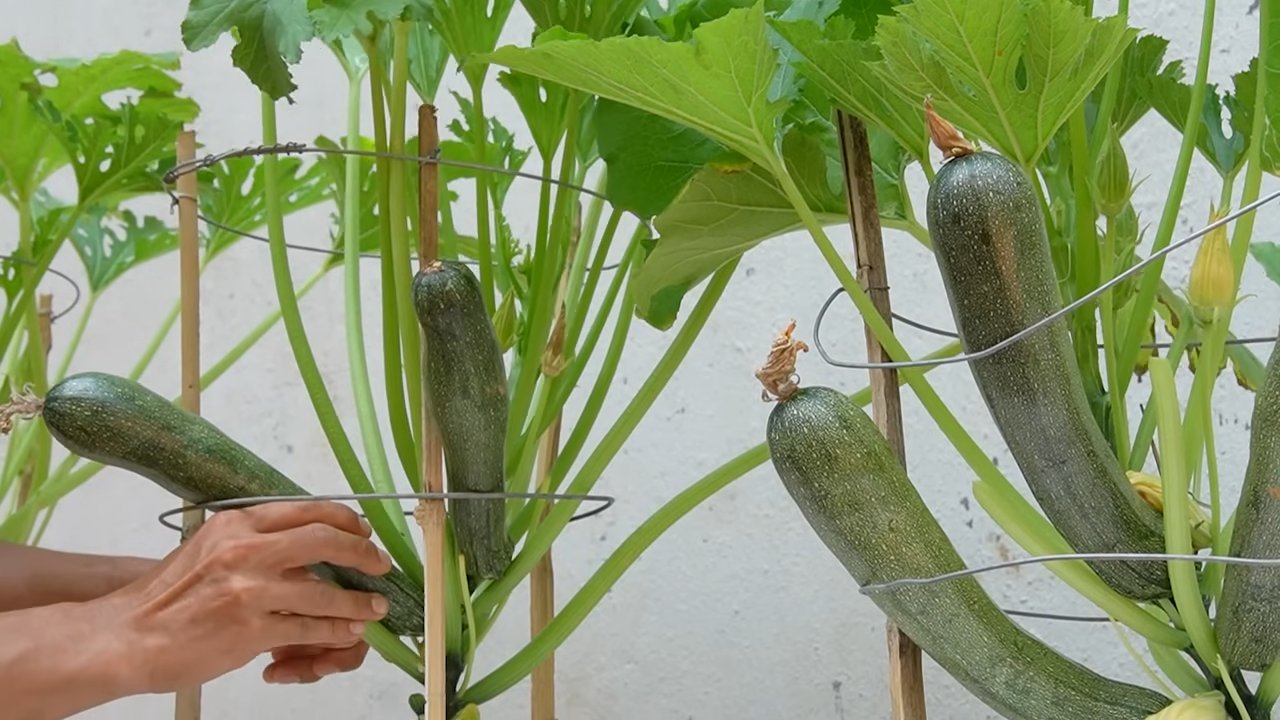
Easy zucchini growing solution is what every gardener dreams of, right? Imagine baskets overflowing with vibrant, versatile zucchini, ready for everything from delicious breads to savory stir-fries. But let’s be honest, sometimes growing zucchini feels less like a dream and more like a battle against pests, diseases, and just plain unpredictable weather.
For centuries, zucchini, a relative newcomer to the gardening scene compared to its squash cousins, has been a staple in Mediterranean cuisine. Its ease of cultivation quickly made it a favorite worldwide. However, that ease can be deceptive! Many gardeners struggle with common zucchini woes, like powdery mildew or blossom end rot.
That’s where these DIY tricks and hacks come in! I’m here to share my tried-and-true methods for achieving a bountiful zucchini harvest, even if you’re a beginner or have limited space. We’ll tackle everything from soil preparation to pest control, ensuring you have the easy zucchini growing solution you’ve been searching for. Say goodbye to frustrating gardening experiences and hello to a zucchini abundance that will have you sharing with neighbors and experimenting with new recipes all season long!
Grow Zucchinis Like a Pro: My Foolproof DIY Self-Watering System
Hey there, fellow gardening enthusiasts! Are you dreaming of overflowing baskets of zucchini but dread the constant watering? I totally get it! Zucchinis are thirsty plants, and keeping them consistently hydrated can be a real chore, especially during those scorching summer months. But don’t worry, I’ve got you covered! I’m going to share my super simple, incredibly effective DIY self-watering system that will have your zucchini plants thriving with minimal effort on your part. Trust me, this is a game-changer!
This project is perfect for beginners, requires minimal tools, and uses readily available materials. Get ready to say goodbye to daily watering and hello to a zucchini bonanza!
What You’ll Need:
Before we dive in, let’s gather our supplies. Here’s what you’ll need to build your own self-watering zucchini oasis:
* Two Large Plastic Buckets (5-gallon or larger): These will form the reservoir and the growing container. Make sure they’re food-grade if you’re concerned about chemicals leaching into your soil.
* Drill with Various Drill Bits: You’ll need a larger bit for drainage holes and a smaller bit for the wicking system.
* Wicking Material (Old T-shirts, Microfiber Cloths, or Rope): This is the heart of the system, drawing water up to the plant. I prefer using strips of old t-shirts because they’re absorbent and readily available.
* Potting Soil: Choose a high-quality potting mix that drains well. Zucchinis love rich soil!
* Gravel or Small Rocks: This will create a drainage layer at the bottom of the growing container.
* Measuring Tape or Ruler: For accurate hole placement.
* Scissors or Utility Knife: For cutting the wicking material.
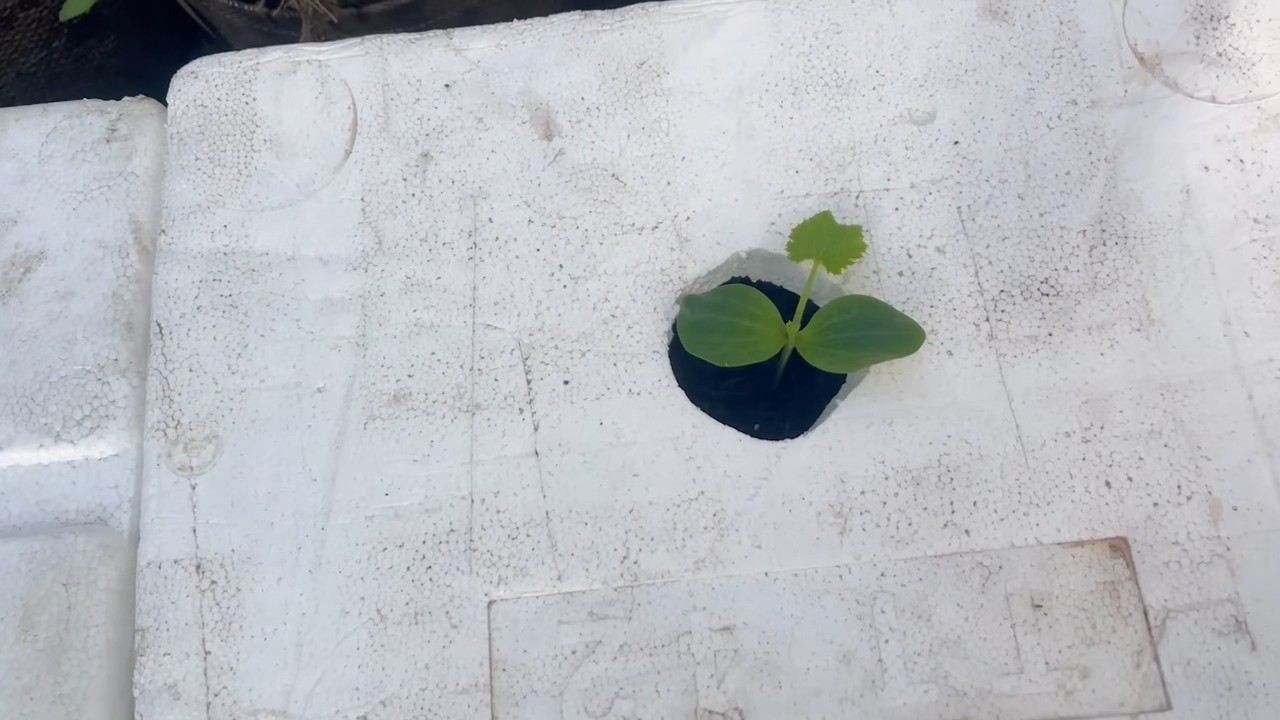
* Zucchini Seedling or Seeds: Of course, you’ll need something to grow!
* Water: The lifeblood of our system!
* Optional: Mulch: To help retain moisture and suppress weeds.
Building Your Self-Watering Zucchini Paradise: Step-by-Step
Alright, let’s get our hands dirty! Follow these steps carefully, and you’ll have your self-watering system up and running in no time.
1. Prepare the Bottom Bucket (Reservoir): This bucket will hold the water that feeds your zucchini plant. No modifications are needed for this bucket, it will serve as the base.
2. Prepare the Top Bucket (Growing Container): This is where the magic happens! We’ll be modifying this bucket to create the perfect environment for your zucchini.
* Drill Drainage Holes: Using your drill and a large drill bit (around 1/2 inch), drill several drainage holes in the bottom of the top bucket. These holes will prevent the soil from becoming waterlogged. I usually drill about 6-8 holes, evenly spaced.
* Drill Wicking Holes: Now, using a smaller drill bit (around 1/4 inch), drill holes near the bottom of the bucket, about 2-3 inches from the base. These holes are for the wicking material to pass through. Drill 3-4 holes, evenly spaced around the bucket.
3. Prepare the Wicking Material: Cut your chosen wicking material into strips that are long enough to reach the bottom of the reservoir bucket and extend a few inches into the growing container. For t-shirt strips, I usually cut them about 2 inches wide and 24 inches long. You’ll need one strip for each wicking hole you drilled.
4. Install the Wicking System: Thread one end of each wicking strip through the wicking holes you drilled in the top bucket. Make sure a good portion of the strip is inside the bucket, ready to be buried in the soil. The other end of the strip should hang down outside the bucket, ready to be submerged in the water reservoir.
5. Add Drainage Layer: Pour a layer of gravel or small rocks into the bottom of the top bucket. This layer will improve drainage and prevent the soil from clogging the wicking holes. A layer of about 2-3 inches is ideal.
6. Add Potting Soil: Fill the top bucket with your chosen potting soil, leaving a few inches of space at the top. Gently press down on the soil to remove any air pockets.
7. Plant Your Zucchini: Now for the exciting part! If you’re using a seedling, carefully remove it from its container and plant it in the center of the top bucket. If you’re starting from seeds, follow the instructions on the seed packet for planting depth and spacing.
8. Position the Top Bucket: Carefully place the top bucket (the growing container) inside the bottom bucket (the reservoir). Make sure the ends of the wicking strips are submerged in the bottom bucket.
9. Add Water to the Reservoir: Fill the bottom bucket with water, making sure the wicking strips are fully submerged. Don’t overfill it; leave a few inches of space at the top to prevent spills.
10. Mulch (Optional): Add a layer of mulch around the base of your zucchini plant. This will help retain moisture, suppress weeds, and regulate soil temperature.
Maintaining Your Self-Watering System: A Few Tips
Now that your self-watering system is set up, here are a few tips to keep your zucchini plant happy and healthy:
* Monitor the Water Level: Check the water level in the reservoir regularly, especially during hot weather. Refill as needed. The frequency will depend on the size of your plant and the weather conditions.
* Fertilize Regularly: Even with a self-watering system, your zucchini plant will still need nutrients. Fertilize regularly with a balanced fertilizer, following the instructions on the fertilizer package.
* Check for Pests and Diseases: Keep an eye out for common zucchini pests and diseases, such as squash bugs, squash vine borers, and powdery mildew. Take action promptly if you notice any problems.
* Rotate Your Crops: To prevent soil depletion and the buildup of pests and diseases, rotate your crops each year. Don’t plant zucchini in the same spot year after year.
* Harvest Regularly: Zucchinis grow quickly, so harvest them regularly to encourage continued production. The ideal size for harvesting is usually around 6-8 inches long.
* Consider Sunlight: Zucchinis need at least 6-8 hours of sunlight per day to thrive. Place your self-watering system in a sunny location.
* Wicking Material Maintenance: Over time, the wicking material might become clogged with soil or algae. Periodically check the wicking strips and replace them if necessary. This will ensure that the system continues to function efficiently.
* Winter Storage: If you live in an area with cold winters, you’ll need to protect your self-watering system from freezing. Either bring the entire system indoors or empty the reservoir and store the buckets in a sheltered location.
Troubleshooting: Common Issues and Solutions
Even with the best planning, you might encounter a few hiccups along the way. Here are some common issues and how to fix them:
* Plant Wilting: If your zucchini plant is wilting, even though the reservoir is full, the wicking system might not be working properly. Check the wicking strips to make sure they’re not clogged or damaged. You might need to replace them. Also, ensure the soil is not compacted and allows for proper water distribution.
* Soil Too Wet: If the soil is constantly soggy, you might have too many drainage holes or the wicking system is too efficient. Try reducing the number of drainage holes or using a less absorbent wicking material.
* Algae Growth in the Reservoir: Algae growth is common in water reservoirs, especially in sunny locations. It’s not usually harmful to the plant, but it can be unsightly. To prevent algae growth, try adding a small amount of hydrogen peroxide to the water or covering the reservoir with a dark-colored lid.
* Pest Infestation: Zucchinis are susceptible to various pests, such as aphids, squash bugs, and squash vine borers. Regularly inspect your plants for signs of infestation and take appropriate action, such as using insecticidal soap or hand-picking the pests.
Why This System Works So Well
The beauty of this DIY self-watering system lies in its simplicity and effectiveness. Here’s why it works so well:
* Consistent Moisture: The wicking system provides a constant supply of water to the plant’s roots, preventing the soil from drying out. This is crucial for zucchini plants, which are heavy feeders and require consistent moisture.
* Reduced Watering Frequency: You’ll only need to refill the reservoir every few days, depending on the weather conditions. This saves you time and effort, especially during hot summer months.
* Improved Drainage: The drainage holes and gravel layer prevent the soil from becoming waterlogged, which can
Conclusion
So, there you have it! This simple, yet incredibly effective, DIY trick for boosting your zucchini harvest is a game-changer for any gardener, regardless of experience level. We’ve walked you through the process, highlighting the ease and affordability of this method. But why is this a must-try? Because it addresses the core needs of zucchini plants – consistent moisture, nutrient delivery, and protection from common pests – all in one fell swoop.
Imagine a garden overflowing with vibrant green zucchini, ready to be transformed into delicious dishes. This isn’t just a pipe dream; it’s an achievable reality with this easy zucchini growing solution. The consistent watering provided by the buried bottle ensures your plants never suffer from drought stress, leading to larger, more abundant fruits. The slow release of nutrients from the compost tea directly to the roots promotes vigorous growth and prevents nutrient deficiencies. And the physical barrier created by the bottle and surrounding mulch helps deter slugs, snails, and other ground-dwelling pests that can wreak havoc on your precious zucchini crop.
But don’t just take our word for it! We encourage you to experiment and adapt this method to suit your specific gardening conditions. For example, if you live in an area with particularly heavy rainfall, you might want to slightly elevate the bottle to prevent waterlogging. Or, if you’re dealing with a specific pest problem, consider adding companion plants like marigolds or nasturtiums around your zucchini plants to further deter them.
Variations to Consider:
* Bottle Size: While a standard wine bottle works well, you can adjust the size depending on the size of your zucchini plant and the frequency with which you want to refill it. Larger plants may benefit from a larger bottle.
* Compost Tea Recipe: Feel free to experiment with different compost tea recipes. You can use a variety of organic materials, such as worm castings, aged manure, or even kitchen scraps (avoiding meat and dairy).
* Mulch Type: While straw mulch is a great option, you can also use other organic mulches like wood chips, shredded leaves, or even grass clippings. Just make sure the mulch is free from weed seeds.
* Fertilizer Alternatives: If you don’t have compost tea readily available, you can use a diluted liquid fertilizer specifically formulated for vegetables. Just be sure to follow the instructions on the label carefully.
This DIY trick isn’t just about growing zucchini; it’s about fostering a deeper connection with your garden and understanding the needs of your plants. It’s about empowering yourself to create a thriving ecosystem in your own backyard.
So, what are you waiting for? Grab a bottle, gather your supplies, and get ready to witness the magic of this easy zucchini growing solution. We’re confident that you’ll be amazed by the results.
And most importantly, we want to hear about your experience! Share your photos, tips, and variations in the comments below. Let’s create a community of zucchini enthusiasts who are passionate about growing healthy, delicious food. Your insights could inspire others to try this method and transform their own gardens. Happy gardening!
Frequently Asked Questions (FAQ)
What type of bottle works best for this method?
A standard glass wine bottle works perfectly well for this DIY trick. However, you can also use plastic bottles, although glass is generally preferred for its durability and resistance to degradation in the sun. The size of the bottle can be adjusted depending on the size of your zucchini plant and how often you want to refill it. For larger plants, consider using a larger bottle to provide a more consistent supply of water and nutrients. Make sure to thoroughly clean any bottle before using it to avoid introducing harmful bacteria or chemicals to your soil.
How often should I refill the bottle with compost tea?
The frequency of refilling the bottle will depend on several factors, including the size of the bottle, the size of your zucchini plant, the weather conditions, and the type of soil you have. As a general rule, check the bottle every few days and refill it when it’s about half empty. During hot, dry weather, you may need to refill it more frequently. Observe your plants closely for signs of stress, such as wilting leaves, and adjust your watering schedule accordingly. Over time, you’ll develop a better understanding of your plants’ needs and how often to refill the bottle.
Can I use this method for other plants besides zucchini?
Yes, this DIY trick can be adapted for use with other plants that benefit from consistent moisture and nutrient delivery. Tomatoes, peppers, cucumbers, and squash are all good candidates. The key is to adjust the size of the bottle and the type of compost tea or fertilizer to suit the specific needs of the plant. For example, tomatoes may benefit from a compost tea that is higher in phosphorus, while leafy greens may prefer a compost tea that is higher in nitrogen. Experiment and observe your plants closely to determine what works best for them.
What if I don’t have compost tea? Can I use something else?
If you don’t have compost tea readily available, you can use a diluted liquid fertilizer specifically formulated for vegetables. Be sure to follow the instructions on the label carefully to avoid over-fertilizing your plants. Another option is to use a diluted solution of seaweed extract or fish emulsion, which are both excellent sources of micronutrients. You can also make your own compost tea by steeping a bag of compost in water for a few days. Just be sure to dilute the tea before using it to avoid burning your plants.
Will this method attract pests to my garden?
While this method can help deter some pests, it’s important to take other measures to protect your plants from infestation. Regularly inspect your plants for signs of pests, such as aphids, whiteflies, or squash bugs. Handpick any pests that you find and dispose of them properly. You can also use organic pest control methods, such as insecticidal soap or neem oil, to control infestations. Companion planting, such as planting marigolds or nasturtiums around your zucchini plants, can also help deter pests.
How deep should I bury the bottle?
The bottle should be buried deep enough so that the neck of the bottle is just above the soil surface. This will allow you to easily refill the bottle without disturbing the roots of your zucchini plant. Make sure to pack the soil firmly around the bottle to prevent it from tipping over. You can also use a small stake to support the bottle if necessary.
What kind of soil is best for growing zucchini with this method?
Zucchini plants thrive in well-drained, fertile soil that is rich in organic matter. Before planting, amend your soil with compost, aged manure, or other organic materials to improve its drainage and fertility. The ideal soil pH for zucchini is between 6.0 and 7.5. You can test your soil pH using a soil testing kit and adjust it accordingly.
How much sunlight do zucchini plants need?
Zucchini plants need at least 6-8 hours of direct sunlight per day to thrive. Choose a planting location that receives plenty of sunlight throughout the day. If you live in a hot climate, you may want to provide some afternoon shade to protect your plants from scorching.
What are some common problems that zucchini plants face, and how can this method help?
Common problems include powdery mildew, squash vine borers, and blossom end rot. This method helps by providing consistent moisture, which can prevent blossom end rot. The improved soil health from the compost tea can also make the plants more resistant to diseases like powdery mildew. While it doesn’t directly address squash vine borers, a healthy, vigorous plant is better able to withstand pest damage. Regular monitoring and other pest control methods are still recommended.
How can I tell if my zucchini plant is getting too much or not enough water, even with this method?
Even with this DIY trick, it’s important to monitor your plants for signs of overwatering or underwatering. Overwatered zucchini plants may have yellowing leaves, stunted growth, and root rot. Underwatered plants may have wilting leaves, dry soil, and small, underdeveloped fruits. Adjust your watering schedule accordingly to ensure that your plants are receiving the right amount of moisture. The beauty of this method is that it provides a consistent supply of water, reducing the risk of both overwatering and underwatering.


Leave a Comment