
Grow Basil Indoors and unlock a world of fresh, aromatic flavor right at your fingertips! Imagine plucking vibrant green basil leaves straight from your kitchen windowsill to add a burst of freshness to your pasta, salads, or homemade pesto. No more last-minute grocery store runs or settling for wilted, lackluster herbs. This isn’t just about convenience; it’s about connecting with nature and enjoying the simple pleasure of nurturing your own food.
Basil, a herb revered for centuries, boasts a rich history deeply intertwined with various cultures. From ancient medicinal uses to its symbolic representation of love and good fortune in Italian folklore, basil has always held a special place in our hearts and kitchens. But let’s be honest, sometimes life gets in the way, and maintaining a thriving outdoor basil patch can feel like a daunting task. That’s where the magic of indoor gardening comes in!
I’m here to share some easy-to-follow DIY tricks and hacks that will empower you to grow basil indoors successfully, regardless of your experience level. Whether you’re a seasoned gardener or a complete beginner, these tips will help you create the perfect environment for your basil to flourish. Say goodbye to expensive store-bought herbs and hello to a constant supply of fresh, flavorful basil, ready to elevate your culinary creations. Let’s get started!

Grow Your Own Delicious Basil Indoors: A Beginner’s Guide
Hey there, fellow plant enthusiasts! Ever dreamt of having fresh, fragrant basil right at your fingertips, no matter the season? Well, dream no more! I’m going to walk you through the surprisingly simple process of growing basil indoors. Trust me, even if you think you have a “black thumb,” you can totally do this. Let’s get started!
What You’ll Need
Before we dive in, let’s gather our supplies. Having everything ready beforehand will make the whole process smoother and more enjoyable.
* Basil Seeds: Choose your favorite variety! Genovese is a classic, but lemon basil, Thai basil, or purple basil are also fantastic options. You can find these at most garden centers or online.
* Seed Starting Tray or Small Pots: These are perfect for getting your seeds started. Make sure they have drainage holes!
* Seed Starting Mix: This is a light, airy soil specifically designed for seedlings. It provides the perfect environment for germination.
* Potting Soil: Once your seedlings are big enough, you’ll need potting soil for their permanent homes.
* Pots (4-6 inches in diameter): These will be the final homes for your basil plants.
* Grow Light (Optional, but Recommended): Especially if you don’t have a super sunny windowsill, a grow light will make a huge difference.
* Watering Can or Spray Bottle: For gentle watering.
* Small Shovel or Spoon: For transferring seedlings.
* Plant Food (Optional): A balanced liquid fertilizer can help your basil thrive.
Starting Your Basil Seeds
This is where the magic begins! We’re going to coax those tiny seeds into becoming beautiful, fragrant basil plants.
1. Prepare Your Seed Starting Tray or Pots: Fill your seed starting tray or small pots with seed starting mix. Gently pat it down to remove any large air pockets, but don’t pack it too tightly.
2. Sow the Seeds: Sprinkle a few basil seeds on top of the soil in each cell or pot. Basil seeds are tiny, so don’t overdo it. A few seeds per cell is plenty.
3. Cover the Seeds Lightly: Sprinkle a very thin layer of seed starting mix over the seeds. They need light to germinate, so don’t bury them too deep.
4. Water Gently: Use a spray bottle or watering can with a gentle nozzle to moisten the soil. You want it to be damp, but not soggy.
5. Create a Humid Environment: Cover the seed starting tray with a clear plastic lid or plastic wrap to create a humid environment. This will help the seeds germinate. If you’re using individual pots, you can place them inside a clear plastic bag.
6. Place in a Warm Location: Basil seeds germinate best in warm temperatures (around 70-75°F). Place your seed starting tray or pots in a warm spot, like on top of your refrigerator or near a radiator.
7. Monitor and Water: Check the soil moisture daily. Keep the soil consistently moist, but not waterlogged. Remove the plastic lid or bag for a few hours each day to allow for air circulation and prevent mold growth.
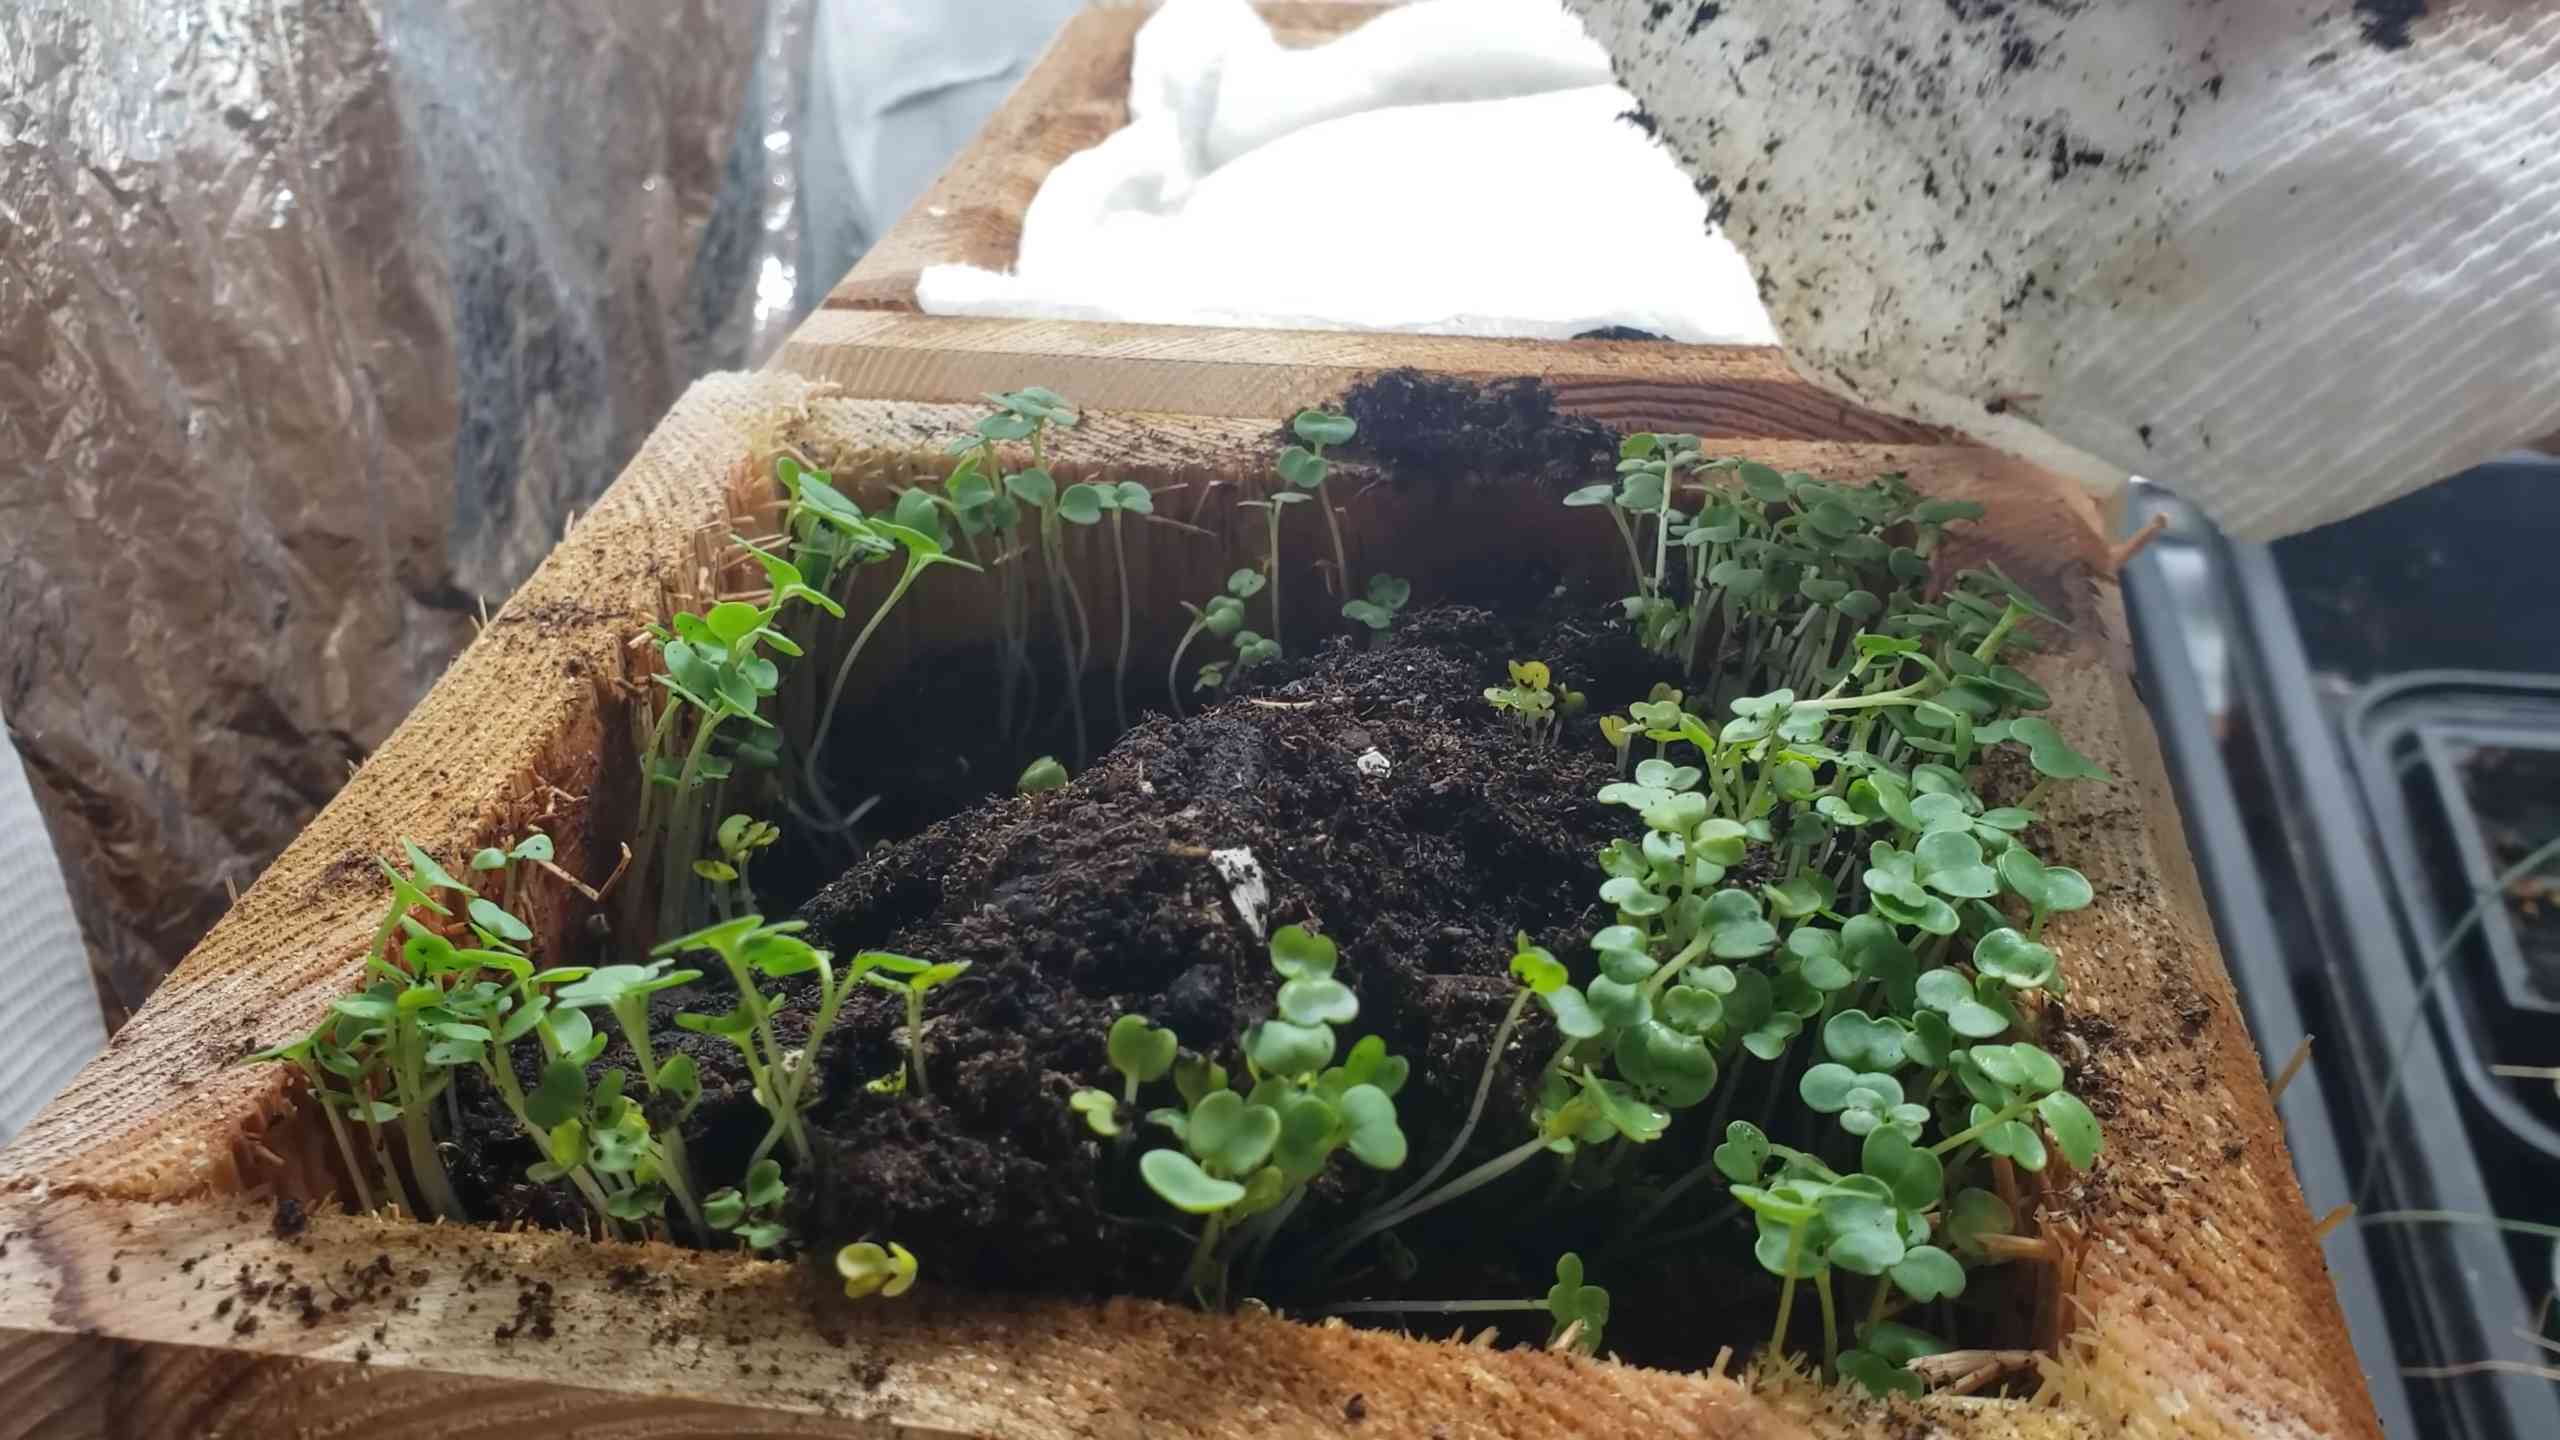
8. Wait for Germination: Basil seeds typically germinate in 5-10 days. Once you see sprouts, remove the plastic lid or bag completely.
Transplanting Your Basil Seedlings
Once your seedlings have developed a few sets of true leaves (the leaves that look like miniature basil leaves, not just the initial seed leaves), it’s time to transplant them into their permanent pots.
1. Prepare Your Pots: Fill your 4-6 inch pots with potting soil. Again, gently pat it down to remove air pockets.
2. Carefully Remove the Seedlings: Gently loosen the soil around the seedlings with a small spoon or fork. Carefully lift the seedlings out of the seed starting tray or pots, being careful not to damage the roots. If you have multiple seedlings growing in one cell, gently separate them, trying to keep as much of the root system intact as possible.
3. Plant the Seedlings: Make a small hole in the center of the potting soil in each pot. Place the seedling in the hole and gently cover the roots with soil.
4. Water Thoroughly: Water the transplanted seedlings thoroughly, until water drains out of the bottom of the pot.
5. Provide Adequate Light: Place your basil plants in a sunny windowsill that receives at least 6 hours of direct sunlight per day. If you don’t have a sunny windowsill, use a grow light. Position the grow light a few inches above the plants and keep it on for 12-16 hours per day.
Caring for Your Indoor Basil Plants
Now that your basil plants are settled in their new homes, it’s time to provide them with the care they need to thrive.
1. Watering: Water your basil plants when the top inch of soil feels dry to the touch. Avoid overwatering, as this can lead to root rot. Make sure the pot has good drainage.
2. Fertilizing: Feed your basil plants with a balanced liquid fertilizer every 2-4 weeks. Follow the instructions on the fertilizer label.
3. Pruning: Pruning is essential for keeping your basil plants bushy and productive. When the plants are about 6 inches tall, pinch off the top set of leaves. This will encourage the plant to branch out and produce more leaves. Continue to pinch off the top sets of leaves regularly to maintain a bushy shape.
4. Pest Control: Keep an eye out for pests, such as aphids or spider mites. If you notice any pests, treat your plants with insecticidal soap or neem oil.
5. Harvesting: You can start harvesting basil leaves as soon as the plants are large enough. Simply pinch off the leaves as needed. To encourage continued growth, harvest the leaves from the top of the plant.
Troubleshooting
Even with the best care, you might encounter a few challenges along the way. Here are some common problems and how to fix them:
* Yellowing Leaves: This could be a sign of overwatering, underwatering, or nutrient deficiency. Check the soil moisture and adjust your watering accordingly. If the soil is consistently moist, allow it to dry out slightly before watering again. If the soil is dry, water thoroughly. If you suspect a nutrient deficiency, fertilize your plants with a balanced liquid fertilizer.
* Leggy Growth: This is usually caused by insufficient light. Move your plants to a sunnier location or provide them with a grow light.
* Slow Growth: This could be due to a variety of factors, including insufficient light, poor soil, or nutrient deficiency. Make sure your plants are getting enough light, are planted in well-draining potting soil, and are being fertilized regularly.
* Pests: As mentioned earlier, keep an eye out for pests and treat them promptly with insecticidal soap or neem oil.
Enjoy Your Fresh Basil!
And there you have it! You’re now equipped with the knowledge to grow your own delicious basil indoors. With a little care and attention, you’ll be enjoying fresh, fragrant basil all year round. Use it in your favorite recipes, make pesto, or simply enjoy the aroma. Happy gardening!
Conclusion
So, there you have it! Mastering the art of growing basil indoors is not only achievable but also incredibly rewarding. We’ve walked you through the essential steps, from selecting the right variety and providing optimal lighting to ensuring proper watering and addressing potential challenges. But why is this DIY trick a must-try?
Firstly, imagine the convenience of having fresh, fragrant basil readily available at your fingertips, regardless of the season. No more last-minute trips to the grocery store or settling for dried herbs that lack the vibrant flavor of fresh basil. With your own indoor basil garden, you can elevate your culinary creations with a burst of authentic, homegrown goodness.
Secondly, growing basil indoors is a sustainable and cost-effective way to enjoy this beloved herb. You’ll reduce your reliance on commercially grown basil, which often involves pesticides and long-distance transportation. Plus, you’ll save money in the long run by avoiding frequent purchases of fresh basil from the store.
Thirdly, the process of nurturing a plant from seed or cutting to a thriving herb is incredibly satisfying. It’s a tangible connection to nature that can bring joy and a sense of accomplishment to your daily life. Watching your basil plants flourish under your care is a truly rewarding experience.
But the possibilities don’t end there! Feel free to experiment with different varieties of basil to discover your favorites. Try growing Genovese basil for classic pesto, Thai basil for Asian-inspired dishes, or lemon basil for a citrusy twist. You can also explore different growing methods, such as hydroponics or aquaponics, for a more advanced and sustainable approach.
Consider companion planting your basil with other herbs like rosemary or thyme, or even vegetables like tomatoes or peppers. Companion planting can help deter pests, improve growth, and enhance the flavor of your plants.
Don’t be afraid to get creative with your indoor basil garden. Use decorative pots and containers to add a touch of style to your home. Create a vertical garden on a sunny wall or windowsill. Or even start a small herb garden as a thoughtful and personalized gift for friends and family.
We strongly encourage you to embark on this exciting journey of growing basil indoors. It’s a simple, affordable, and rewarding way to enhance your culinary experiences, connect with nature, and add a touch of green to your home.
Once you’ve tried it, we’d love to hear about your experience! Share your tips, tricks, and photos with us in the comments section below. Let’s build a community of indoor basil growers and inspire others to discover the joys of homegrown herbs. Happy growing!
Frequently Asked Questions (FAQ)
What is the best type of basil to grow indoors?
The best type of basil to grow indoors depends on your personal preferences and culinary needs. However, some popular and well-suited varieties include Genovese basil (for classic pesto), Thai basil (for Asian cuisine), lemon basil (for a citrusy flavor), and dwarf basil (for smaller spaces). Genovese basil is a reliable choice for beginners due to its ease of growth and versatility. Consider the size of your growing space when choosing a variety; dwarf basil is an excellent option if you have limited space. Experimenting with different varieties is a great way to discover your favorite flavors and aromas.
How much sunlight does indoor basil need?
Basil requires a significant amount of sunlight to thrive indoors. Aim for at least 6-8 hours of direct sunlight per day. A south-facing window is typically the best option, as it provides the most intense sunlight. If you don’t have access to sufficient natural light, you can supplement with artificial grow lights. LED grow lights are a popular choice due to their energy efficiency and ability to provide the full spectrum of light that basil needs. Position the grow lights about 6-12 inches above the plants and keep them on for 14-16 hours per day. Insufficient light can lead to leggy growth and reduced flavor.
How often should I water my indoor basil?
Watering frequency depends on several factors, including the size of the pot, the type of potting mix, and the ambient temperature. Generally, you should water your basil when the top inch of soil feels dry to the touch. Avoid overwatering, as this can lead to root rot. Ensure that the pot has drainage holes to allow excess water to escape. When watering, water deeply until water drains out of the bottom of the pot. During warmer months, you may need to water more frequently. Check the soil moisture regularly and adjust your watering schedule accordingly.
What kind of soil is best for growing basil indoors?
Basil prefers well-draining soil that is rich in organic matter. A good potting mix for basil should consist of a combination of peat moss, perlite, and vermiculite. You can also add compost or other organic amendments to improve the soil’s fertility and drainage. Avoid using garden soil, as it can be too heavy and may contain pests or diseases. A slightly acidic to neutral pH (around 6.0-7.0) is ideal for basil growth.
How do I fertilize my indoor basil plants?
Basil plants benefit from regular fertilization, especially during the growing season. Use a balanced liquid fertilizer diluted to half strength every 2-4 weeks. Look for a fertilizer with an N-P-K ratio of around 10-10-10 or 20-20-20. Avoid over-fertilizing, as this can lead to excessive foliage growth at the expense of flavor. Organic fertilizers, such as compost tea or fish emulsion, are also excellent options.
How do I harvest basil leaves from my indoor plants?
Harvesting basil leaves regularly encourages bushier growth and prevents the plant from flowering prematurely. To harvest, pinch or cut off the leaves just above a leaf node (the point where leaves emerge from the stem). Start harvesting when the plant is about 6-8 inches tall. Avoid removing more than one-third of the plant’s leaves at any one time. Regularly pinching off the flower buds will also help to prolong the plant’s productive life.
What are some common problems when growing basil indoors?
Some common problems when growing basil indoors include pests (such as aphids, spider mites, and whiteflies), diseases (such as fungal infections), and nutrient deficiencies. Regularly inspect your plants for signs of pests or diseases. If you detect any problems, take action promptly to prevent them from spreading. Use insecticidal soap or neem oil to control pests. Ensure that your plants have adequate air circulation to prevent fungal diseases. If you notice yellowing leaves or stunted growth, it may be a sign of nutrient deficiency. Adjust your fertilization schedule accordingly.
Can I grow basil from seed indoors?
Yes, you can easily grow basil from seed indoors. Start seeds indoors 6-8 weeks before the last expected frost. Sow the seeds in a seed-starting tray or small pots filled with seed-starting mix. Keep the soil moist and warm (around 70-75°F). The seeds should germinate in about 5-10 days. Once the seedlings have developed a few sets of true leaves, you can transplant them into larger pots.
Can I propagate basil from cuttings indoors?
Yes, propagating basil from cuttings is a quick and easy way to create new plants. Take a 4-6 inch cutting from a healthy basil plant, removing the lower leaves. Place the cutting in a glass of water, ensuring that the lower nodes are submerged. Change the water every few days. Roots should start to develop in about 1-2 weeks. Once the roots are about an inch long, you can transplant the cutting into a pot filled with potting mix.
How do I keep my indoor basil plant from getting leggy?
Leggy growth in basil is often caused by insufficient light. Ensure that your plants are receiving at least 6-8 hours of direct sunlight per day or are supplemented with artificial grow lights. Regularly pinching off the top growth will also encourage bushier growth and prevent the plant from becoming leggy.

Leave a Comment