
Grow Bay Leaf Cuttings: Unlock the secrets to propagating your own aromatic bay laurel at home! Have you ever dreamt of having a constant supply of fresh bay leaves for your culinary creations, without ever having to run to the store? Well, dream no more! This DIY guide will walk you through the surprisingly simple process of taking cuttings from your existing bay leaf plant and nurturing them into thriving new trees.
The bay laurel, or Laurus nobilis, boasts a rich history, deeply intertwined with ancient Greek and Roman cultures. Wreaths of bay leaves were awarded to victors, heroes, and scholars, symbolizing glory and triumph. Imagine bringing that same sense of accomplishment to your own garden by successfully propagating these iconic plants!
But beyond the historical significance, learning how to grow bay leaf cuttings is incredibly practical. Bay leaves can be quite expensive to buy fresh, and dried leaves often lack the vibrant flavor of their freshly picked counterparts. Plus, propagating your own plants is a sustainable and rewarding way to expand your garden and share the bounty with friends and family. I’m excited to share these simple steps with you, so you can enjoy the fresh, aromatic flavor of homegrown bay leaves whenever you desire. Let’s get started!
Propagating Bay Laurel: A DIY Guide to Growing Your Own Bay Leaf Tree from Cuttings
Hey there, fellow plant enthusiasts! Have you ever dreamed of having a constant supply of fresh bay leaves right in your backyard? Well, I’m here to tell you it’s totally achievable, and it’s easier than you might think! Forget buying those dried-up leaves from the grocery store; we’re going to learn how to propagate bay laurel ( *Laurus nobilis* ) from cuttings. This DIY project is not only rewarding but also a fantastic way to expand your herb garden on a budget. Let’s dive in!
What You’ll Need
Before we get started, let’s gather all the necessary materials. Trust me, having everything ready beforehand will make the whole process smoother and more enjoyable.
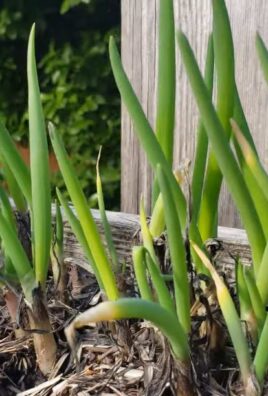
* Healthy Bay Laurel Tree: Obviously, you’ll need a source for your cuttings. Choose a mature, healthy bay laurel tree that’s free from pests and diseases.
* Sharp, Clean Pruning Shears or Knife: This is crucial! Dull or dirty tools can damage the cuttings and introduce diseases. I always sterilize my tools with rubbing alcohol before using them.
* Rooting Hormone: This isn’t strictly necessary, but it significantly increases your chances of success. I prefer using a powdered rooting hormone, but liquid versions work too.
* Small Pots or Containers: You’ll need pots to plant your cuttings in. I recommend using pots that are at least 3-4 inches in diameter.
* Well-Draining Potting Mix: Bay laurel cuttings need a well-draining medium to prevent root rot. A mix of perlite, vermiculite, and peat moss works well. You can also use a commercial seed-starting mix.
* Clear Plastic Bags or a Humidity Dome: These will help create a humid environment for your cuttings, which is essential for successful rooting.
* Spray Bottle with Water: For misting the cuttings to keep them hydrated.
* Labels and a Pen: To keep track of your cuttings and their progress.
* Optional: Heat Mat: A heat mat can help speed up the rooting process, especially in cooler climates.
Taking the Cuttings: The Foundation of Success
The timing of taking cuttings is important. I’ve found that late spring or early summer is the best time, as the bay laurel tree is actively growing.
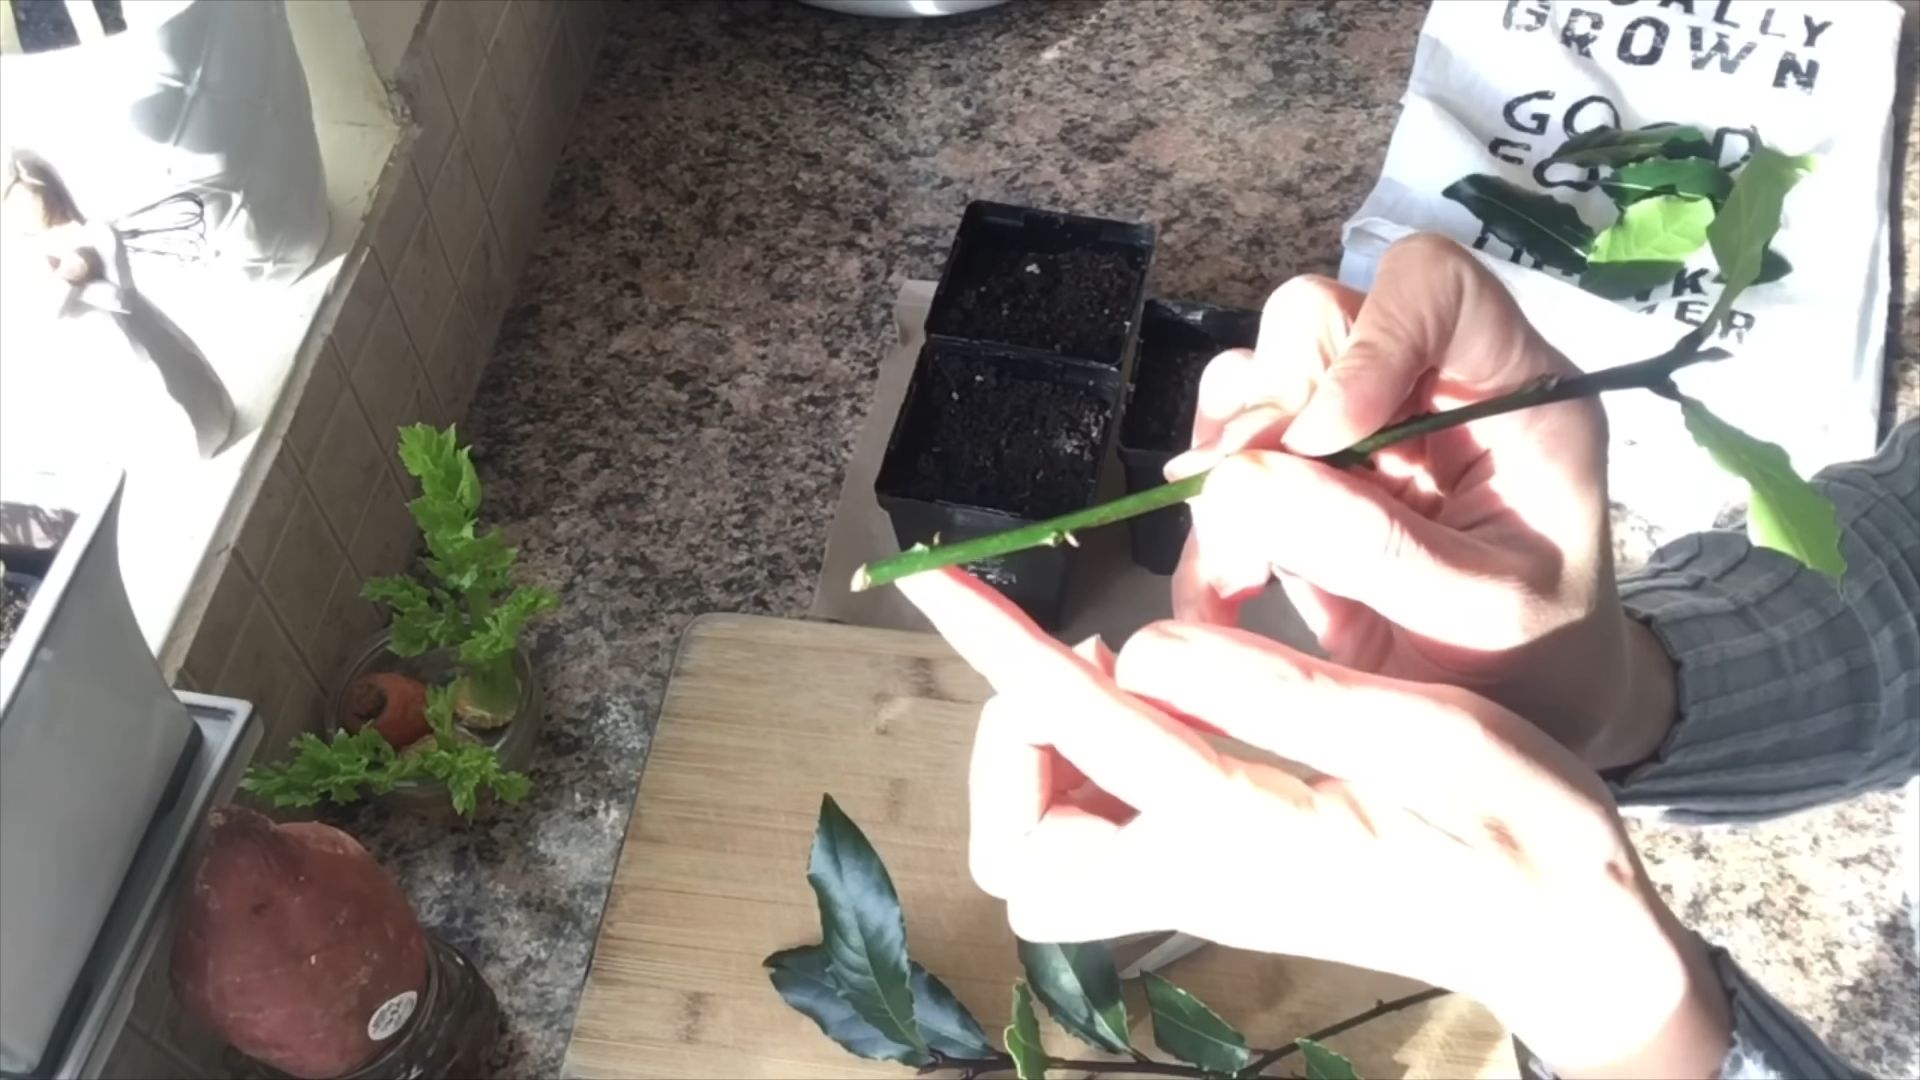
1. Choose the Right Stems: Look for semi-hardwood stems that are about 4-6 inches long. These are stems that have started to mature but are still somewhat flexible. Avoid stems that are too young and green or too old and woody.
2. Make the Cut: Using your sterilized pruning shears or knife, make a clean, angled cut just below a node (the point where a leaf or branch grows from the stem). An angled cut increases the surface area for root development.
3. Remove Lower Leaves: Remove the leaves from the bottom 1-2 inches of the cutting. This will prevent the leaves from rotting when they’re buried in the potting mix. Be careful not to damage the stem while removing the leaves.
4. Prepare the Cutting: If the remaining leaves are very large, you can cut them in half to reduce moisture loss. This helps the cutting conserve energy while it’s trying to root.
Planting the Cuttings: Giving Them a Home
Now that we have our cuttings, it’s time to give them a place to call home.
1. Prepare the Pots: Fill your pots with the well-draining potting mix. Gently tap the pots to settle the mix.
2. Apply Rooting Hormone: Moisten the bottom inch of the cutting and dip it into the rooting hormone powder. Tap off any excess powder. This step is optional, but I highly recommend it for better results.
3. Plant the Cutting: Use a pencil or your finger to create a hole in the potting mix. Carefully insert the cutting into the hole, making sure that the bottom 1-2 inches are buried. Gently firm the soil around the cutting to secure it in place.
4. Water Thoroughly: Water the cuttings thoroughly until the water drains out of the bottom of the pot. This will help settle the soil and provide the cuttings with the moisture they need to start rooting.
Creating a Humid Environment: The Key to Rooting
Bay laurel cuttings need a humid environment to prevent them from drying out before they can develop roots.
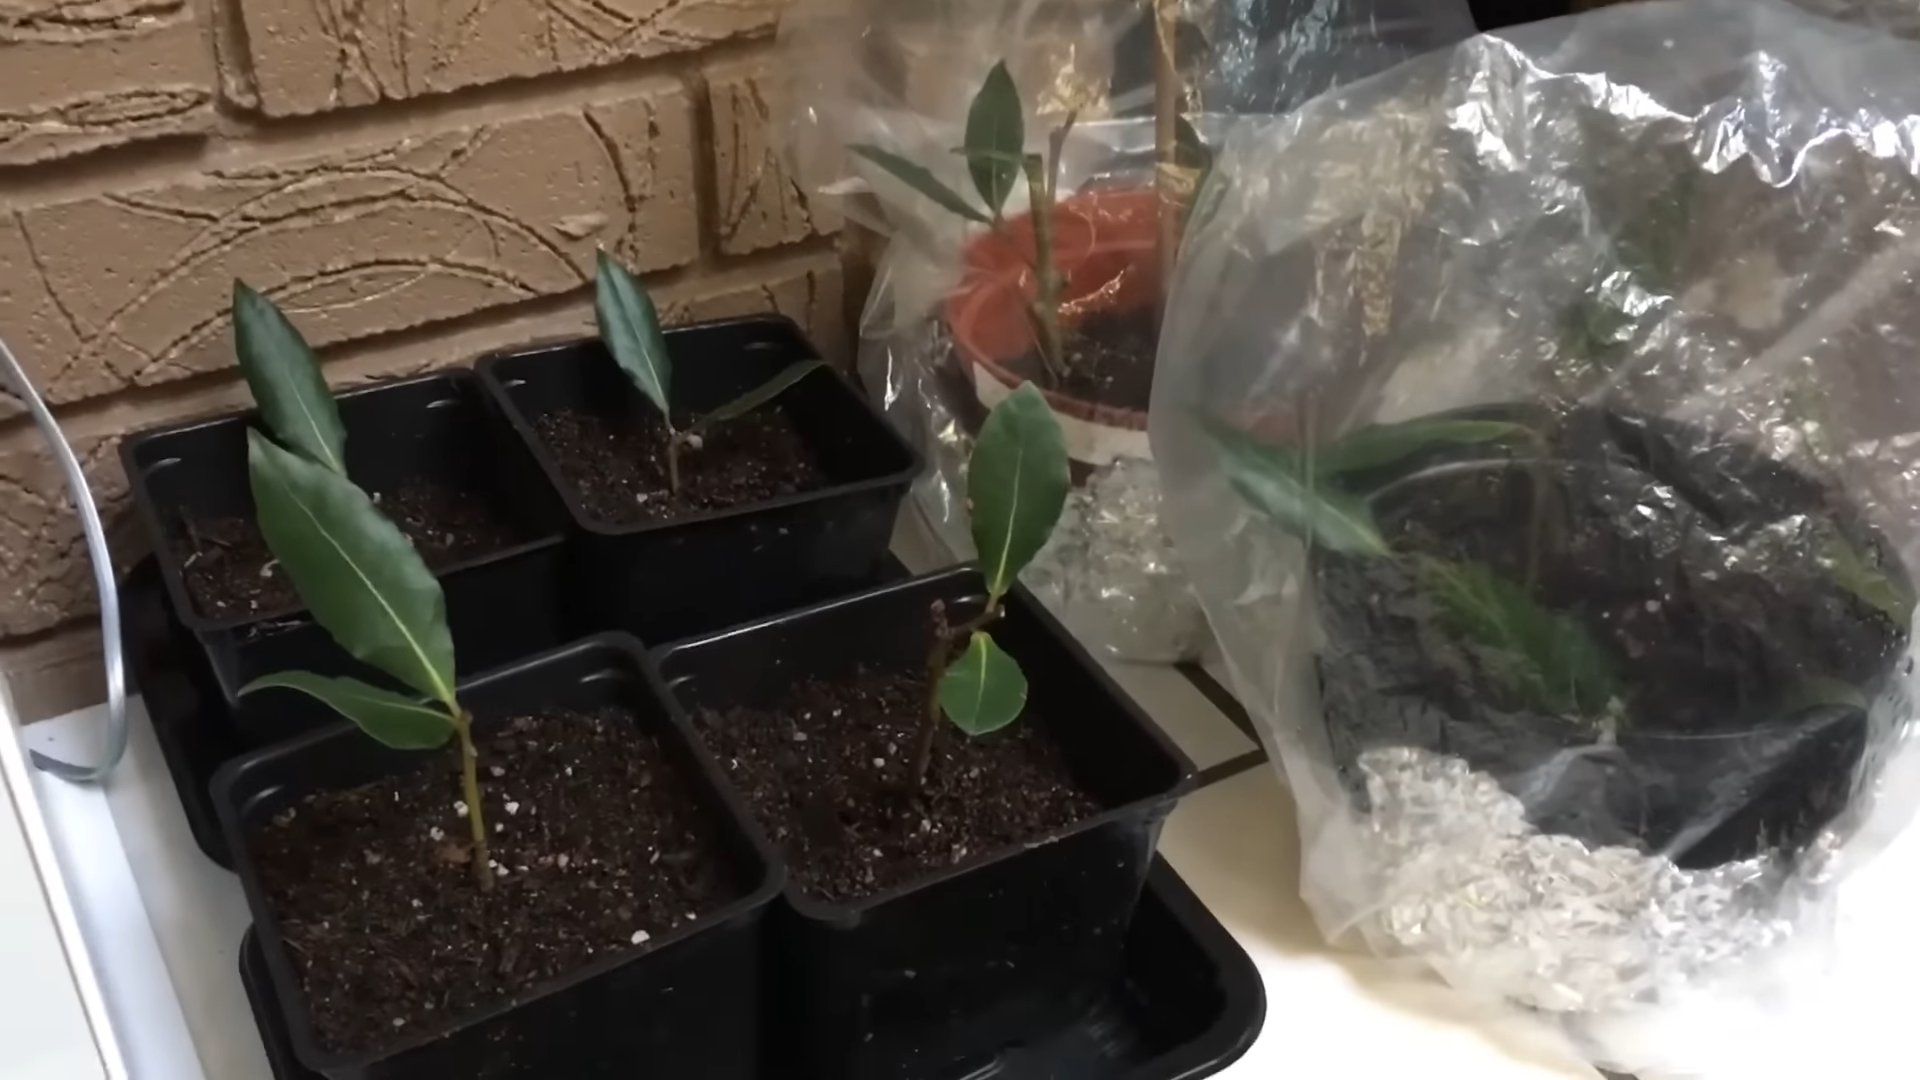
1. Cover with Plastic Bag or Humidity Dome: Place a clear plastic bag over each pot, making sure that the bag doesn’t touch the leaves. You can use skewers or chopsticks to prop up the bag if needed. Alternatively, you can use a humidity dome if you have one.
2. Misting: Mist the cuttings with water every day or every other day to keep them hydrated. This is especially important if you’re using a plastic bag, as the humidity inside the bag can drop quickly.
3. Placement: Place the pots in a warm, bright location, but out of direct sunlight. Direct sunlight can scorch the cuttings. A windowsill that receives indirect light is ideal.
4. Optional Heat Mat: If you’re using a heat mat, place the pots on the mat. The gentle warmth will help speed up the rooting process.
Patience is a Virtue: Waiting for Roots to Develop
This is where the patience comes in. Rooting can take anywhere from 4 to 8 weeks, so don’t get discouraged if you don’t see results immediately.
1. Check for Roots: After about 4 weeks, gently tug on the cuttings to see if they have developed roots. If you feel resistance, that’s a good sign! You can also gently remove a cutting from the pot to check for roots.
2. Ventilation: Once you see signs of rooting, start to gradually ventilate the cuttings by opening the plastic bag or humidity dome for a few hours each day. This will help them acclimate to the lower humidity levels.
3. Transplanting: Once the cuttings have developed a good root system, you can transplant them into larger pots or directly into the garden. Choose a location that receives full sun to partial shade and has well-draining soil.
Caring for Your New Bay Laurel Trees: Nurturing Your Success
Congratulations! You’ve successfully propagated bay laurel from cuttings. Now it’s time to care for your new trees and watch them grow.
1. Watering: Water your bay laurel trees regularly, especially during dry periods. Allow the soil to dry out slightly between waterings.
2. Fertilizing: Fertilize your bay laurel trees in the spring and summer with a balanced fertilizer.
3. Pruning: Prune your bay laurel trees regularly to maintain their shape and encourage bushier growth. You can also harvest leaves for cooking as needed.
4. Pest and Disease Control: Keep an eye out for pests and diseases, such as aphids, scale, and leaf spot. Treat any problems promptly with appropriate insecticides or fungicides.
5. Winter Protection: In colder climates, protect your bay laurel trees from frost and freezing temperatures by wrapping them in burlap or moving them indoors.
Troubleshooting: Addressing Common Issues
Even with the best intentions, things don’t always go as planned. Here are some common issues you might encounter and how to address them:
* Cuttings Rotting: This is usually caused by overwatering or poor drainage. Make sure your potting mix is well-draining and avoid overwatering.
* Cuttings Drying Out: This is usually caused by low humidity. Make sure to keep the cuttings covered with a plastic bag or humidity dome and mist them regularly.
* Cuttings Not Rooting: This could be due to a number of factors, such as poor quality cuttings, improper rooting hormone application, or unfavorable environmental conditions. Try taking new cuttings from a different part of the tree, using a higher concentration of rooting hormone, or providing more warmth and humidity.
* Leaf Drop: Leaf drop can be caused by stress, such as transplanting or sudden changes in temperature or humidity. Provide your bay laurel trees with consistent care and avoid sudden changes in their environment.
Final Thoughts: Enjoying the Fruits (or Leaves!) of Your Labor
Growing bay laurel from cuttings is a rewarding and cost-effective way to expand your herb garden. With a little patience and attention, you can have a constant supply of fresh bay leaves for all your culinary creations. So, grab your pruning shears, gather your supplies, and get ready to embark on this exciting DIY adventure! Happy growing!
Conclusion
So, there you have it! Growing bay leaf cuttings might seem a little daunting at first, but with a little patience and the right approach, you can cultivate your own thriving bay leaf plant right at home. Forget relying solely on expensive, often dried-out leaves from the grocery store. Imagine the satisfaction of snipping fresh, fragrant bay leaves straight from your own plant to infuse your soups, stews, and sauces with unparalleled flavor. This DIY trick isn’t just about saving money; it’s about connecting with nature and experiencing the joy of growing your own herbs.
This method is a must-try for several reasons. First, it’s incredibly rewarding. Watching a tiny cutting develop roots and eventually transform into a healthy plant is a truly fulfilling experience. Second, it’s a sustainable way to expand your herb garden. Instead of constantly buying new plants, you can propagate from existing ones, reducing waste and saving resources. Third, you have complete control over the growing environment, ensuring that your bay leaf plant is healthy and free from harmful chemicals.
Don’t be afraid to experiment with variations! Some gardeners have had success using different rooting hormones or growing mediums. You could try using perlite instead of vermiculite, or even a combination of both. Another variation is to try different types of containers. While small pots work well, you could also try using a propagation tray with individual cells. Just remember to keep the humidity high and the soil consistently moist.
Consider trying different bay leaf varieties as well. While the common bay laurel (Laurus nobilis) is the most widely used, there are other varieties that offer slightly different flavor profiles. For example, California bay laurel (Umbellularia californica) has a stronger, more pungent flavor. Experimenting with different varieties can add depth and complexity to your culinary creations.
The key to success with growing bay leaf cuttings is patience. It can take several weeks, or even months, for roots to develop. Don’t get discouraged if you don’t see results immediately. Just keep providing the cuttings with the right conditions – warmth, humidity, and indirect light – and eventually, they will root.
We wholeheartedly encourage you to give this DIY trick a try. It’s a simple, cost-effective, and incredibly rewarding way to grow your own bay leaf plant. Once you’ve successfully propagated your own cuttings, you’ll have a steady supply of fresh, flavorful bay leaves at your fingertips.
And most importantly, we want to hear about your experience! Share your tips, tricks, and successes in the comments below. Let us know what worked for you, what challenges you faced, and any variations you tried. Your feedback will help other gardeners learn and grow, and together, we can all enjoy the benefits of fresh, homegrown bay leaves. So, grab your clippers, gather your supplies, and get ready to embark on a rewarding journey of growing bay leaf cuttings. Happy gardening!
Frequently Asked Questions (FAQ)
How long does it take for bay leaf cuttings to root?
Rooting time for bay leaf cuttings can vary significantly depending on several factors, including the time of year, the health of the cutting, and the environmental conditions. Generally, it can take anywhere from 4 to 12 weeks for roots to develop. Be patient and consistent with your care, and don’t be discouraged if you don’t see results immediately. Regularly check for root development by gently tugging on the cutting. If you feel resistance, it’s likely that roots have formed.
What is the best time of year to take bay leaf cuttings?
The best time to take bay leaf cuttings is typically in late spring or early summer, when the plant is actively growing. During this time, the cuttings are more likely to root successfully. Avoid taking cuttings during the dormant season (winter) as they are less likely to root.
What type of rooting hormone should I use?
While rooting hormone is not strictly necessary, it can significantly increase the success rate of rooting bay leaf cuttings. Look for a rooting hormone specifically formulated for woody plants. These hormones typically contain a higher concentration of auxins, which are plant hormones that promote root development. Follow the instructions on the rooting hormone package carefully.
What kind of soil or growing medium should I use?
A well-draining growing medium is essential for rooting bay leaf cuttings. A mixture of perlite and vermiculite is a popular choice, as it provides good aeration and moisture retention. You can also use a seed starting mix or a combination of peat moss and sand. Avoid using garden soil, as it can be too heavy and may contain pathogens that can harm the cuttings.
How much light do bay leaf cuttings need?
Bay leaf cuttings need bright, indirect light to root successfully. Avoid placing them in direct sunlight, as this can scorch the leaves and dry out the cuttings. A north-facing window or a spot under a grow light is ideal.
How often should I water bay leaf cuttings?
Keep the growing medium consistently moist, but not waterlogged. Water the cuttings when the top inch of the soil feels dry to the touch. Avoid overwatering, as this can lead to root rot. A spray bottle can be helpful for misting the cuttings to maintain humidity.
How can I increase humidity for bay leaf cuttings?
High humidity is crucial for successful rooting of bay leaf cuttings. You can increase humidity by placing a clear plastic bag or dome over the cuttings. Make sure to vent the bag or dome regularly to prevent the buildup of mold or mildew. You can also use a humidity tray or a humidifier to increase the humidity in the surrounding area.
What if my bay leaf cuttings start to turn yellow or brown?
Yellowing or browning leaves can indicate several problems, such as overwatering, underwatering, or lack of humidity. Check the moisture level of the growing medium and adjust your watering accordingly. If the humidity is low, try increasing it. If the problem persists, the cutting may be diseased or damaged. Remove any affected leaves and monitor the cutting closely.
Can I grow bay leaf cuttings in water?
While it’s possible to root some plants in water, bay leaf cuttings generally root better in a solid growing medium. Water rooting can sometimes lead to weak or brittle roots that are less likely to survive when transplanted to soil.
How do I know when the bay leaf cuttings are ready to be transplanted?
The cuttings are ready to be transplanted when they have developed a healthy root system. You should be able to see several roots emerging from the bottom of the container. Gently remove the cutting from the container and inspect the roots. If the roots are well-developed and fill the container, it’s time to transplant.
What kind of pot and soil should I use when transplanting the rooted bay leaf cuttings?
Choose a pot that is slightly larger than the root ball of the cutting. Use a well-draining potting mix that is specifically formulated for herbs or shrubs. Avoid using garden soil, as it can be too heavy and may not drain well.
How do I care for my newly transplanted bay leaf plant?
After transplanting, water the plant thoroughly and place it in a location with bright, indirect light. Avoid placing it in direct sunlight, as this can scorch the leaves. Water the plant regularly, allowing the soil to dry out slightly between waterings. Fertilize the plant every few weeks with a balanced fertilizer.
Can I grow bay leaf cuttings indoors?
Yes, bay leaf plants can be grown indoors, especially if you live in a climate with cold winters. Provide the plant with plenty of bright, indirect light and maintain consistent humidity. You may need to supplement with artificial light during the winter months.
How big will my bay leaf plant get?
Bay leaf plants can grow quite large, reaching up to 60 feet tall in their native habitat. However, when grown in containers, they typically stay much smaller, reaching a height of 6 to 8 feet. You can prune the plant regularly to maintain its size and shape.
Are bay leaves poisonous?
Fresh bay leaves are not poisonous, but they are very tough and difficult to digest. It’s best to remove them from dishes before serving. Dried bay leaves are also not poisonous, but they can be sharp and may cause choking if swallowed.
Leave a Comment