
Grow Bok Choy Kitchen Garden: Imagine stepping outside your back door and harvesting fresh, crisp bok choy for your stir-fry, all grown with your own two hands! Sounds dreamy, right? Well, it doesn’t have to be just a dream. This humble leafy green, also known as Chinese cabbage, has been cultivated in China for over 1,500 years, becoming a staple in Asian cuisine and now, increasingly, in gardens around the world.
But why should you bother growing your own? Let’s face it, supermarket produce can sometimes lack that vibrant freshness and flavor. Plus, knowing exactly where your food comes from and how it’s grown is incredibly rewarding. That’s where these simple, yet effective, DIY tricks come in. I’m going to share my favorite tips and hacks to help you successfully grow bok choy kitchen garden, even if you’re a complete beginner.
Whether you have a sprawling backyard or just a sunny windowsill, you can enjoy the satisfaction of harvesting your own delicious and nutritious bok choy. These DIY methods are not only cost-effective but also environmentally friendly, allowing you to control the quality of your food and reduce your carbon footprint. So, grab your gardening gloves, and let’s get started on this exciting journey of growing your own bok choy!
Growing Bok Choy: From Kitchen Scraps to Garden Bounty!
Hey there, fellow gardening enthusiasts! Ever thought about turning your kitchen scraps into a thriving garden? Well, today, I’m going to show you how to grow bok choy from those leftover bases you usually toss in the compost. It’s easier than you think, and incredibly rewarding. Get ready to impress your friends (and yourself!) with your bok choy growing prowess.
What You’ll Need
Before we dive in, let’s gather our supplies. This is a pretty low-key project, so you probably have most of this stuff already:
- Bok choy bases (the part you usually cut off and discard)
- A shallow dish or container
- Water
- Potting soil
- A small pot or container (at least 6 inches in diameter)
- A sunny windowsill or grow light
- Optional: Rooting hormone (can speed things up, but not essential)
The Magic of Regrowing: A Step-by-Step Guide
Okay, let’s get our hands dirty! Here’s how to coax new life out of those bok choy bases:
- Prepare the Bok Choy Bases: After using the leafy part of your bok choy, don’t throw away the base! Trim it neatly, leaving about 1-2 inches of the base intact. Make sure there aren’t any rotten or mushy parts. We want a clean, healthy start.
- Water Propagation: Place the bok choy bases in your shallow dish or container. Add enough water to cover the bottom inch or so of the bases. You don’t want to submerge the entire base, just the bottom part where the roots will emerge.
- Find a Sunny Spot: Place the dish on a sunny windowsill or under a grow light. Bok choy loves light, so the more, the better. If you’re using a windowsill, rotate the dish every day or two to ensure even light exposure. This will prevent the bok choy from leaning towards the light source.
- Change the Water Regularly: This is crucial! Change the water every 1-2 days to prevent bacteria and algae growth. Fresh water keeps things clean and encourages healthy root development.
- Watch for Roots: Within a few days (usually 3-7), you should start to see tiny roots emerging from the bottom of the bok choy bases. This is where the magic happens! Be patient; sometimes it takes a little longer.
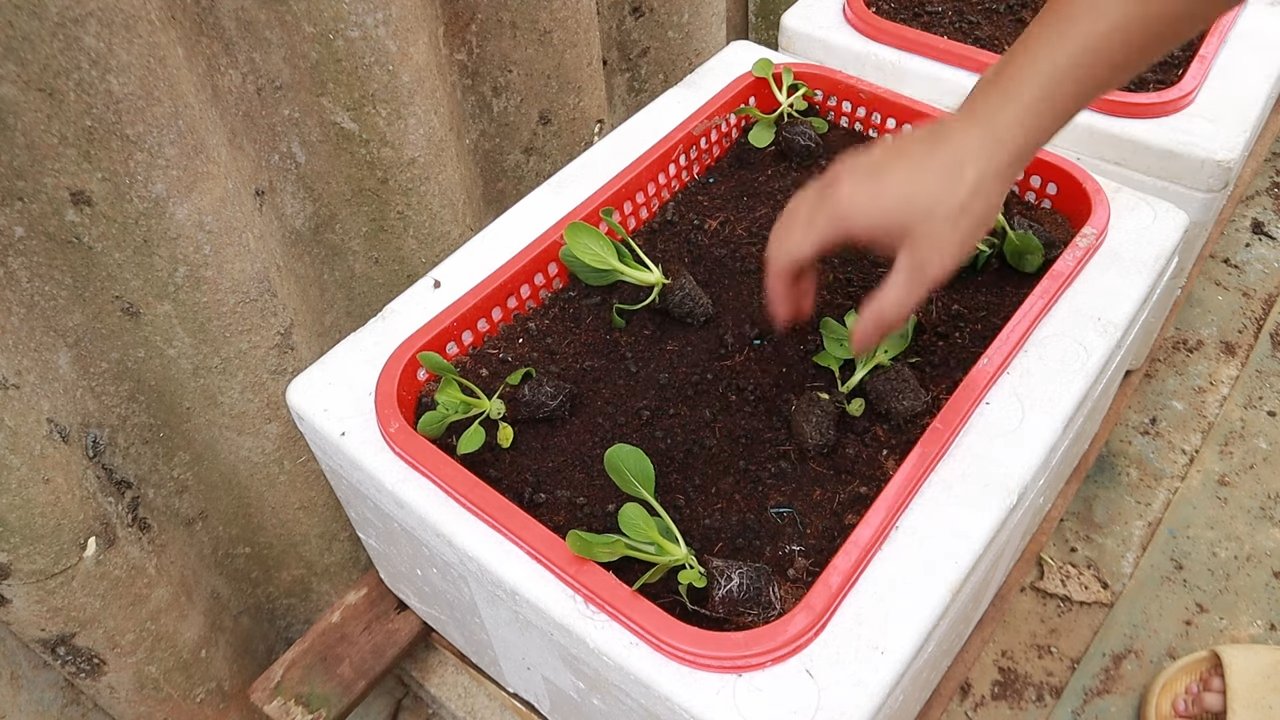
- Potting Time: Once the roots are about an inch long, it’s time to move your bok choy to a pot. Fill your pot with good-quality potting soil. Make a small hole in the center of the soil.
- Transplant Carefully: Gently remove the bok choy base from the water and carefully place it in the hole you made in the potting soil. Cover the roots with soil, but leave the top of the base exposed.
- Water Thoroughly: Water the newly potted bok choy thoroughly, making sure the soil is evenly moist. Don’t overwater, though; soggy soil can lead to root rot.
- Back to the Sunny Spot: Place the pot back on the sunny windowsill or under the grow light. Continue to rotate the pot regularly for even growth.
- Watering Schedule: Water your bok choy whenever the top inch of soil feels dry to the touch. Bok choy likes consistent moisture, but it doesn’t like to be waterlogged.
- Fertilizing (Optional): If you want to give your bok choy a little boost, you can fertilize it every 2-3 weeks with a diluted liquid fertilizer. Follow the instructions on the fertilizer package.
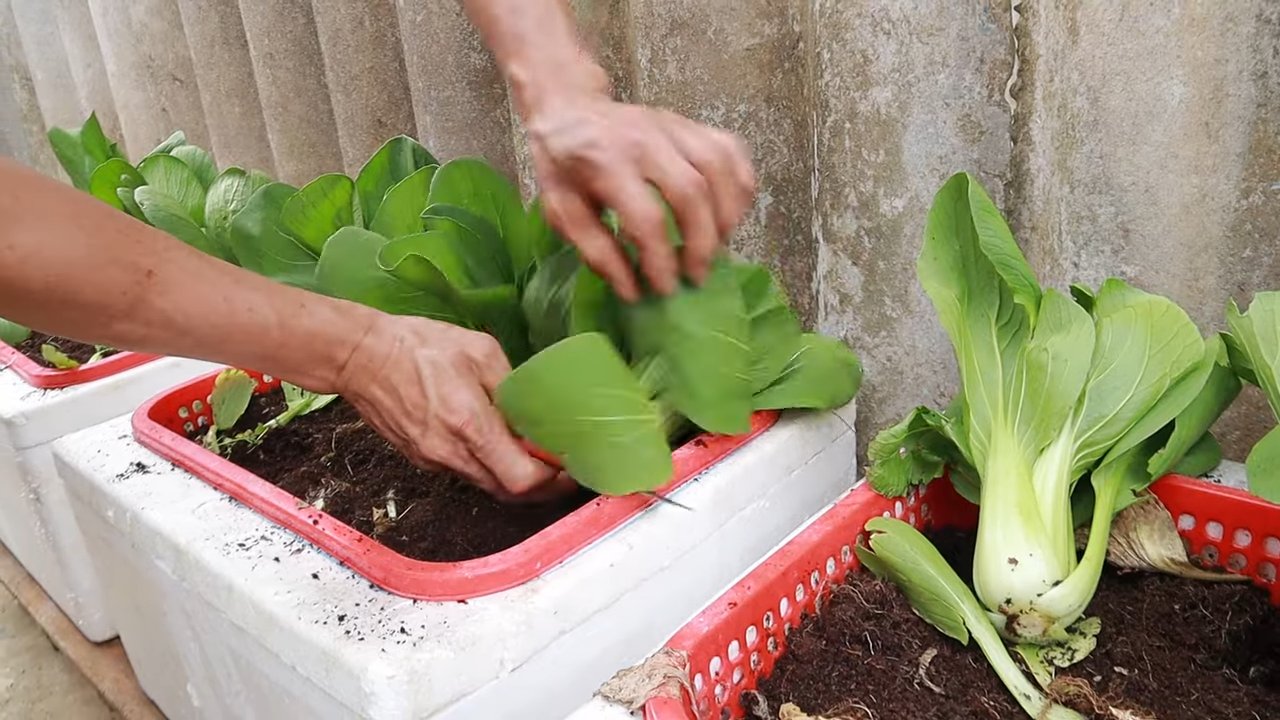
- Harvest Time: After a few weeks, you should start to see new leaves growing from the center of the bok choy base. You can harvest these leaves as needed, or wait until the plant is larger and harvest the entire head.
Taking it Outside: Transplanting to the Garden
If you live in a climate where bok choy thrives (cool weather is best!), you can transplant your regrown bok choy to your garden. Here’s how:
- Harden Off the Seedlings: Before transplanting, you need to “harden off” your bok choy seedlings. This means gradually exposing them to outdoor conditions over a period of about a week. Start by placing the pot outside for an hour or two each day, gradually increasing the amount of time they spend outdoors. This will help them adjust to the sun, wind, and temperature changes.
- Choose the Right Location: Bok choy prefers a location with partial shade, especially in warmer climates. Choose a spot in your garden that gets at least 4-6 hours of sunlight per day.
- Prepare the Soil: Bok choy likes well-drained soil that is rich in organic matter. Amend your garden soil with compost or other organic material before planting.
- Transplant Carefully: Dig a hole in the garden soil that is slightly larger than the pot your bok choy is growing in. Gently remove the bok choy from the pot and place it in the hole. Cover the roots with soil and water thoroughly.
- Space Appropriately: Space your bok choy plants about 6-12 inches apart to allow them room to grow.
- Water Regularly: Water your transplanted bok choy regularly, especially during dry periods.
- Protect from Pests: Bok choy can be susceptible to pests such as aphids and cabbage worms. Monitor your plants regularly and take action if you see any signs of infestation. You can use organic pest control methods such as insecticidal soap or neem oil.
- Harvesting: You can harvest your bok choy when the leaves are large enough to eat. You can harvest individual leaves as needed, or harvest the entire head.
Troubleshooting Tips
Sometimes, things don’t go exactly as planned. Here are a few common problems you might encounter and how to fix them:
- Yellowing Leaves: This could be a sign of overwatering or underwatering. Check the soil moisture and adjust your watering schedule accordingly. It could also be a nutrient deficiency. Try fertilizing with a balanced fertilizer.
- Leggy Growth: This means your bok choy isn’t getting enough light. Move it to a sunnier location or provide supplemental light with a grow light.
- Slow Growth: This could be due to a number of factors, including poor soil, lack of nutrients, or cool temperatures. Make sure your soil is well-drained and rich in organic matter. Fertilize regularly and provide adequate warmth.
- Pests: As mentioned earlier, bok choy can be susceptible to pests. Inspect your plants regularly and take action if you see any signs of infestation.
- Rotting Base: This is usually caused by overwatering or poor drainage. Make sure your soil is well-drained and avoid overwatering. If the base is rotting, you may need to start over with a fresh bok choy base.
Extra Tips for Bok Choy Success
Here are a few extra tips to help you grow the best bok choy possible:
- Choose the Right Variety: There are many different varieties of bok choy available, so choose one that is well-suited to your climate and growing conditions.
- Start with Healthy Bases: The healthier the bok choy base, the better the chances of success. Choose bases that are firm, crisp, and free from blemishes.
- Be Patient: Regrowing bok choy takes time, so be patient and don’t get discouraged if you don’t see results immediately.
- Experiment: Don’t be afraid to experiment with different techniques and methods to find what works best for you.
- Enjoy the Process: Growing your own food is a rewarding experience, so enjoy the process and celebrate your successes!
Why Regrow Bok Choy?
Besides being a fun and rewarding project, regrowing bok choy has several benefits:
- It’s Sustainable: You’re reducing food waste and making the most of your resources.
- It’s Economical: You’re saving money on groceries.
- It’s Educational: You’re learning about plant propagation and gardening.
- It’s Delicious: You’re growing your own fresh, healthy bok choy!
So, there you have it! Everything you need to know to grow bok choy from kitchen scraps. Give it a try, and I think you’ll be amazed at how easy and rewarding it is. Happy gardening!
Conclusion
So, there you have it! Cultivating your own bok choy kitchen garden is not only achievable, but it’s also incredibly rewarding. From the crisp, fresh taste of homegrown greens to the satisfaction of nurturing life from seed to harvest, this DIY project offers a multitude of benefits. We’ve walked you through the essential steps, from selecting the right seeds and preparing the soil to providing optimal care and harvesting your bounty.
Why is this a must-try? Because store-bought bok choy simply can’t compare to the vibrant flavor and nutritional value of freshly picked, organically grown greens. Plus, you’ll be reducing your carbon footprint by minimizing transportation and packaging waste. Imagine stepping outside your door and snipping a handful of bok choy for a stir-fry, salad, or soup – the convenience and freshness are unparalleled.
But the beauty of gardening lies in its adaptability. Feel free to experiment with different varieties of bok choy. Try growing baby bok choy for a more delicate flavor and texture, or explore colorful varieties like Red Choi for a visually stunning addition to your garden and plate. You can also adapt the growing method to suit your space. If you have limited space, consider growing bok choy in containers on a balcony or patio. Vertical gardening techniques can also maximize your yield in a small area.
Don’t be afraid to get creative with companion planting. Marigolds can help deter pests, while herbs like dill and chamomile can attract beneficial insects. Observe your plants closely and adjust your care routine as needed. Gardening is a learning process, and every season brings new opportunities to refine your skills.
We wholeheartedly encourage you to embark on this bok choy growing adventure. It’s a fantastic way to connect with nature, learn about sustainable food practices, and enjoy the delicious rewards of your labor. Remember, even if you encounter challenges along the way, don’t give up! Every gardener faces setbacks, but the key is to learn from your mistakes and keep trying.
And most importantly, we want to hear about your experiences! Share your photos, tips, and stories with us in the comments section below. Let’s create a community of bok choy enthusiasts who can support and inspire each other. Whether you’re a seasoned gardener or a complete beginner, your insights are valuable. So, grab your seeds, get your hands dirty, and start growing your own delicious and nutritious bok choy today! You’ll be amazed at how easy and rewarding it is to cultivate your own little piece of edible paradise. Happy gardening!
Frequently Asked Questions (FAQ)
What is the best time of year to plant bok choy?
Bok choy is a cool-season crop, meaning it thrives in cooler temperatures and shorter days. The ideal time to plant bok choy is in early spring or late summer/early fall. In spring, aim to plant after the last frost, typically 4-6 weeks before the average last frost date in your area. For a fall harvest, plant 6-8 weeks before the first expected frost. Avoid planting during the hottest months of summer, as high temperatures can cause bok choy to bolt (go to seed prematurely), resulting in bitter-tasting leaves.
How much sunlight does bok choy need?
Bok choy prefers partial shade, especially during the warmer months. While it can tolerate full sun, the leaves may become scorched or stressed in intense heat. Aim for at least 4-6 hours of sunlight per day. If you live in a particularly hot climate, provide afternoon shade to protect your plants from the harshest rays.
What kind of soil is best for growing bok choy?
Bok choy thrives in well-draining, fertile soil that is rich in organic matter. The ideal soil pH is between 6.0 and 7.5. Before planting, amend your soil with compost, aged manure, or other organic materials to improve drainage, fertility, and water retention. If your soil is heavy clay, consider adding sand or perlite to improve drainage.
How often should I water my bok choy plants?
Bok choy needs consistent moisture to thrive. Water deeply and regularly, especially during dry periods. Aim to keep the soil consistently moist but not waterlogged. Check the soil moisture regularly by sticking your finger about an inch into the soil. If it feels dry, it’s time to water. Avoid overhead watering, as this can increase the risk of fungal diseases. Instead, water at the base of the plants.
What are some common pests and diseases that affect bok choy?
Bok choy can be susceptible to several pests and diseases, including aphids, flea beetles, cabbage worms, and fungal diseases like downy mildew and clubroot. To prevent pest and disease problems, practice good garden hygiene, such as removing plant debris and weeds regularly. Inspect your plants regularly for signs of pests or diseases and take action promptly. You can use organic pest control methods, such as insecticidal soap or neem oil, to control aphids and other pests. For fungal diseases, ensure good air circulation and avoid overhead watering.
How do I harvest bok choy?
You can harvest bok choy at any stage of growth, depending on your preference. For baby bok choy, harvest when the leaves are about 4-6 inches long. For mature bok choy, harvest when the heads are firm and compact. To harvest, simply cut the entire head at the base of the plant with a sharp knife. You can also harvest individual leaves as needed, starting with the outer leaves.
Can I grow bok choy in containers?
Yes, bok choy grows well in containers, making it a great option for gardeners with limited space. Choose a container that is at least 12 inches deep and wide to allow enough room for the roots to grow. Use a well-draining potting mix and water regularly. Place the container in a location that receives at least 4-6 hours of sunlight per day.
How do I prevent bok choy from bolting?
Bolting, or premature flowering, can occur when bok choy is exposed to high temperatures or stress. To prevent bolting, plant bok choy at the right time of year (early spring or late summer/early fall), provide adequate shade during hot weather, and ensure consistent watering. Choose bolt-resistant varieties of bok choy if you live in a warm climate.
Can I save seeds from my bok choy plants?
Yes, you can save seeds from your bok choy plants, but it requires allowing the plants to bolt and produce flowers. Bok choy is a biennial, meaning it typically takes two years to complete its life cycle. In the first year, it produces leaves, and in the second year, it produces flowers and seeds. Allow the flowers to dry on the plant, then harvest the seed pods and extract the seeds. Store the seeds in a cool, dry place. Keep in mind that bok choy can cross-pollinate with other members of the Brassica family, so the seeds may not be true to type.
Is bok choy nutritious?
Absolutely! Bok choy is a nutritional powerhouse, packed with vitamins, minerals, and antioxidants. It’s an excellent source of vitamins A, C, and K, as well as folate, calcium, and potassium. Bok choy is also low in calories and high in fiber, making it a healthy and delicious addition to any diet. Enjoy it in stir-fries, salads, soups, or steamed as a side dish.

Leave a Comment