
Grow Broccoli at Home: Imagine stepping into your backyard and harvesting crisp, vibrant broccoli florets, ready to be steamed, roasted, or tossed into a delicious salad. Sounds idyllic, right? Well, it’s more achievable than you might think! For centuries, cultivating our own food has been a cornerstone of self-sufficiency and a connection to the earth. From ancient Roman gardens to the victory gardens of wartime, growing your own produce has always been a rewarding endeavor.
But let’s be honest, the thought of growing broccoli, especially if you’re a beginner, can feel a little daunting. That’s where these simple DIY tricks and hacks come in! I’m here to demystify the process and show you how easy and fulfilling it can be to grow broccoli at home, even if you have limited space or experience. We’ll cover everything from choosing the right variety to protecting your precious plants from pests, ensuring you have a bountiful harvest.
Why do you need these DIY tricks? Because store-bought broccoli simply can’t compare to the flavor and freshness of homegrown. Plus, you’ll know exactly what’s gone into growing it, avoiding harmful pesticides and supporting sustainable practices. So, grab your gardening gloves, and let’s get started on this exciting journey to fresh, homegrown broccoli!
Brokkoli selbst anbauen: Dein umfassender DIY-Leitfaden
Hey Gartenfreunde! Habt ihr euch jemals gefragt, wie ihr diesen gesunden, grünen Superhelden direkt in eurem Garten anbauen könnt? Brokkoli ist nicht nur lecker und nahrhaft, sondern auch überraschend einfach anzubauen, wenn man ein paar grundlegende Dinge beachtet. In diesem Artikel zeige ich euch, wie ihr Schritt für Schritt euren eigenen Brokkoli anbauen könnt – vom Samen bis zur Ernte!
Was du für den Brokkoli-Anbau brauchst
Bevor wir loslegen, hier eine Liste der Dinge, die du benötigst:
* Brokkolisamen: Wähle eine Sorte, die für dein Klima geeignet ist. Es gibt verschiedene Sorten, die sich in Reifezeit und Größe unterscheiden.
* Anzuchttöpfe oder -schalen: Für die Voranzucht der Samen.
* Anzuchterde: Spezielle Erde für die Anzucht, die nährstoffarm und locker ist.
* Gartenerde: Gute, nährstoffreiche Gartenerde für das Beet oder den Kübel.
* Kompost oder organischer Dünger: Um den Boden anzureichern.
* Gießkanne oder Gartenschlauch: Zum Bewässern der Pflanzen.
* Gartenwerkzeug: Spaten, Harke, Pflanzkelle.
* Schutznetz (optional): Um die Pflanzen vor Schädlingen wie Kohlweißlingen zu schützen.
* Pflanzstäbe (optional): Für zusätzlichen Halt, wenn die Pflanzen größer werden.
Der richtige Zeitpunkt für die Aussaat
Der Zeitpunkt der Aussaat hängt von deinem Klima und der Brokkolisorte ab. Generell gibt es zwei Möglichkeiten:
* Frühjahrsaussaat: Für eine Ernte im Sommer. Die Samen werden im Februar oder März im Haus vorgezogen.
* Sommeraussaat: Für eine Ernte im Herbst. Die Samen werden im Mai oder Juni direkt ins Beet gesät oder vorgezogen.
Ich empfehle, die Samen vorzuziehen, da dies die Keimung und das Wachstum beschleunigt und die Pflanzen vor ungünstigen Wetterbedingungen schützt.
Aussaat und Voranzucht im Haus
1. Vorbereitung der Anzuchttöpfe: Fülle die Anzuchttöpfe oder -schalen mit Anzuchterde. Drücke die Erde leicht an.
2. Aussaat der Samen: Lege in jeden Topf 2-3 Samen. Bedecke die Samen mit einer dünnen Schicht Erde (ca. 0,5 cm).
3. Bewässerung: Befeuchte die Erde vorsichtig mit einer Sprühflasche oder Gießkanne. Die Erde sollte feucht, aber nicht nass sein.
4. Standort: Stelle die Anzuchttöpfe an einen hellen, warmen Ort (ca. 18-20°C). Ein Fensterbrett oder ein Gewächshaus sind ideal.
5. Feuchtigkeit: Halte die Erde feucht, indem du sie regelmäßig besprühst. Du kannst die Töpfe auch mit einer durchsichtigen Folie oder einem Deckel abdecken, um die Luftfeuchtigkeit zu erhöhen. Achte darauf, dass du die Folie regelmäßig lüftest, um Schimmelbildung zu vermeiden.
6. Keimung: Die Samen keimen in der Regel innerhalb von 5-10 Tagen. Sobald die Keimlinge erscheinen, entferne die Folie oder den Deckel.
7. Pikieren: Wenn die Keimlinge 2-3 Blätter haben, kannst du sie pikieren. Das bedeutet, dass du die schwächeren Pflanzen entfernst und die stärksten in größere Töpfe umpflanzt. Fülle die neuen Töpfe mit Gartenerde, die mit etwas Kompost angereichert ist.
Vorbereitung des Beets oder Kübels
Während die Brokkolipflanzen im Haus wachsen, kannst du das Beet oder den Kübel vorbereiten.
1. Standortwahl: Brokkoli benötigt einen sonnigen Standort mit mindestens 6 Stunden Sonne pro Tag.
2. Bodenvorbereitung: Lockere den Boden gründlich auf und entferne Unkraut und Steine.
3. Bodenverbesserung: Reicher den Boden mit Kompost oder organischem Dünger an. Brokkoli ist ein Starkzehrer und benötigt viele Nährstoffe.
4. pH-Wert: Der ideale pH-Wert für Brokkoli liegt zwischen 6,0 und 7,0. Du kannst den pH-Wert mit einem Bodentest überprüfen und gegebenenfalls anpassen.
5. Drainage: Achte darauf, dass der Boden gut drainiert ist, um Staunässe zu vermeiden.
Auspflanzen der Brokkolipflanzen
Sobald die Brokkolipflanzen kräftig genug sind (ca. 15-20 cm hoch) und keine Frostgefahr mehr besteht, kannst du sie ins Beet oder in den Kübel auspflanzen.
1. Abhärten: Bevor du die Pflanzen auspflanzt, solltest du sie einige Tage lang abhärten. Stelle sie tagsüber ins Freie und hole sie nachts wieder herein. Dadurch gewöhnen sie sich an die äußeren Bedingungen.
2. Pflanzabstand: Pflanze die Brokkolipflanzen im Abstand von 45-60 cm zueinander. Bei Reihenpflanzung sollte der Abstand zwischen den Reihen 60-75 cm betragen.
3. Pflanzloch: Grabe ein Pflanzloch, das etwas größer ist als der Wurzelballen der Pflanze.
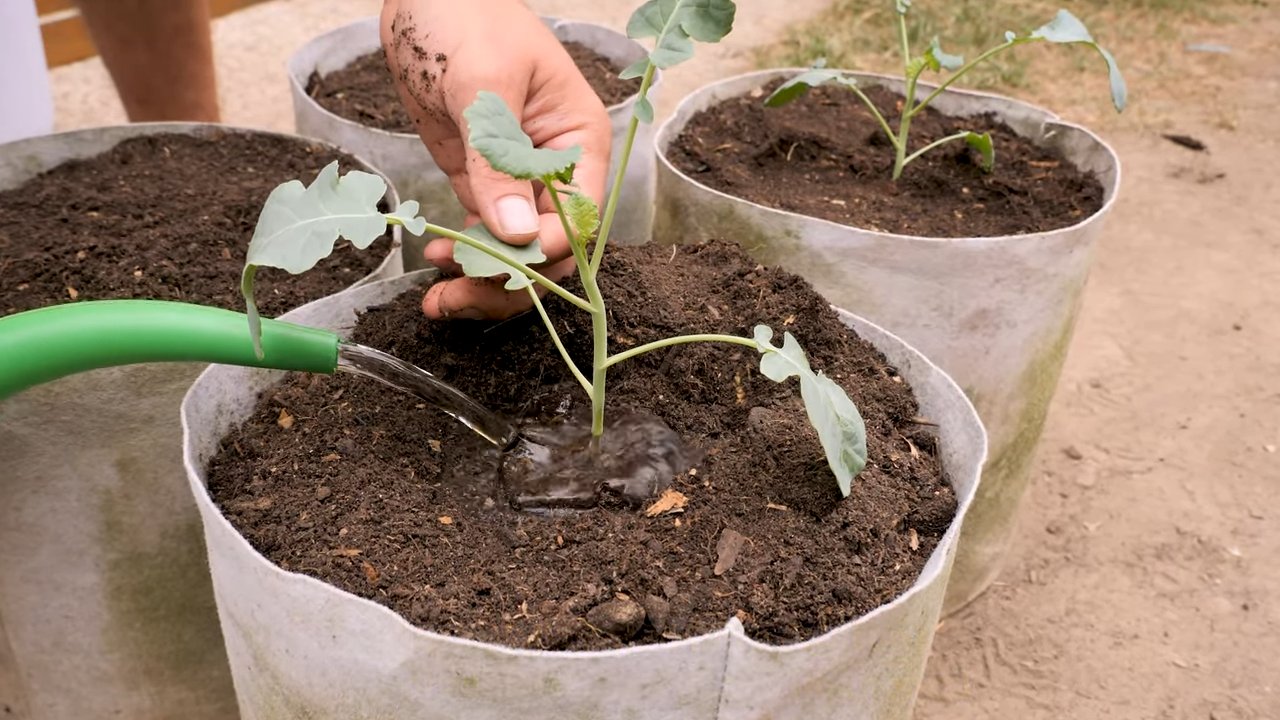
4. Einsetzen der Pflanze: Setze die Pflanze vorsichtig in das Pflanzloch und fülle es mit Erde auf. Drücke die Erde leicht an.
5. Bewässerung: Gieße die Pflanzen nach dem Auspflanzen gründlich.
6. Schutz: Schütze die jungen Pflanzen vor Schädlingen wie Kohlweißlingen, indem du ein Schutznetz über sie spannst.
Pflege des Brokkolis
Nach dem Auspflanzen benötigt der Brokkoli regelmäßige Pflege, um gut zu wachsen und eine reiche Ernte zu bringen.
1. Bewässerung: Gieße die Pflanzen regelmäßig, besonders bei trockenem Wetter. Der Boden sollte immer feucht, aber nicht nass sein.
2. Düngung: Dünge die Pflanzen alle 2-3 Wochen mit einem organischen Dünger oder Kompost.
3. Unkrautbekämpfung: Entferne regelmäßig Unkraut, um die Nährstoffkonkurrenz zu reduzieren.
4. Schädlingsbekämpfung: Kontrolliere die Pflanzen regelmäßig auf Schädlinge wie Kohlweißlinge, Blattläuse oder Schnecken. Bei Bedarf kannst du biologische Schädlingsbekämpfungsmittel einsetzen.
5. Stützung: Wenn die Brokkolipflanzen größer werden, kann es notwendig sein, sie mit Pflanzstäben zu stützen, um zu verhindern, dass sie umknicken.
Ernte des Brokkolis
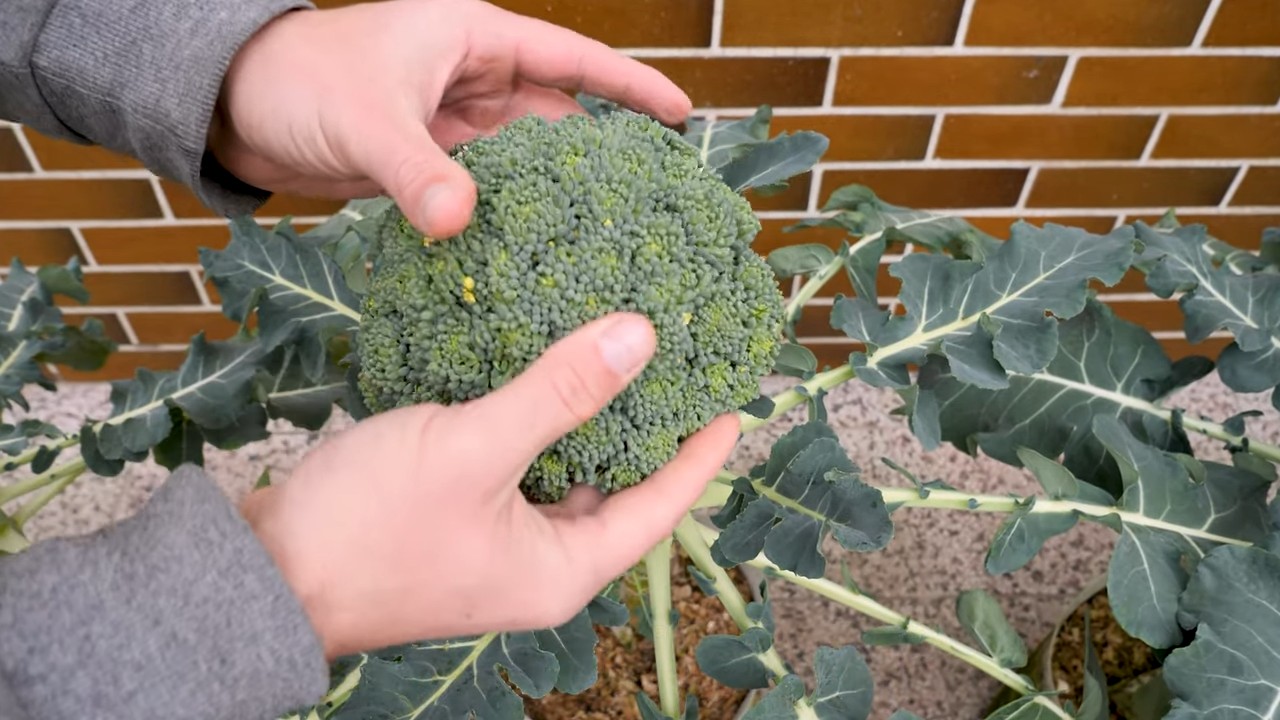
Die Erntezeit hängt von der Brokkolisorte und dem Zeitpunkt der Aussaat ab. In der Regel kannst du den Brokkoli ernten, wenn der Hauptkopf fest und geschlossen ist.
1. Erntezeitpunkt: Ernte den Brokkoli, bevor die Blüten anfangen, sich zu öffnen.
2. Erntemethode: Schneide den Hauptkopf mit einem scharfen Messer ab. Lasse dabei einige Blätter an der Pflanze, da sich aus den Seitentrieben noch weitere kleine Köpfe entwickeln können.
3. Lagerung: Brokkoli ist im Kühlschrank etwa eine Woche haltbar. Du kannst ihn auch einfrieren, um ihn länger aufzubewahren.
Häufige Probleme und Lösungen
Auch beim Brokkoli-Anbau können Probleme auftreten. Hier sind einige häufige Probleme und wie du sie lösen kannst:
* Kohlhernie: Eine Pilzkrankheit, die die Wurzeln befällt. Vorbeugung durch Fruchtfolge und Anbau resistenter Sorten.
* Kohlweißling: Die Raupen fressen die Blätter. Bekämpfung mit Schutznetzen oder biologischen Insektiziden.
* Blattläuse: Saugen an den Blättern. Bekämpfung mit Schmierseife oder Nützlingen wie Marienkäfern.
* Schnecken: Fressen die Blätter. Bekämpfung mit Schneckenkorn oder Schneckenzäunen.
* Gel
Conclusion
So, there you have it! Growing your own broccoli at home isn’t just a gardening project; it’s a gateway to fresher, more flavorful meals and a deeper connection with the food you eat. We’ve walked through the steps, demystified the process, and hopefully, inspired you to give it a try.
Why is this DIY trick a must-try? Because store-bought broccoli simply can’t compare to the vibrant green, crisp texture, and subtly sweet taste of homegrown. You control the growing conditions, ensuring your broccoli is free from unwanted pesticides and packed with nutrients. Plus, there’s an undeniable satisfaction in nurturing a plant from seed to table. It’s a rewarding experience that connects you to the natural world and provides a healthy, delicious addition to your diet.
But don’t stop there! Experiment with different varieties of broccoli. Try growing Romanesco broccoli for its stunning fractal patterns and unique flavor, or perhaps some purple sprouting broccoli for a splash of color on your plate. Consider companion planting to deter pests and improve soil health. Marigolds, for example, are excellent at repelling nematodes, while dill attracts beneficial insects that prey on aphids. You can also adjust the planting schedule to extend your harvest season. Succession planting, where you sow seeds every few weeks, will ensure a continuous supply of fresh broccoli throughout the growing season.
Beyond the traditional steamed or roasted broccoli, explore creative ways to incorporate your homegrown bounty into your meals. Add it to stir-fries, soups, salads, or even blend it into a creamy broccoli cheddar soup. The possibilities are endless!
We understand that gardening can sometimes feel daunting, but remember that every gardener starts somewhere. Don’t be afraid to make mistakes – they’re valuable learning opportunities. The most important thing is to get your hands dirty, enjoy the process, and celebrate the small victories along the way.
We are confident that with a little patience and care, you’ll be harvesting your own delicious broccoli in no time. So, grab your seeds, prepare your soil, and embark on this exciting gardening adventure. We encourage you to try this DIY trick and discover the joys of growing your own food.
And most importantly, we want to hear about your experience! Share your photos, tips, and challenges in the comments below. Let’s build a community of home gardeners who are passionate about growing their own fresh, healthy broccoli. What variety did you choose? What challenges did you face, and how did you overcome them? Your insights could inspire and help other aspiring gardeners. Let’s cultivate a thriving community of broccoli growers!
Ready to Grow Your Own Broccoli?
Don’t wait any longer! Start planning your garden today and experience the satisfaction of harvesting your own delicious, homegrown broccoli. You won’t regret it!
Frequently Asked Questions (FAQ)
What is the best time of year to plant broccoli?
The best time to plant broccoli depends on your climate. In cooler climates with mild summers, you can plant broccoli in early spring for a summer harvest and again in late summer for a fall harvest. In warmer climates, it’s best to plant broccoli in the fall or winter for a spring harvest, as broccoli prefers cooler temperatures. Avoid planting during the hottest months of summer, as high temperatures can cause the broccoli to bolt (go to seed) prematurely. Check your local frost dates to determine the best planting times for your region. Generally, you want to start seeds indoors 6-8 weeks before the last expected frost in spring or 10-12 weeks before the first expected frost in fall.
How much sunlight does broccoli need?
Broccoli needs at least 6 hours of direct sunlight per day to thrive. Choose a location in your garden that receives full sun for optimal growth and head development. If you live in a particularly hot climate, some afternoon shade can be beneficial to prevent the broccoli from bolting. Insufficient sunlight can result in leggy plants with small, underdeveloped heads.
What kind of soil is best for growing broccoli?
Broccoli prefers well-drained, fertile soil with a pH between 6.0 and 7.0. Amend your soil with compost or other organic matter to improve drainage, fertility, and water retention. Broccoli is a heavy feeder, so it’s important to ensure the soil is rich in nutrients. Consider adding a slow-release fertilizer at planting time to provide a steady supply of nutrients throughout the growing season. Avoid planting broccoli in compacted or poorly drained soil, as this can lead to root rot and other problems.
How often should I water broccoli?
Broccoli needs consistent moisture to grow properly. Water deeply and regularly, especially during dry periods. Aim to keep the soil consistently moist but not waterlogged. Mulching around the plants can help retain moisture and suppress weeds. Check the soil moisture regularly and water when the top inch feels dry to the touch. Avoid overhead watering, as this can promote fungal diseases. Instead, water at the base of the plants.
What are some common pests and diseases that affect broccoli?
Broccoli is susceptible to several pests and diseases, including cabbage worms, aphids, flea beetles, clubroot, and downy mildew. Regularly inspect your plants for signs of pests or diseases. Use organic pest control methods, such as handpicking pests, using insecticidal soap, or applying Bacillus thuringiensis (Bt) to control cabbage worms. To prevent diseases, ensure good air circulation, avoid overhead watering, and practice crop rotation. If you encounter a serious disease problem, consider using a fungicide labeled for use on broccoli.
How do I know when my broccoli is ready to harvest?
Broccoli is ready to harvest when the head is firm, tight, and the individual florets are still closed. The size of the head will vary depending on the variety, but generally, you should harvest when the head is about 4-7 inches in diameter. Use a sharp knife to cut the head from the plant, leaving a few inches of stem. After harvesting the main head, the plant may produce smaller side shoots that you can also harvest.
Can I grow broccoli in containers?
Yes, you can grow broccoli in containers, but you’ll need to choose a large container (at least 5 gallons) to accommodate the plant’s root system. Use a high-quality potting mix and ensure the container has good drainage. Container-grown broccoli may require more frequent watering and fertilization than broccoli grown in the ground. Choose a sunny location for your container and monitor the plants closely for pests and diseases.
What can I do if my broccoli starts to bolt?
Bolting (going to seed) is a common problem with broccoli, especially in hot weather. Once broccoli starts to bolt, the head will become loose and the flavor will deteriorate. To prevent bolting, choose heat-tolerant varieties, plant at the appropriate time of year, and provide adequate water and shade during hot weather. If your broccoli starts to bolt, you can still harvest the head, but it may not be as flavorful.
How can I store harvested broccoli?
Store harvested broccoli in the refrigerator in a plastic bag or container. Broccoli is best used within a few days of harvesting, but it can last up to a week if stored properly. You can also freeze broccoli for longer storage. To freeze broccoli, blanch it in boiling water for 3-5 minutes, then plunge it into ice water to stop the cooking process. Drain the broccoli well and store it in freezer bags or containers.
Leave a Comment