
Grow Broccoli in Kitchen? Absolutely! Imagine harvesting fresh, vibrant broccoli right from your own kitchen, even if you don’t have a sprawling garden. Sounds like a dream, right? Well, it’s a dream that can easily become a reality with a few simple tricks and a little DIY spirit. For centuries, people have cultivated food in unconventional spaces, from window boxes in bustling cities to indoor herb gardens in cozy apartments. This resourcefulness stems from a deep connection to nature and a desire for fresh, healthy produce.
But why should you bother growing broccoli indoors? In today’s world, access to fresh, organic vegetables can be challenging and expensive. Plus, there’s something incredibly satisfying about nurturing a plant from seed to harvest. This DIY guide will empower you to grow broccoli in kitchen, offering a sustainable and rewarding way to enjoy this nutritious vegetable. I’m going to share some easy-to-follow steps and insider tips that will have you enjoying homegrown broccoli in no time. Get ready to transform your kitchen into a mini-farm!
Brokkoli in der Küche ziehen: Dein DIY-Guide für frisches Gemüse direkt vom Fensterbrett
Hey Gemüsegärtner-Freunde! Habt ihr Lust, euch auch im Winter mit frischem Brokkoli zu versorgen, ohne dafür in den Supermarkt zu müssen? Dann seid ihr hier genau richtig! Ich zeige euch, wie ihr Brokkoli ganz einfach in eurer Küche ziehen könnt. Klingt verrückt? Ist es aber nicht! Es ist ein super spannendes Projekt, das nicht nur Spaß macht, sondern euch auch mit leckerem, selbstgezogenem Gemüse belohnt.
Was du brauchst: Die Materialliste
Bevor wir loslegen, hier eine Liste mit allen Dingen, die du für dein Indoor-Brokkoli-Projekt benötigst:
* Brokkolisamen: Am besten Bio-Samen, um sicherzustellen, dass sie nicht behandelt wurden. Du findest sie in jedem Gartencenter oder online.
* Anzuchterde: Spezielle Anzuchterde ist nährstoffarm und locker, ideal für die Keimung der Samen.
* Anzuchttöpfe oder -schalen: Kleine Töpfe oder Schalen mit Drainagelöchern sind perfekt für die Vorkultur.
* Größere Töpfe: Sobald die Brokkoli-Pflänzchen größer sind, brauchen sie mehr Platz. Töpfe mit einem Durchmesser von mindestens 20 cm sind ideal.
* Pflanzerde: Nährstoffreiche Pflanzerde für das spätere Umpflanzen.
* Sprühflasche: Zum Befeuchten der Erde.
* Gießkanne: Für das spätere Gießen.
* Helle Fensterbank oder Pflanzenlampe: Brokkoli braucht viel Licht!
* Optional: Ein Mini-Gewächshaus oder eine durchsichtige Plastikhaube, um die Luftfeuchtigkeit zu erhöhen.
* Optional: Flüssigdünger für Gemüse, um die Pflanzen später mit Nährstoffen zu versorgen.
Phase 1: Die Aussaat – Der Start deines Brokkoli-Abenteuers
Die Aussaat ist der erste und wichtigste Schritt. Hier legen wir den Grundstein für unsere Brokkoli-Ernte.
1. Vorbereitung der Anzuchttöpfe: Fülle die Anzuchttöpfe oder -schalen mit Anzuchterde. Drücke die Erde leicht an.
2. Aussaat der Samen: Lege in jeden Topf 2-3 Brokkolisamen. Bedecke die Samen mit einer dünnen Schicht Anzuchterde (ca. 0,5 cm).
3. Bewässerung: Befeuchte die Erde vorsichtig mit einer Sprühflasche. Die Erde sollte feucht, aber nicht nass sein.
4. Standort: Stelle die Anzuchttöpfe an einen hellen, warmen Ort. Eine Fensterbank ist ideal. Wenn du ein Mini-Gewächshaus oder eine Plastikhaube hast, kannst du die Töpfe darunter stellen, um die Luftfeuchtigkeit zu erhöhen.
5. Geduld: Jetzt heißt es warten! Die Samen keimen in der Regel innerhalb von 5-10 Tagen. Achte darauf, dass die Erde immer feucht bleibt.
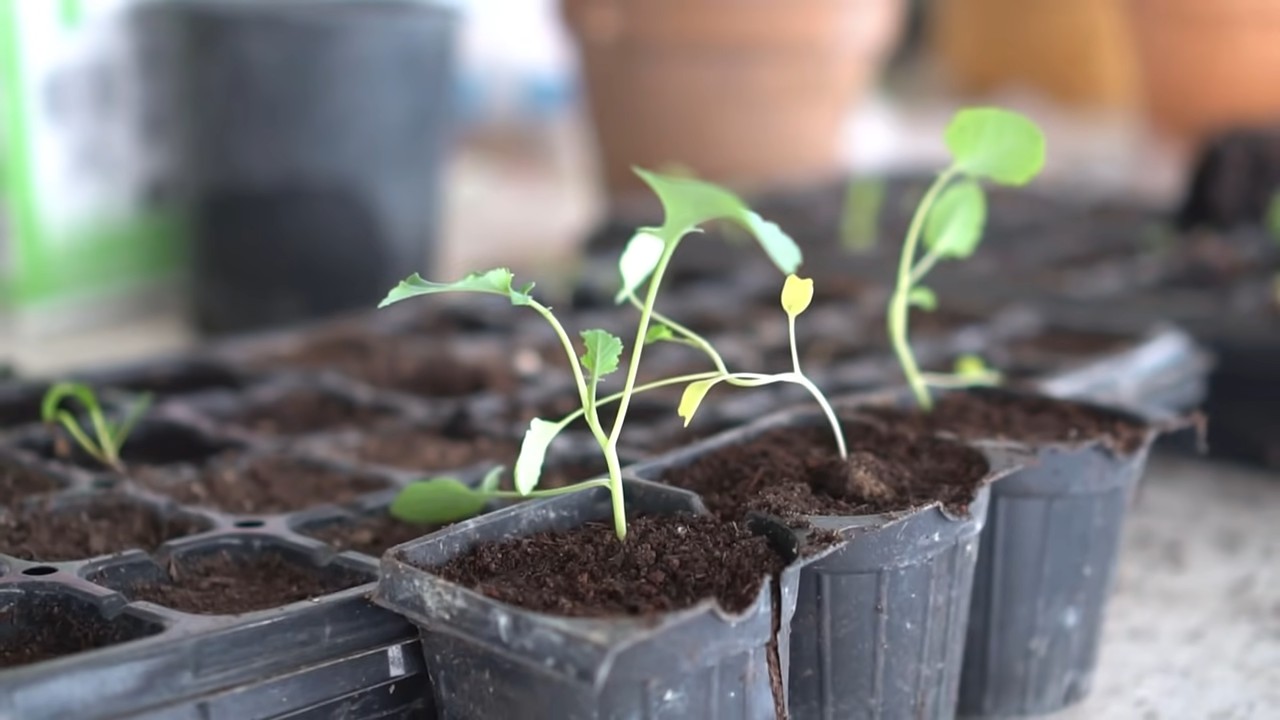
Phase 2: Die Aufzucht – Vom Keimling zur kleinen Pflanze
Sobald die ersten Keimlinge sprießen, beginnt die Aufzuchtphase. Hier kümmern wir uns darum, dass unsere kleinen Brokkoli-Pflänzchen stark und gesund werden.
1. Vereinzeln: Wenn in einem Topf mehrere Keimlinge gewachsen sind, solltest du die schwächsten entfernen, damit die stärkste Pflanze genügend Platz und Nährstoffe hat. Schneide die schwächeren Keimlinge einfach mit einer Schere direkt über der Erde ab.
2. Licht: Brokkoli braucht viel Licht. Wenn deine Fensterbank nicht hell genug ist, solltest du eine Pflanzenlampe verwenden. Die Lampe sollte ca. 12-14 Stunden am Tag eingeschaltet sein.
3. Bewässerung: Gieße die Pflänzchen regelmäßig, aber vermeide Staunässe. Die Erde sollte immer leicht feucht sein.
4. Drehen: Drehe die Töpfe regelmäßig, damit die Pflanzen gleichmäßig wachsen und sich nicht zum Licht hinbiegen.
5. Härten: Bevor du die Pflanzen in größere Töpfe umpflanzt, solltest du sie abhärten. Stelle die Töpfe für ein paar Stunden am Tag nach draußen (wenn das Wetter es zulässt). So gewöhnen sich die Pflanzen an die frische Luft und die Sonne.
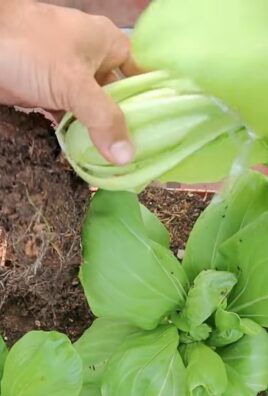
Phase 3: Das Umpflanzen – Mehr Platz für Wachstum
Wenn die Brokkoli-Pflänzchen ca. 10-15 cm groß sind und mehrere Blätter haben, ist es Zeit, sie in größere Töpfe umzupflanzen.
1. Vorbereitung der größeren Töpfe: Fülle die größeren Töpfe mit Pflanzerde.
2. Umpflanzen: Hebe die Brokkoli-Pflänzchen vorsichtig aus den Anzuchttöpfen. Achte darauf, die Wurzeln nicht zu beschädigen.
3. Einsetzen: Setze die Pflänzchen in die größeren Töpfe und fülle die Töpfe mit Erde auf. Drücke die Erde leicht an.
4. Bewässerung: Gieße die Pflanzen gründlich.
5. Standort: Stelle die Töpfe an einen hellen, sonnigen Ort.
Phase 4: Die Pflege – Damit dein Brokkoli prächtig gedeiht
Nach dem Umpflanzen beginnt die eigentliche Pflegephase. Hier sorgen wir dafür, dass unser Brokkoli optimal wächst und eine schöne Blüte bildet.
1. Bewässerung: Gieße die Pflanzen regelmäßig, aber vermeide Staunässe. Die Erde sollte immer leicht feucht sein.
2. Düngung: Dünge die Pflanzen alle 2-3 Wochen mit einem Flüssigdünger für Gemüse. Achte darauf, die Dosierungsanleitung auf der Verpackung zu beachten.
3. Licht: Brokkoli braucht viel Licht. Wenn deine Fensterbank nicht hell genug ist, solltest du eine Pflanzenlampe verwenden.
4. Belüftung: Sorge für eine gute Belüftung, um Pilzkrankheiten vorzubeugen. Lüfte den Raum regelmäßig oder stelle einen kleinen Ventilator auf.
5. Schädlinge: Achte auf Schädlinge wie Blattläuse oder Kohlweißlingsraupen. Bei Befall kannst du die Schädlinge mit einem natürlichen Schädlingsbekämpfungsmittel bekämpfen.
6. Stützen: Wenn die Brokkoli-Pflanze zu schwer wird, kann es sinnvoll sein, sie mit einem Stab zu stützen.
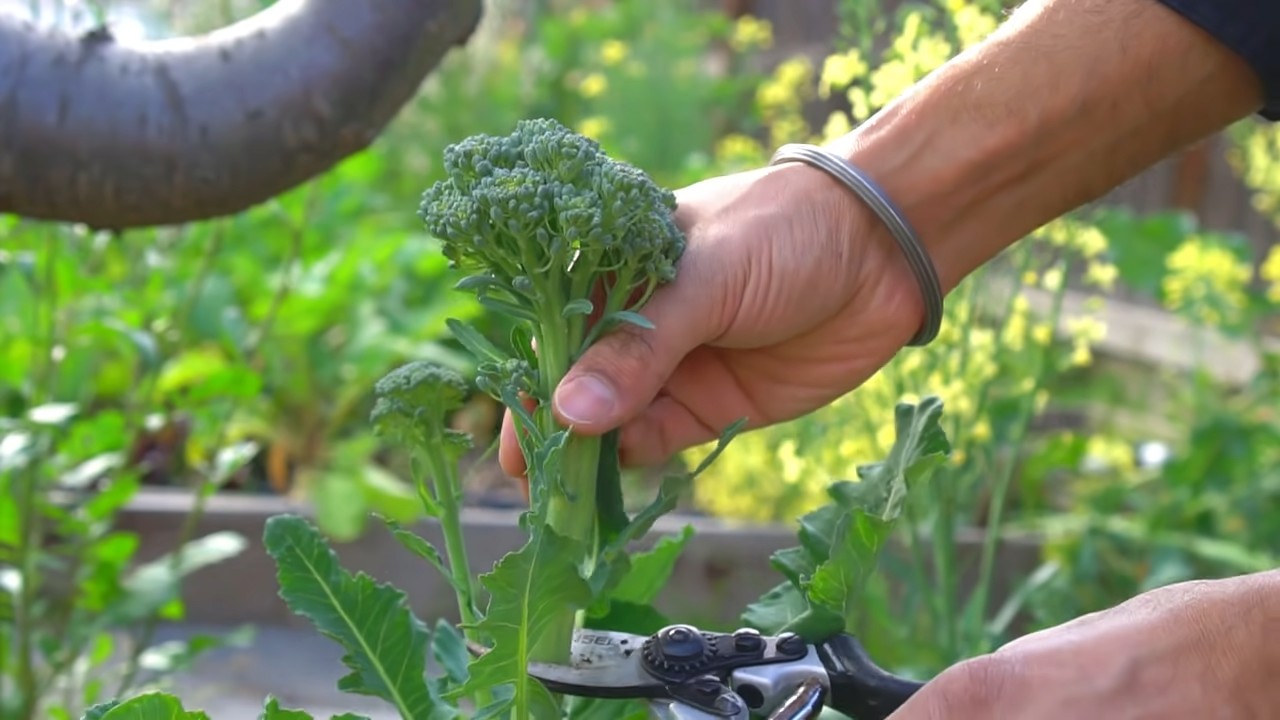
Phase 5: Die Ernte – Endlich frischer Brokkoli!
Nach ca. 60-80 Tagen kannst du deinen ersten selbstgezogenen Brokkoli ernten!
1. Erntezeitpunkt: Der Brokkoli ist reif, wenn die Blütenköpfe fest und geschlossen sind.
2. Ernten: Schneide den Brokkoli mit einem scharfen Messer ab. Lasse dabei einige Blätter an der Pflanze, damit sie weiterwachsen kann.
3. Genießen: Genieße deinen frischen, selbstgezogenen Brokkoli! Er schmeckt pur, gedünstet, gebraten oder als Zutat in Suppen und Aufläufen.
Zusätzliche Tipps für deinen Indoor-Brokkoli-Anbau
* Sortenwahl: Wähle eine Brokkolisorte, die für den Anbau in Töpfen geeignet ist. Es gibt spezielle Zwergsorten, die sich besonders gut eignen.
* Temperatur: Brokkoli bevorzugt kühle Temperaturen. Die ideale Temperatur liegt zwischen 15 und 20 Grad Celsius.
* Luftfeuchtigkeit: Brokkoli mag eine hohe Luftfeuchtigkeit. Du kannst die Luftfeuchtigkeit erhöhen, indem du die Pflanzen regelmäßig mit Wasser besprühst oder eine Schale mit Wasser in die Nähe der Pflanzen stellst.
* Nach der Ernte: Auch nach der Ernte des Haupttriebs können sich Seitentriebe bilden, die du ebenfalls ernten kannst.
* Krankheiten: Achte auf Anzeichen von Krankheiten wie Mehltau oder Falscher Mehltau. Bei Befall solltest du die betroffenen Blätter entfernen und die Pflanze mit einem geeigneten Fungizid behandeln.
Ich hoffe, dieser Guide hilft dir dabei, deinen eigenen Brokk
Conclusion
So, there you have it! Growing broccoli in your kitchen, while it might seem like a project reserved for seasoned gardeners, is surprisingly accessible and rewarding. This DIY trick isn’t just about saving a few dollars at the grocery store; it’s about connecting with your food, understanding its life cycle, and enjoying the unparalleled freshness of homegrown produce. Forget those limp, store-bought heads – imagine crisp, vibrant broccoli florets, bursting with flavor, ready to be steamed, roasted, or enjoyed raw in your favorite salad.
But why is this DIY trick a must-try? Beyond the freshness factor, it’s about control. You control the growing environment, ensuring your broccoli is free from harmful pesticides and herbicides. You control the harvest, picking your broccoli at its peak ripeness for optimal taste and nutritional value. And you control the variety, experimenting with different types of broccoli to find your absolute favorite.
Think about the possibilities! You could try growing sprouting broccoli, which produces smaller, more tender florets over a longer period. Or perhaps you’d prefer Romanesco broccoli, with its stunning fractal patterns and delicate flavor. You could even experiment with different growing mediums, from traditional soil to hydroponics, to see what works best for you.
Don’t be afraid to get creative with your indoor broccoli garden. Consider adding companion plants like basil or chamomile to deter pests and enhance the flavor of your broccoli. Use grow lights to supplement natural sunlight, especially during the darker months. And don’t forget to rotate your crops regularly to prevent soil depletion.
This isn’t just a recipe for growing broccoli; it’s a recipe for a more sustainable, flavorful, and fulfilling life. It’s a chance to reconnect with nature, even in the heart of your urban dwelling. It’s a chance to learn new skills, challenge yourself, and reap the delicious rewards of your labor.
We wholeheartedly encourage you to try this DIY trick and experience the joy of growing your own broccoli. It’s easier than you think, and the results are well worth the effort. So, grab your seeds, gather your supplies, and get ready to embark on a delicious adventure.
And most importantly, we want to hear about your experience! Share your photos, tips, and challenges in the comments below. Let’s create a community of indoor broccoli growers, sharing our knowledge and inspiring each other to cultivate a greener, healthier future. Let us know what variety of broccoli you decided to grow, what challenges you faced, and what you learned along the way. Your feedback will help us refine this guide and make it even more accessible to aspiring indoor gardeners. So, don’t be shy – share your story and let’s grow together!
Frequently Asked Questions (FAQ)
1. What kind of broccoli seeds should I use for indoor growing?
The best broccoli seeds for indoor growing are those that are specifically labeled as “early maturing” or “compact varieties.” These types of broccoli tend to be smaller and faster-growing, making them well-suited for container gardening. Some popular choices include ‘Waltham 29’, ‘De Cicco’, and ‘Packman’. You can also try sprouting broccoli varieties, which offer a continuous harvest of smaller florets. Always purchase seeds from a reputable source to ensure their quality and viability.
2. How much sunlight does indoor broccoli need?
Broccoli requires at least 6-8 hours of direct sunlight per day to thrive. If you don’t have a sunny windowsill that provides this much light, you’ll need to supplement with grow lights. Fluorescent or LED grow lights are excellent options, as they provide the necessary spectrum of light for healthy plant growth. Position the grow lights about 6-12 inches above the broccoli plants and keep them on for 12-16 hours per day.
3. What type of soil is best for growing broccoli indoors?
Broccoli prefers well-draining, nutrient-rich soil. A good potting mix for indoor broccoli should contain a blend of peat moss, perlite, and vermiculite. You can also add compost or aged manure to the soil to provide extra nutrients. Avoid using garden soil, as it can be too heavy and may contain pests or diseases. Ensure your container has drainage holes to prevent waterlogging.
4. How often should I water my indoor broccoli plants?
Water your broccoli plants regularly, keeping the soil consistently moist but not soggy. Water deeply whenever the top inch of soil feels dry to the touch. Avoid overwatering, as this can lead to root rot. The frequency of watering will depend on factors such as the size of your container, the temperature, and the humidity level. Check the soil moisture regularly and adjust your watering schedule accordingly.
5. How do I fertilize my indoor broccoli plants?
Broccoli is a heavy feeder and requires regular fertilization to produce healthy growth and abundant florets. Start fertilizing your plants about two weeks after they emerge, using a balanced liquid fertilizer diluted to half strength. Fertilize every two to three weeks throughout the growing season. You can also supplement with organic fertilizers such as compost tea or fish emulsion.
6. How do I deal with pests and diseases on my indoor broccoli plants?
Indoor broccoli plants are less susceptible to pests and diseases than those grown outdoors, but they can still be affected. Common pests include aphids, whiteflies, and cabbage worms. You can control these pests by handpicking them off the plants, spraying them with insecticidal soap, or introducing beneficial insects such as ladybugs. Diseases such as powdery mildew and downy mildew can be prevented by ensuring good air circulation and avoiding overwatering. If you notice any signs of disease, remove the affected leaves immediately.
7. When is the right time to harvest my indoor broccoli?
Harvest your broccoli when the florets are firm and tightly closed. The central head should be about 4-6 inches in diameter. Use a sharp knife to cut the head from the plant, leaving a few inches of stem. After harvesting the central head, the plant may produce smaller side shoots, which can also be harvested.
8. Can I grow broccoli indoors year-round?
Yes, you can grow broccoli indoors year-round, provided you have adequate light and temperature control. Broccoli prefers cool temperatures, so aim to keep the growing environment between 60-70°F (15-21°C). Use grow lights to supplement natural sunlight during the winter months.
9. What size container should I use for growing broccoli indoors?
A container that is at least 12 inches in diameter and 12 inches deep is recommended for growing a single broccoli plant indoors. This will provide enough space for the roots to develop properly. Make sure the container has drainage holes to prevent waterlogging.
10. Can I transplant broccoli seedlings that I started indoors to my outdoor garden?
Yes, you can transplant broccoli seedlings that you started indoors to your outdoor garden, provided the weather conditions are suitable. Harden off the seedlings by gradually exposing them to outdoor conditions for a week or two before transplanting. Choose a sunny location with well-draining soil. Transplant the seedlings in the early morning or late afternoon to avoid stressing them.
Leave a Comment