
Grow Celery at Home: A Beginner’s Guide to Crunchy, Homegrown Goodness
Have you ever dreamt of biting into a crisp, juicy stalk of celery, knowing you grew it yourself, right there in your backyard? Well, that dream is closer than you think! This article is your complete guide to Grow Celery at Home, revealing simple yet effective DIY tricks and techniques to cultivate this versatile vegetable in your own garden, no matter how small your space.
For centuries, celery has held a place of importance in various cultures, used not only as a culinary ingredient but also for its medicinal properties. From ancient Roman times, where it was considered a delicacy, to its modern-day popularity as a healthy snack, celery has consistently proven its worth. But buying celery from the supermarket often means compromising on freshness and flavor. That’s where the magic of home gardening comes in!
Why Grow Your Own Celery?
Growing your own celery offers numerous advantages. Firstly, you’ll enjoy the unparalleled taste of freshly harvested celery, bursting with flavor and devoid of the preservatives often found in store-bought produce. Secondly, growing celery at home allows you to control the growing process, ensuring your plants receive the best possible care and resulting in a bountiful harvest. Finally, it’s incredibly rewarding to nurture a plant from seed to stalk, connecting you more deeply with your food and the natural world. This DIY guide will empower you to achieve this rewarding experience.
So, whether you’re a seasoned gardener or a complete beginner, get ready to embark on this exciting journey of growing celery at home. Let’s get our hands dirty and discover the secrets to cultivating this crunchy delight in your own garden!
Growing Celery from Scraps: A Complete Guide
I love celery, and I hate buying it every week! So, I decided to try growing my own. It’s surprisingly easy, and you’ll be amazed at how much you can save. This guide will walk you through the entire process, from selecting your celery to harvesting your delicious homegrown stalks.
Phase 1: Selecting and Preparing Your Celery
- Choose the right celery: Select a bunch of celery with firm, crisp stalks and bright green leaves. Avoid any that show signs of wilting or discoloration. The base of the celery, where the roots will grow, is crucial, so make sure it’s healthy and intact.
- Prepare the celery base: Carefully cut off the bottom inch or two of the celery stalk, ensuring you get a clean, flat cut. This section contains the dormant buds that will sprout new roots and leaves.
- Remove the outer leaves: Gently remove any wilted or damaged outer leaves. This helps focus the plant’s energy on root and stalk development.
- Rinse thoroughly: Rinse the celery base under cool running water to remove any dirt or debris. This helps prevent rot and promotes healthy growth.
Phase 2: Starting the Growing Process
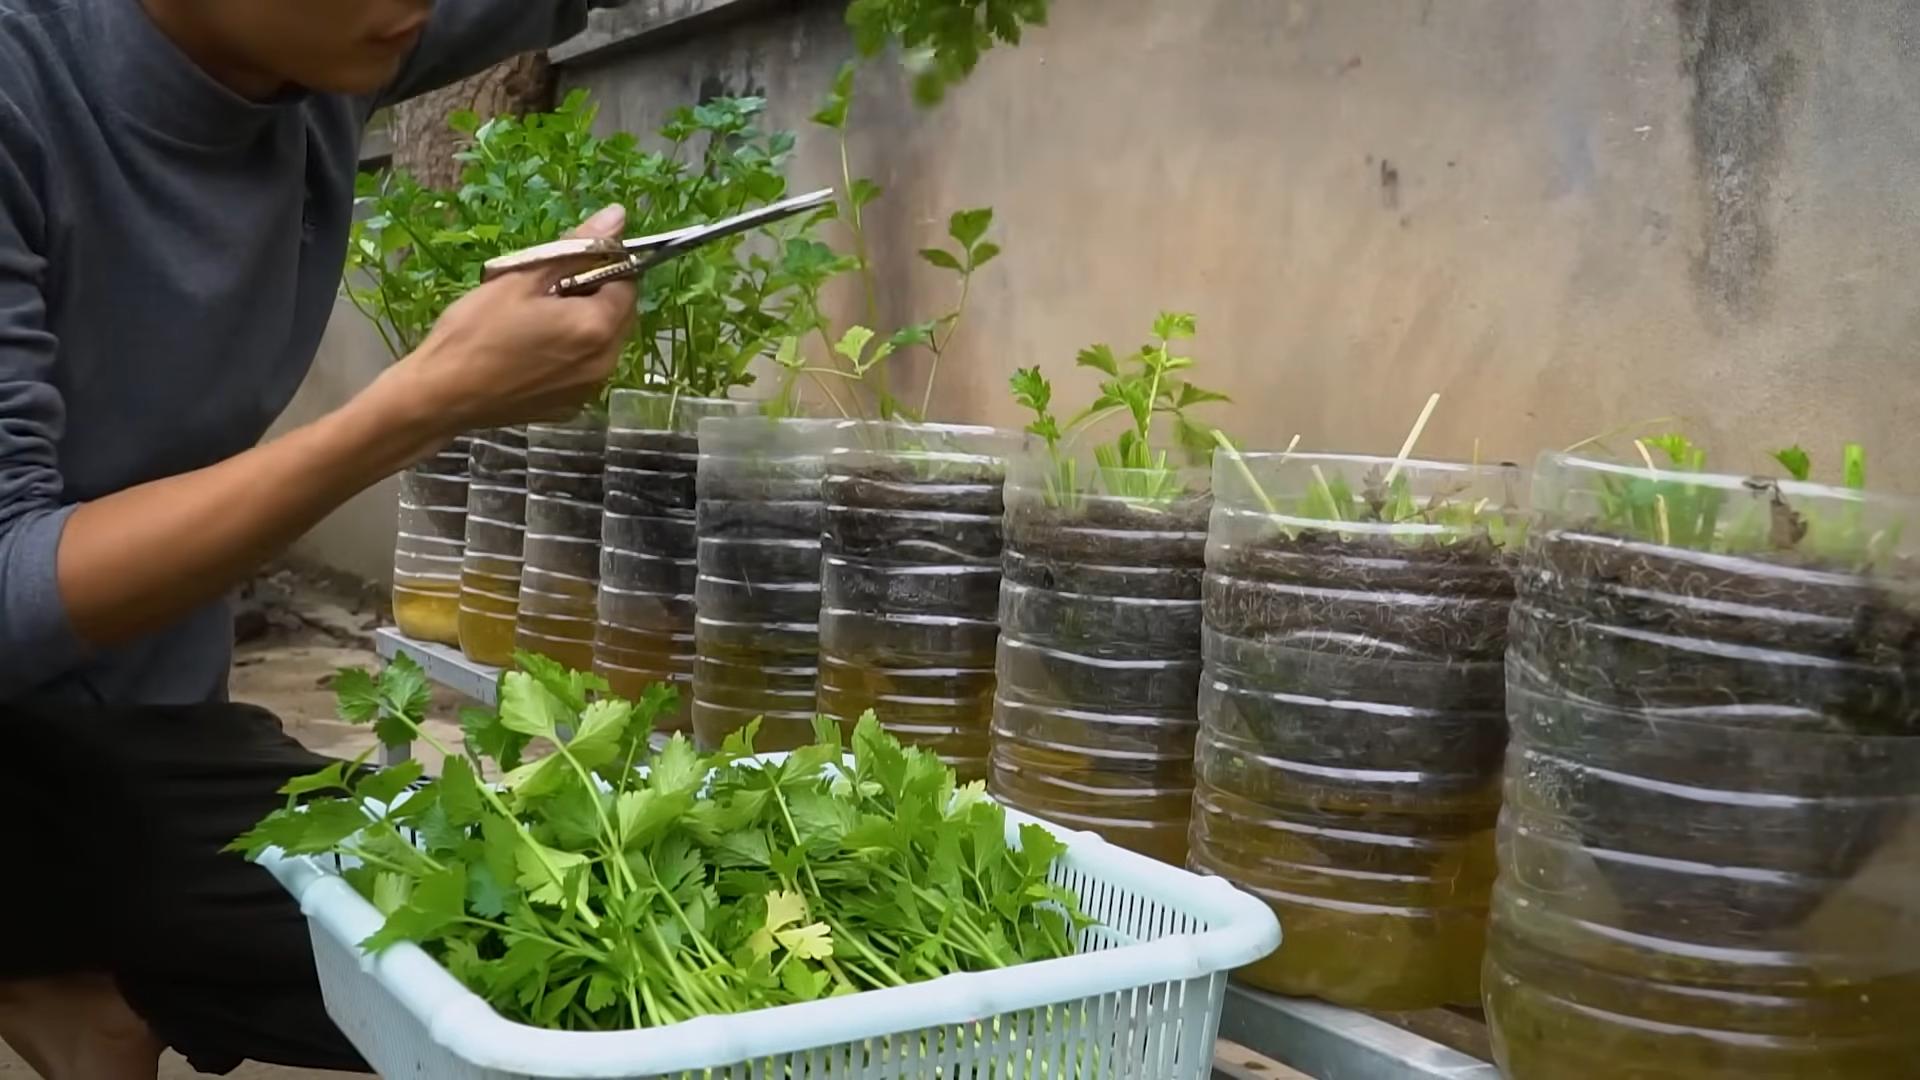
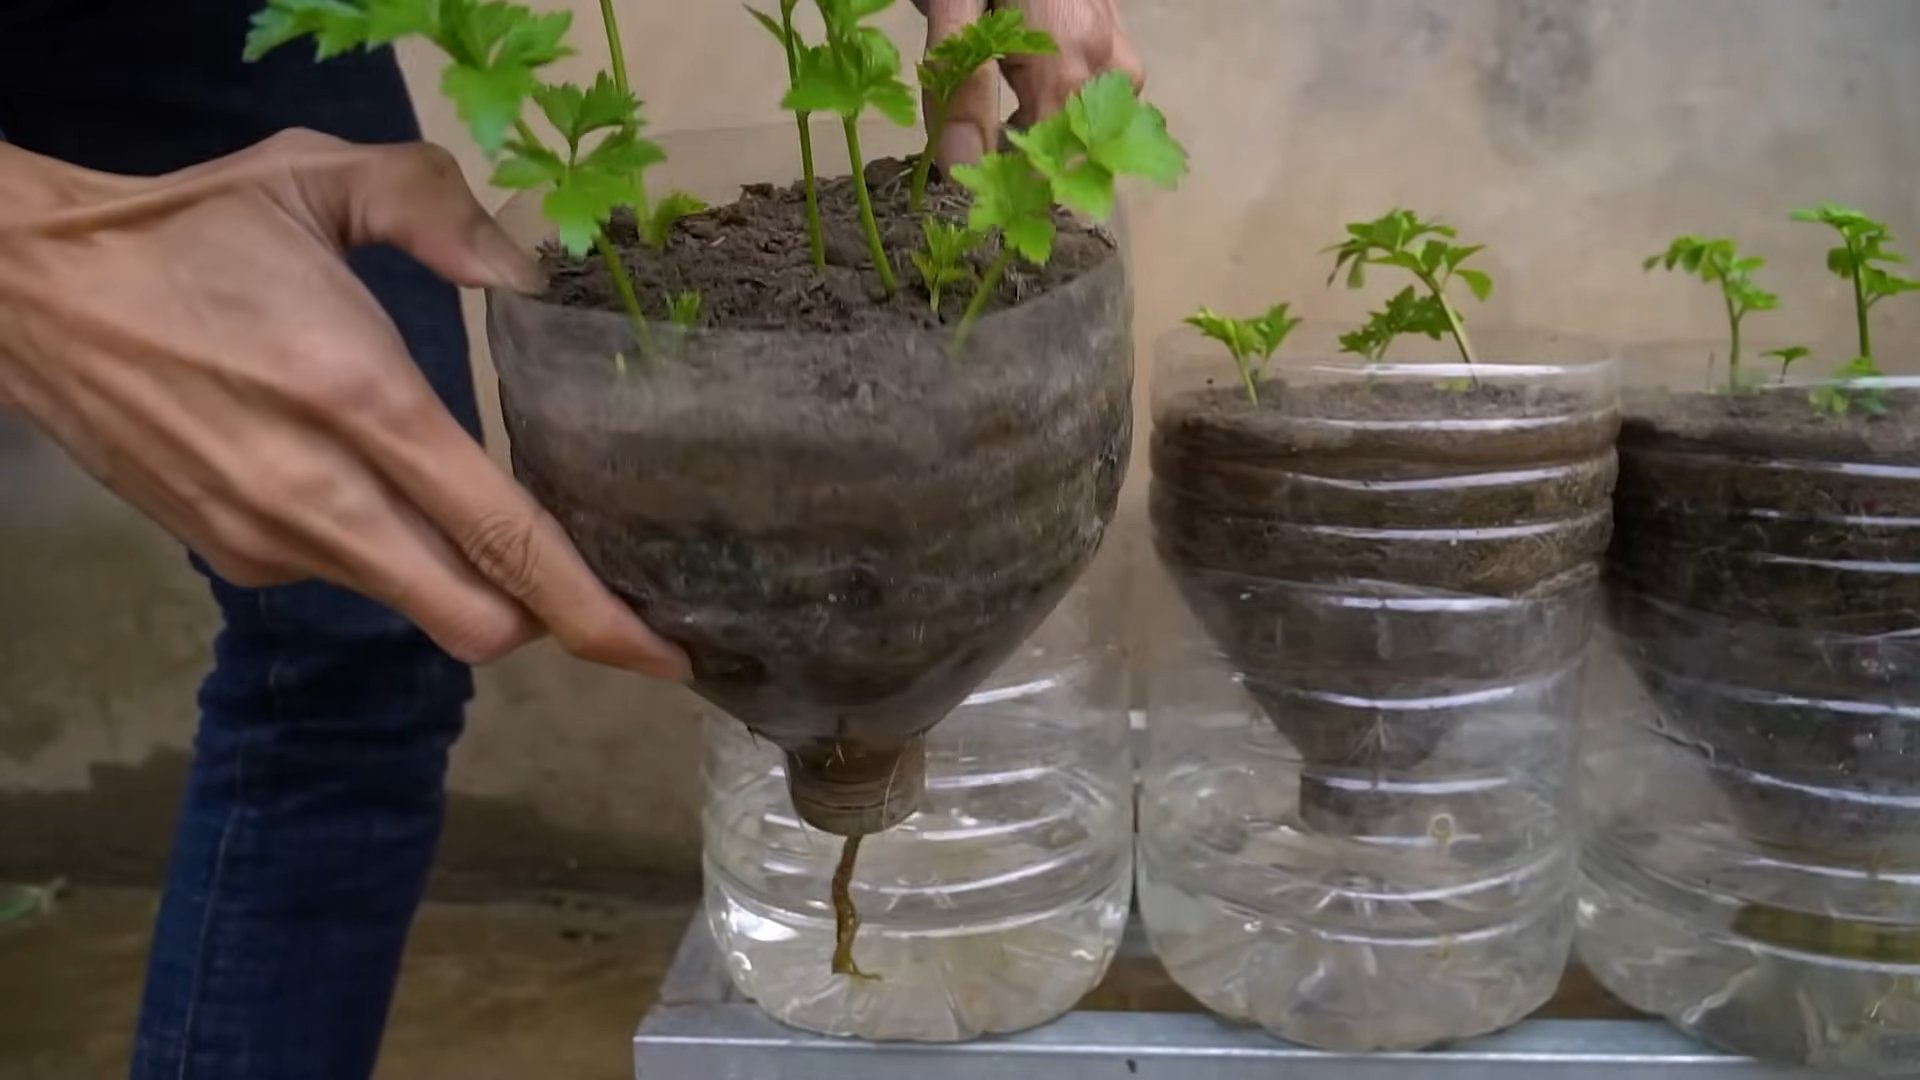
- Choose your container: You can use a shallow dish, a small pot, or even a jar. Make sure it’s at least 2-3 inches deep and has drainage holes to prevent waterlogging. A wide, shallow container is ideal because celery roots spread out.
- Add water: Fill your chosen container with about an inch of water. The water level should just barely cover the base of the celery. Don’t submerge the entire base; only the bottom inch or so needs to be in contact with the water.
- Place the celery base: Carefully place the prepared celery base into the water, ensuring the cut end is fully submerged. The base should sit securely without tipping over.
- Find a sunny spot: Place your container in a sunny location. Celery needs at least 6-8 hours of sunlight per day to thrive. A south-facing windowsill is usually ideal.
- Change the water: Change the water every day or every other day. This prevents the water from becoming stagnant and helps prevent the growth of bacteria and mold. Use fresh, cool water each time.
Phase 3: Observing Growth and Transplanting
- Monitor for root growth: Within a week or two, you should start to see small roots emerging from the base of the celery. This is a sign that your celery is successfully growing.
- Observe leaf growth: After a few more weeks, you’ll notice new leaves sprouting from the center of the celery. These new leaves will be smaller and lighter green than the original leaves.
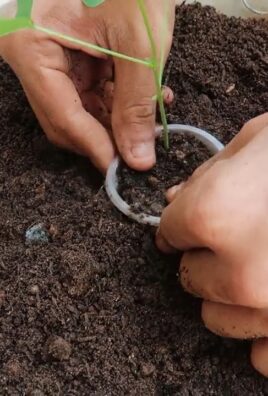
- Transplanting (optional): Once the roots are well-established and the new leaves are several inches tall, you can transplant your celery into a larger pot or directly into the garden. If transplanting to a pot, use a well-draining potting mix. If planting outdoors, choose a location with partial shade and well-drained soil.
- Watering and fertilizing: Keep the soil consistently moist but not waterlogged. You can use a balanced liquid fertilizer every few weeks to promote healthy growth. Follow the instructions on the fertilizer packaging for proper dilution.
Phase 4: Harvesting Your Celery
- Harvesting time: Depending on the variety of celery and growing conditions, it can take several months for your celery to mature. You’ll know it’s ready to harvest when the stalks are thick, crisp, and have reached your desired size.
- Harvesting method: Carefully cut the outer stalks at the base, leaving the inner stalks to continue growing. You can harvest stalks individually as needed, or you can harvest the entire plant at once.
- Storage: Store harvested celery in the refrigerator in a plastic bag to maintain its freshness. Proper storage can extend the shelf life of your homegrown celery for several days.
- Troubleshooting: If you notice any signs of disease or pests, take appropriate action. This might involve removing affected leaves, treating with an organic pesticide, or improving growing conditions.
Tips for Success
- Use filtered water: Tap water can sometimes contain minerals that can inhibit growth. Filtered water is often a better choice.
- Maintain consistent water levels: Don’t let the water level drop too low, as this can stress the plant and hinder growth.
- Rotate your container: Rotate your container regularly to ensure even sunlight exposure on all sides of the celery.
- Be patient: Growing celery takes time. Don’t get discouraged if you don’t see results immediately. With patience and care, you’ll be enjoying your homegrown celery in no time.
Possible Problems and Solutions
- Wilting leaves: This could indicate underwatering or too much direct sunlight. Adjust watering and provide some shade if necessary.
- Yellowing leaves: This could be a sign of nutrient deficiency. Use a balanced liquid fertilizer to address this issue.
- Root rot: This is often caused by overwatering or poor drainage. Ensure your container has adequate drainage and avoid overwatering.
- Pests: Aphids and other pests can sometimes affect celery. Use organic pest control methods to address infestations.
Conclusion
So there you have it – a simple, yet incredibly rewarding method for growing your own celery at home! This DIY trick isn’t just about saving money on grocery bills; it’s about experiencing the satisfaction of nurturing a plant from its humble beginnings to a crisp, flavorful stalk ready for your next meal. Growing celery at home allows you to control the quality, freshness, and even the variety of celery you consume, ensuring a superior culinary experience. The process is surprisingly straightforward, requiring minimal effort and resources, making it accessible to even the most novice gardeners. Beyond the delicious results, growing your own celery connects you to the natural world, fostering a deeper appreciation for the food we eat and the processes that bring it to our tables. This simple act of cultivation can be incredibly therapeutic and rewarding, offering a welcome escape from the daily grind. Don’t just take our word for it – try it yourself and discover the magic of homegrown celery! You might be surprised at how easy it is to transform a simple celery base into a thriving plant, providing you with a continuous supply of this versatile vegetable.
We encourage you to experiment with different growing methods and conditions to find what works best for you. Perhaps you’ll discover that a slightly different lighting setup or a specific type of soil yields even better results. Share your experiences, successes, and even your challenges – we’d love to hear from you and learn from your journey. Post your pictures on social media using #HomegrownCelery and tag us! Let’s build a community of home celery growers, sharing tips, tricks, and the joy of harvesting our own delicious, homegrown produce. Remember, even small successes in gardening can be incredibly fulfilling, and growing your own celery is a fantastic place to start. So, grab a celery base, follow our simple steps, and embark on this rewarding gardening adventure. You won’t regret it! The taste of homegrown celery is truly unparalleled.
Variations and Suggestions
While the core method outlined in this article provides a solid foundation for growing celery at home, there are several variations you can explore to personalize your growing experience:
Different Celery Types:
Experiment with different varieties of celery. Some varieties might be better suited to your climate or growing conditions. Look for seeds or starter plants at your local garden center.
Hydroponics:
Consider growing your celery hydroponically. This method involves growing plants without soil, using a nutrient-rich water solution. Hydroponics can offer faster growth and higher yields.
Indoor vs. Outdoor Growing:
Adapt the method based on whether you’re growing indoors or outdoors. Indoor growing requires careful attention to lighting, while outdoor growing needs protection from harsh weather conditions.
Companion Planting:
Explore companion planting. Certain plants can benefit each other when grown together. Research which plants complement celery and enhance its growth.
Frequently Asked Questions
Q: How long does it take to grow celery from a base?
A: It typically takes around 6-8 weeks to grow celery from a base to a harvestable size. However, this can vary depending on factors like growing conditions, the type of celery, and the care provided. Be patient and consistent in your care, and you’ll be rewarded with delicious homegrown celery.
Q: What type of soil is best for growing celery?
A: Celery thrives in loose, well-draining soil that is rich in organic matter. A slightly acidic soil pH (around 6.0-6.8) is ideal. You can amend your soil with compost or other organic materials to improve its drainage and nutrient content.
Q: How much sunlight does celery need?
A: Celery requires at least 6 hours of sunlight per day. If you’re growing celery indoors, you’ll need to provide supplemental lighting to ensure it receives enough light. A south-facing window is generally ideal for indoor celery cultivation.
Q: What are the common problems encountered when growing celery?
A: Some common problems include pests like aphids and slugs, fungal diseases like leaf spot, and nutrient deficiencies. Regularly inspect your plants for signs of pests or diseases and address them promptly. Ensure your celery receives adequate nutrients through proper fertilization.
Q: Can I grow celery from seeds?
A: Yes, you can grow celery from seeds, but it’s a more time-consuming process than growing from a base. Starting celery from seeds requires more attention to detail and careful management of germination and seedling growth. Growing from a base is generally recommended for beginners due to its simplicity and faster results.
Q: What should I do if my celery starts to bolt?
A: Bolting, or the premature formation of flower stalks, is often caused by stress, such as heat or drought. If your celery starts to bolt, it will become tough and bitter. Try to provide consistent watering and shade if necessary to prevent bolting. Harvest the celery as soon as possible before it becomes completely unpalatable.
Q: How do I harvest my homegrown celery?
A: Harvest your celery when the stalks are firm and fully developed. You can harvest individual stalks as needed, or you can harvest the entire plant at once. Use a sharp knife to cut the stalks cleanly at the base.
Q: Can I save seeds from my homegrown celery to plant next year?
A: While you can technically try to save seeds from your homegrown celery, it’s not always a reliable method. Celery is often a hybrid, meaning the seeds may not produce plants identical to the parent plant. It’s generally easier and more reliable to purchase new seeds or starter plants each year. However, if you’re interested in experimenting, collect the seeds from the flower stalks after they have fully matured and dried.
Remember, growing your own celery is a journey, not a race. Enjoy the process, learn from your experiences, and savor the delicious rewards of your homegrown harvest. Happy growing!


Leave a Comment