
Grow Garlic Indoors? Absolutely! Imagine the satisfaction of snipping fresh, pungent garlic greens right from your windowsill, even in the dead of winter. Forget those bland, store-bought herbs – we’re talking about homegrown flavor that will elevate your culinary creations to a whole new level. For centuries, garlic has been revered not only for its culinary uses but also for its medicinal properties. From ancient Egypt, where it fueled the pyramid builders, to traditional Chinese medicine, garlic has been a staple in cultures around the globe.
But why should you bother learning how to grow garlic indoors? Well, for starters, it’s incredibly rewarding! Plus, it’s a fantastic way to reduce your reliance on grocery stores and embrace a more sustainable lifestyle. Maybe you live in an apartment with limited outdoor space, or perhaps you just want to enjoy fresh garlic year-round. Whatever your reason, this DIY guide is here to equip you with all the tips and tricks you need to succeed. I’m excited to share my experiences and help you cultivate your own indoor garlic haven. Let’s get started and unlock the secrets to growing this amazing herb right in your home!
Growing Garlic Indoors: A Simple DIY Guide
Hello, dear garden friends! Do you want to enjoy fresh garlic all year round without having a garden? Then you’ve come to the right place! I’ll show you how you can easily grow garlic in your home. It’s easier than you think and a lot of fun!
What you need:
- Garlic cloves (organic garlic is best, as it is less treated)
- A pot (at least 15 cm / 6 inches in diameter)
- Potting soil (preferably organic potting soil)
- Water
- A bright location (e.g., a windowsill)
- Optional: Liquid fertilizer for vegetables
Choosing the right garlic variety:
Not every type of garlic is equally well-suited for growing in a pot. In general, softneck garlic is better suited than hardneck garlic. Softneck garlic is more robust and adapts better to indoor conditions. It’s best to ask at a garden center which varieties are recommended for pot cultivation.
Step-by-Step Guide:
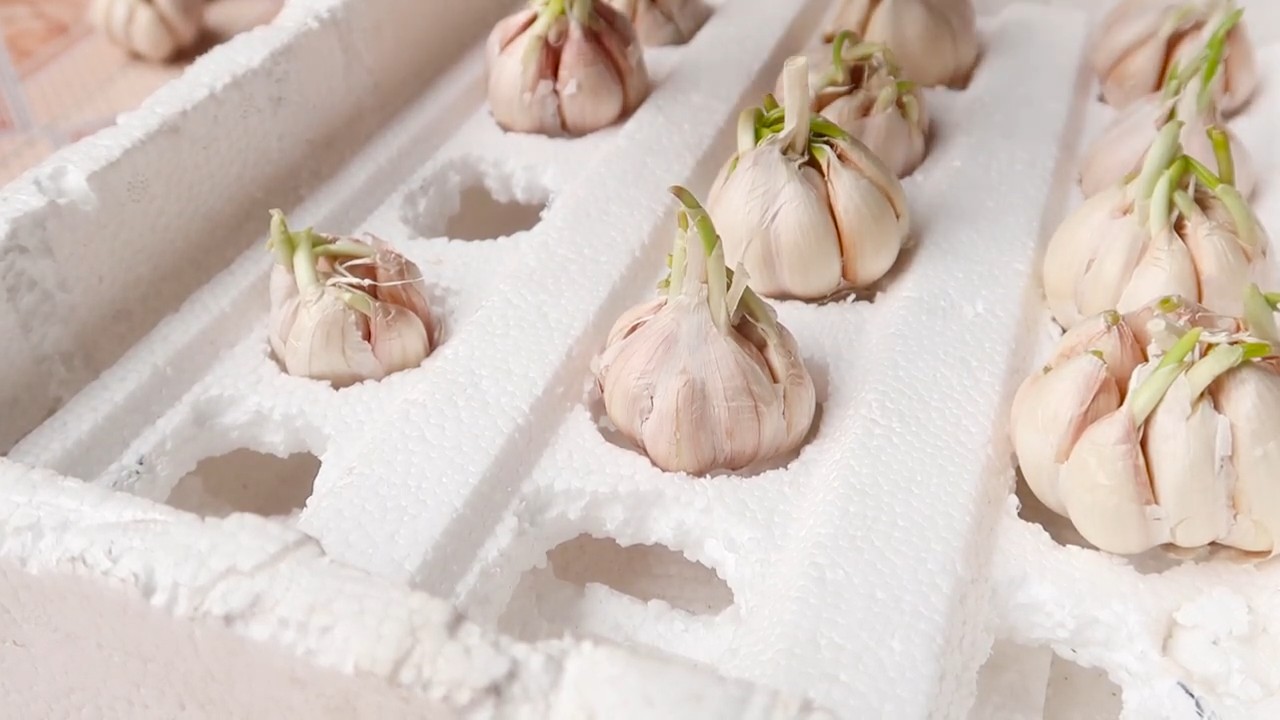
1. Prepare the garlic cloves:
- Choose the largest and healthiest garlic cloves. The larger the clove, the stronger the plant will be.
- Leave the outer skin on the cloves; it protects the clove and helps it retain moisture.
- Make sure the cloves have no damage or signs of mold.
2. Prepare the pot:
- Choose a pot with sufficient holes in the bottom so that excess water can drain away. Waterlogging is poison for garlic!
- Fill the pot with potting soil. Leave about 2-3 cm (1 inch) of space to the rim.
- Press the soil down lightly.
3. Plant the garlic cloves:
- Make small holes in the soil with your finger or a small stick. The holes should be about 5 cm (2 inches) deep.
- Place the garlic cloves in the holes with the pointed side up.
- Cover the cloves with soil and press the soil down lightly.
- Make sure there is enough space between the cloves (about 5-7 cm / 2-3 inches) so they can develop well.
4. Watering:
- Water the soil gently until it is well-moistened. Make sure no water remains standing in the pot.
- Water the plants regularly, but not too much. The soil should always be slightly moist, but not wet.
5. The right location:
- Place the pot in a bright location, e.g., on a windowsill. Garlic needs a lot of light to grow well.
- Rotate the pot regularly so that the plants get even light from all sides.
6. Care:
- Regularly remove any weeds that grow in the pot.
- Fertilize the plants every few weeks with a liquid fertilizer for vegetables. Follow the dosage instructions on the packaging.
- Observe the plants regularly for pests or diseases. If necessary, you can use biological pesticides.
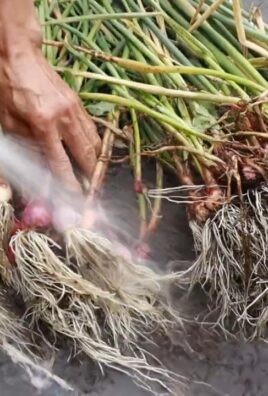
The Harvest:
The harvest time depends on the variety and conditions. As a rule, you can harvest the first garlic bulbs after about 6-8 months.
- Signs of ripeness: The leaves turn yellow and begin to wilt.
- The harvest: Carefully pull the garlic bulbs out of the soil.
- Drying: Let the garlic bulbs dry in a dry and airy place. This will make them last longer.
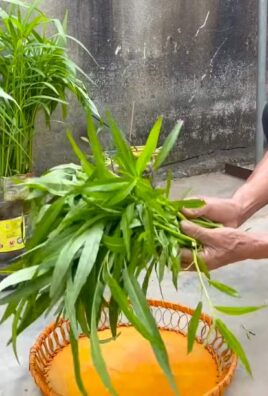
Harvesting Garlic Greens:
You don’t necessarily have to wait for the garlic bulbs! You can also harvest the garlic greens and use them to season food.
- When to harvest: As soon as the greens have reached a height of about 15-20 cm (6-8 inches).
- How to harvest: Cut the greens with scissors or a knife. Make sure you don’t harvest too much green at once, so the plant can continue to grow.
- Use: The garlic greens taste similar to garlic, but milder. They are excellent for seasoning salads, soups, sauces, and much more.
Problem Solving:
- Yellow leaves: Yellow leaves can be a sign of too much or too little water. Check the soil moisture and adjust your watering accordingly.
- Pests: Garlic can be infested by aphids or other pests. Spray the plants with a solution of water and insecticidal soap.
- Mold: Mold can occur if the soil is too moist. Ensure good ventilation and water less.
Tips and Tricks:
- Growing garlic in water: You can also grow garlic in a glass of water. To do this, place a garlic clove with the pointed side up in a glass of water. Make sure that only the bottom part of the clove is in the water. After a few days, roots will form and the garlic greens will start to grow.
- Garlic as a natural pest repellent: Garlic has a deterrent effect on many pests. Plant garlic between your other plants to protect them from pests.
- Garlic as a fertilizer: Garlic contains many nutrients that are good for plants. Use garlic water (water in which garlic cloves have been soaked) as a fertilizer for your plants.
Why grow garlic indoors?
There are many good reasons to grow garlic indoors:
- Fresh garlic all year round: You always have fresh garlic on hand, no matter the season.
- Space-saving: You don’t need a garden to grow garlic. A pot on the windowsill is enough.
- Easy: Growing garlic indoors is simple and straightforward.
- Sustainable: You can grow your own garlic and save yourself from buying it at the supermarket.
- Healthy: Garlic is rich in vitamins and minerals and has many health benefits.
I hope you enjoyed this guide and that it inspires you to grow your own garlic indoors. It’s a great feeling to grow your own food and know where it comes from. Happy gardening

Conclusion
So, there you have it! Growing garlic indoors is not only possible, but it’s also surprisingly rewarding. Forget those last-minute grocery store runs when you’re missing that crucial clove; with a little patience and this simple DIY trick, you can have fresh, flavorful garlic greens right at your fingertips. We’ve walked you through the process, from selecting the right cloves to providing the optimal growing conditions, and hopefully, we’ve demystified any concerns you might have had about bringing this pungent plant indoors.
But why is this a must-try? Beyond the sheer convenience of having a readily available supply of garlic flavor, growing garlic indoors offers a unique connection to your food. You get to witness the entire life cycle of the plant, from dormant clove to vibrant green shoots, and that’s an experience that’s both educational and deeply satisfying. Plus, let’s be honest, there’s something incredibly cool about showing off your indoor garlic garden to friends and family!
Don’t be afraid to experiment! While we’ve focused on growing garlic greens for their mild, chive-like flavor, you can also try forcing bulbs indoors for a more intense garlic experience. Just remember that the bulbs grown indoors may not be as large or robust as those grown outdoors, but they’ll still pack a flavorful punch. You can also explore different varieties of garlic to see which ones thrive best in your indoor environment. Elephant garlic, with its milder flavor and larger cloves, might be a fun option to try. Consider using different types of containers as well. Terracotta pots can help regulate moisture, while self-watering planters can simplify the watering process.
And speaking of variations, consider companion planting! Certain herbs, like parsley and rosemary, can thrive alongside your indoor garlic, creating a miniature herb garden that’s both beautiful and functional. Just be sure to research the specific needs of each plant to ensure they’re compatible.
Ultimately, the success of your indoor garlic garden depends on your willingness to experiment and adapt. Pay attention to your plants, observe their growth patterns, and adjust your care routine accordingly. Don’t be discouraged if you encounter a few bumps along the way; gardening is a learning process, and every mistake is an opportunity to improve.
We wholeheartedly encourage you to give this DIY trick a try. It’s a simple, affordable, and incredibly rewarding way to bring a touch of the garden indoors and enjoy the fresh, vibrant flavor of garlic year-round. Once you’ve experienced the joy of harvesting your own homegrown garlic greens, you’ll never look at a clove of garlic the same way again.
So, grab a few cloves, gather your supplies, and get ready to embark on your indoor garlic growing adventure! And most importantly, don’t forget to share your experiences with us. We’d love to hear about your successes, your challenges, and any tips or tricks you’ve discovered along the way. Share your photos and stories on social media using #IndoorGarlicGarden, and let’s inspire others to discover the joys of growing their own food, one clove at a time. Let us know how your **grow garlic indoors** journey goes!
Frequently Asked Questions (FAQ)
1. What kind of garlic should I use for growing indoors?
The best garlic to use for growing indoors is softneck garlic. Softneck varieties tend to be more adaptable to indoor conditions and are more likely to produce greens. You can also use hardneck garlic, but it may not be as productive indoors. Avoid using garlic from the grocery store if possible, as it may have been treated to prevent sprouting. Instead, look for organic garlic from a local farmer’s market or garden center. Organic garlic is more likely to sprout and grow successfully.
2. How much sunlight does my indoor garlic need?
Garlic needs at least 6-8 hours of sunlight per day to thrive. If you don’t have a sunny windowsill, you can supplement with a grow light. Place the grow light about 6-12 inches above the plants and keep it on for 12-14 hours per day. Rotate the plants regularly to ensure that all sides receive adequate light. Without enough light, your garlic will become leggy and weak.
3. What kind of soil should I use?
Use a well-draining potting mix that is rich in organic matter. Avoid using garden soil, as it can be too heavy and may contain pests or diseases. You can also amend your potting mix with compost or worm castings to provide additional nutrients. Make sure the pot you choose has drainage holes to prevent waterlogging.
4. How often should I water my indoor garlic?
Water your garlic when the top inch of soil feels dry to the touch. Avoid overwatering, as this can lead to root rot. Water deeply, until water drains out of the drainage holes. Reduce watering during the winter months when the plants are not actively growing.
5. How do I harvest garlic greens?
You can start harvesting garlic greens when they are about 6-8 inches tall. Use scissors to snip off the greens near the base of the plant. Avoid cutting off more than one-third of the plant at a time, as this can weaken it. The greens will regrow, allowing you to harvest them multiple times.
6. Can I grow garlic bulbs indoors?
Yes, you can grow garlic bulbs indoors, but they may not be as large or robust as those grown outdoors. To grow bulbs, plant the cloves in the fall and provide them with a cold period of at least 4-6 weeks. This can be done by placing the pots in a cool, dark location, such as a garage or basement. After the cold period, bring the plants back indoors and provide them with plenty of sunlight and water.
7. My garlic greens are turning yellow. What should I do?
Yellowing leaves can be a sign of several problems, including overwatering, underwatering, nutrient deficiency, or pest infestation. Check the soil moisture and adjust your watering accordingly. If the soil is dry, water deeply. If the soil is soggy, allow it to dry out before watering again. You can also fertilize your plants with a balanced liquid fertilizer to provide them with essential nutrients. Inspect the plants for pests, such as aphids or spider mites, and treat them accordingly.
8. How do I deal with pests on my indoor garlic?
Common pests that can affect indoor garlic include aphids, spider mites, and fungus gnats. You can control these pests by spraying the plants with insecticidal soap or neem oil. You can also try wiping the leaves with a damp cloth to remove pests. For fungus gnats, allow the soil to dry out between waterings and use sticky traps to catch the adults.
9. Can I use the same cloves to grow garlic again?
No, you cannot use the same cloves to grow garlic again. Each clove will only produce one plant. You will need to use new cloves each time you want to grow garlic.
10. How long does it take to grow garlic indoors?
It takes about 4-6 weeks to grow garlic greens indoors. To grow garlic bulbs, it takes about 6-8 months.
11. Is growing garlic indoors worth it?
Absolutely! Growing garlic indoors is a rewarding experience that allows you to enjoy fresh, flavorful garlic greens year-round. It’s also a great way to connect with your food and learn about the growing process. Plus, it’s a fun and educational activity for kids.

Leave a Comment