
Grow Peas at Home – imagine stepping into your backyard and plucking fresh, sweet peas straight from the vine! Sounds idyllic, right? Well, it’s more achievable than you might think! For centuries, cultivating your own food has been a cornerstone of self-sufficiency and a connection to nature. From ancient Roman gardens to victory gardens during wartime, growing peas and other edibles has always been a way to nourish ourselves and our communities.
But let’s be honest, sometimes the idea of gardening feels overwhelming. That’s where these simple DIY tricks and hacks come in. I’m here to show you that you don’t need a sprawling farm or a green thumb of legend to grow peas at home successfully. Whether you have a tiny balcony, a raised bed, or a traditional garden plot, I’ve got tips to help you maximize your yield and enjoy the delicious rewards of your labor.
Why do you need these DIY tricks? Because growing peas can be tricky! From choosing the right variety to providing proper support, there are a few key things to know to avoid common pitfalls. This article is packed with easy-to-follow advice that will save you time, money, and frustration. Get ready to transform your space into a pea-producing paradise!
Growing Peas at Home: A Complete DIY Guide
Hey there, fellow gardening enthusiasts! I’m so excited to share my tried-and-true method for growing delicious, sweet peas right in your own backyard (or even on your balcony!). Forget those bland, store-bought peas – nothing beats the taste of freshly picked, homegrown goodness. This guide will walk you through every step, from choosing the right variety to harvesting your bountiful crop. Let’s get started!
Choosing Your Pea Variety
Before we dive into the nitty-gritty, let’s talk about pea varieties. There are a few main types, and the best one for you will depend on your preferences and growing conditions.
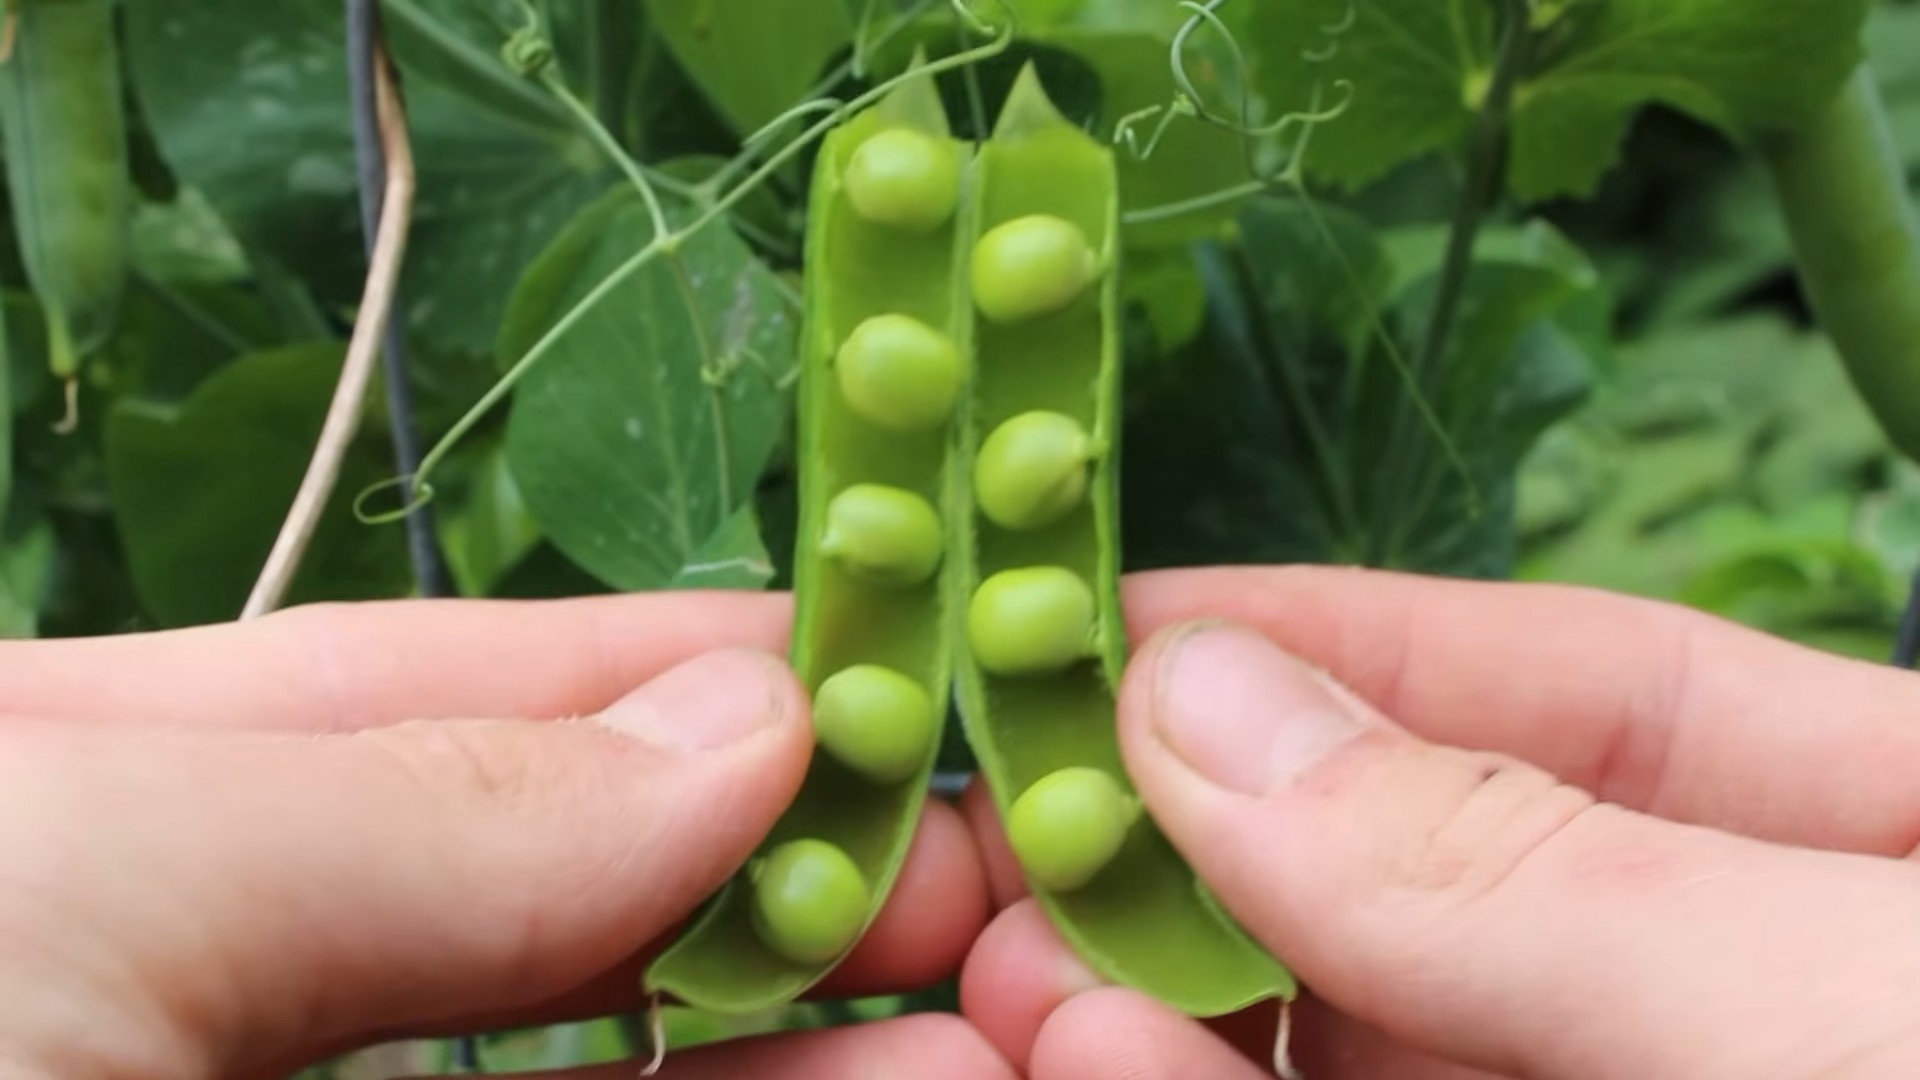
* **Shelling Peas (English Peas):** These are the classic peas you shell to eat the round seeds inside. They have tough pods that aren’t edible. Popular varieties include ‘Little Marvel’ and ‘Green Arrow.’
* **Snap Peas:** These have edible pods that are plump and crunchy. You eat the whole pod, seeds and all! ‘Sugar Snap’ is a well-known and reliable variety.
* **Snow Peas:** These also have edible pods, but they’re flatter and thinner than snap peas. They’re often used in stir-fries. ‘Oregon Sugar Pod II’ is a great choice.
Consider your climate and the length of your growing season when choosing your variety. Some peas are more heat-tolerant than others, and some mature faster. Check the seed packet for specific information.
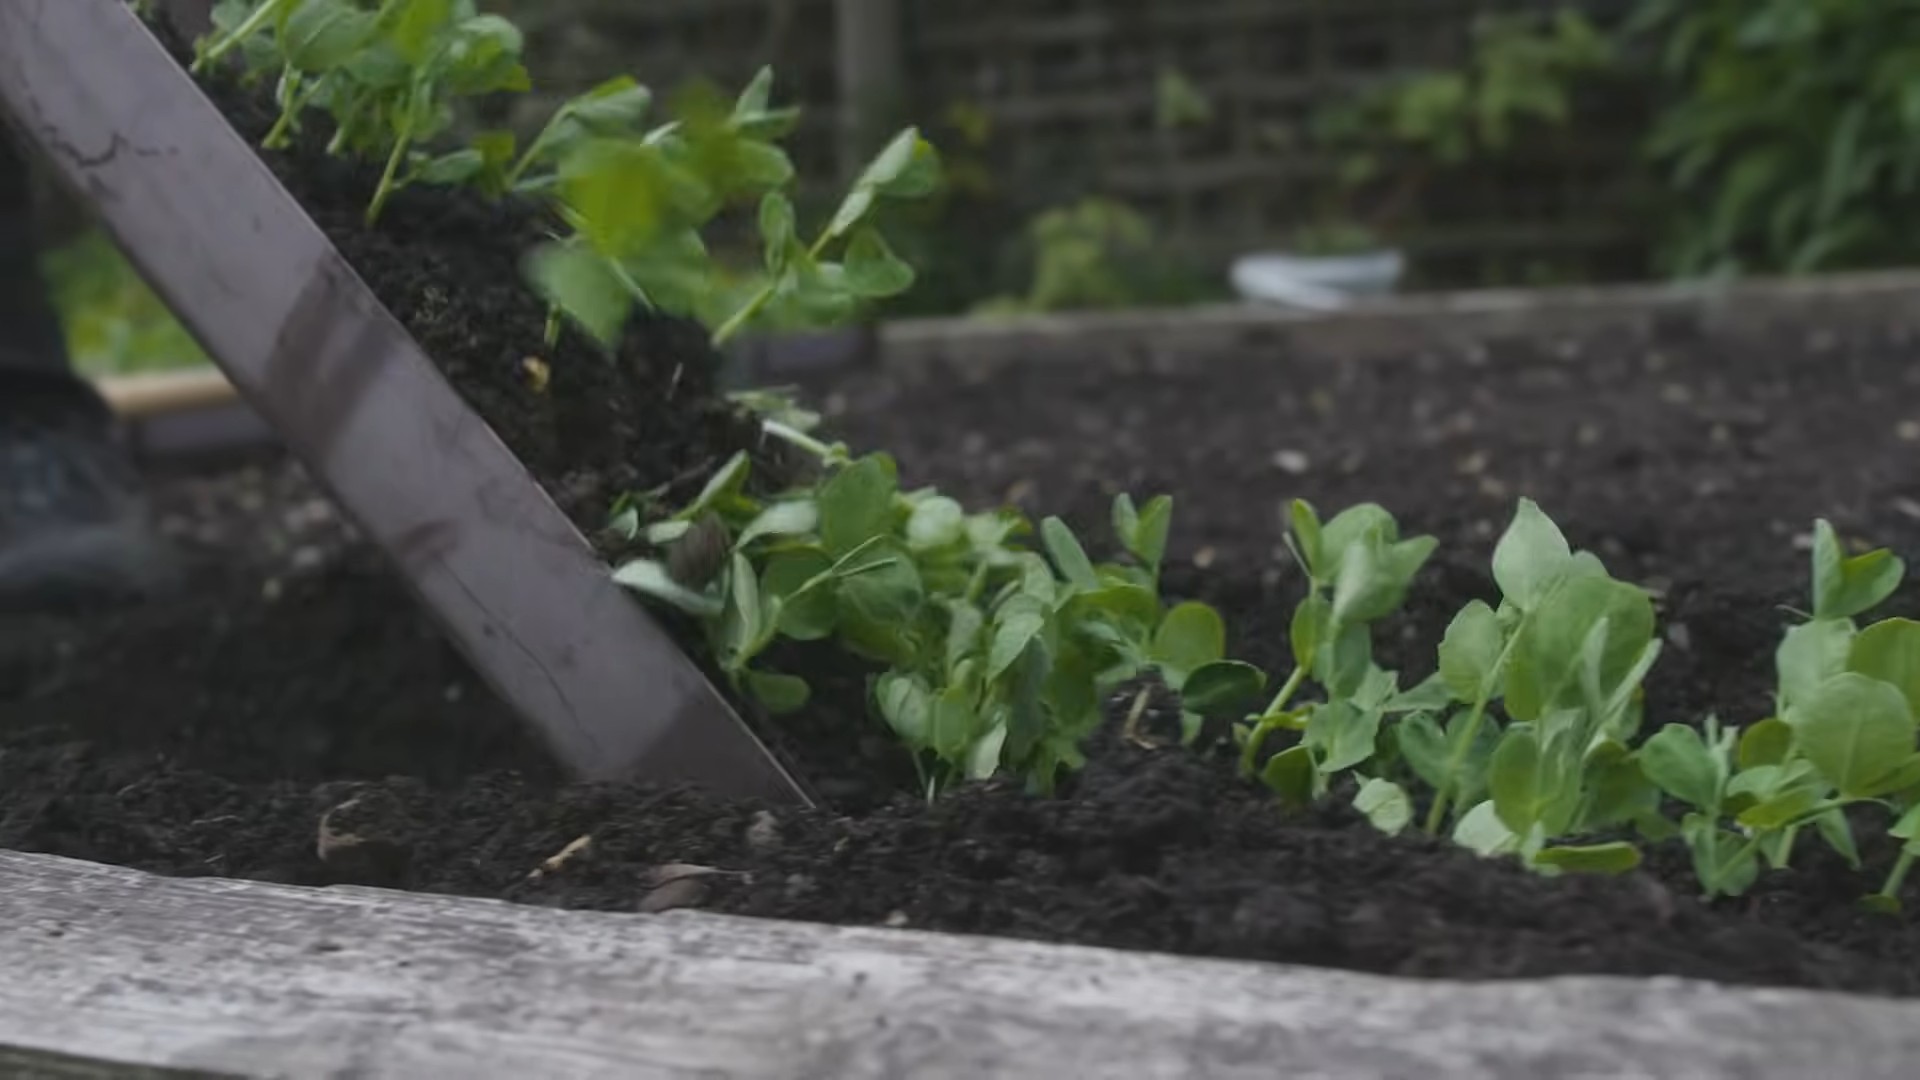
Preparing Your Pea Patch
Peas thrive in well-drained soil that’s rich in organic matter. Here’s how to get your garden bed ready:
1. **Choose a Sunny Spot:** Peas need at least 6 hours of sunlight per day. Pick a location that gets plenty of sunshine, especially in the morning.
2. **Test Your Soil:** A soil test will tell you the pH level and nutrient content of your soil. Peas prefer a slightly acidic to neutral pH (around 6.0 to 7.0). You can buy a soil testing kit at most garden centers.
3. **Amend the Soil:** Based on your soil test results, amend the soil as needed. If your soil is too acidic, add lime. If it’s lacking in nutrients, incorporate compost or well-rotted manure. I personally love using compost – it’s a fantastic all-around soil amendment.
4. **Loosen the Soil:** Use a garden fork or tiller to loosen the soil to a depth of at least 12 inches. This will improve drainage and allow the pea roots to penetrate easily.
5. **Remove Rocks and Debris:** Clear the area of any rocks, weeds, or other debris. This will give your pea plants a clean and healthy start.
6. **Create a Raised Bed (Optional):** If your soil is poorly drained, consider creating a raised bed. This will improve drainage and prevent root rot.
Planting Your Pea Seeds
The timing of planting is crucial for success. Peas are a cool-season crop, so you’ll want to plant them in early spring or late summer.
1. **Check Your Local Frost Dates:** Find out the average last frost date for your area. You can usually find this information online or from your local extension office.
2. **Plant Early:** Plant your pea seeds 4-6 weeks before the last expected frost in spring. In areas with mild winters, you can also plant in the fall for a winter or early spring harvest.
3. **Soak the Seeds (Optional):** Soaking the seeds in water for 12-24 hours before planting can help them germinate faster. I usually skip this step, but it can be helpful if your soil is dry.
4. **Sow the Seeds:** Plant the seeds 1-2 inches deep and 1-2 inches apart. If you’re planting in rows, space the rows about 18-24 inches apart.
5. **Water Gently:** Water the soil gently after planting to avoid disturbing the seeds.
6. **Label Your Rows:** Don’t forget to label your rows with the variety of pea you planted. This will help you keep track of your plants and know when to expect your harvest.
Providing Support for Your Pea Plants
Peas are vining plants, which means they need something to climb on. Providing support will keep the plants off the ground, improve air circulation, and make harvesting easier.
* **Trellis:** A trellis is a great option for supporting pea plants. You can buy a pre-made trellis or build your own using wood, bamboo, or metal.
* **Netting:** Garden netting is another easy and affordable option. Simply stretch the netting between two posts or stakes.
* **Pea Brush:** Pea brush is a traditional method of supporting pea plants. It involves using branches from trees or shrubs to create a natural trellis.
* **DIY Structures:** Get creative! You can use anything from old ladders to repurposed fencing to support your pea plants.
No matter what type of support you choose, make sure it’s sturdy enough to hold the weight of the mature plants.
1. **Install Support at Planting:** It’s best to install your support system at the time of planting. This will prevent you from disturbing the pea plants later on.
2. **Guide the Vines:** As the pea plants grow, gently guide the vines onto the support structure. They will eventually start to climb on their own.
Caring for Your Pea Plants
Once your pea plants are established, it’s important to provide them with proper care to ensure a healthy and productive harvest.
1. **Water Regularly:** Peas need consistent moisture, especially during flowering and pod development. Water deeply whenever the soil feels dry to the touch. Avoid overwatering, as this can lead to root rot.
2. **Weed Regularly:** Keep the area around your pea plants free of weeds. Weeds compete with the pea plants for water and nutrients.
3. **Fertilize Sparingly:** Peas are legumes, which means they can fix nitrogen from the air. This reduces the need for fertilizer. However, you can give them a boost with a light application of compost tea or a balanced fertilizer.
4. **Watch for Pests and Diseases:** Keep an eye out for common pea pests and diseases, such as aphids, pea weevils, and powdery mildew. Take action promptly if you notice any problems. I like to use organic pest control methods whenever possible.
5. **Mulch:** Apply a layer of mulch around your pea plants to help retain moisture, suppress weeds, and regulate soil temperature. Straw, wood chips, or shredded leaves are all good options.
Harvesting Your Peas
The moment you’ve been waiting for! Harvesting your peas at the right time is crucial for getting the best flavor and texture.
1. **Harvest Regularly:** Harvest your peas frequently, as this will encourage the plants to produce more pods.
2. **Check for Maturity:** The timing of harvest will depend on the type of pea you’re growing.
* **Shelling Peas:** Harvest when the pods are plump and the peas inside are well-developed.
* **Snap Peas:** Harvest when the pods are plump and the peas inside are small and tender.
* **Snow Peas:** Harvest when the pods are flat and the peas inside are barely visible.
3. **Pick Carefully:** Use your fingers or scissors to carefully pick the pods from the vine. Avoid pulling on the vine, as this can damage the plant.
4. **Taste Test:** The best way to determine if your peas are ready to harvest is to taste them! They should be sweet and tender.
5. **Enjoy Fresh:** Freshly picked peas are the most delicious! Eat them raw, steam them, or add them to your favorite recipes.
Troubleshooting Common Pea Problems
Even with the best care, you may encounter some problems when growing peas. Here are a few common issues and how to address them:
* **Poor Germination:** If your pea seeds aren’t germinating, it could be due to cold soil, dry soil, or old seeds. Make sure the soil is warm enough (at least 40°F), keep the soil moist, and use fresh seeds.
* **Yellowing Leaves:** Yellowing leaves can be a sign of nutrient deficiency, overwatering, or disease. Check your soil pH and nutrient levels, avoid overwatering, and treat any diseases promptly.
* **Powdery Mildew:** Powdery mildew is a fungal disease that can cause a white, powdery coating on the leaves. Improve air circulation, avoid overhead watering, and treat with a fungicide if necessary.
* **Aphids:** Aphids are small, sap-sucking insects that can weaken pea plants. Spray them with a strong stream of water or use insecticidal soap.
* **Pea Weevils:** Pea weevils are small beetles that lay their eggs in pea pods. The larvae then feed on the peas inside. Plant early to avoid the peak weevil season, and use row covers to protect your plants.
Saving Pea Seeds
If you want to save seeds from your pea plants for next year, here’s how:
1. **Choose Healthy
Conclusion
So, there you have it! Growing peas at home is not only achievable, but it’s also incredibly rewarding. Forget those bland, store-bought peas that lack that fresh, garden-sweet flavor. With a little effort and these simple steps, you can cultivate your own supply of delicious, vibrant peas right in your backyard or even on your balcony.
Why is this DIY trick a must-try? Because it puts you in control. You know exactly what goes into your food – no pesticides, no preservatives, just pure, unadulterated pea goodness. Plus, the taste difference is undeniable. Homegrown peas burst with a sweetness and tenderness that you simply can’t find in commercially grown varieties. Imagine the satisfaction of serving a dish featuring peas you nurtured from seed to table!
Beyond the superior flavor, growing your own peas is also a fantastic way to connect with nature and enjoy the therapeutic benefits of gardening. It’s a calming and fulfilling activity that can reduce stress and improve your overall well-being. And let’s not forget the educational aspect – it’s a great way to teach children about where their food comes from and the importance of sustainable practices.
Ready to take your pea-growing game to the next level? Consider these variations:
* Succession Planting: Plant new pea seeds every two to three weeks for a continuous harvest throughout the growing season.
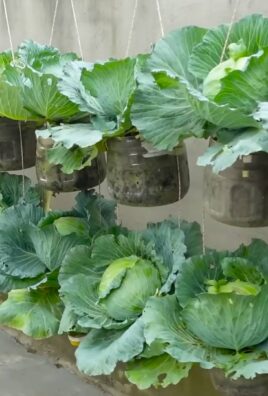
* Vertical Gardening: If you’re short on space, grow your peas vertically using trellises, netting, or even repurposed materials like old ladders. This not only saves space but also improves air circulation and reduces the risk of disease.
* Different Varieties: Experiment with different pea varieties to find your favorites. Sugar snap peas, snow peas, and shelling peas all offer unique flavors and textures. Try a mix to add variety to your meals.
* Companion Planting: Plant peas alongside beneficial companion plants like carrots, radishes, and cucumbers. These plants can help deter pests and improve soil health.
Don’t be intimidated if you’re a beginner gardener. Growing peas at home is a relatively easy and forgiving process. With a little patience and attention, you’ll be harvesting your own delicious peas in no time.
We wholeheartedly encourage you to give this DIY trick a try. It’s a simple, cost-effective, and incredibly rewarding way to enjoy fresh, flavorful peas. Once you taste the difference, you’ll never go back to store-bought again.
So, grab your seeds, prepare your soil, and get ready to embark on your pea-growing adventure! And most importantly, don’t forget to share your experiences with us. We’d love to hear about your successes, challenges, and any tips you’ve discovered along the way. Share your photos and stories on social media using #HomegrownPeas and let’s inspire others to join the fun! Happy gardening!
Frequently Asked Questions (FAQ)
What is the best time of year to plant peas?
Peas are a cool-season crop, meaning they thrive in cooler temperatures. The best time to plant peas is in early spring, as soon as the soil can be worked. In many regions, this is typically around February or March. You can also plant a fall crop of peas in late summer or early fall, about 6-8 weeks before the first expected frost. Check your local climate and frost dates to determine the optimal planting time for your area. Planting too late in the spring can result in poor yields as the plants struggle in the heat.
What kind of soil do peas need?
Peas prefer well-drained soil that is rich in organic matter. The ideal soil pH is between 6.0 and 7.5. Before planting, amend your soil with compost or well-rotted manure to improve its fertility and drainage. Avoid soils that are heavy clay or prone to waterlogging, as this can lead to root rot. If your soil is compacted, consider adding sand or other amendments to improve drainage. A soil test can help you determine the specific nutrient needs of your soil and guide your amendment choices.
How much sunlight do peas need?
Peas need at least 6-8 hours of sunlight per day to thrive. Choose a planting location that receives full sun for the majority of the day. If you live in a particularly hot climate, some afternoon shade may be beneficial to prevent the plants from overheating. Insufficient sunlight can result in leggy growth, reduced yields, and increased susceptibility to diseases.
Do peas need a trellis?
Most pea varieties, especially climbing varieties, benefit from having a trellis or other support structure to grow on. This helps to keep the plants off the ground, improving air circulation and reducing the risk of disease. It also makes harvesting easier. You can use a variety of materials for your trellis, such as bamboo stakes, netting, chicken wire, or even repurposed materials like old ladders or branches. Bush varieties of peas may not require a trellis, but they can still benefit from some support to prevent them from sprawling.
How often should I water my peas?
Peas need consistent moisture to thrive, especially during flowering and pod development. Water deeply and regularly, aiming to keep the soil consistently moist but not waterlogged. The frequency of watering will depend on the weather conditions and the type of soil you have. In general, water when the top inch of soil feels dry to the touch. Avoid overhead watering, as this can increase the risk of fungal diseases. Drip irrigation or soaker hoses are a good way to water peas efficiently and effectively.
What are some common pests and diseases that affect peas?
Peas can be susceptible to a variety of pests and diseases, including aphids, pea weevils, powdery mildew, and root rot. To prevent pest and disease problems, choose disease-resistant varieties, practice good sanitation, and provide adequate air circulation. Inspect your plants regularly for signs of pests or diseases and take action promptly if you notice any problems. Organic pest control methods, such as insecticidal soap or neem oil, can be effective for controlling aphids and other pests. Proper watering and drainage can help prevent root rot.
How do I know when my peas are ready to harvest?
The timing of harvest will depend on the type of peas you are growing. Sugar snap peas are ready to harvest when the pods are plump and the peas inside are small and tender. Snow peas are harvested when the pods are flat and the peas are just beginning to develop. Shelling peas are harvested when the pods are full and the peas inside are large and well-formed. The best way to determine if your peas are ready to harvest is to taste them. They should be sweet and tender, not starchy or tough. Harvest regularly to encourage continued production.
Can I save seeds from my pea plants?
Yes, you can save seeds from your pea plants, but it’s important to choose open-pollinated varieties rather than hybrid varieties. To save seeds, allow some of the pods to dry completely on the plant. Once the pods are dry and brittle, shell the peas and store them in an airtight container in a cool, dry place. Label the container with the variety name and the date. Saved pea seeds can be viable for several years if stored properly.
How can I improve the flavor of my homegrown peas?
The flavor of your homegrown peas can be influenced by a number of factors, including the variety you choose, the soil conditions, and the weather. To improve the flavor of your peas, choose a variety that is known for its sweetness and tenderness. Amend your soil with compost or other organic matter to improve its fertility and drainage. Provide adequate sunlight and water. Harvest your peas at the peak of ripeness, when they are sweet and tender. And finally, enjoy them fresh from the garden for the best possible flavor.
Leave a Comment