
Grow Pineapple at Home – sounds like a tropical dream, right? Well, it doesn’t have to be just a dream! Imagine plucking a juicy, sun-ripened pineapple straight from your own backyard. Forget those expensive grocery store pineapples; with a little patience and some simple techniques, you can cultivate your own tropical treat.
The pineapple, a symbol of hospitality and welcome, has a rich history. Originating in South America, it was quickly embraced by cultures worldwide, becoming a prized possession and a status symbol. Today, we can bring that same sense of wonder and abundance into our own homes. But why go through the effort of growing your own pineapple?
Let’s face it, store-bought pineapples can be inconsistent in quality and often lack that intense, sweet flavor. Plus, there’s something incredibly rewarding about nurturing a plant from start to finish and enjoying the fruits (literally!) of your labor. This DIY guide will walk you through the process step-by-step, showing you how easy it is to grow pineapple at home, even if you don’t have a green thumb. I’ll share my favorite tips and tricks, ensuring you’ll be enjoying homegrown pineapple in no time. Get ready to transform your space into a mini-tropical paradise!
Ananas selber ziehen: So klappt’s garantiert!
Hey Leute! Habt ihr auch genug von teuren Ananas aus dem Supermarkt? Ich zeige euch heute, wie ihr ganz einfach eure eigene Ananas zu Hause ziehen könnt. Es ist einfacher als ihr denkt und macht super viel Spaß! Lasst uns loslegen!
Was du brauchst:
* Eine reife Ananas (am besten eine mit grünen, gesunden Blättern)
* Ein scharfes Messer
* Einen Topf (ca. 15-20 cm Durchmesser)
* Anzuchterde oder Blumenerde
* Wasser
* Optional: Bewurzelungspulver
* Optional: Eine Sprühflasche
Die richtige Ananas auswählen:
Bevor wir loslegen, ist es wichtig, die richtige Ananas auszuwählen. Achtet auf folgende Punkte:
* Reife: Die Ananas sollte reif, aber nicht überreif sein. Sie sollte einen angenehmen, süßen Duft haben.
* Blätter: Die Blätter sollten grün und gesund aussehen. Vermeidet Ananas mit braunen oder welken Blättern.
* Form: Wählt eine Ananas mit einer gleichmäßigen Form.
* Schale: Die Schale sollte keine Druckstellen oder Beschädigungen aufweisen.
Anleitung: Schritt für Schritt zur eigenen Ananas
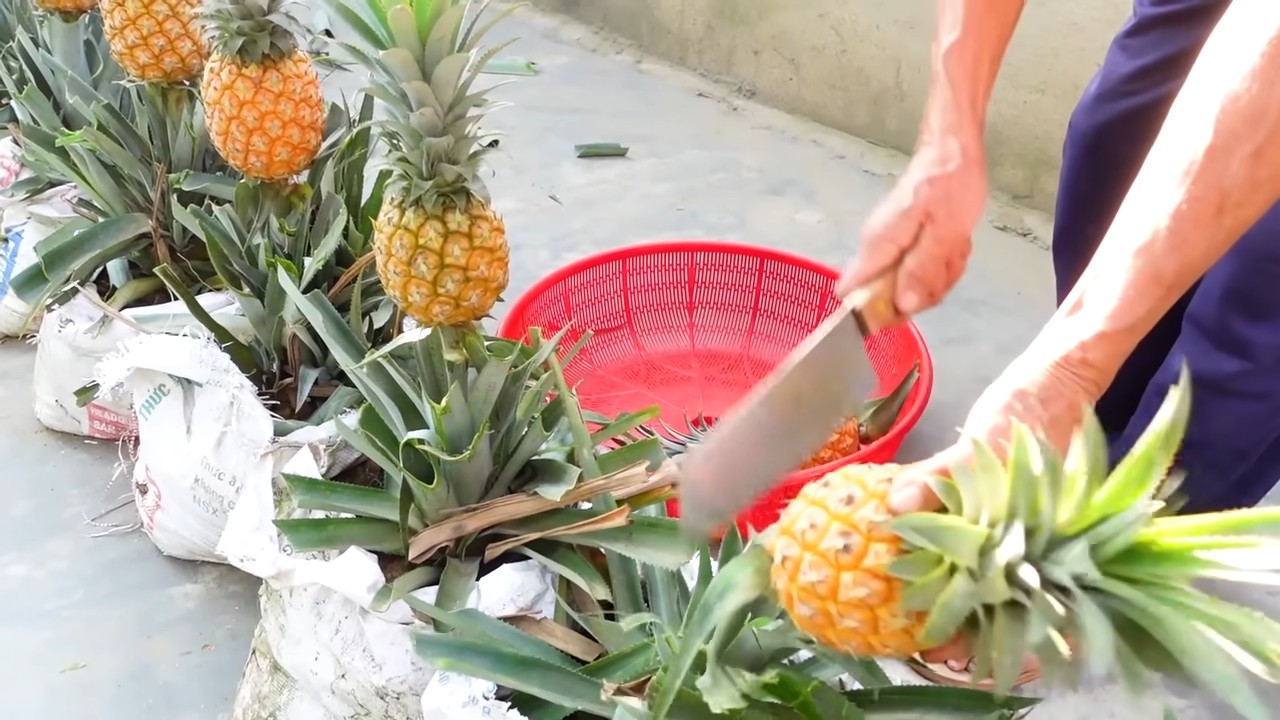
1. Die Blätterkrone vorbereiten
1. Blätterkrone abschneiden: Nehmt euer scharfes Messer und schneidet die Blätterkrone der Ananas ab. Achtet darauf, dass ihr etwa 2-3 cm Fruchtfleisch an der Krone lasst.
2. Fruchtfleisch entfernen: Entfernt vorsichtig das restliche Fruchtfleisch von der Blätterkrone. Das ist wichtig, da das Fruchtfleisch sonst faulen kann und die Wurzelbildung behindert. Ich mache das am liebsten, indem ich mit dem Messer vorsichtig unter das Fruchtfleisch fahre und es dann abheble.
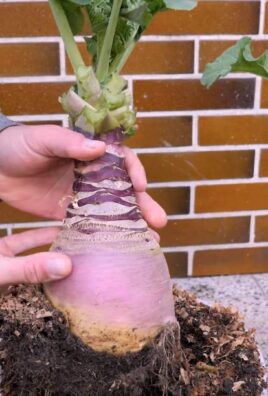
3. Untere Blätter entfernen: Entfernt die untersten Blätter der Blätterkrone, bis etwa 2-3 cm des Stiels frei liegen. Dadurch werden die Stellen freigelegt, an denen später die Wurzeln wachsen werden.
4. Optional: Bewurzelungspulver: Wenn ihr möchtet, könnt ihr die freigelegten Stellen mit Bewurzelungspulver bestreuen. Das fördert die Wurzelbildung. Ich habe damit gute Erfahrungen gemacht, aber es ist kein Muss.
2. Die Blätterkrone bewurzeln
Es gibt zwei Methoden, um die Blätterkrone zu bewurzeln: im Wasser oder direkt in der Erde. Ich bevorzuge die Methode im Wasser, da man die Wurzelbildung besser beobachten kann.
Methode 1: Bewurzelung im Wasser
1. Glas vorbereiten: Füllt ein Glas oder eine Vase mit Wasser. Das Wasser sollte sauber und zimmerwarm sein.
2. Blätterkrone ins Wasser stellen: Stellt die Blätterkrone so ins Wasser, dass nur der Stiel im Wasser steht. Die Blätter sollten nicht im Wasser sein, da sie sonst faulen können.
3. Standort wählen: Stellt das Glas an einen hellen, warmen Ort, aber nicht in die direkte Sonne.
4. Wasser wechseln: Wechselt das Wasser alle 2-3 Tage, um die Bildung von Bakterien zu verhindern.
5. Wurzelbildung beobachten: Nach einigen Wochen (ca. 2-8 Wochen) sollten sich die ersten Wurzeln bilden. Habt Geduld, es kann etwas dauern!
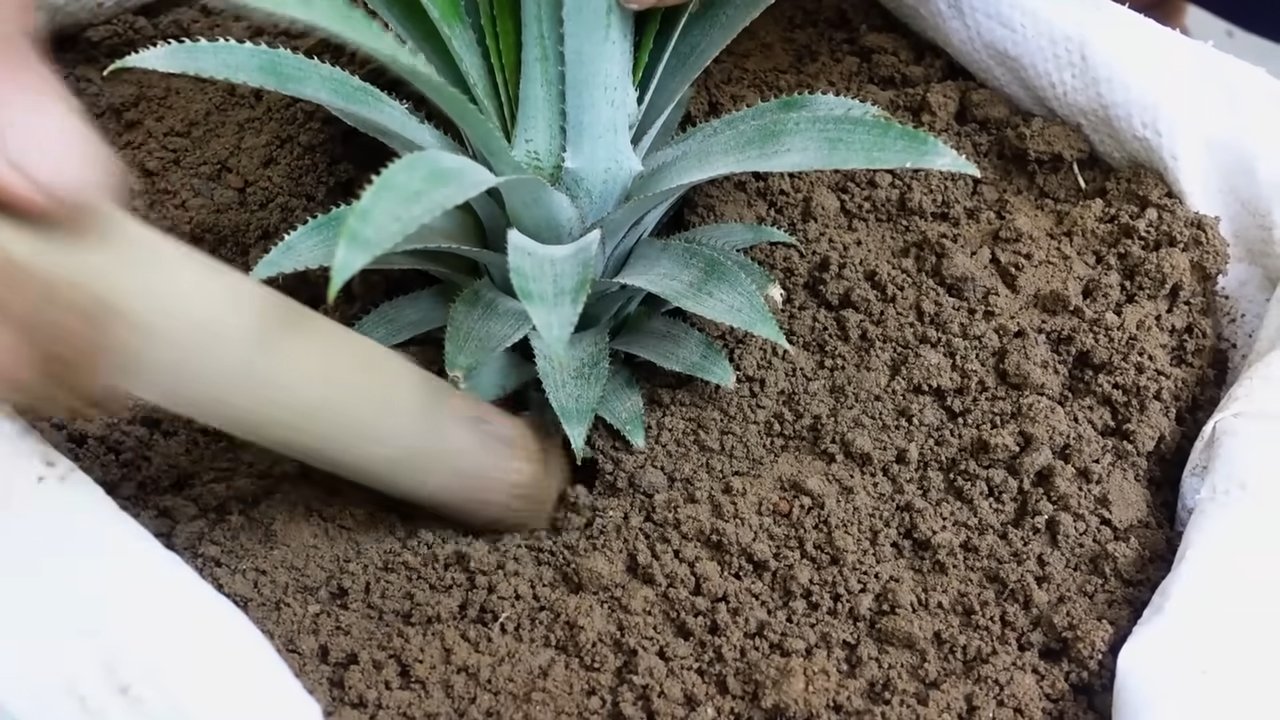
Methode 2: Bewurzelung direkt in der Erde
1. Topf vorbereiten: Füllt den Topf mit Anzuchterde oder Blumenerde.
2. Blätterkrone einpflanzen: Macht ein kleines Loch in die Erde und pflanzt die Blätterkrone so ein, dass der Stiel mit Erde bedeckt ist.
3. Angießen: Gießt die Erde vorsichtig an, sodass sie feucht, aber nicht nass ist.
4. Standort wählen: Stellt den Topf an einen hellen, warmen Ort, aber nicht in die direkte Sonne.
5. Feuchtigkeit halten: Haltet die Erde feucht, aber nicht nass.
3. Die Ananas einpflanzen
Sobald die Wurzeln etwa 2-3 cm lang sind (bei der Methode im Wasser), ist es Zeit, die Ananas einzupflanzen.
1. Topf vorbereiten: Wählt einen Topf, der etwas größer ist als der vorherige (ca. 20-25 cm Durchmesser). Füllt den Topf mit Anzuchterde oder Blumenerde.
2. Ananas einpflanzen: Macht ein Loch in die Erde und pflanzt die Ananas vorsichtig ein. Achtet darauf, dass die Wurzeln nicht beschädigt werden.
3. Angießen: Gießt die Erde vorsichtig an, sodass sie feucht, aber nicht nass ist.
4. Standort wählen: Stellt den Topf an einen hellen, warmen Ort mit viel Sonnenlicht. Ananas lieben die Sonne!
4. Die Ananas pflegen
Die Pflege der Ananas ist relativ einfach, aber es gibt ein paar Dinge, die ihr beachten solltet:
* Gießen: Gießt die Ananas regelmäßig, aber nicht zu viel. Die Erde sollte immer leicht feucht sein, aber nicht nass. Vermeidet Staunässe, da dies zu Wurzelfäule führen kann.
* Düngen: Düngt die Ananas während der Wachstumsperiode (Frühling und Sommer) alle 2-4 Wochen mit einem Flüssigdünger für Zimmerpflanzen.
* Luftfeuchtigkeit: Ananas lieben eine hohe Luftfeuchtigkeit. Ihr könnt die Luftfeuchtigkeit erhöhen, indem ihr die Blätter regelmäßig mit Wasser besprüht oder den Topf auf einen Untersetzer mit Wasser und Kieselsteinen stellt.
* Temperatur: Die ideale Temperatur für Ananas liegt zwischen 20 und 30 Grad Celsius.
* Umpflanzen: Wenn die Ananas zu groß für den Topf wird, müsst ihr sie in einen größeren Topf umpflanzen.
5. Geduld haben!
Es kann bis zu 2-3 Jahre dauern, bis eure Ananas Früchte trägt. Habt Geduld und gebt nicht auf! Die Ananas wird euch mit einer leckeren, selbstgezogenen Frucht belohnen.
Zusätzliche Tipps und Tricks:
* Ananas zum Blühen bringen: Um die Ananas zum Blühen zu bringen, könnt ihr sie mit Ethylen behandeln. Das geht ganz einfach, indem ihr einen Apfel in eine Plastiktüte steckt und die Ananas mit in die Tüte stellt. Der Apfel gibt Ethylen ab, was die Blüte anregen kann. Lasst die Ananas und den Apfel für etwa eine Woche in der Tüte.
* Überwintern: Im Winter solltet ihr die Ananas an einen hellen, kühlen Ort stellen und weniger gießen.
* Schädlinge: Achtet auf Schädlinge wie Spinnmilben oder Wollläuse. Bei Befall könnt ihr die Ananas mit einem geeigneten Insektizid behandeln.
* Braune Blattspitzen: Braune Blattspitzen können ein Zeichen für zu trockene Luft oder zu wenig Wasser sein. Besprüht die Blätter regelmäßig mit Wasser und achtet darauf, dass die Erde nicht austrocknet.
* Gelbe Blätter: Gelbe Blätter können ein Zeichen für Nährstoffmangel sein. Düngt die Ananas mit einem Flüssigdünger für Zimmerpflanzen.
Ich hoffe, diese Anleitung hilft euch dabei, eure eigene Ananas zu ziehen. Es ist ein tolles Gefühl, eine Frucht selbst anzubauen und zu ernten. Viel Erfolg und viel Spaß dabei!
Conclusion
So, there you have it! Growing your own pineapple at home isn’t just a fun project; it’s a rewarding experience that brings a touch of the tropics right to your windowsill or garden. Forget those expensive, sometimes bland, store-bought pineapples. Imagine the satisfaction of harvesting a sweet, juicy pineapple that you nurtured from start to finish. This DIY trick is a must-try for anyone who loves fresh produce, enjoys a bit of gardening, or simply wants to impress their friends and family with their green thumb.
But why is this method so compelling? First, it’s incredibly cost-effective. You’re essentially turning the top of a pineapple you would have otherwise discarded into a brand new plant. Second, it’s a fantastic way to reduce food waste and embrace a more sustainable lifestyle. Third, and perhaps most importantly, the taste of a homegrown pineapple is simply unparalleled. The flavor is more intense, the sweetness is more pronounced, and the texture is perfectly tender.
Don’t be afraid to experiment with variations! Try using different types of pineapples, such as the Sugarloaf or the Red Spanish variety, to see which one thrives best in your environment. You can also experiment with different potting mixes to find the perfect blend for optimal growth. Some gardeners swear by adding a bit of compost or aged manure to the soil to boost nutrient levels. Consider using a self-watering pot to minimize the risk of over or under-watering, especially if you’re prone to forgetting to water your plants.
For those living in colder climates, consider growing your pineapple in a container that can be easily moved indoors during the winter months. Pineapples thrive in warm, sunny conditions, so providing them with adequate light and warmth is crucial for their survival. You might even consider using a grow light to supplement natural sunlight during the darker months.
The key to success with this DIY trick is patience. It takes time for a pineapple plant to mature and produce fruit, but the wait is well worth it. Think of it as a long-term investment in deliciousness! And remember, even if your first attempt isn’t a resounding success, don’t give up. Gardening is all about learning and adapting, so keep experimenting until you find what works best for you.
We wholeheartedly encourage you to give this DIY trick a try. It’s a fun, educational, and ultimately delicious way to connect with nature and enjoy the fruits (literally!) of your labor. Once you’ve harvested your first homegrown pineapple, be sure to share your experience with us! We’d love to hear about your successes, your challenges, and any tips or tricks you’ve discovered along the way. Share your photos and stories on social media using #HomegrownPineapple and let’s inspire others to embark on this tropical adventure. Let’s all enjoy the satisfaction of growing pineapple at home.
Frequently Asked Questions (FAQ)
How long does it take to grow a pineapple from a top?
The time it takes to grow a pineapple from a top can vary depending on several factors, including climate, sunlight, and care. Generally, it takes anywhere from 2 to 3 years for a pineapple plant to mature and produce fruit. The first few months are crucial for root development, so be patient and consistent with watering. Once the plant is established, it will gradually grow larger and eventually produce a flower stalk, which will eventually develop into a pineapple.
What kind of soil is best for growing pineapples?
Pineapples prefer well-draining, slightly acidic soil. A good potting mix for pineapples would be a blend of peat moss, perlite, and vermiculite. This combination provides good drainage, aeration, and moisture retention. You can also add a bit of compost or aged manure to the soil to boost nutrient levels. Avoid using heavy clay soils, as they can retain too much water and lead to root rot.
How much sunlight does a pineapple plant need?
Pineapples thrive in bright, sunny conditions. They need at least 6 hours of direct sunlight per day to grow properly and produce fruit. If you’re growing your pineapple indoors, place it near a sunny window or use a grow light to supplement natural sunlight. If you live in a hot climate, you may need to provide some afternoon shade to prevent the leaves from scorching.
How often should I water my pineapple plant?
Water your pineapple plant regularly, but avoid overwatering. The soil should be kept consistently moist, but not soggy. Water thoroughly when the top inch of soil feels dry to the touch. During the warmer months, you may need to water more frequently. In the winter, reduce watering as the plant’s growth slows down.
How do I know when my pineapple is ripe?
There are several signs that indicate a pineapple is ripe. The color of the skin will change from green to yellow or golden. The pineapple will also have a sweet, fragrant aroma. You can also gently tug on one of the leaves; if it comes off easily, the pineapple is likely ripe. Finally, the pineapple should feel slightly soft to the touch.
What if my pineapple plant doesn’t produce fruit?
There are several reasons why your pineapple plant may not be producing fruit. One common reason is insufficient sunlight. Make sure your plant is getting at least 6 hours of direct sunlight per day. Another reason could be a lack of nutrients. Fertilize your plant regularly with a balanced fertilizer. You can also try forcing your pineapple plant to fruit by enclosing it in a plastic bag with a ripe apple for a few days. The ethylene gas released by the apple can stimulate flowering.
Can I grow a pineapple indoors?
Yes, you can definitely grow a pineapple indoors, especially if you live in a colder climate. Choose a pot that is large enough to accommodate the plant’s root system. Place the pot near a sunny window or use a grow light to provide adequate light. Water regularly and fertilize as needed. Be sure to monitor the plant for pests and diseases.
What are some common pests and diseases that affect pineapple plants?
Some common pests that can affect pineapple plants include mealybugs, scale, and spider mites. These pests can be controlled with insecticidal soap or neem oil. Root rot is a common disease that can affect pineapple plants, especially if the soil is not well-draining. To prevent root rot, make sure to use a well-draining potting mix and avoid overwatering.
Is it necessary to remove the bottom leaves of the pineapple top before planting?
Yes, it’s important to remove the bottom leaves of the pineapple top before planting. This helps to prevent rot and encourages root development. Gently twist off the bottom leaves, exposing about an inch or two of the stem. Allow the stem to dry for a few days before planting to further reduce the risk of rot.
What kind of fertilizer should I use for my pineapple plant?
Use a balanced fertilizer with an NPK ratio of 10-10-10 or 14-14-14. Fertilize your pineapple plant every 2-3 months during the growing season (spring and summer). Follow the instructions on the fertilizer package for proper application rates. You can also use a liquid fertilizer diluted in water.


Leave a Comment