
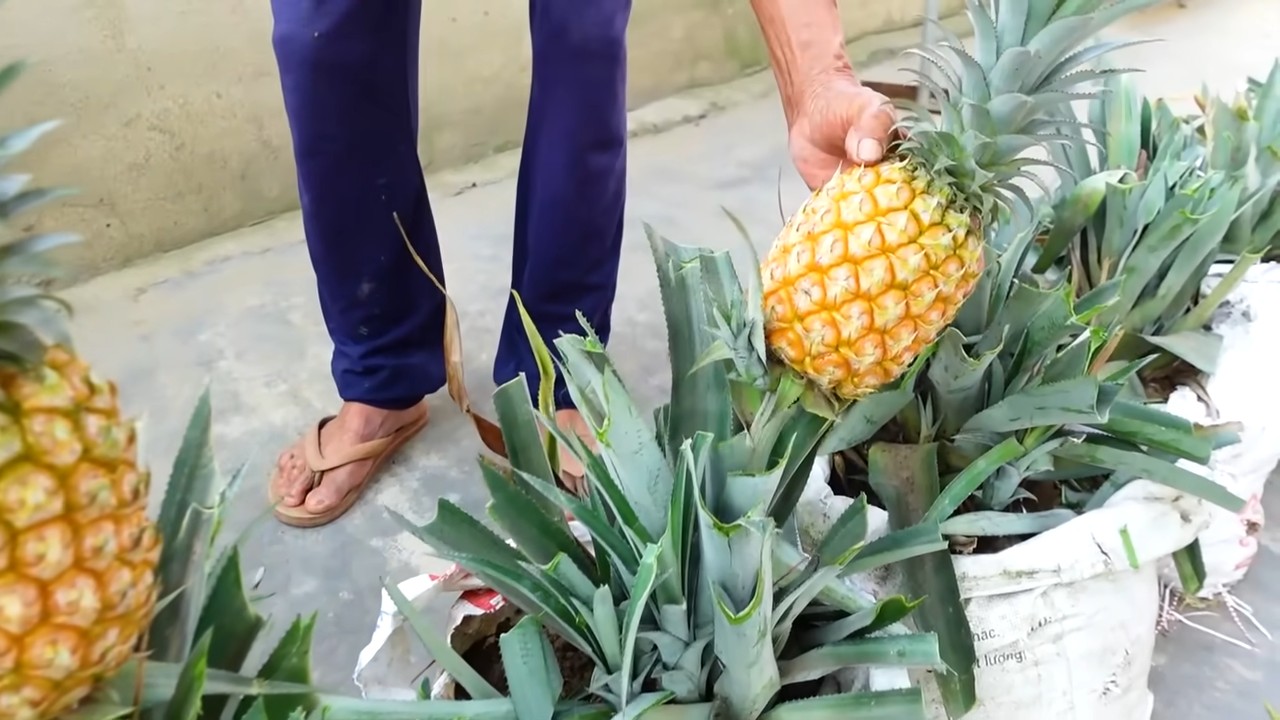
Grow Pineapples at Home? Absolutely! Imagine plucking a juicy, sun-ripened pineapple straight from your own backyard. Sounds like a tropical dream, right? Well, it’s more achievable than you might think, and this DIY guide is your passport to pineapple paradise.
For centuries, pineapples have symbolized hospitality and luxury. Originating in South America, they were once so prized in Europe that they were rented out as status symbols for dinner parties! Now, you can skip the rental fees and cultivate your own piece of tropical history.
But why should you bother with the effort? Because store-bought pineapples, while delicious, often lack the intense flavor of a freshly grown fruit. Plus, there’s immense satisfaction in nurturing a plant from humble beginnings to a thriving, fruit-bearing beauty. In this article, I’ll share simple, effective tricks and hacks to help you grow pineapples at home, regardless of your gardening experience. Whether you have a sprawling garden or just a sunny windowsill, I’ll show you how to create the perfect environment for your pineapple to flourish. Get ready to impress your friends and family with your newfound tropical gardening skills!
Grow Your Own Pineapple: Your Tropical Dream for Home
Hey everyone! Have you always dreamed of harvesting your own pineapples? I’ll show you how you can easily make this tropical dream come true at home. It’s easier than you think, and the result is simply fantastic! Let’s get started!
What you need:
- A ripe pineapple (an organic pineapple is best, as they often haven’t been treated with growth inhibitors)
- A sharp knife
- A container with water
- Toothpicks (optional)
- A pot with well-draining soil (soil for pineapples or a mix of potting soil, sand, and perlite)
- A sunny location
- Patience!
Preparing the Pineapple: Off with its Head!
- Cut off the top: Take your sharp knife and cut off the leafy crown of the pineapple about 2-3 cm (1 inch) below the leaves. Make sure you don’t cut off too much fruit flesh, as this increases the risk of rot.
- Remove the fruit flesh: Carefully remove the remaining fruit flesh from the bottom part of the crown. This is important to prevent rot. You can simply cut the flesh off with a knife or peel it away with your fingers.
- Remove the lower leaves: Remove the lowest leaves of the crown until about 2-3 cm (1 inch) of the stalk is exposed. This is where the roots will grow later.
Rooting: Into the Water!
- Rooting in water (Method 1): Fill your container with water. The water level should be just enough so that only the exposed stalk of the pineapple crown is in the water. The leaves should not be in the water, as they could rot.
- The toothpick trick (optional): If you like, you can stick toothpicks into the stalk to suspend the pineapple crown above the water. Simply insert the toothpicks around the stalk so they can rest on the rim of the container.
- Choose a location: Place the container in a bright, warm spot, but not in direct sun. A windowsill is ideal.
- Change the water: Change the water every 2-3 days to prevent rot.
- Patience is required: After a few weeks (approx. 2-8 weeks), the first roots should form. Be patient, it can take a while!
- Rooting directly in soil (Method 2): Alternatively, you can plant the prepared pineapple crown directly into moist pineapple soil. Make sure the soil is well-draining and doesn’t get too wet. Keep the soil moist, but not soggy. This method can be a bit faster, but it also carries a higher risk of rot.
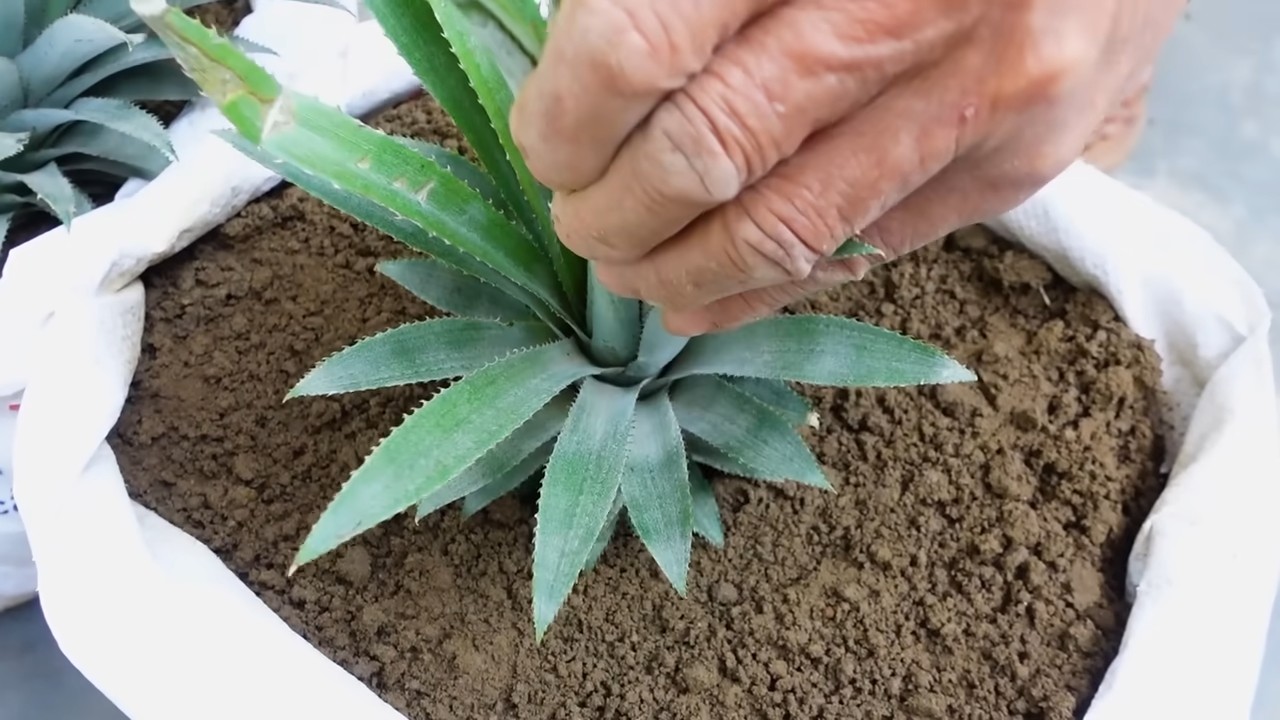
Planting: Into the Soil!
- Prepare the pot: Choose a pot that is slightly larger than the pineapple crown. Fill the pot with your pineapple soil mix.
- Plant the pineapple crown: Make a hole in the soil and carefully place the pineapple crown inside. Be careful not to damage the roots. Fill the hole with soil and press it down lightly.
- Water: Water the pineapple thoroughly after planting.
- Choose a location: Place the pot in a sunny, warm spot. Pineapples love the sun!
Care: Keeping Your Pineapple Happy!
- Watering: Water the pineapple regularly, but avoid waterlogging. The soil should always be slightly moist. In winter, the pineapple needs less water.
- Fertilizing: During the growing season (spring and summer), fertilize the pineapple every 2-4 weeks with a liquid fertilizer for fruit plants.
- Humidity: Pineapples love high humidity. You can increase the humidity by regularly spraying the leaves with water or by placing the pot on a tray with water and pebbles.
- Overwintering: In winter, you should place the pineapple in a bright, cool spot (approx. 15-20 degrees Celsius / 59-68°F). Water less and do not fertilize.
- Repotting: When the pineapple has outgrown its pot, you should repot it into a larger one.
Flowering: The Wait is Over!
- Patience, patience: It can take up to 2-3 years for your pineapple to flower and bear fruit. Be patient and don’t give up!
- Encouraging the bloom: To encourage flowering, you can place an apple in a plastic bag with the pineapple plant and seal the bag. The apple releases ethylene, a gas that can stimulate flowering. Leave the apple in the bag for about a week.
- The flower: When the pineapple blooms, small, violet flowers will appear in the center of the plant.
- The fruit: After flowering, the pineapple fruit will begin to develop. It takes several months for the fruit to ripen.
Harvest: The Reward for Your Hard Work!
- Recognizing ripeness: A ripe pineapple has a golden-yellow color and a sweet fragrance. The leaves can be pulled out of the fruit easily.
- Harvesting: Cut the pineapple with a sharp knife.
- Enjoy: Enjoy your homegrown pineapple! It’s guaranteed to taste better than any store-bought one.
Common Problems and Solutions:
- Rot: If the pineapple crown rots, you probably left too much fruit flesh on the stalk or didn’t change the water regularly. Cut off the rotten parts and try again.
- No roots: If no roots form after several weeks, the pineapple crown may not have been prepared correctly, or the location might not be optimal. Try again with a different pineapple crown and a brighter, warmer location.
- Yellow leaves: Yellow leaves can be a sign of too much or too little water. Check the soil’s moisture and adjust your watering accordingly.
- Pests: Pineapples can be infested by pests like spider mites or mealybugs. Combat the pests with a suitable insecticide or with natural remedies like neem oil.
Additional Tips:
- It’s best to use rainwater or distilled water for watering.
- Rotate the pot regularly so the pineapple grows evenly.
- Talk to your pineapple! Plants respond to positive attention. (Sounds weird, but it’s true!)
I hope this guide helps you grow your own pineapples. It’s an exciting and rewarding project that will bring you a lot of joy. Good luck and enjoy the taste
Conclusion
So, there you have it! Growing pineapples at home, while it might seem like a tropical dream reserved for professional farmers, is surprisingly achievable with a little patience and this simple DIY trick. We’ve walked you through the process, from selecting the perfect pineapple to nurturing its growth, and hopefully, dispelled any myths you might have encountered along the way.
But why should you bother? Why dedicate precious time and space to cultivating your own pineapple when you can simply pick one up at the grocery store? The answer lies in the unparalleled satisfaction of nurturing life from something you would normally discard. It’s about connecting with nature, understanding the slow and steady rhythm of growth, and ultimately, savoring a fruit that tastes all the sweeter because you grew it yourself. Plus, homegrown pineapples often boast a flavor profile that surpasses store-bought varieties, bursting with a sweetness and tang that’s simply unmatched.
This DIY pineapple growing method isn’t just a fun project; it’s a sustainable practice. By repurposing the top of a pineapple, you’re reducing food waste and contributing to a more eco-conscious lifestyle. It’s a small act with a surprisingly large impact.
Ready to take your pineapple growing to the next level? Consider these variations:
* Experiment with different pineapple varieties: Explore the nuances of different pineapple cultivars, such as the ‘Smooth Cayenne’ or the ‘Sugarloaf,’ to discover your personal favorite. Each variety offers a unique flavor and texture profile.
* Hydroponic pineapple growing: For those with limited space or a penchant for modern gardening techniques, consider growing your pineapple hydroponically. This method involves suspending the pineapple top in a nutrient-rich water solution, eliminating the need for soil.
* Greenhouse cultivation: If you live in a colder climate, a greenhouse can provide the ideal environment for your pineapple to thrive, extending the growing season and protecting it from frost.
We’ve provided you with the knowledge and the tools; now it’s time to put them into action. Don’t be intimidated by the process. Remember, even if your first attempt isn’t a resounding success, you’ll learn valuable lessons that will improve your chances next time. The journey is just as rewarding as the destination.
We wholeheartedly encourage you to try this DIY trick and experience the joy of growing pineapples at home. It’s a rewarding, sustainable, and ultimately delicious endeavor. Once you’ve embarked on your pineapple-growing adventure, we’d love to hear about your experiences! Share your photos, tips, and triumphs in the comments below. Let’s create a community of home pineapple growers and inspire others to embrace the magic of homegrown fruit. Happy growing!
Frequently Asked Questions (FAQ)
Q: How long does it take to grow a pineapple from a top?
A: Patience is key! It typically takes anywhere from 2 to 3 years for a pineapple plant grown from a top to produce a mature fruit. The exact timeframe depends on various factors, including climate, sunlight exposure, soil quality, and the specific pineapple variety. Don’t be discouraged if it takes longer than expected; the wait will be worth it!
Q: What kind of soil is best for growing pineapples?
A: Pineapples thrive in well-draining, slightly acidic soil. A mixture of equal parts potting soil, perlite, and sand is an excellent choice. The perlite and sand ensure good drainage, preventing root rot, while the potting soil provides essential nutrients. You can also amend your soil with organic matter, such as compost or well-rotted manure, to improve its fertility and drainage. Avoid heavy clay soils, as they tend to retain too much moisture.
Q: How much sunlight does a pineapple plant need?
A: Pineapples are sun-loving plants and require at least 6 hours of direct sunlight per day. If you’re growing your pineapple indoors, place it near a south-facing window where it can receive ample sunlight. If you don’t have access to sufficient natural light, you can supplement with grow lights. Insufficient sunlight can lead to stunted growth and reduced fruit production.
Q: How often should I water my pineapple plant?
A: Water your pineapple plant thoroughly when the top inch of soil feels dry to the touch. Avoid overwatering, as this can lead to root rot. During the warmer months, you may need to water more frequently than during the cooler months. Ensure that the pot has adequate drainage holes to prevent water from accumulating at the bottom. You can also mist
So, there you have it! Growing pineapples at home, while it might seem like a tropical dream reserved for professional farmers, is surprisingly achievable with a little patience and this simple DIY trick. We’ve walked you through the process, from selecting the perfect pineapple to nurturing its growth, and hopefully, dispelled any myths you might have encountered along the way.
But why should you bother? Why dedicate precious time and space to cultivating your own pineapple when you can simply pick one up at the grocery store? The answer lies in the unparalleled satisfaction of nurturing life from something you would normally discard. It’s about connecting with nature, understanding the slow and steady rhythm of growth, and ultimately, savoring a fruit that tastes all the sweeter because you grew it yourself. Plus, homegrown pineapples often boast a flavor profile that surpasses store-bought varieties, bursting with a sweetness and tang that’s simply unmatched.
This DIY pineapple growing method isn’t just a fun project; it’s a sustainable practice. By repurposing the top of a pineapple, you’re reducing food waste and contributing to a more eco-conscious lifestyle. It’s a small act with a surprisingly large impact.
Ready to take your pineapple growing to the next level? Consider these variations:
* Experiment with different pineapple varieties: Explore the nuances of different pineapple cultivars, such as the ‘Smooth Cayenne’ or the ‘Sugarloaf,’ to discover your personal favorite. Each variety offers a unique flavor and texture profile.
* Hydroponic pineapple growing: For those with limited space or a penchant for modern gardening techniques, consider growing your pineapple hydroponically. This method involves suspending the pineapple top in a nutrient-rich water solution, eliminating the need for soil.
* Greenhouse cultivation: If you live in a colder climate, a greenhouse can provide the ideal environment for your pineapple to thrive, extending the growing season and protecting it from frost.
We’ve provided you with the knowledge and the tools; now it’s time to put them into action. Don’t be intimidated by the process. Remember, even if your first attempt isn’t a resounding success, you’ll learn valuable lessons that will improve your chances next time. The journey is just as rewarding as the destination.
We wholeheartedly encourage you to try this DIY trick and experience the joy of growing pineapples at home. It’s a rewarding, sustainable, and ultimately delicious endeavor. Once you’ve embarked on your pineapple-growing adventure, we’d love to hear about your experiences! Share your photos, tips, and triumphs in the comments below. Let’s create a community of home pineapple growers and inspire others to embrace the magic of homegrown fruit. Happy growing!
Frequently Asked Questions (FAQ)
Q: How long does it take to grow a pineapple from a top?
A: Patience is key! It typically takes anywhere from 2 to 3 years for a pineapple plant grown from a top to produce a mature fruit. The exact timeframe depends on various factors, including climate, sunlight exposure, soil quality, and the specific pineapple variety. Don’t be discouraged if it takes longer than expected; the wait will be worth it!
Q: What kind of soil is best for growing pineapples?
A: Pineapples thrive in well-draining, slightly acidic soil. A mixture of equal parts potting soil, perlite, and sand is an excellent choice. The perlite and sand ensure good drainage, preventing root rot, while the potting soil provides essential nutrients. You can also amend your soil with organic matter, such as compost or well-rotted manure, to improve its fertility and drainage. Avoid heavy clay soils, as they tend to retain too much moisture.
Q: How much sunlight does a pineapple plant need?
A: Pineapples are sun-loving plants and require at least 6 hours of direct sunlight per day. If you’re growing your pineapple indoors, place it near a south-facing window where it can receive ample sunlight. If you don’t have access to sufficient natural light, you can supplement with grow lights. Insufficient sunlight can lead to stunted growth and reduced fruit production.
Q: How often should I water my pineapple plant?
A: Water your pineapple plant thoroughly when the top inch of soil feels dry to the touch. Avoid overwatering, as this can lead to root rot. During the warmer months, you may need to water more frequently than during the cooler months. Ensure that the pot has adequate drainage holes to prevent water from accumulating at the bottom. You can also mist the leaves occasionally to increase humidity, especially in dry climates.
Q: What kind of fertilizer should I use for my pineapple plant?
A: Feed your pineapple plant with a balanced, water-soluble fertilizer every 2-3 months during the growing season (spring and summer). Look for a fertilizer with an NPK ratio (nitrogen, phosphorus, potassium) of 10-10-10 or 14-14-14. Dilute the fertilizer according to the package instructions and apply it to the soil around the base of the plant. Avoid over-fertilizing, as this can burn the roots. You can also use organic fertilizers, such as compost tea or fish emulsion, to provide essential nutrients.
Q: How do I know when my pineapple is ripe?
A: Several indicators can help you determine when your pineapple is ripe. The most obvious sign is a change in color from green to yellow or golden-brown. The pineapple should also have a fragrant aroma, and the eyes (the individual segments of the fruit) should be slightly flattened. You can also gently tug on one of the leaves; if it comes off easily, the pineapple is likely ripe. Avoid squeezing the pineapple, as this can damage the fruit.
Q: My pineapple plant is not producing fruit. What could be the problem?
A: Several factors can contribute to a lack of fruit production in pineapple plants. Insufficient sunlight, inadequate watering, nutrient deficiencies, and temperature fluctuations are common culprits. Ensure that your plant is receiving at least 6 hours of direct sunlight per day, water it regularly but not excessively, and fertilize it with a balanced fertilizer. You can also try inducing flowering by exposing the plant to ethylene gas. This can be done by placing a ripe apple or banana near the plant and covering it with a plastic bag for a few days. The ethylene gas released by the fruit will stimulate flowering.
Q: Can I grow pineapples indoors year-round?
A: Yes, you can grow pineapples indoors year-round, especially if you live in a climate with cold winters. Provide your plant with adequate sunlight, water, and fertilizer, and maintain a consistent temperature. You may need to supplement with grow lights during the winter months to ensure that the plant receives enough light.
Q: What are some common pests and diseases that affect pineapple plants?
A: Pineapple plants can be susceptible to various pests and diseases, including mealybugs, scale insects, spider mites, and root rot. Regularly inspect your plant for signs of infestation or disease. Mealybugs and scale insects can be treated with insecticidal soap or neem oil. Spider mites can be controlled by increasing humidity and spraying the plant with water. Root rot is caused by overwatering and can be prevented by ensuring good drainage. If you suspect root rot, repot the plant in fresh, well-draining soil.
Q: Is growing pineapples at home worth the effort?
A: Absolutely! While it requires patience and dedication, growing pineapples at home is a rewarding experience. The satisfaction of nurturing a plant from a discarded top and harvesting your own delicious fruit is unparalleled. Plus, homegrown pineapples often taste better than store-bought varieties. It’s a fun, sustainable, and educational project that can bring joy to your life.

Leave a Comment