
Grow Rosemary Indoors and unlock a world of fragrant possibilities right in your home! Imagine having fresh, aromatic rosemary readily available for your culinary creations, herbal remedies, or even just to enjoy its invigorating scent. Forget those sad, dried-up sprigs from the grocery store – with a few simple tricks, you can cultivate a thriving rosemary plant indoors, regardless of your outdoor space or climate.
Rosemary, steeped in history and folklore, has been cherished for centuries. From ancient Greece, where students wore rosemary garlands to enhance memory, to its symbolic use in weddings and funerals, this herb carries a rich cultural significance. But beyond its historical charm, rosemary offers a wealth of practical benefits. It’s a potent antioxidant, boasts anti-inflammatory properties, and is believed to improve cognitive function.
Why should you learn how to grow rosemary indoors? Well, many gardeners struggle with rosemary, especially in colder climates where it can’t survive the winter outdoors. Bringing it inside allows you to enjoy this wonderful herb year-round. Plus, it’s incredibly rewarding to nurture a plant from a small seedling to a flourishing bush. In this article, I’ll share my tried-and-true DIY tricks and hacks to help you successfully grow rosemary indoors, even if you don’t have a green thumb. Get ready to transform your windowsill into a fragrant, thriving herb garden!
Growing Rosemary Indoors: Your Comprehensive DIY Guide
Hey plant friends! Rosemary is not only a delicious herb for cooking but also a beautiful plant that can enrich your home with its fragrance. And the best part? You can easily grow rosemary indoors! I’ll show you how it’s done. Don’t worry, even if you don’t have a green thumb, you’re sure to succeed with this guide.
What you need: The right equipment
Before we get started, let’s make sure you have everything on hand. Here is a list of the things you’ll need for your indoor rosemary project:
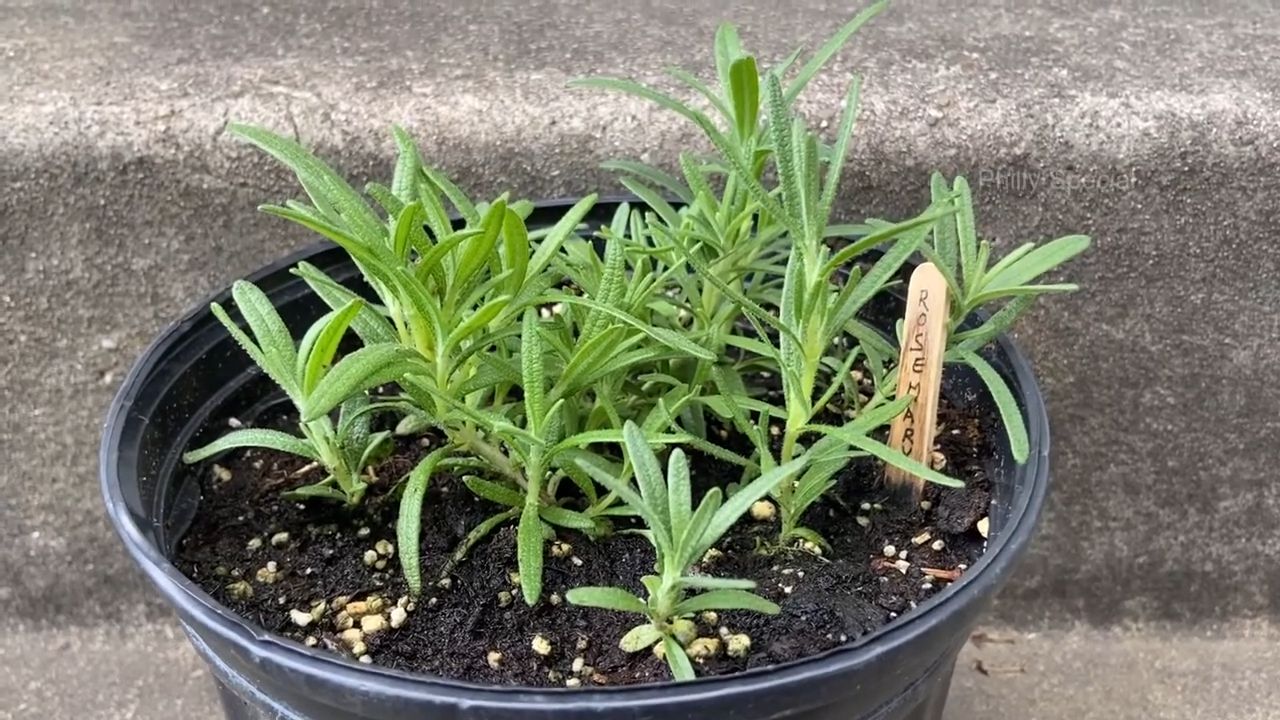
- Rosemary plant or rosemary seeds: you can either buy a pre-grown plant or grow rosemary from seed. Both work, but starting with a plant is, of course, faster.
- A pot with good drainage: Rosemary does not like waterlogged soil. So, a pot with holes in the bottom is a must.
- Well-draining potting soil: Rosemary loves sandy, well-draining soil. A mixture of potting soil, sand, and perlite is ideal.
- A sunny location: Rosemary needs a lot of light, at least 6 hours of direct sunlight per day. A south-facing window is perfect.
- Watering can or spray bottle: For watering the plant.
- Optional: Grow light: If you don’t have enough sunlight, a grow light can help.
- Optional: Fertilizer for herbs: To supply your rosemary with the necessary nutrients.
Growing Rosemary from Seed: Patience is Required
If you decide to start with seeds, you will need a bit more patience, but it is also a very rewarding experience.
- Prepare the seeds: Soak the rosemary seeds in warm water for 24 hours. This helps to speed up germination.
- Sowing: Fill a small pot or a seed tray with the prepared soil. Sprinkle the seeds evenly on the soil and cover them lightly with a thin layer of soil.
- Moisture: Gently moisten the soil with a spray bottle. Make sure the soil is damp but not wet.
- Warmth and light: Place the pot in a warm, bright location. A temperature of 20-25°C (68-77°F) is ideal. You can also use a clear plastic wrap or a mini-greenhouse to increase humidity.
- Patience: Rosemary seeds take time to germinate. It can take 2-3 weeks for the first seedlings to appear. Keep the soil moist during this time.
- Pricking out: Once the seedlings are large enough to handle (about 5-7 cm / 2-3 inches high), you can transplant them into larger pots.
Planting a Rosemary Plant: The Quick Start
If you have bought a pre-grown rosemary plant, planting it is a piece of cake.
- Prepare the pot: Fill the pot with the prepared soil. Leave about 2-3 cm (1 inch) of space at the top.
- Carefully remove the plant: Gently take the rosemary plant out of its old pot. Loosen the roots a bit if they are tightly bound.
- Planting: Place the plant in the new pot and fill the remaining space with soil. Press the soil down lightly.
- Watering: Water the plant thoroughly until water runs out of the drainage holes.
- Location: Place the pot in a sunny location.
The Right Care: How to Keep Your Rosemary Happy
Rosemary is relatively low-maintenance, but there are a few things you should keep in mind to make it feel at home.
- Watering: Water your rosemary when the top layer of soil is dry. Make sure the water can drain well to avoid waterlogging. In winter, rosemary needs less water.
- Light: Rosemary needs a lot of light. If your rosemary doesn’t get enough sunlight, the leaves can turn yellow or fall off. In this case, you should use a grow light.
- Humidity: Rosemary does not like high humidity. Ensure good ventilation to prevent fungal diseases.
- Fertilizing: During the growing season (spring and summer), fertilize your rosemary every 2-4 weeks with a special herb fertilizer.
- Pruning: Prune your rosemary regularly to make it bushier and to encourage the formation of new shoots. You can use the cut sprigs for cooking or dry them.
- Repotting: If your rosemary becomes too large for its pot, you should transplant it into a larger one.
Common Problems and Solutions
Even with rosemary care, problems can arise. Here are a few common problems and how you can solve them:
- Yellow leaves: Yellow leaves can be a sign of too much or too little water, too little light, or a nutrient deficiency. Check your watering habits, the location, and fertilize if necessary.
- Brown leaves: Brown leaves can be caused by air that is too dry, too much sun, or fungal diseases. Provide higher humidity, protect the plant from direct midday sun, and treat it with a fungicide if necessary.
- Pests: Rosemary can be infested by pests such as spider mites or aphids. Check your plant regularly and treat it with a suitable insecticide if necessary.
- Fungal diseases: Fungal diseases can be caused by excessive humidity or poor ventilation. Ensure good ventilation and treat the plant with a fungicide if necessary.
Harvesting Rosemary: Fresh Herbs for Your Kitchen
You can harvest your rosemary anytime, as soon as it is large enough. Simply cut off the sprigs you need. It’s best to harvest in the morning when the essential oils are most concentrated. You can use the fresh sprigs immediately for cooking or dry them to make them last longer.
Drying Rosemary: How to Preserve the Flavor
There are several ways to dry rosemary:
- Air-drying: Tie the rosemary sprigs into small bundles and hang them in a dry, dark, and well-ventilated place. It takes about 1-3 weeks for the sprigs to dry completely.
- Drying in the oven: Place the rosemary sprigs on a baking sheet and dry them at a low temperature (approx. 50°C / 120°F) for 2-4 hours. Make sure the oven door is slightly open so that moisture can escape.
- Drying in a dehydrator: Place the rosemary sprigs in the dehydrator and dry them according to the manufacturer’s instructions.
Store the dried rosemary in an airtight container in a cool, dark, and dry place.
Using Rosemary: Versatile in the Kitchen
Rosemary is a versatile herb that can be used in many dishes. Here are a few ideas:
Bread and pastries: Rosemary can enhance bread, rolls, and focaccia.
Meat dishes: Rosemary pairs excellently with lamb, pork, beef, and poultry.
Vegetable dishes: Rosemary gives potatoes, zucchini, eggplant, and other vegetables a special flavor.
Soups and stews: Rosemary can add an aromatic note to soups and stews.

Conclusion
So, there you have it! Mastering the art of growing rosemary indoors is not only achievable, but it’s also incredibly rewarding. Imagine having fresh, fragrant rosemary sprigs at your fingertips, ready to elevate your culinary creations any time of year. No more relying on expensive, often wilted, supermarket herbs. This DIY trick empowers you to cultivate your own thriving rosemary plant, bringing a touch of the Mediterranean into your home.
Why is this a must-try? Because it’s economical, sustainable, and incredibly satisfying. Think about the money you’ll save by not constantly buying rosemary. Consider the environmental impact of reducing your reliance on commercially grown herbs that are often shipped long distances. And, most importantly, relish the joy of nurturing a living plant and harvesting its flavorful bounty.
But the benefits don’t stop there. Growing rosemary indoors allows you to control the growing environment, ensuring optimal conditions for your plant. You can regulate the light, temperature, and humidity, protecting your rosemary from harsh weather conditions and pests. This level of control translates to healthier, more productive plants.
Looking for variations? Absolutely! Experiment with different rosemary varieties. ‘Blue Boy’ is a compact variety perfect for smaller spaces, while ‘Tuscan Blue’ boasts upright growth and intensely fragrant needles. You can also try propagating rosemary from cuttings, expanding your indoor herb garden without spending a dime. Consider using different types of containers, from terracotta pots to self-watering planters, to find what works best for your lifestyle and aesthetic preferences. You can even add companion plants like thyme or lavender to create a miniature herb garden.
Don’t be afraid to experiment with different soil mixes. While rosemary prefers well-draining soil, you can amend your potting mix with perlite or vermiculite to improve drainage and aeration. You can also add a slow-release fertilizer to provide your rosemary with a steady supply of nutrients.
The key to success is observation. Pay close attention to your rosemary plant and adjust your care routine as needed. If the leaves start to turn yellow, it may be a sign of overwatering or nutrient deficiency. If the plant is not growing vigorously, it may need more light.
We wholeheartedly encourage you to embark on this indoor rosemary growing adventure. It’s a simple yet profound way to connect with nature, enhance your cooking, and add a touch of beauty to your home. Once you’ve experienced the joy of harvesting your own fresh rosemary, you’ll never go back to store-bought herbs.
So, grab a pot, some soil, and a rosemary plant, and get started today! And most importantly, we want to hear about your experience. Share your tips, tricks, and triumphs in the comments below. Let’s build a community of indoor rosemary growers and inspire others to cultivate their own green spaces. Let us know what worked for you, what challenges you faced, and what delicious dishes you created with your homegrown rosemary. Your feedback will help us refine our guide and empower others to succeed. Happy growing!
Frequently Asked Questions (FAQ)
1. What kind of pot is best for growing rosemary indoors?
The best pot for growing rosemary indoors is one that provides adequate drainage. Terracotta pots are a great option because they are porous, allowing excess moisture to evaporate. Plastic pots are also suitable, but make sure they have drainage holes. The size of the pot should be appropriate for the size of the rosemary plant. A young rosemary plant can start in a smaller pot (6-8 inches in diameter), but as it grows, you’ll need to transplant it to a larger pot (10-12 inches or more). Ensure the pot is wide enough to accommodate the root system and provide stability for the plant.
2. How much sunlight does indoor rosemary need?
Rosemary thrives in bright, direct sunlight. Ideally, your indoor rosemary plant should receive at least 6-8 hours of sunlight per day. A south-facing window is usually the best location. If you don’t have a south-facing window, a west-facing window can also work. If your rosemary plant isn’t getting enough natural light, you can supplement it with a grow light. Position the grow light a few inches above the plant and leave it on for 12-14 hours per day. Insufficient light can lead to leggy growth and reduced flavor.
3. How often should I water my indoor rosemary plant?
Watering frequency depends on several factors, including the size of the pot, the type of soil, and the humidity level. Generally, you should water your rosemary plant when the top inch of soil feels dry to the touch. Avoid overwatering, as this can lead to root rot. When you water, water thoroughly until water drains out of the drainage holes. Allow the excess water to drain away completely. During the winter months, when the plant is not actively growing, you may need to water less frequently.
4. What kind of soil is best for growing rosemary indoors?
Rosemary prefers well-draining soil that is slightly acidic to neutral (pH 6.0-7.0). A good potting mix for rosemary should be light and airy, allowing for good drainage and aeration. You can use a commercial potting mix specifically formulated for herbs, or you can make your own by mixing equal parts of potting soil, perlite, and sand. Avoid using heavy garden soil, as it can become compacted and waterlogged.
5. How do I fertilize my indoor rosemary plant?
Rosemary is not a heavy feeder, but it will benefit from occasional fertilization. You can fertilize your rosemary plant every 2-3 months during the growing season (spring and summer) with a balanced liquid fertilizer diluted to half strength. Alternatively, you can use a slow-release fertilizer at the beginning of the growing season. Avoid over-fertilizing, as this can lead to leggy growth and reduced flavor.
6. How do I prune my indoor rosemary plant?
Pruning is essential for maintaining the shape and health of your rosemary plant. Prune your rosemary plant regularly to encourage bushier growth and prevent it from becoming leggy. You can prune your rosemary plant at any time of year, but the best time to prune is in the spring, after the plant has finished flowering. Use sharp, clean pruning shears to remove dead, damaged, or diseased branches. You can also prune back healthy branches to shape the plant and encourage new growth.
7. How do I deal with pests and diseases on my indoor rosemary plant?
Rosemary is generally resistant to pests and diseases, but it can be susceptible to spider mites, aphids, and powdery mildew. To prevent pests and diseases, keep your rosemary plant healthy by providing it with adequate sunlight, water, and ventilation. Inspect your plant regularly for signs of pests or diseases. If you notice any pests, you can try spraying the plant with insecticidal soap or neem oil. If you notice any signs of powdery mildew, you can try spraying the plant with a fungicide.
8. Can I propagate rosemary from cuttings indoors?
Yes, propagating rosemary from cuttings is a great way to expand your indoor herb garden. Take cuttings from healthy, non-flowering stems in the spring or summer. The cuttings should be about 4-6 inches long. Remove the leaves from the bottom inch of the cutting and dip the cut end in rooting hormone. Plant the cutting in a pot filled with well-draining potting mix. Keep the soil moist but not soggy. Place the pot in a warm, bright location. The cuttings should root in about 4-6 weeks.
9. My rosemary plant is turning brown. What am I doing wrong?
Browning leaves on a rosemary plant can be caused by several factors, including overwatering, underwatering, nutrient deficiency, or pest infestation. Check the soil moisture to determine if you are watering too much or too little. If the soil is consistently wet, you may be overwatering. If the soil is dry, you may be underwatering. If you suspect a nutrient deficiency, try fertilizing the plant with a balanced liquid fertilizer. Inspect the plant for signs of pests, such as spider mites or aphids.
10. Can I use my indoor rosemary for cooking?
Absolutely! One of the best things about growing rosemary indoors is that you can harvest fresh rosemary sprigs for cooking whenever you need them. Simply snip off a few sprigs with clean scissors or pruning shears. Rosemary is a versatile herb that can be used in a wide variety of dishes, including roasted meats, vegetables, soups, and sauces. Fresh rosemary has a more intense flavor than dried rosemary, so use it sparingly.


Leave a Comment