
Grow snap peas kitchen – imagine plucking fresh, crisp snap peas right from your kitchen, adding a burst of sweetness to your salad or stir-fry. Sounds dreamy, right? Well, it’s more achievable than you think! For centuries, humans have cultivated food close to home, from ancient rooftop gardens in Babylon to the victory gardens of wartime. This connection to our food source is deeply ingrained, and now, with space at a premium, bringing the garden indoors is making a huge comeback.
I know what you’re thinking: “I don’t have a green thumb!” But trust me, growing snap peas in your kitchen is surprisingly simple and rewarding. This DIY guide will walk you through every step, from choosing the right container to harvesting your delicious bounty.
Why should you bother? Because store-bought snap peas often lack that vibrant, fresh flavor. Plus, you’ll be reducing your carbon footprint and enjoying the satisfaction of nurturing something from seed to table. Ready to grow snap peas kitchen and transform your space into a mini-farm? Let’s get started!
Growing Snap Peas Indoors: A Delicious DIY Project
Hey there, fellow plant enthusiasts! Ever dreamt of having fresh, crunchy snap peas right at your fingertips, even when the weather outside is frightful? Well, dream no more! I’m going to walk you through a super fun and rewarding DIY project: growing snap peas indoors. It’s easier than you think, and the taste of homegrown snap peas is simply unbeatable.
What You’ll Need: The Snap Pea Starter Pack
Before we dive in, let’s gather our supplies. Here’s what you’ll need to transform your kitchen into a mini snap pea farm:
* Snap Pea Seeds: Choose a variety that’s known for its compact growth, like ‘Sugar Ann’ or ‘Bush Champion’. These are bush varieties and won’t need as much vertical support as vining types. You can find these at most garden centers or online.
* Containers: You’ll need containers that are at least 6 inches deep and wide. I prefer using plastic pots with drainage holes, but you can also repurpose yogurt containers or even milk cartons (just make sure to clean them thoroughly and poke some drainage holes).
* Potting Mix: Use a high-quality potting mix that’s well-draining. Avoid using garden soil, as it can compact and not provide the necessary aeration for your snap pea roots.
* Grow Lights (Optional but Recommended): While snap peas can grow indoors with natural light, they’ll thrive with the consistent and intense light provided by grow lights. LED grow lights are energy-efficient and work wonders.
* Small Trellis or Support System: Even bush varieties benefit from some support. You can use bamboo stakes, chopsticks, or even twigs from your backyard. A small trellis works great too!
* Spray Bottle: For misting your seedlings.
* Watering Can or Pitcher: For watering your mature plants.
* Seed Starting Tray (Optional): If you want to start your seeds indoors before transplanting them to larger containers.
Phase 1: Planting Your Snap Pea Seeds
Okay, let’s get our hands dirty! This is where the magic begins.
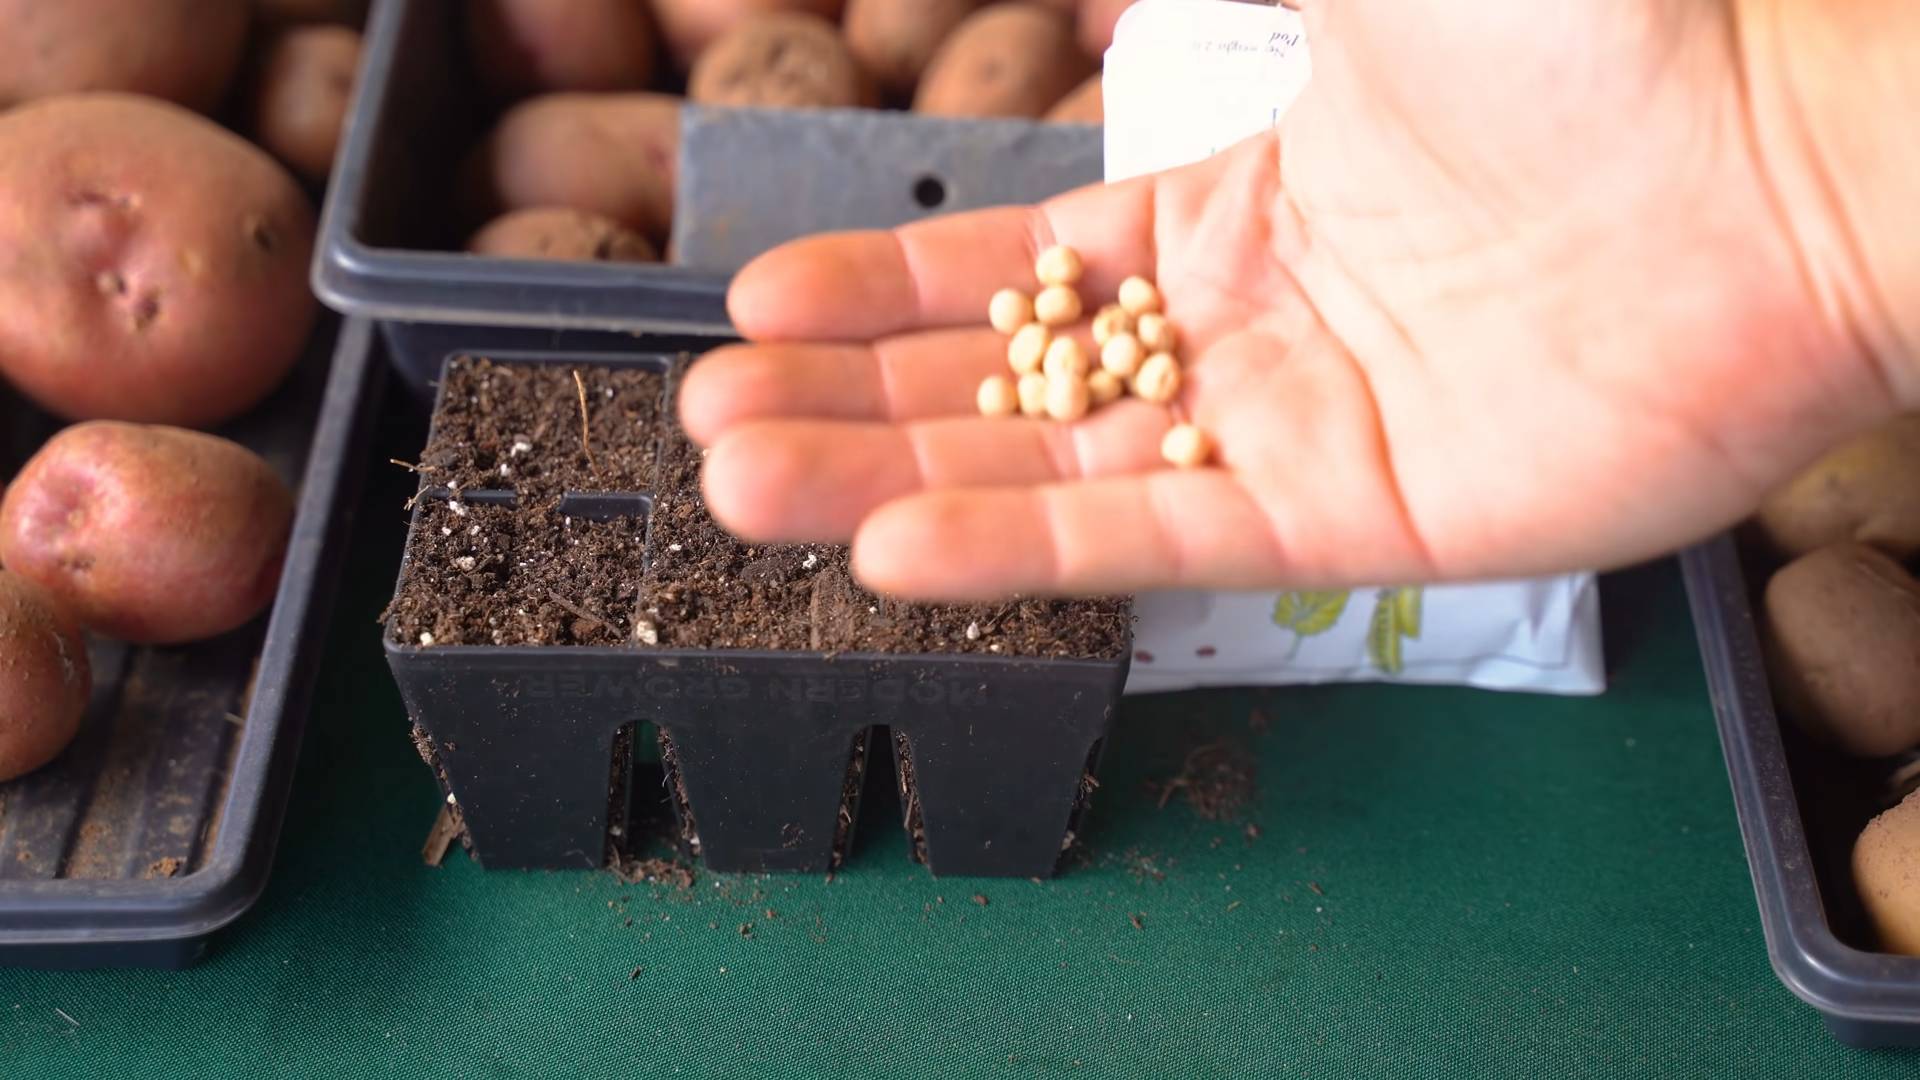
1. Soaking the Seeds (Optional but Recommended): To speed up germination, soak your snap pea seeds in lukewarm water for 12-24 hours before planting. This helps soften the seed coat and encourages sprouting.
2. Preparing Your Containers: Fill your containers with potting mix, leaving about an inch of space at the top. Gently tap the containers to settle the soil.
3. Planting the Seeds: Make small holes about an inch deep and 2-3 inches apart in the potting mix. Place one or two seeds in each hole. Planting two seeds per hole increases your chances of germination.
4. Covering the Seeds: Gently cover the seeds with potting mix and lightly pat down the soil.
5. Watering: Water the soil thoroughly until it’s moist but not soggy. You can use a spray bottle or a watering can with a gentle nozzle.
6. Finding the Right Spot: Place your containers in a warm location with plenty of light. A sunny windowsill that gets at least 6 hours of direct sunlight is ideal. If you’re using grow lights, position them a few inches above the soil surface.
Phase 2: Nurturing Your Snap Pea Seedlings
Now comes the waiting game! But don’t worry, it won’t be long before you see those little sprouts emerge.
1. Maintaining Moisture: Keep the soil consistently moist but not waterlogged. Check the soil moisture daily by sticking your finger about an inch into the soil. If it feels dry, water gently.
2. Providing Light: If you’re using natural light, rotate your containers regularly to ensure that all sides of the plants receive equal sunlight. This will prevent them from leaning towards the light source. If you’re using grow lights, keep them on for 12-16 hours per day.
3. Thinning Seedlings (If Necessary): If both seeds in a hole germinate, thin them out by snipping off the weaker seedling at the soil line. This will give the stronger seedling more room to grow.
4. Adding Support: Once your seedlings are a few inches tall, it’s time to add your support system. Gently insert bamboo stakes or chopsticks into the soil near the plants. You can also use a small trellis. As the plants grow, gently guide their tendrils to the support.
5. Fertilizing (Optional): If you notice that your plants are growing slowly or the leaves are turning yellow, you can fertilize them with a balanced liquid fertilizer diluted to half strength. Follow the instructions on the fertilizer label. I usually wait a few weeks after germination before fertilizing.
Phase 3: Harvesting Your Delicious Snap Peas
The moment you’ve been waiting for! Harvesting your own homegrown snap peas is incredibly satisfying.
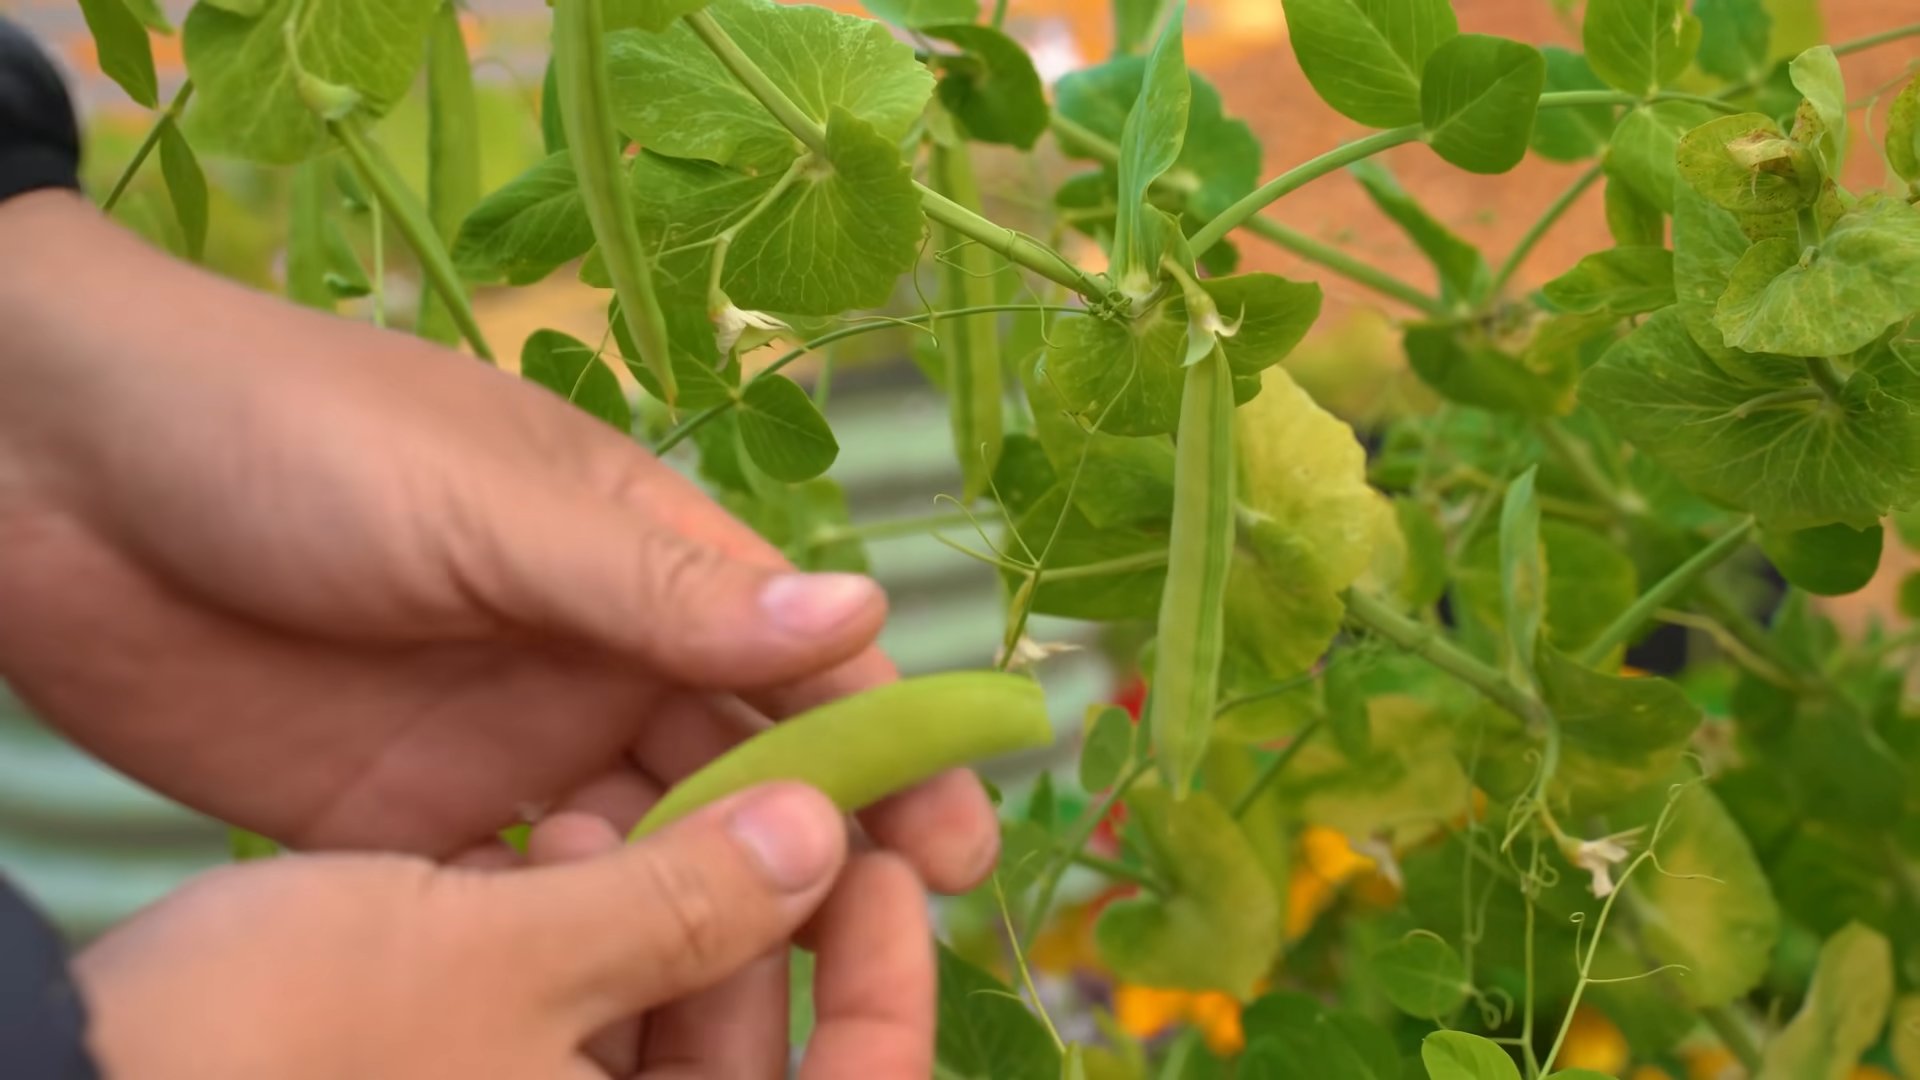
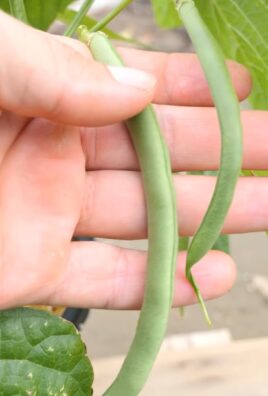
1. Knowing When to Harvest: Snap peas are ready to harvest when the pods are plump and filled with peas, but before the pods become tough and stringy. The pods should be bright green and snap easily when bent.
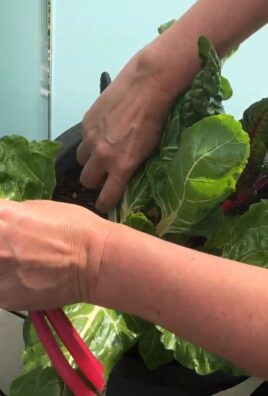
2. Harvesting Technique: Use scissors or pruning shears to carefully cut the snap peas from the vine. Avoid pulling on the pods, as this can damage the plant.
3. Harvesting Regularly: Harvest your snap peas regularly to encourage the plant to produce more pods. The more you harvest, the more you’ll get!
4. Enjoying Your Harvest: Snap peas are delicious eaten raw, steamed, stir-fried, or added to salads. They’re a healthy and flavorful addition to any meal.
Troubleshooting: Common Snap Pea Problems and Solutions
Even with the best care, you might encounter a few challenges along the way. Here are some common problems and how to fix them:
* Poor Germination: If your seeds aren’t germinating, make sure the soil is warm enough and consistently moist. You can also try scarifying the seeds by gently rubbing them with sandpaper before soaking them.
* Leggy Seedlings: Leggy seedlings are tall and spindly, usually due to insufficient light. Move your plants to a brighter location or use grow lights.
* Yellowing Leaves: Yellowing leaves can be caused by a variety of factors, including overwatering, underwatering, nutrient deficiencies, or pests. Check the soil moisture and adjust your watering accordingly. You can also fertilize your plants with a balanced liquid fertilizer.
* Pests: Aphids and spider mites are common pests that can attack snap peas. Inspect your plants regularly and treat any infestations with insecticidal soap or neem oil.
* Powdery Mildew: Powdery mildew is a fungal disease that can cause a white, powdery coating on the leaves. Improve air circulation around your plants and treat with a fungicide if necessary.
Tips and Tricks for Snap Pea Success
Here are a few extra tips to help you grow the best snap peas ever:
* Choose the Right Variety: As I mentioned earlier, choose a bush variety of snap pea for indoor growing. These varieties are more compact and don’t require as much vertical support.
* Provide Adequate Light: Snap peas need plenty of light to thrive. If you don’t have a sunny windowsill, invest in grow lights.
* Water Wisely: Overwatering can lead to root rot, so be sure to let the soil dry out slightly between waterings.
* Provide Support: Even bush varieties benefit from some support. Use bamboo stakes, chopsticks, or a small trellis to help the plants stay upright.
* Harvest Regularly: Harvesting your snap peas regularly will encourage the plant to produce more pods.
* Succession Planting: To extend your harvest, plant new seeds every few weeks. This will ensure that you have a continuous supply of fresh snap peas.
* Consider Companion Planting: Plant your snap peas alongside other vegetables that benefit them, such as carrots, radishes, and cucumbers.
Growing snap peas indoors is a fun and rewarding project that anyone can do. With a little bit of care and attention, you can enjoy fresh, delicious snap peas all year round. So, grab your seeds, get your hands dirty, and start growing! Happy gardening!
Conclusion
So, there you have it! Growing your own snap peas in the kitchen is not just a fun project; it’s a gateway to incredibly fresh, flavorful, and readily available produce right at your fingertips. Forget those limp, store-bought snap peas that have traveled miles and lost their vibrancy. Imagine the satisfaction of snipping crisp, sweet pods just moments before adding them to your salad, stir-fry, or simply enjoying them as a healthy snack. This DIY trick is a must-try for anyone looking to add a touch of green to their home, reduce their reliance on grocery stores, and experience the unparalleled taste of homegrown vegetables.
This method is particularly appealing because it’s accessible to everyone, regardless of gardening experience or outdoor space. Whether you live in a bustling city apartment or a sprawling suburban home, you can successfully cultivate snap peas indoors with minimal effort and resources. The simplicity of the process, combined with the rewarding outcome, makes it an ideal project for families, individuals, and even classrooms.
But don’t stop there! Once you’ve mastered the basics, feel free to experiment with different varieties of snap peas. Some are sweeter, some are more prolific, and some have unique colors. Try growing ‘Sugar Snap’ for its classic sweetness, ‘Super Sugar Snap’ for its extra-large pods, or even a purple variety for a visually stunning addition to your kitchen garden.
You can also explore different growing mediums. While soil works perfectly well, you might consider trying hydroponics for a faster and potentially more efficient growth rate. Just be sure to research the specific nutrient requirements for snap peas in a hydroponic system.
Furthermore, consider the presentation of your indoor snap pea garden. Use attractive containers that complement your kitchen decor. Train the vines to climb up trellises or decorative supports to create a visually appealing and space-saving display. You can even incorporate other herbs or vegetables into the same container for a miniature kitchen garden ecosystem.
The possibilities are endless! The key is to start small, be patient, and observe your plants closely. Pay attention to their needs, adjust your watering and lighting accordingly, and don’t be afraid to experiment.
We are confident that you’ll find growing snap peas in your kitchen to be a rewarding and enjoyable experience. It’s a simple yet profound way to connect with nature, appreciate the miracle of plant growth, and enjoy the delicious fruits (or rather, vegetables!) of your labor.
So, what are you waiting for? Gather your supplies, plant your seeds, and embark on this exciting culinary adventure. And most importantly, we encourage you to share your experiences with us! Post photos of your indoor snap pea gardens on social media using #KitchenSnapPeas and tell us about your successes, challenges, and favorite ways to enjoy your homegrown harvest. We can’t wait to see what you create! Let’s all embrace the joy of growing our own food, one snap pea at a time. This is a great way to grow snap peas kitchen and enjoy fresh produce.
Frequently Asked Questions (FAQ)
What kind of snap pea seeds should I use for indoor growing?
The best snap pea seeds for indoor growing are bush or dwarf varieties, as they tend to be more compact and manageable in containers. ‘Sugar Ann’ is a popular early-maturing bush variety that’s well-suited for indoor cultivation. ‘Sugar Snap’ can also be grown indoors, but it will require more support as it grows taller. Look for seeds specifically labeled for container gardening or indoor growing for the best results. Always purchase seeds from a reputable source to ensure good germination rates and disease resistance.
How much sunlight do snap peas need when grown indoors?
Snap peas need at least 6-8 hours of direct sunlight per day to thrive. If you don’t have a south-facing window that provides sufficient sunlight, you’ll need to supplement with artificial grow lights. Fluorescent or LED grow lights are excellent options. Position the lights about 6-12 inches above the plants and keep them on for 12-16 hours per day. Monitor your plants closely and adjust the lighting as needed. Signs of insufficient light include leggy growth, pale leaves, and poor pod production.
What type of soil is best for growing snap peas in containers?
Use a well-draining potting mix specifically formulated for containers. Avoid using garden soil, as it can become compacted and doesn’t drain well in pots. A good potting mix will contain a blend of peat moss, perlite, and vermiculite. You can also add some compost to the mix for extra nutrients. Ensure the container has drainage holes to prevent waterlogging, which can lead to root rot.
How often should I water my indoor snap peas?
Water your snap peas regularly, keeping the soil consistently moist but not soggy. Check the soil moisture level daily by sticking your finger about an inch into the soil. If it feels dry, it’s time to water. Water deeply, allowing the excess water to drain out of the drainage holes. Avoid overhead watering, as this can promote fungal diseases. Instead, water at the base of the plant. Reduce watering frequency during cooler or cloudy periods.
Do snap peas need support when grown indoors?
Yes, most snap pea varieties are vining plants and will need support to climb. Provide a trellis, stakes, or netting for the vines to cling to. You can purchase pre-made trellises or create your own using bamboo stakes and twine. Train the vines to climb the support as they grow. This will help to keep the plants upright, improve air circulation, and maximize pod production. Bush varieties may require less support, but a small stake can still be beneficial.
How long does it take for snap peas to mature and produce pods?
Snap peas typically take 60-70 days to mature and produce pods. However, this can vary depending on the variety, growing conditions, and climate. You can start harvesting snap peas when the pods are plump and the peas inside are well-developed but not too large. Regularly harvesting the pods will encourage the plant to produce more.
Are there any common pests or diseases that affect indoor snap peas?
Common pests that can affect indoor snap peas include aphids, spider mites, and whiteflies. Regularly inspect your plants for signs of infestation and take action promptly. You can control these pests by spraying the plants with insecticidal soap or neem oil. Fungal diseases, such as powdery mildew, can also be a problem, especially in humid conditions. Ensure good air circulation around the plants and avoid overhead watering to prevent fungal diseases. If you notice signs of disease, remove the affected leaves and treat the plants with a fungicide.
Can I grow snap peas indoors year-round?
Yes, you can grow snap peas indoors year-round, provided you have adequate light and temperature control. Snap peas prefer temperatures between 60-70°F (15-21°C). If your home is too warm or too cold, you may need to adjust the temperature or provide supplemental heating or cooling. With proper care, you can enjoy a continuous harvest of fresh snap peas throughout the year.
How do I harvest snap peas?
Harvest snap peas when the pods are plump and filled out, but before the peas inside become too large and starchy. Use scissors or pruning shears to snip the pods from the vine, being careful not to damage the plant. Harvest regularly to encourage continued production. The more you harvest, the more the plant will produce.
What can I do with my harvested snap peas?
Snap peas are incredibly versatile and can be enjoyed in a variety of ways. Eat them raw as a healthy snack, add them to salads, stir-fries, or soups. They can also be steamed, sautéed, or roasted. Snap peas are a good source of vitamins, minerals, and fiber, making them a nutritious addition to your diet. You can also freeze snap peas for later use. Simply blanch them in boiling water for a few minutes, then transfer them to an ice bath to stop the cooking process. Drain well and store in freezer bags.
Leave a Comment